This post may contain affiliate links. Please read our disclosure policy.
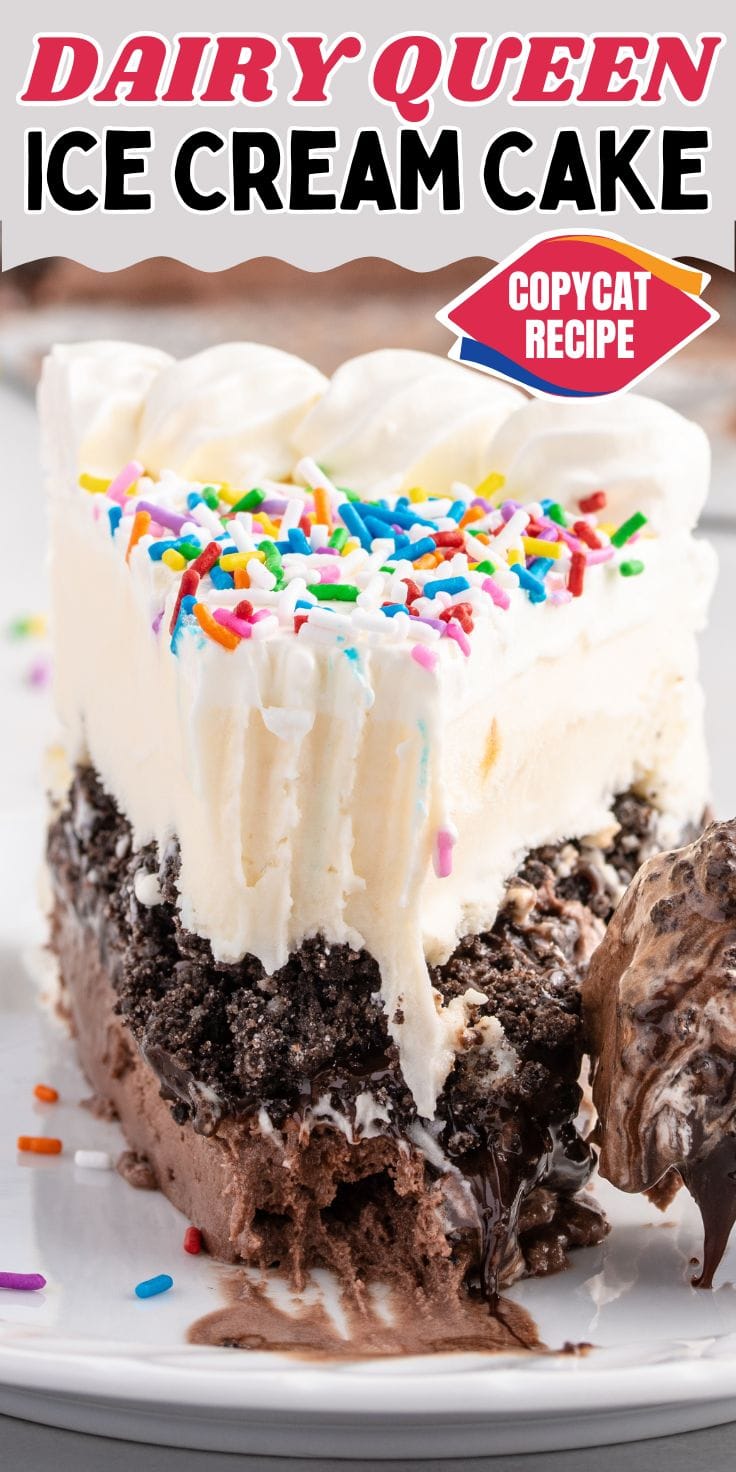
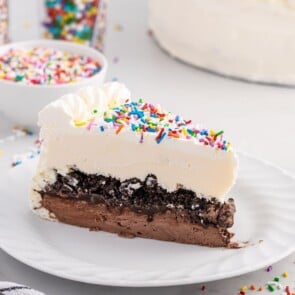
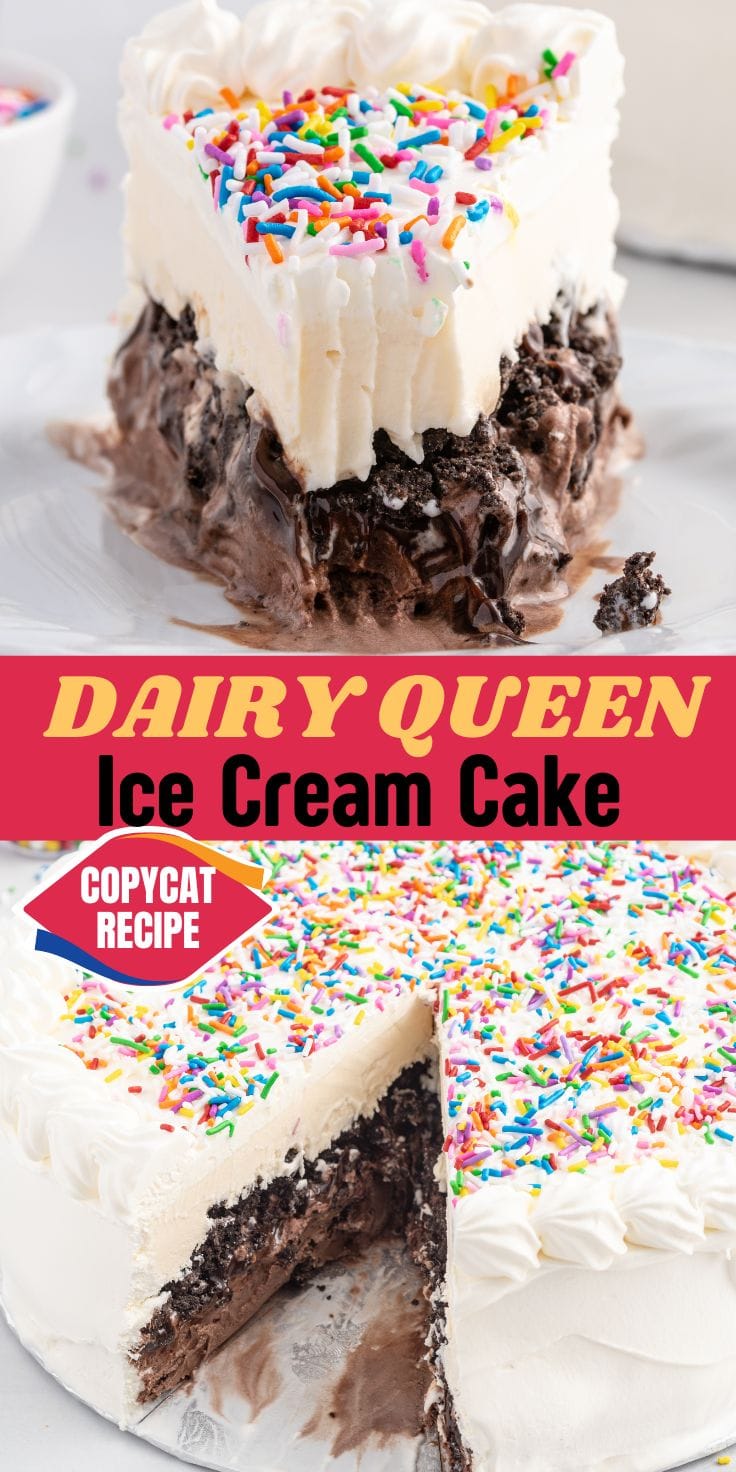
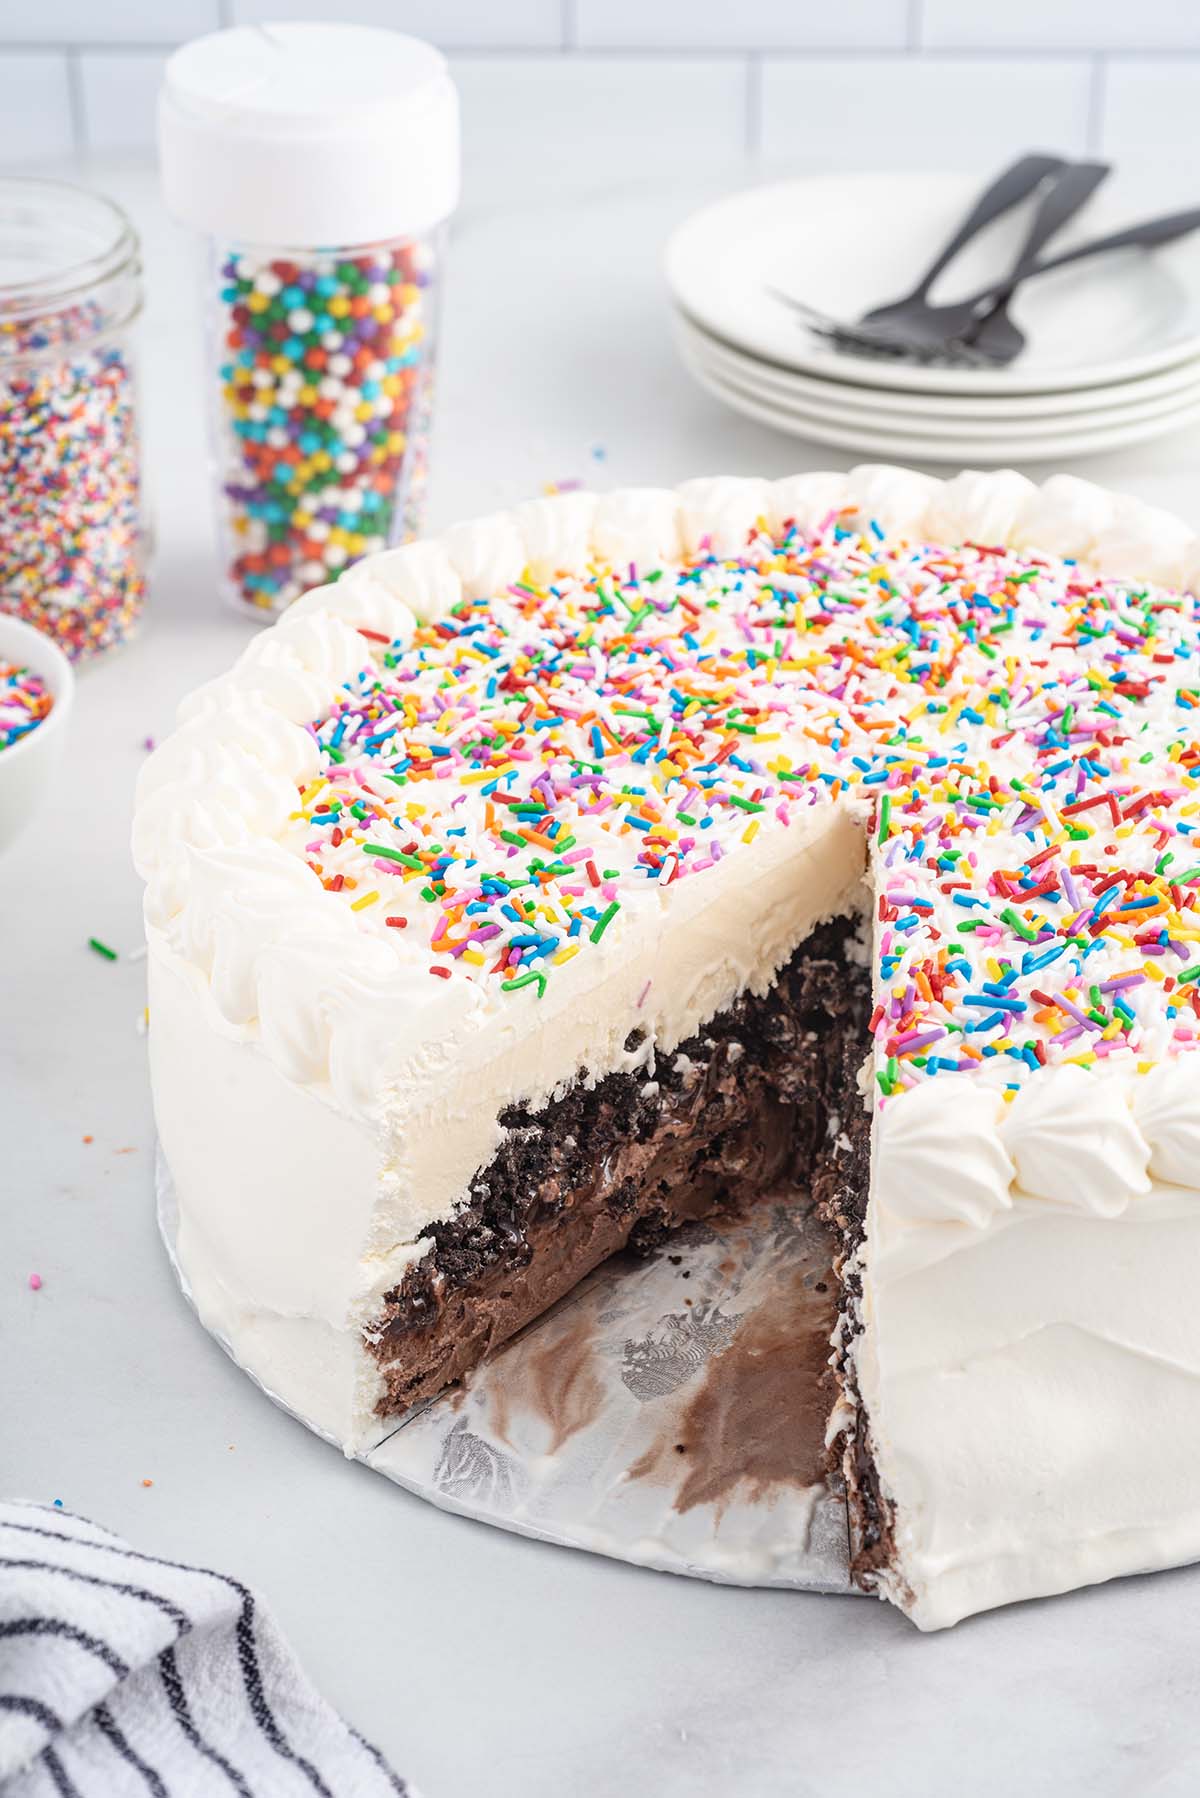
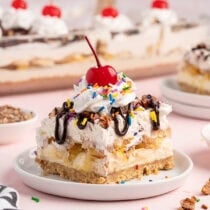
My copycat Dairy Queen ice cream cake brings back all the birthday memories—chocolate and vanilla ice cream, that cookie crunchy fudge layer in the middle, and creamy whipped topping, all made right at home.
What Is a Dairy Queen Ice Cream Cake?
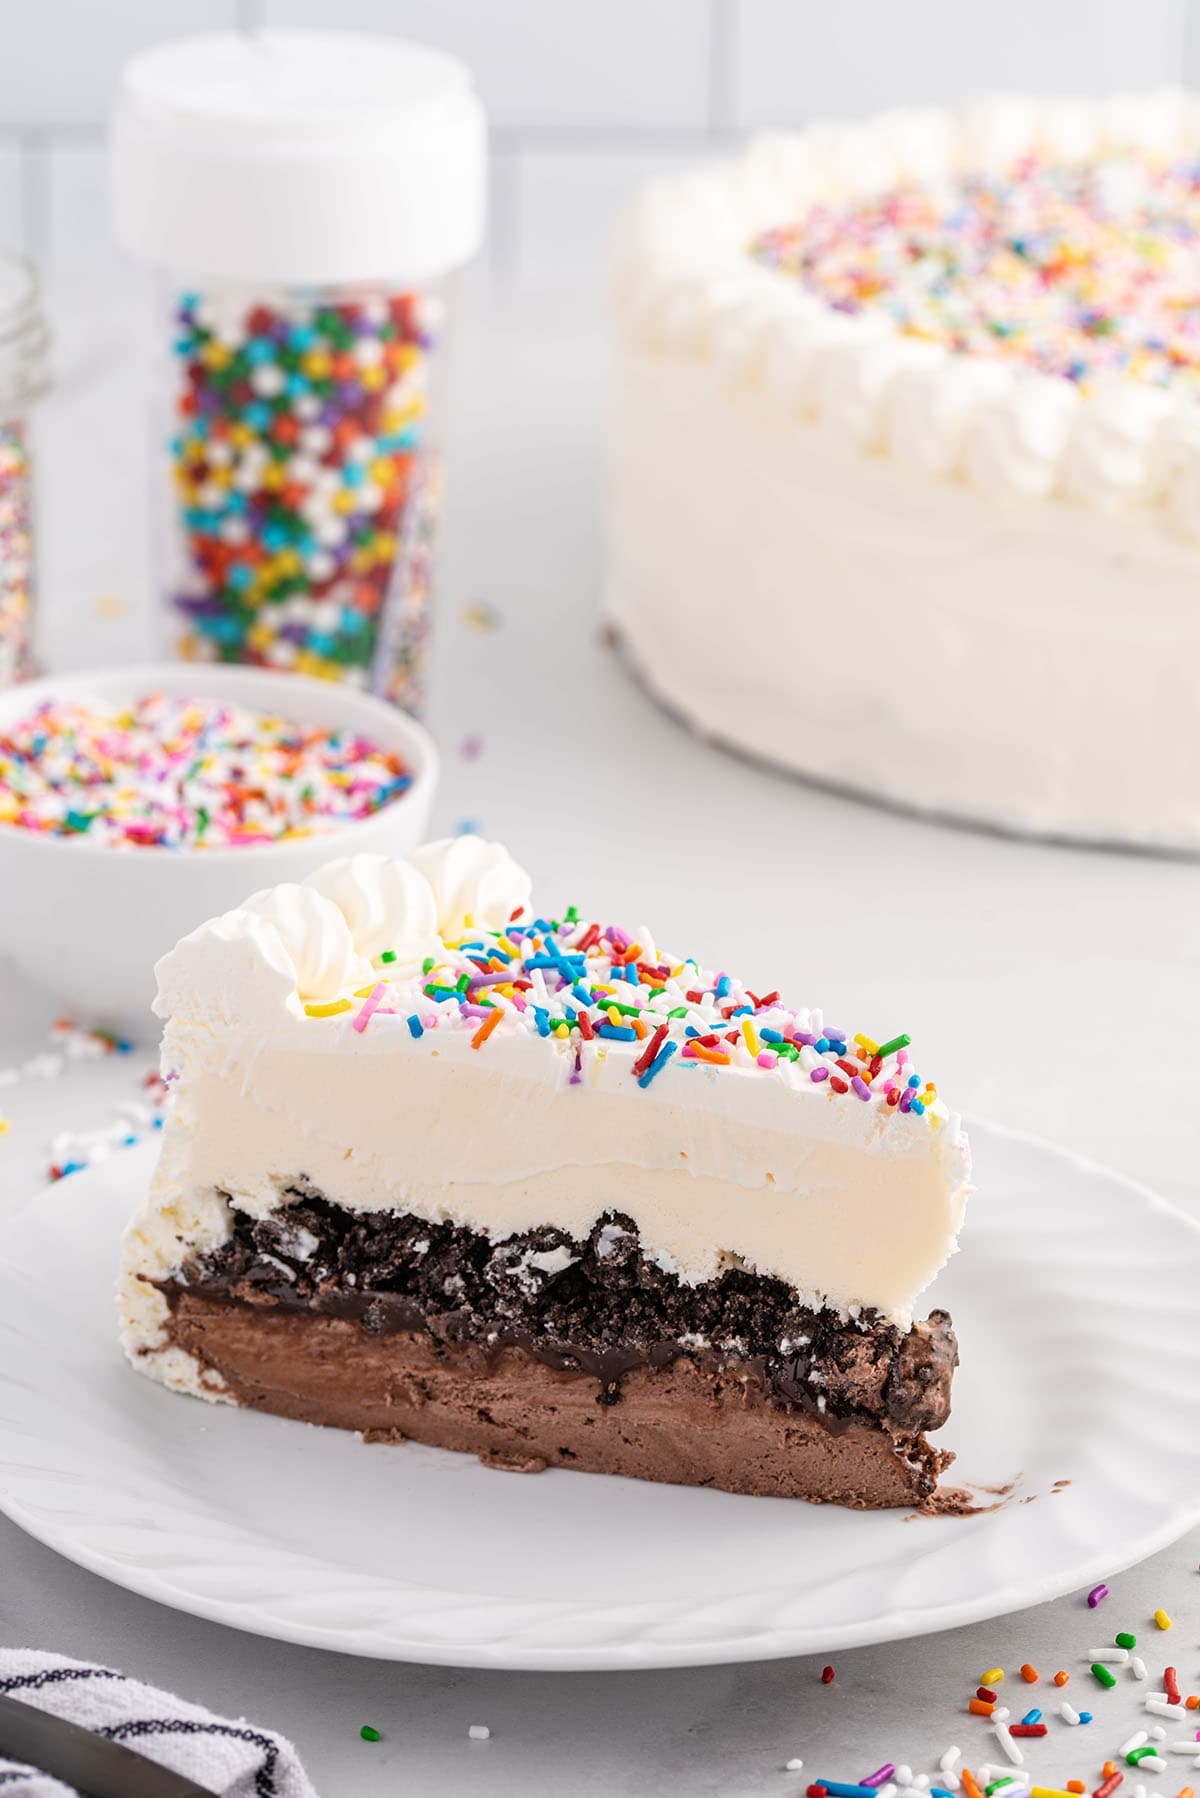
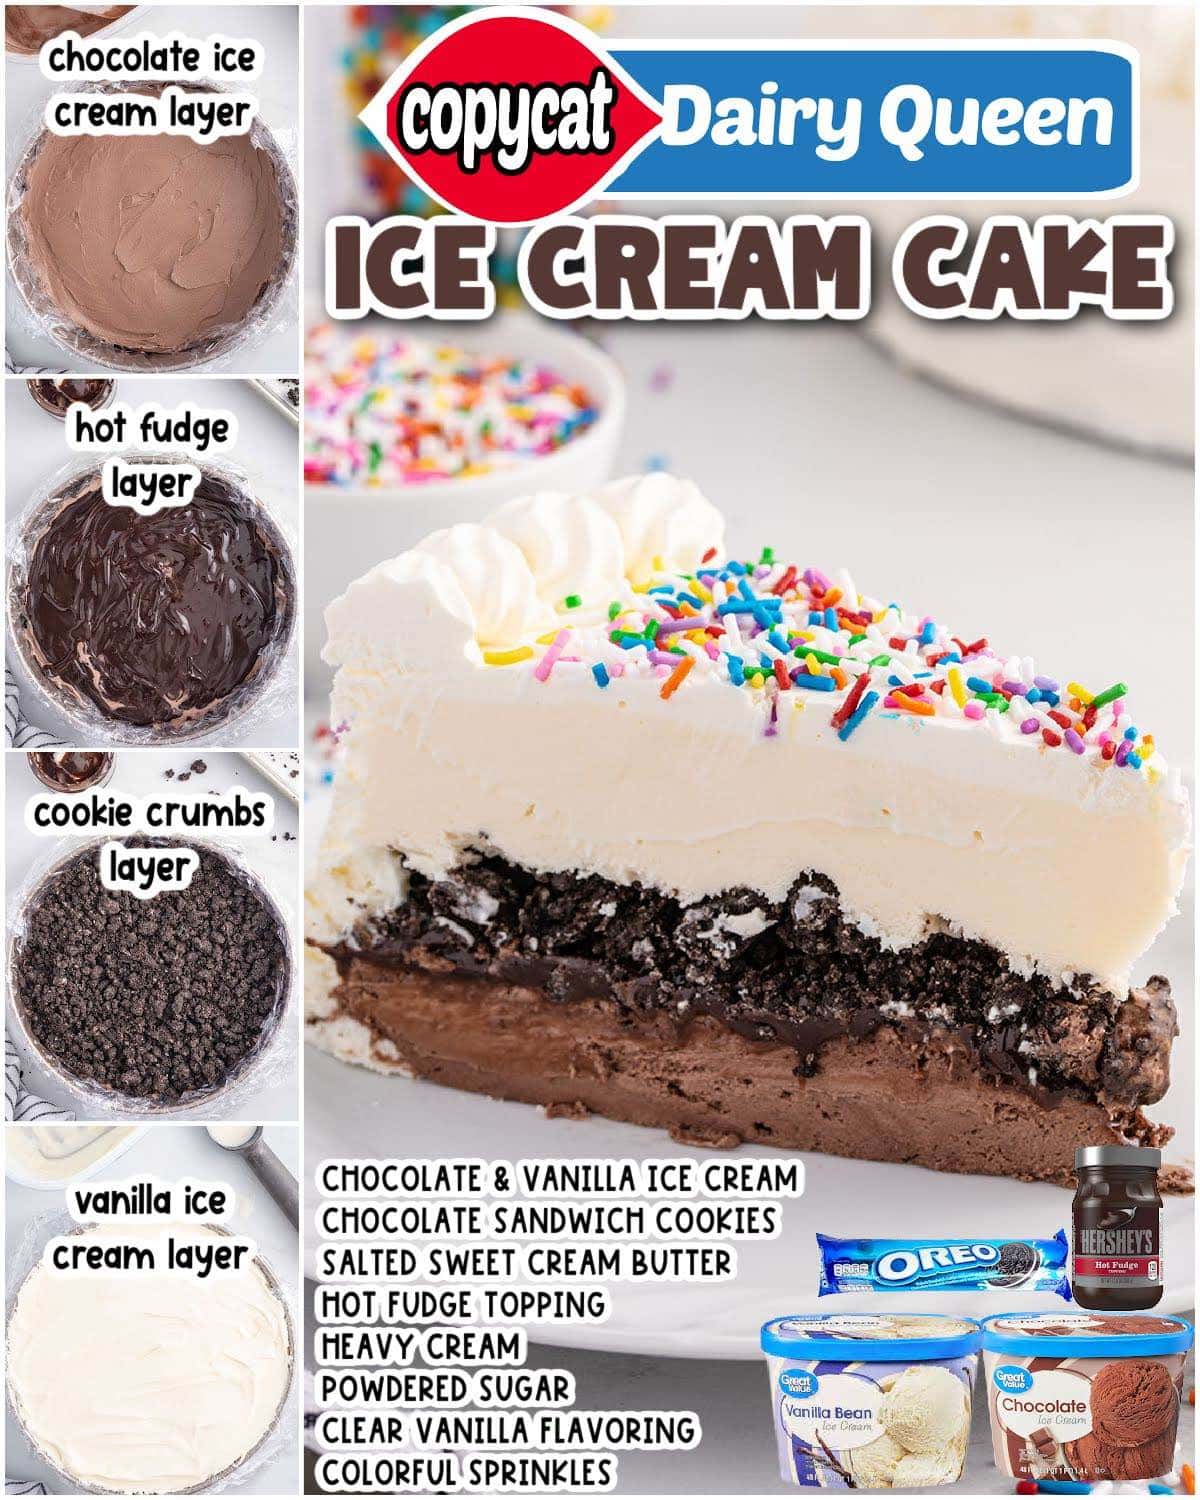
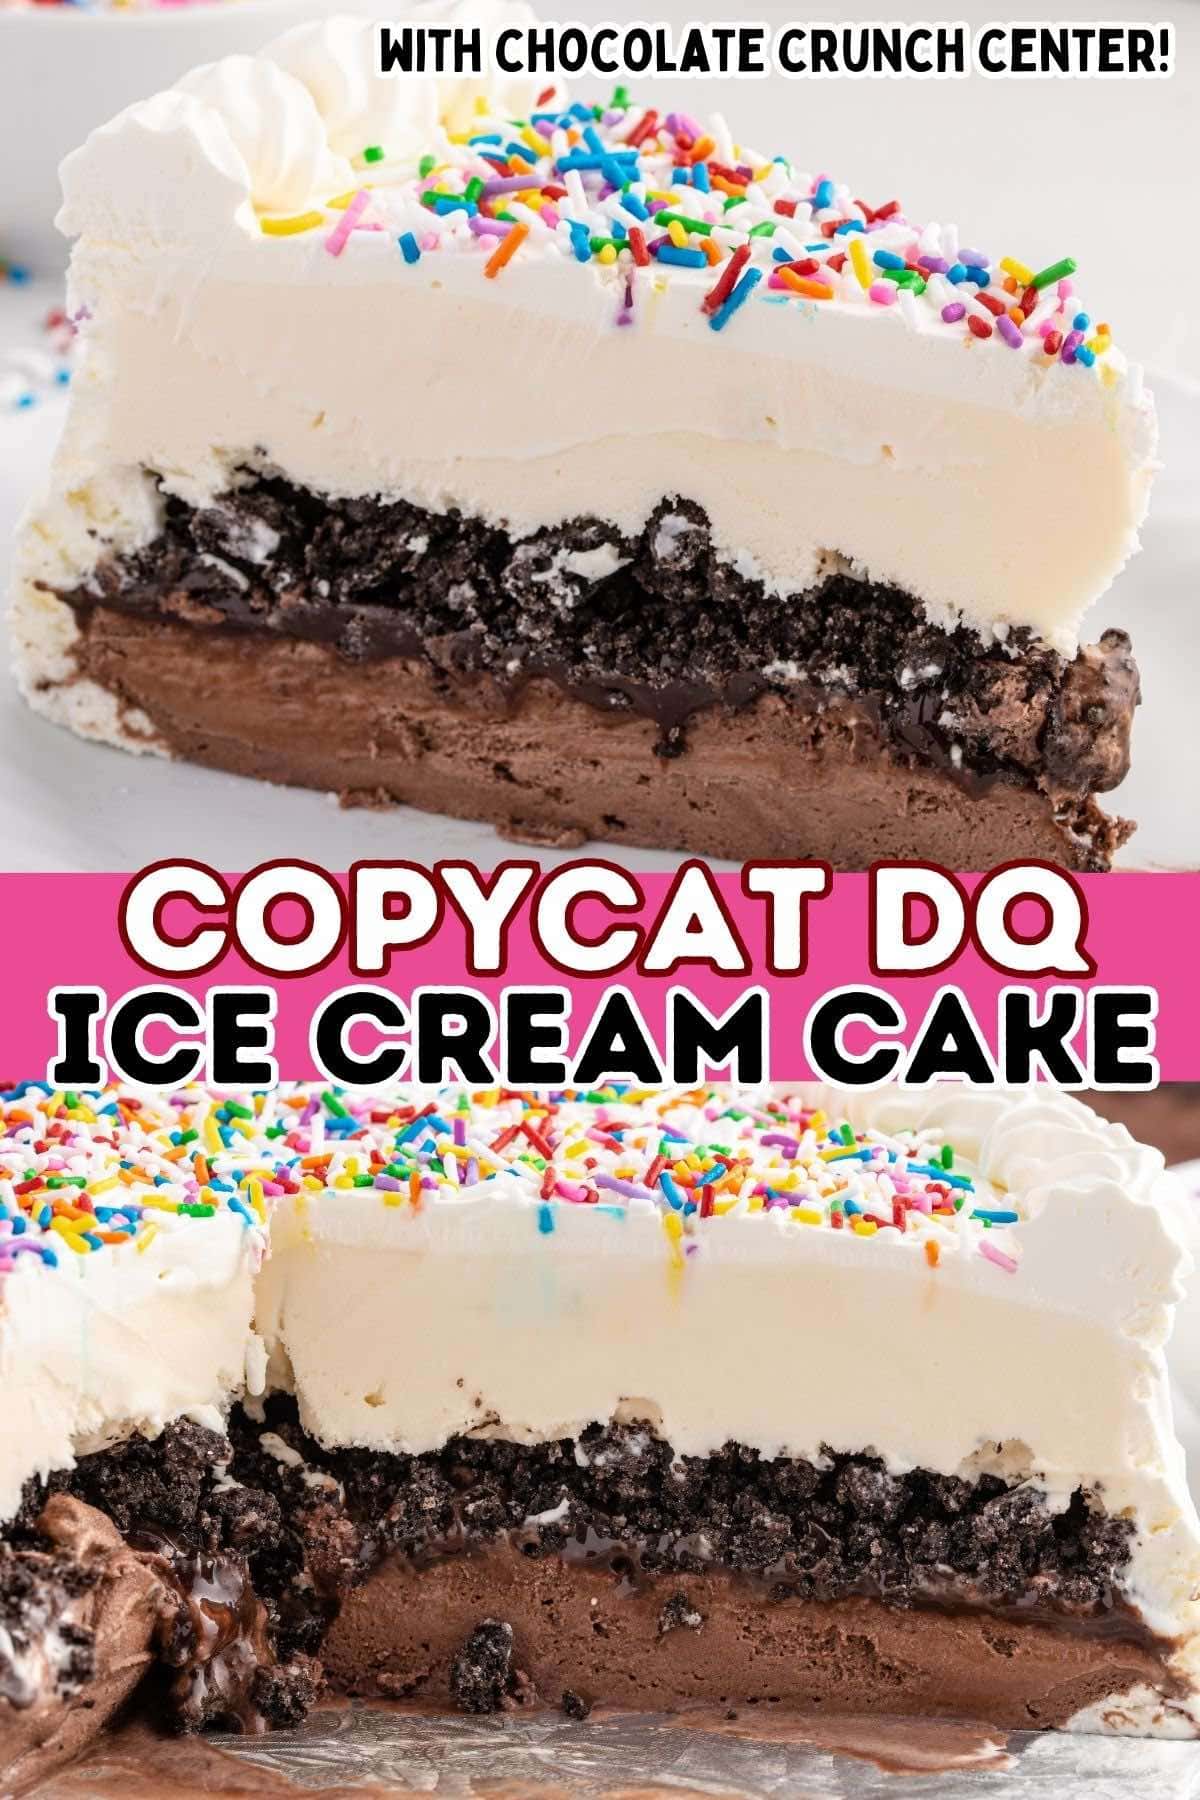
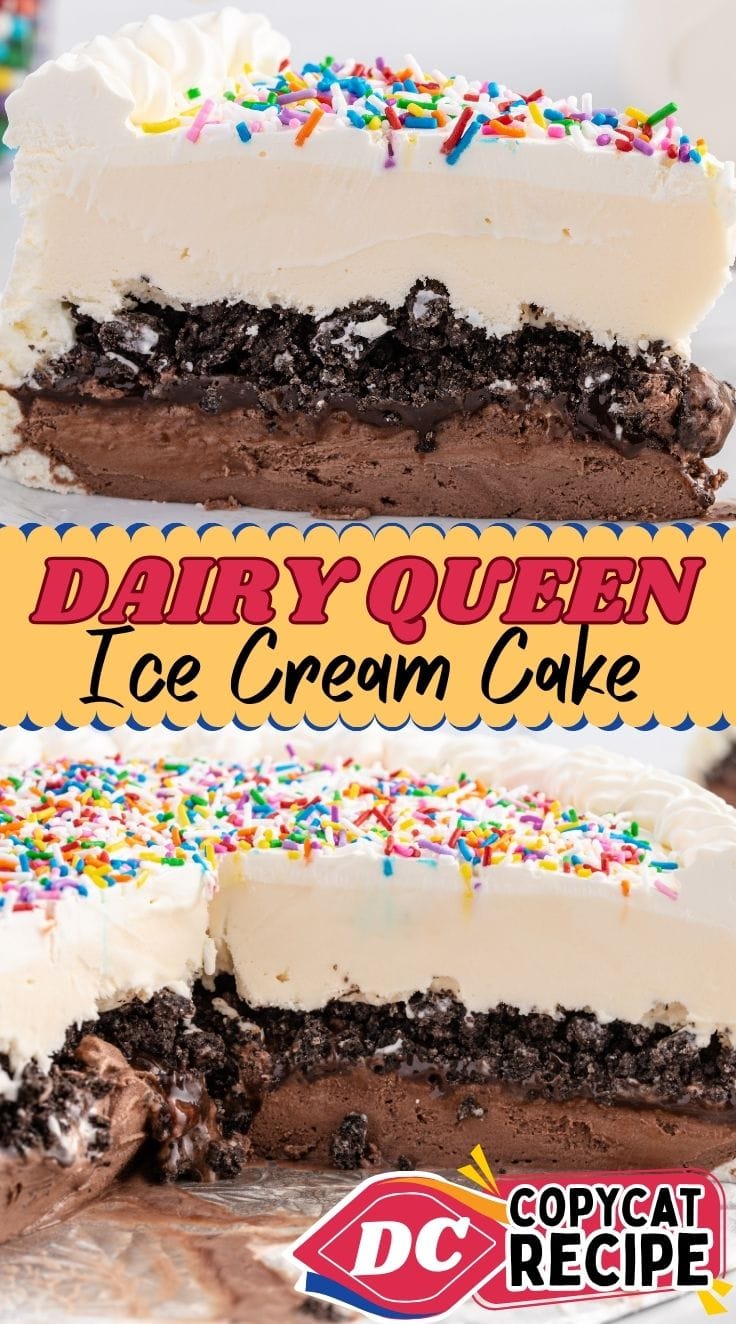
This Dairy Queen Ice Cream Cake recipe is a copycat of the renowned DQ classic, combining layers of vanilla and chocolate ice cream, the signature hot fudge, and crunchy cookie crunch center. The contrast of creamy textures and rich flavors in this dessert make it the best Dairy Queen cake based on a beloved classic.
Our homemade ice cream cake recipe lets you save money and make your own customizable version!
I have made this several times everyone loves it!
DQ Ice Cream Cake Ingredients
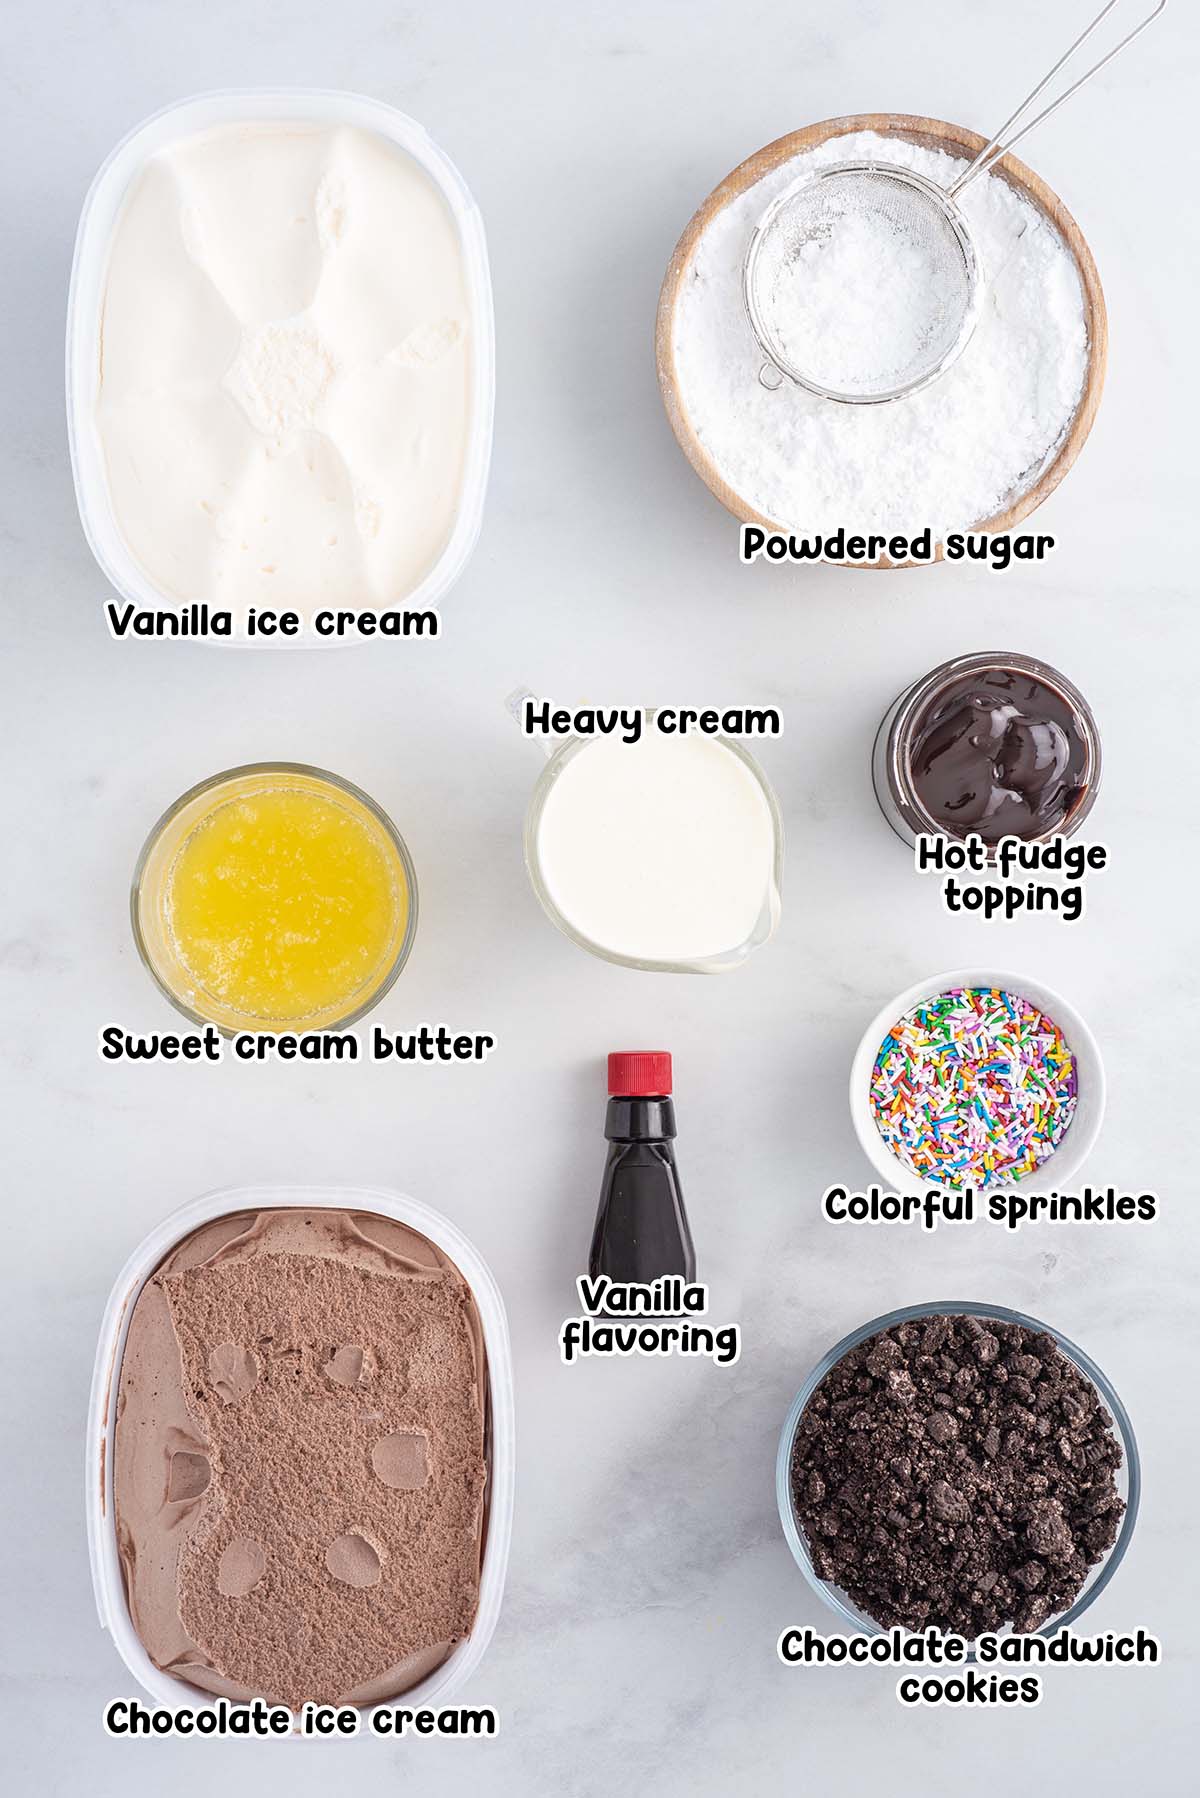
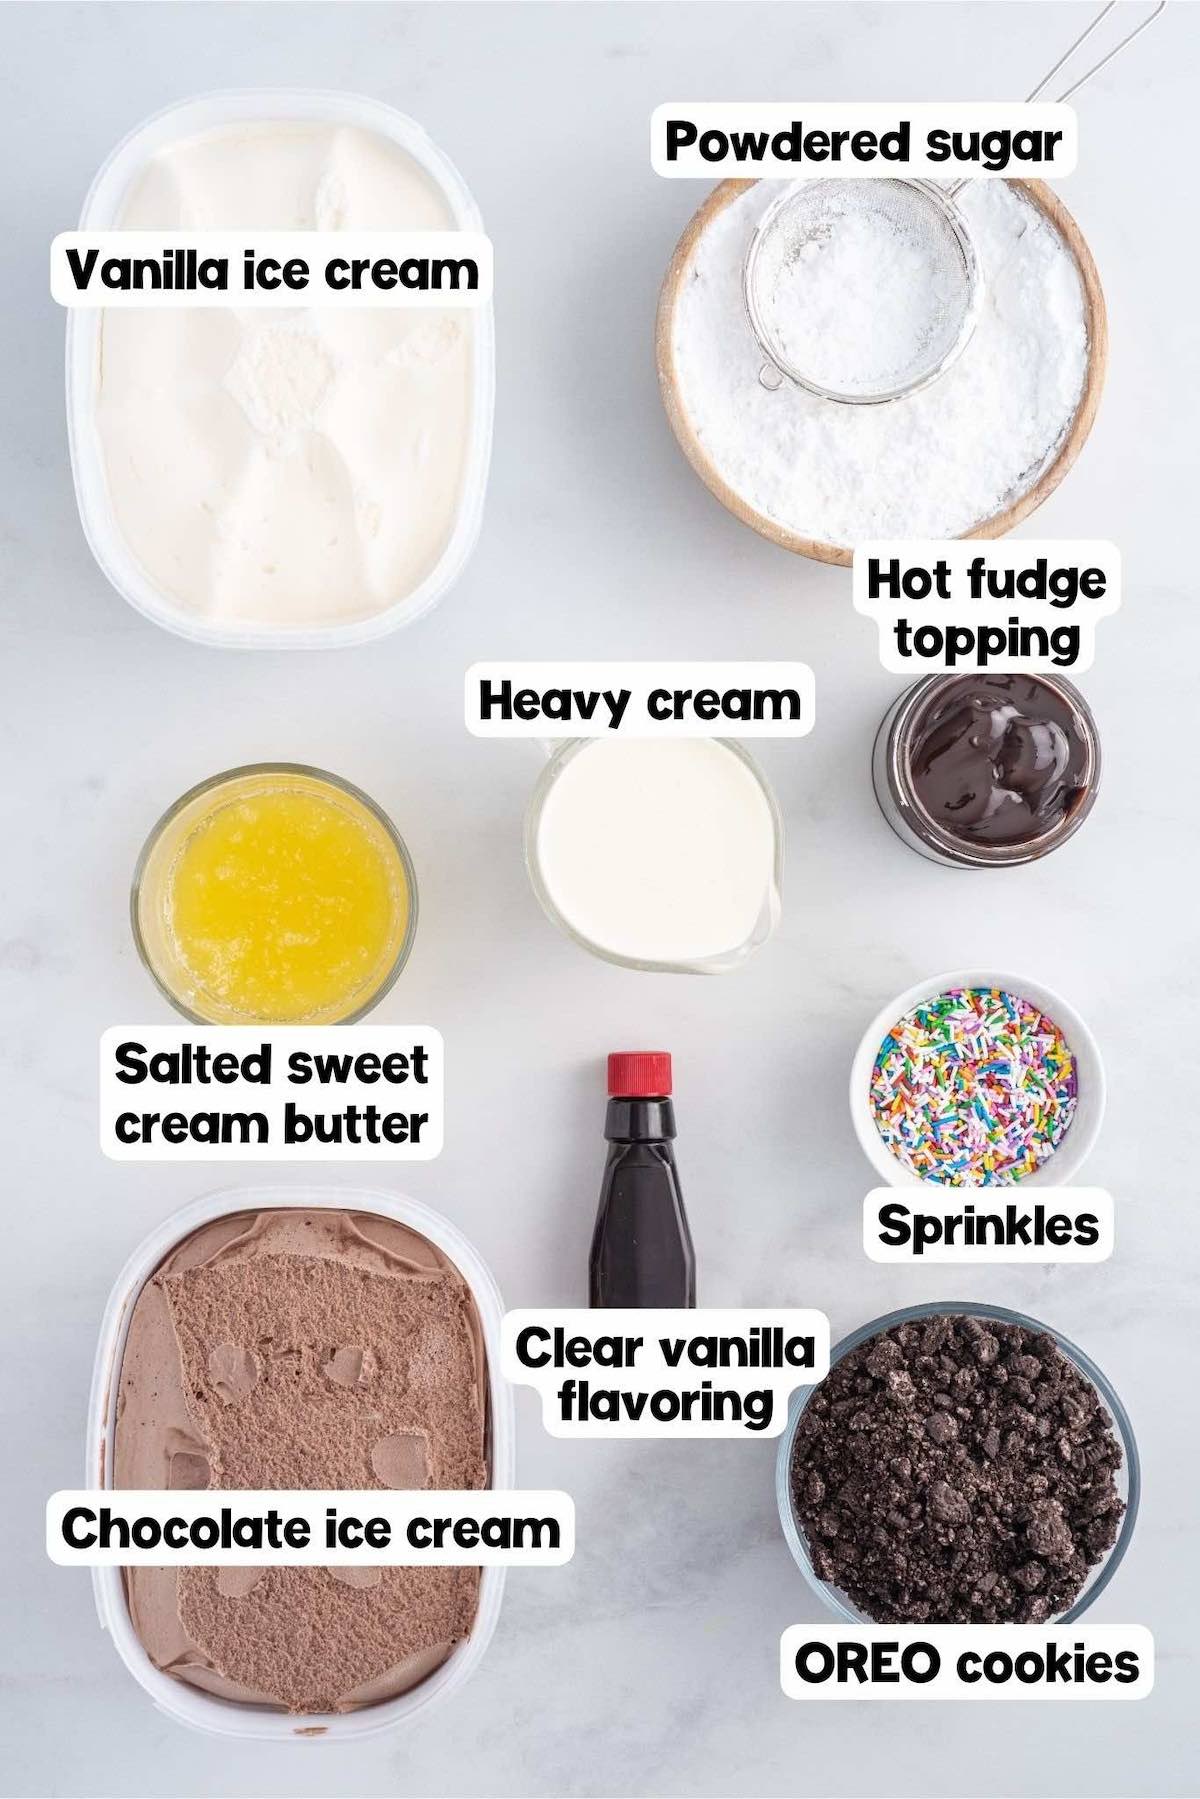
- Chocolate ice cream: Use your favorite store-bought brand or make your own homemade chocolate ice cream.
- Vanilla ice cream: Use your favorite store-bought brand or make your own vanilla ice cream from scratch.
- Chocolate sandwich cookies: I used regular Oreo cookies for my chocolate crunchies, but you can use any generic brand with a cream center. Vanilla sandwich cookies will taste delicious, too!
- Salted sweet cream butter
- Hot fudge sundae topping: I used Smucker’s store-bought brand, but feel free to use your favorite or make your own hot fudge sauce. You can also substitute the hot fudge with caramel sauce.
- Heavy cream
- Powdered sugar
- Clear vanilla flavoring
- Colorful sprinkles (optional garnish)
See the recipe card for full information on ingredients and quantities.
How to Make a Homemade Dairy Queen Ice Cream Cake
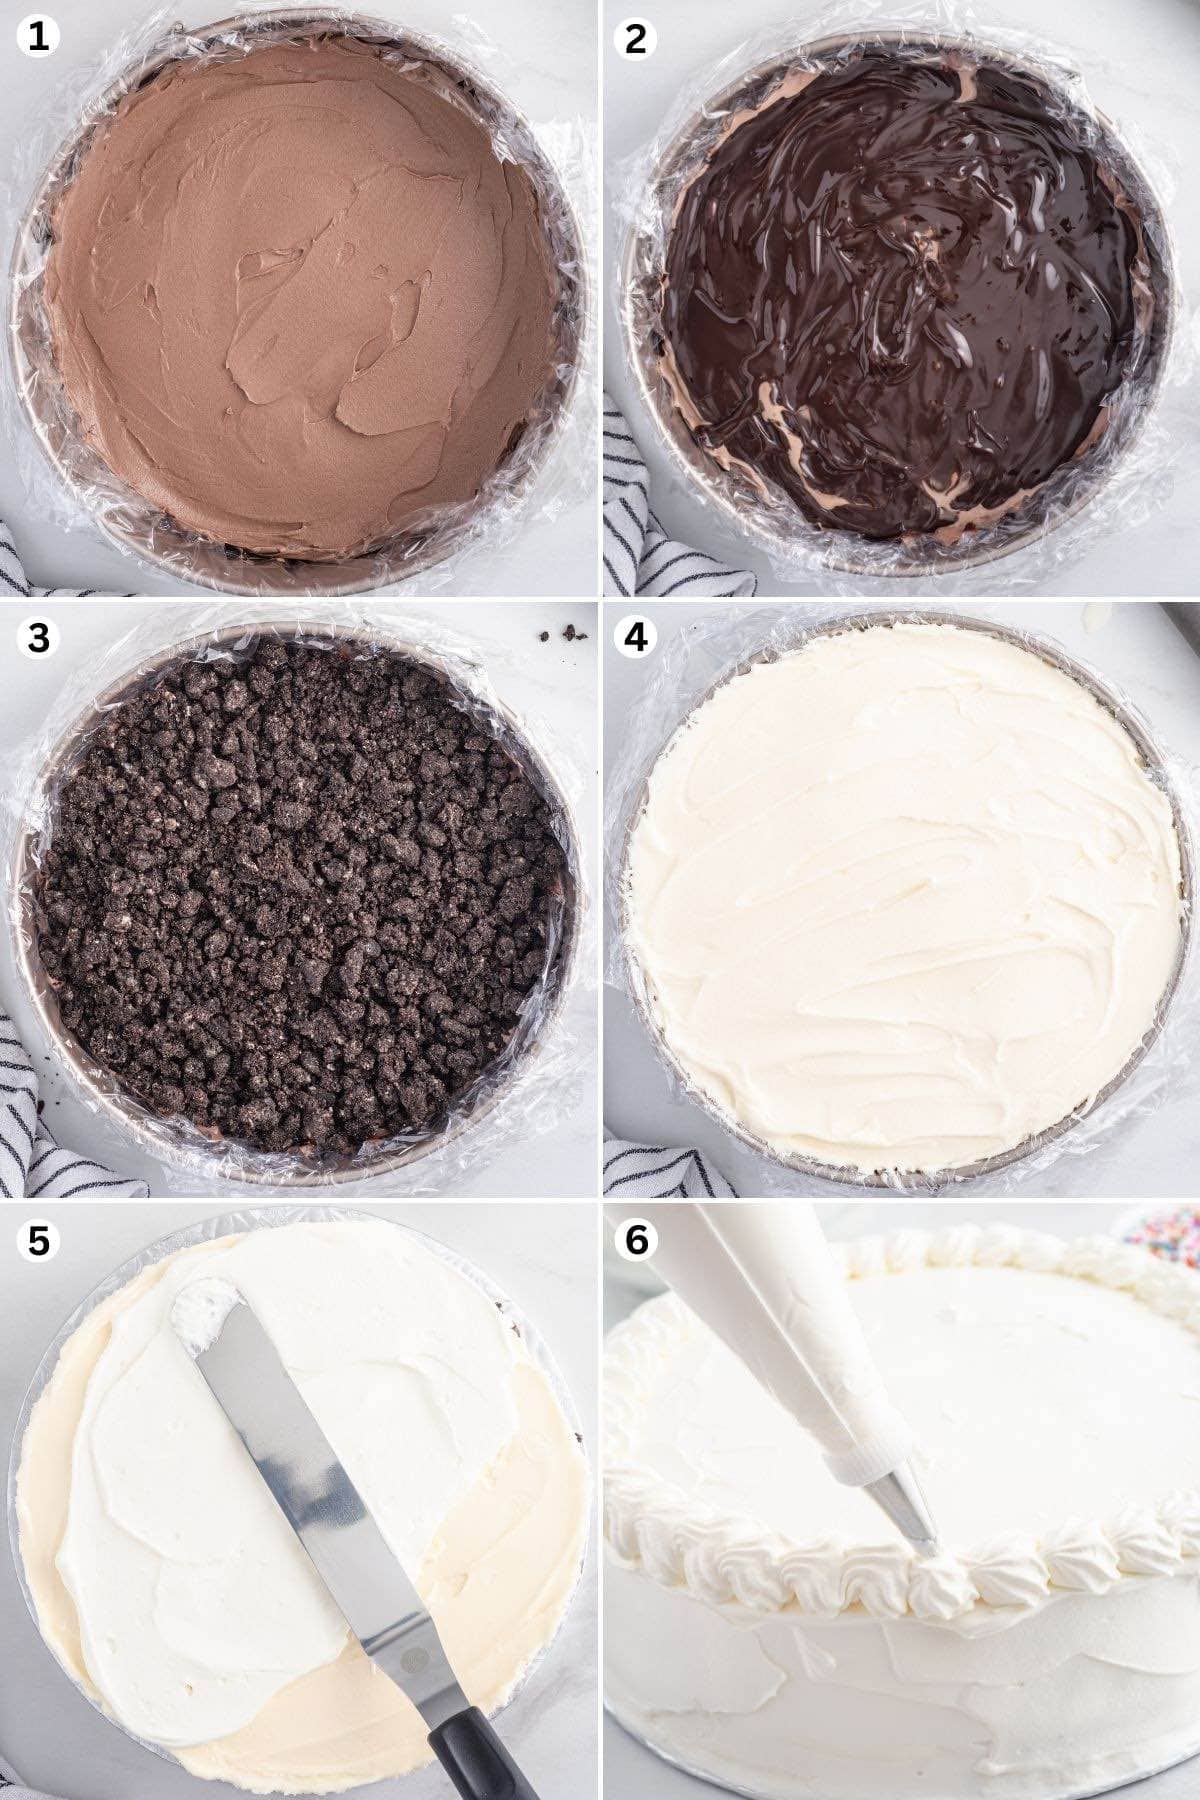
- Bake The Cookie Crunch: Combine the crushed cookies with melted butter. Spread the coated cookie crumbs in an even layer on the prepared baking sheet and bake at 350 degrees Fahrenheit for 7 – 8 minutes. Cool completely.
- Begin With The Base: Spread the chocolate ice cream into the bottom of the springform pan. Place it in the freezer for 30 minutes to 1 hour.
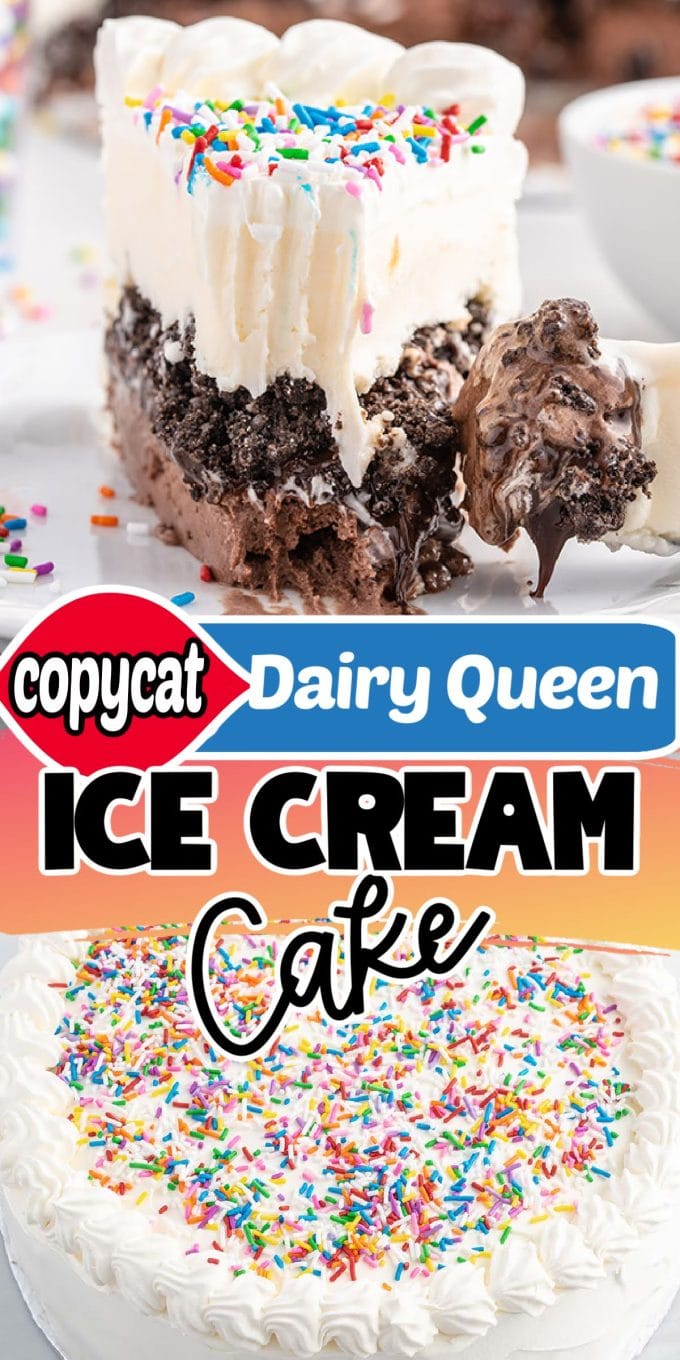
- Make The Middle Layer: Spread the softened hot fudge over the top of the chocolate ice cream layer. Sprinkle the baked cookie crumbs over the hot fudge. Return to the freezer for 1 hour.
- The Top Layer: Spread the vanilla ice cream over the cookie crunch layer. Return the springform pan to the freezer for 4 – 6 hours, or overnight.
- Form The Frosting: Beat together the heavy cream, powdered sugar, and vanilla on medium speed, just until the powdered sugar is incorporated, then beat on high until stiff peaks form.
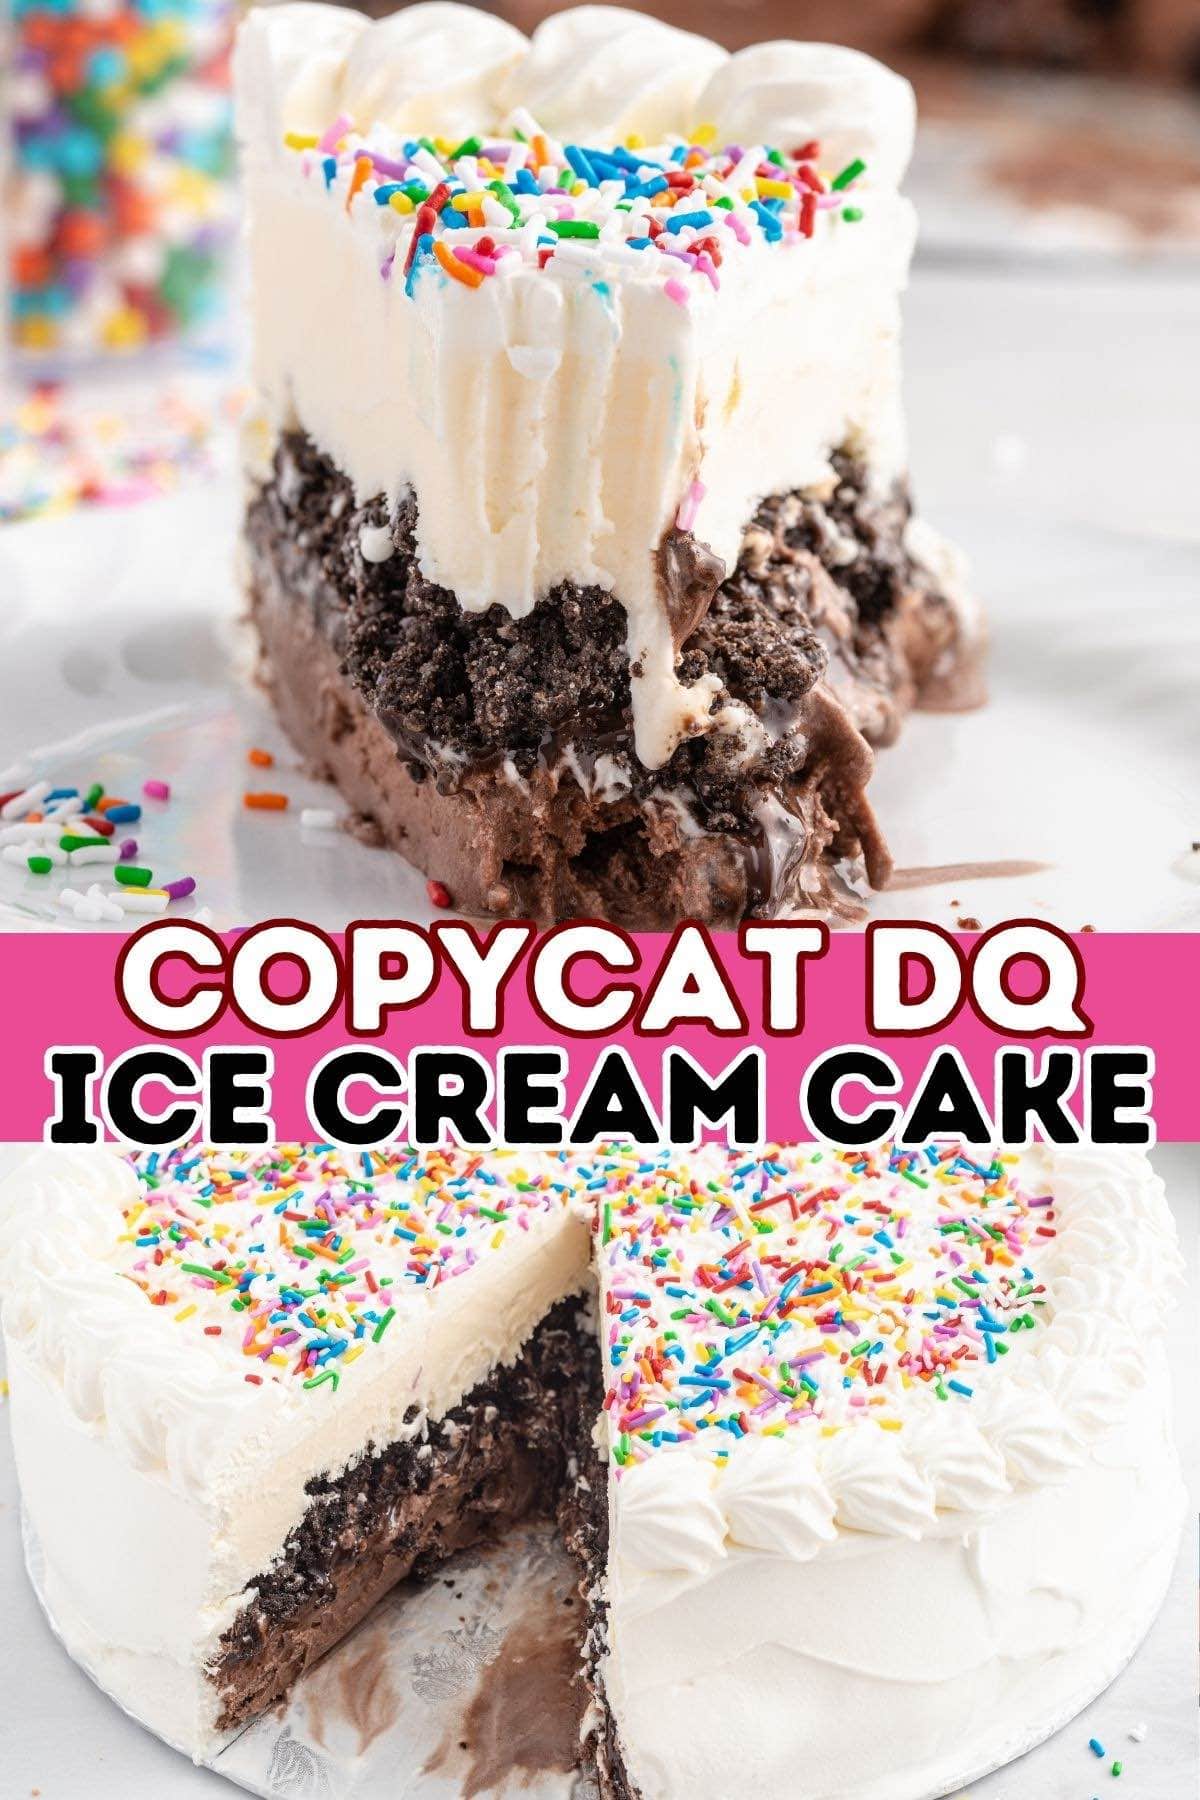
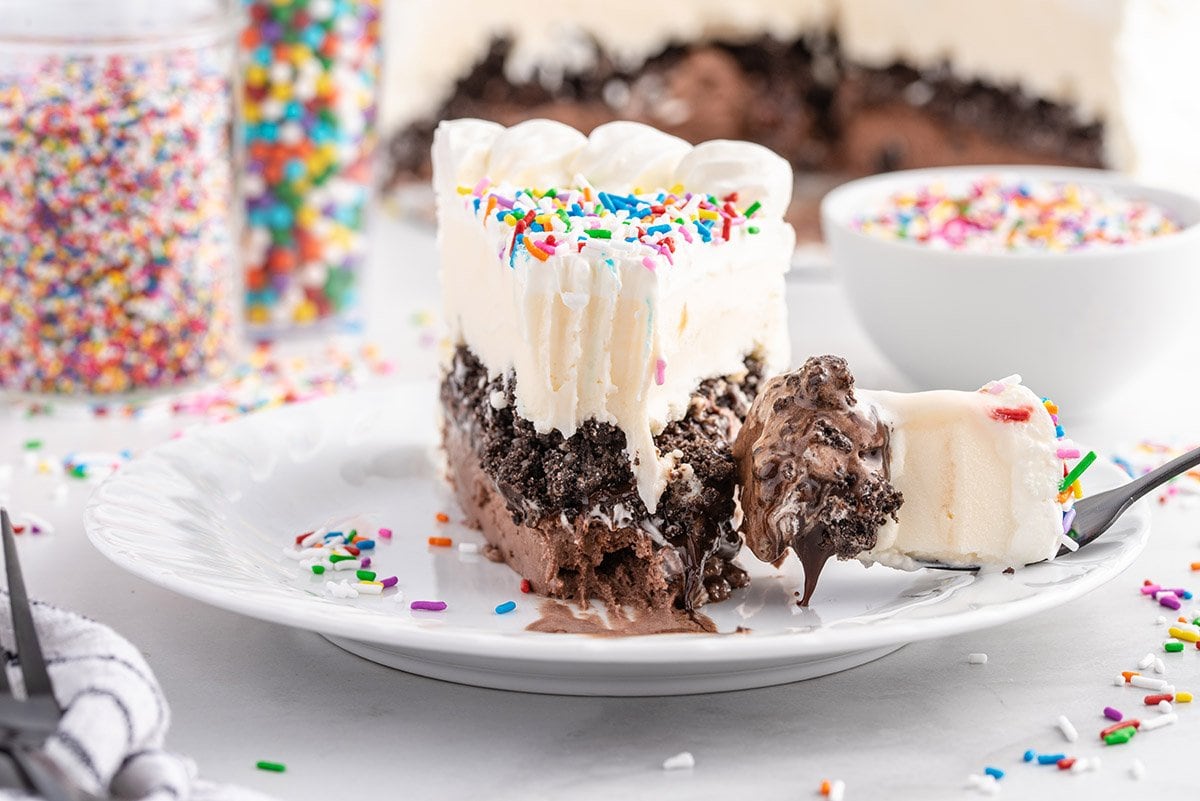
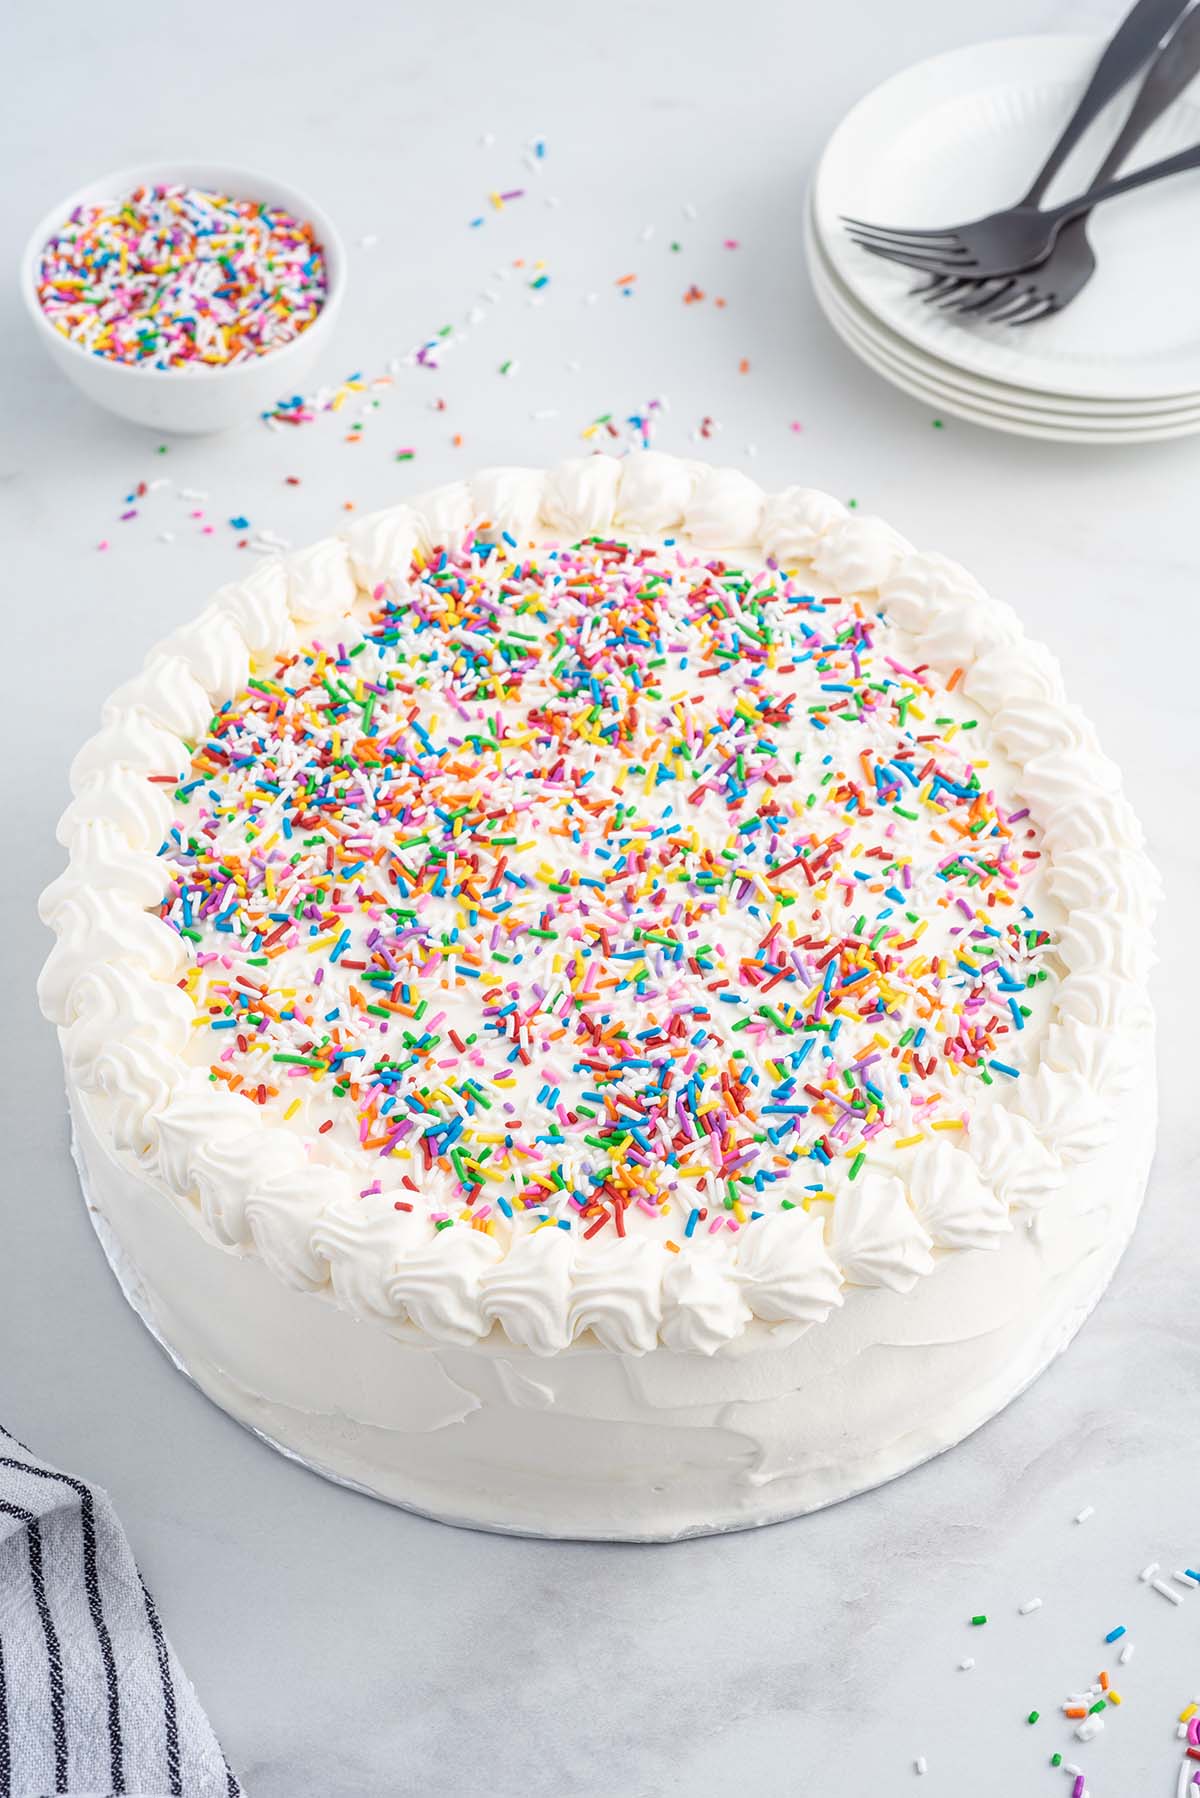
- Decorate The Dessert: Remove the outer sides of the pan and the plastic wrap, then lift the cake onto a plate. Frost the sides and top of the cake and then pipe a pretty pattern around the edge. Top with colorful sprinkles.
- Slice And Serve: Place the cake back into the freezer until you are ready to serve. Enjoy!
Tips
- Prep the Pan: Line a 9-inch springform pan with plastic wrap and freeze while baking the cookie crunch. A round cake pan works too.
- Soften Ice Cream: Let it sit out 15–20 minutes so it spreads easily.
- Warm the Fudge: Microwave for 20–25 seconds (lid off!) to soften for spreading.
- Chill the Bowl: Freeze your metal mixing bowl 30 minutes before frosting.
- Check Freezer Space: Make sure your cake pan will fit before you start.
Serving Notes
Store the ice cream cake in the freezer, wrapped in plastic, or in an airtight container. Let it sit out a few minutes before serving to soften. Use a sharp knife dipped in warm (not hot) water for clean slices.
Makes 12 servings, or more if you cut smaller kid-friendly pieces.
Variations
- Tasty Toppings: Swap sprinkles for caramel, butterscotch, chocolate drizzle, nuts, candy, cookies, pretzels, cookie dough, or brownie bites.
- Custom Cakes: Use colored sprinkles, edible images, or logos to match any theme or occasion.
- Flavor Swaps: Use your favorite ice cream or mix-ins to match your favorite Blizzard combo.
Storage Instructions
Store any leftovers in a cake carrier in the freezer for up to 7 days. Uncut cake can be wrapped tightly or sealed in a container for up to 1 month.
For the best taste and texture, eat the cut cake within a few days.
No oven, no baking, no stress. That is the whole premise behind my easy no bake desserts.
This is one of my favorite copycat dessert recipes, and you can see them all here.
More Easy Dairy Queen Copycat Recipes
- Dairy Queen Oreo Ice Cream Cake
- Homemade Buster Bars
- Dairy Queen Chocolate Ice Cream Cake (tastes just like a Choco Brownie Extreme Blizzard)
- Copycat Buster Bar Ice Cream Cake
If you tried this Dairy Queen Ice Cream Cake Recipe or any other recipe on my website, please leave a 🌟 star rating and let me know how it went in the 📝 comments below. Thanks for visiting!!!

Dairy Queen Ice Cream Cake
Ingredients
Ice Cream Cake Layers
- 1-1½ quarts chocolate ice cream (depending on brand)
- 1-1½ quarts vanilla ice cream (depending on brand, I used vanilla bean)
Cookie Crunch Layer
- 20 crushed chocolate sandwich cookies (with cream center)
- 4 tablespoons salted sweet cream butter melted
Hot Fudge Layer
- 11.75 ounce jar hot fudge topping
Whipped Cream Frosting
- 2 cups cold heavy cream
- 1¼ cup powdered sugar
- 1½ teaspoons clear vanilla flavoring
- Colorful sprinkles (optional garnish)
Instructions
- Line a 9 inch springform pan with plastic wrap. Set it aside.
- Heat the oven to 350*. Line a 10 x 15 baking sheet with parchment paper. Set it aside.
- Add the crushed chocolate sandwich cookies to a small mixing bowl.20 crushed chocolate sandwich cookies
- Stir in the melted butter until completely combined.4 tablespoons salted sweet cream butter
- Evenly spread the coated cookie crumbs on the lined baking sheet. Bake for 7 – 8 minutes. Remove from the oven and allow the cookie crumbs to completely cool.
- While the cookie crumbs are baking, remove the chocolate ice cream from the freezer and allow it to soften. This will make spreading the ice cream into the pan much easier.1-1½ quarts chocolate ice cream
- Once the ice cream has softened for 15 – 20 minutes, evenly spread the chocolate ice cream layer into the prepared springform pan. Place it back in the freezer for 1 hour.
- Just before you are ready for the hot fudge layer, remove the lid to the hot fudge and place in the microwave for 20 – 25 seconds to soften the hot fudge. The hot fudge should not actually be hot. You do not want it to melt into the ice cream. It should only be softened to make it easier to spread.11.75 ounce jar hot fudge topping
- Stir the hot fudge, then using either a silicone spatula, or an offset spatula, evenly spread the hot fudge over the top of the chocolate ice cream layer.
- Evenly sprinkle the baked and cooled cookie crumbs over the top of the hot fudge layer, gently pat the cookie crumbs to form a solid layer. Do not press the cookies into the hot fudge. Return to the freezer for 1 hour.
- 15 – 20 minutes before you are ready to spread the vanilla ice cream layer, remove the vanilla ice cream from the freezer to soften.1-1½ quarts vanilla ice cream
- Remove the springform pan from the freezer, and evenly spread the vanilla ice cream on top of the cookie crunch layer. Return the springform pan to the freezer for 4 – 6 hours, or overnight.
- 30 minutes before you are ready to “frost” the ice cream cake, place the mixing bowl in the freezer. If you are using a stand mixer, place the metal bowl in the freezer. If you are using a handheld mixer, place your mixing bowl, preferably a metal mixing bowl, in the freezer for 30 minutes.
- Remove the bowl from the freezer, add the heavy cream, powdered sugar and clear vanilla flavoring. Beat on medium, just until the powdered sugar is incorporated, then beat on high until stiff peaks form, about 3 – 4 minutes.2 cups cold heavy cream, 1¼ cup powdered sugar, 1½ teaspoons clear vanilla flavoring
- Separate out 1 cup of whipped cream frosting and place in either a decorator’s piping bag fitted with a star shaped tip or a ziploc bag with the corned snipped off.
- You will need to work quickly, especially if the weather is warm. Remove the ice cream cake from the freezer.
- Remove the outer edges of the springform pan. Using either a cake lifter, or a large sturdy spatula, remove the plastic wrap and place the ice cream cake on either a serving plate or a round decorators board.
- Using either a silicone spatula, or an offset spatula, quickly frost the sides and top of the ice cream cake.
- Using even pressure, holding the decorators piping bag ½ inch above the edge of the top of the cake, pipe either a shell pattern or swirl pattern around the edge of the ice cream cake.
- Evenly sprinkle the colorful sprinkles on the top of the ice cream cake. Place the cake back into the freezer until you are ready to serve.Colorful sprinkles
Jenn’s Notes
- If you do not have a springform pan, you can use a round cake pan lined with plastic wrap.
- You can substitute any flavors of ice cream for the chocolate and vanilla ice cream.
- You can substitute the hot fudge with caramel, and the chocolate sandwich cookies with vanilla sandwich cookies.
- Heating the hot fudge in the microwave for 20-25 seconds will soften it so that it’s easier to spread on top of the chocolate ice cream layer.
- Make sure to reserve room in your freezer to fit the cake pan.


For the cookie layer I just used crushed cookies and hot fudge…no butter or baking! I’ve made this many times…the most fun was using a silicone mini loaf pan for individual cakes!!!
I’m so confused…who came up with this recipe?? Spaceships and Laser Beams or Princess Pinky Girl????
So easy to do! Made it twice now, thank you!
Can you buy the whip cream frosting instead of make it? If so what is it called.
Yes! You can just buy whipped frosting
what are you doing with the 10×15 pan?
It’s used to bake the crushed cookies.
Looks so yummy I almost ate my phone.
I’m going to try these recipes with the family
I have made this several times everyone loves it
My daughter’s favorite way to celebrate her birthday!!! Guess who’s going to be surprised a little early this year!!! It looks perfect!! I can hardly wait to surprise her!! Thank you!!
Am making the ice cream cake for my daughter birthday party