


This post may contain affiliate links. Please read our disclosure policy.
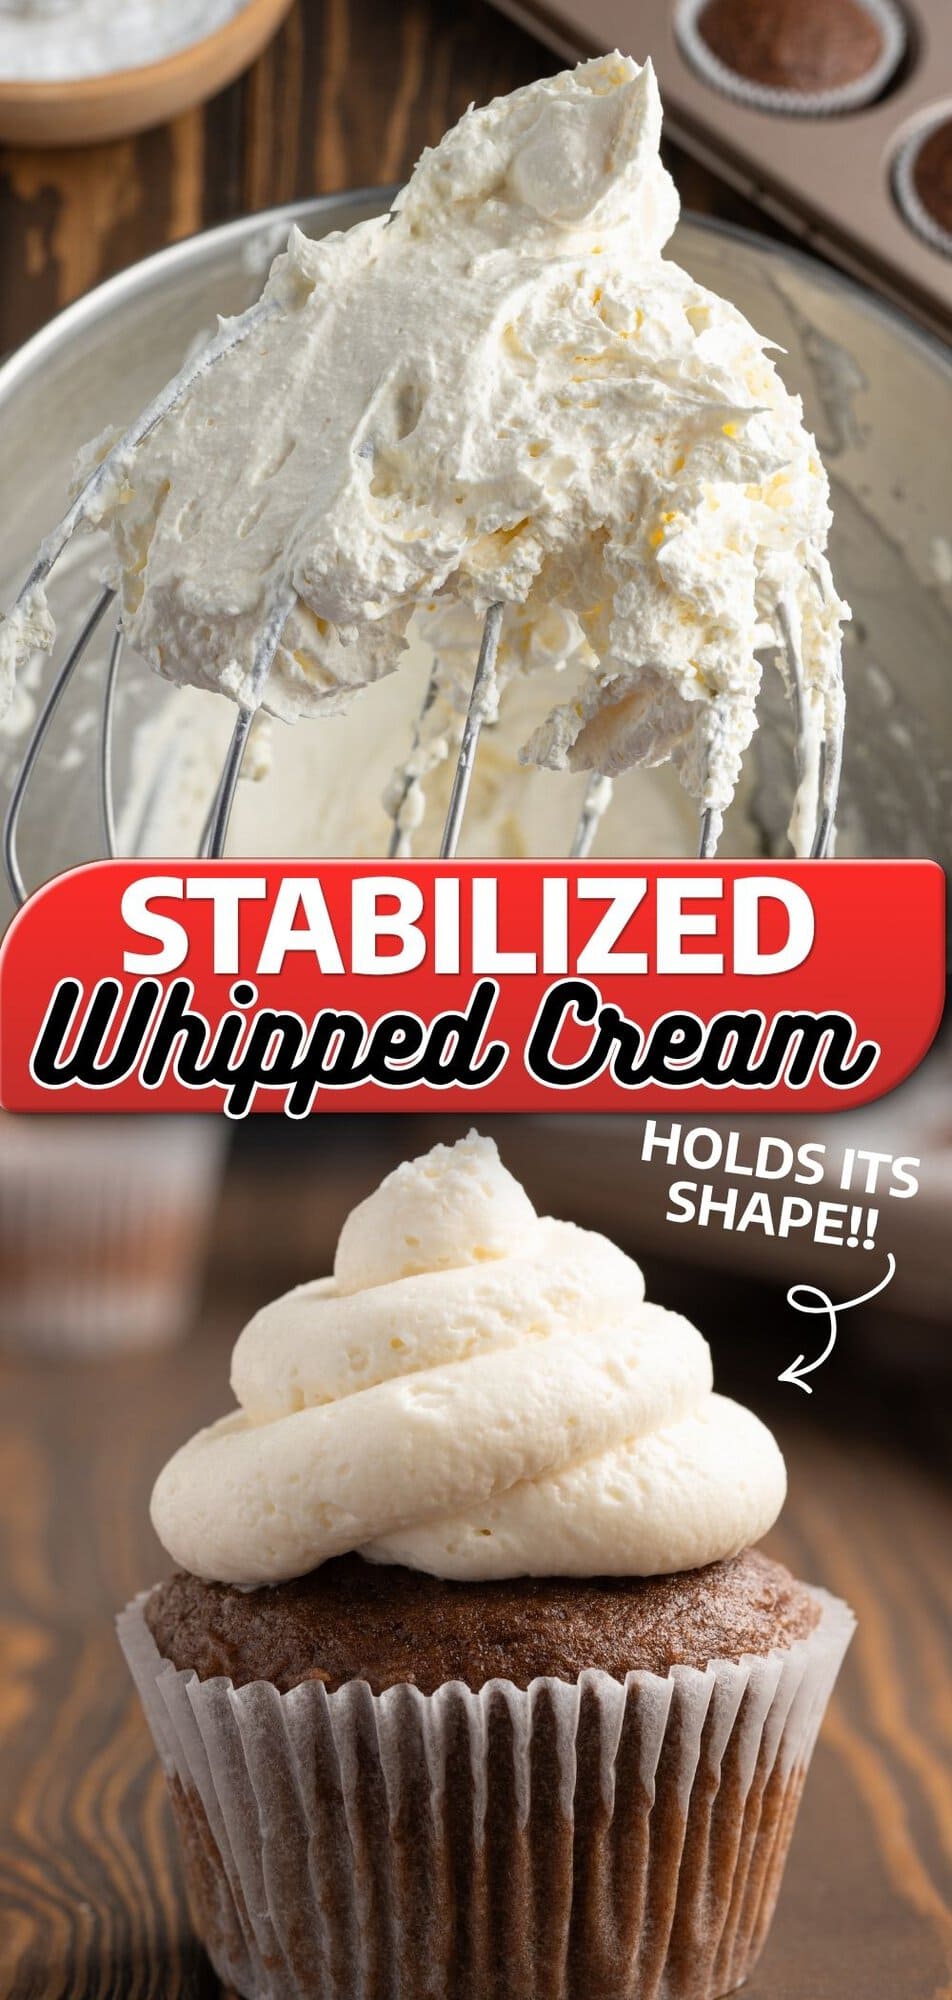
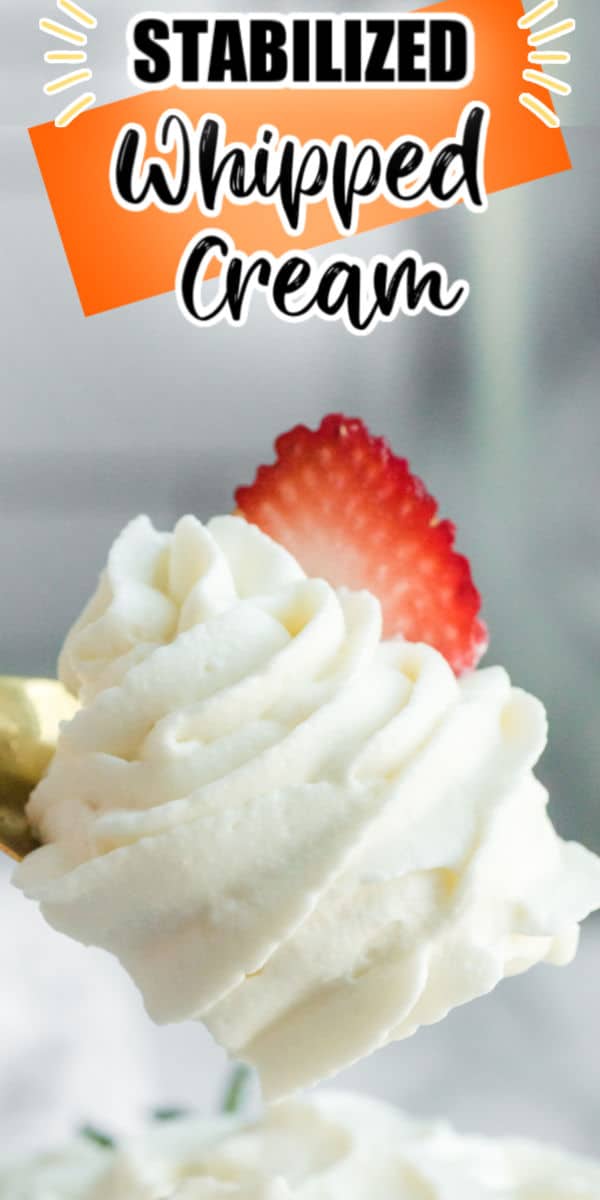
This homemade whipped cream recipe is stabilized with gelatin, which means it holds its shape for piping, stays firm for hours after decorating, and freezes just like Cool Whip. And it tastes exactly like fresh, real whipped cream. Because it is.



My grandma made homemade whipped cream every single time. She never touched the stuff in the tub. Growing up, I thought everyone made it from scratch.
When I got older and realized most people were buying it, I understood why. Convenience is real. But once you know how to do this, the homemade version is hard to go back from. This recipe is what I make now when I need whipped cream that does its job.
The thing that makes this version different from your basic three-ingredient whipped cream is the gelatin. As gelatin cools, it sets and creates a structure inside the cream that holds all those tiny air bubbles in place. Think about how Jell-O firms up in the fridge. Same idea, but inside your whipped cream.
That is why this cream holds its shape in the fridge for two days without weeping. It is why you can pipe it hours after making it, and freeze it for a month and pull it out when you need it. And the part that surprised me the most: it does not change the flavor at all.
If you are looking for recipes that use this whipped cream, my Strawberry Shortcake Trifle is one of the best places to start. My Strawberry Cool Whip Pie also works beautifully with this as a substitute for store-bought Cool Whip.
Key Ingredients

- Unflavored gelatin. This is what makes this recipe work. Sprinkled over cold water and dissolved over gentle heat, it gives the whipped cream its structure. It holds up for hours after piping and freezes well without breaking down. If you have never worked with gelatin before, do not let it intimidate you. The dissolving step takes about 5 to 7 seconds and then you set it aside to cool.
- Heavy whipping cream, cold. Use it straight from the refrigerator. Cold cream is essential. It is what allows the cream to whip quickly and hold its volume. Heavy cream and heavy whipping cream are the same thing. Regular whipping cream (without the word “heavy”) has less fat and will not hold up as well for this recipe.
- Cold water. Used to bloom the gelatin. Blooming just means letting the dry gelatin absorb the water before it goes over the heat. This step takes a few minutes and makes sure the gelatin dissolves evenly with no lumps.
- Powdered sugar. Use powdered sugar, not granulated. The fine texture dissolves seamlessly into the cream, and the small amount of cornstarch it contains adds a little extra stability on its own. If you use granulated sugar in a batch this size, you can end up with grit.
- Pure vanilla extract. One and a half teaspoons adds that clean, classic flavor that makes this taste like real whipped cream. Use pure, not imitation.
How to Make Stabilized Whipped Cream
Step 1: Chill your bowl and whisk. Place a large mixing bowl and whisk attachment in the refrigerator to chill while you prep everything else. Cold equipment helps the cream whip faster.
Step 2: Bloom the gelatin. Add 2¼ tablespoons of cold water to a small heat-safe bowl. Sprinkle 1½ teaspoons of unflavored gelatin evenly over the top and let it sit for a few minutes. The gelatin will absorb the water and look thick and slightly gummy. That is exactly what you want.
Step 3: Dissolve the gelatin. Set the bowl over a small saucepan of simmering water, like a bain marie, and stir the gelatin mixture while watching closely. It only takes about 5 to 7 seconds to dissolve fully and should look like clear liquid with no granules when it is done. Remove it from the heat and let it cool to room temperature before adding it to the cream. Warm gelatin added to cold whipped cream will deflate it before it has a chance to set.
Step 4: Whip the cream to soft peaks. Remove your chilled bowl and whisk from the refrigerator and add the 1½ cups of heavy whipping cream, ⅜ cup of powdered sugar, and 1½ teaspoons of vanilla. Whip starting on low speed, then gradually build to high until the cream thickens and soft peaks form. Soft peaks mean the cream holds a peak that droops gently when you lift the whisk, not one that stands straight up. Stay close once it starts to thicken, because whipped cream moves from soft peaks to overwhipped in a matter of seconds.
Step 5: Thin the gelatin slightly. Stir 1½ teaspoons of heavy whipping cream into the cooled gelatin mixture. This loosens it just enough to pour smoothly into the cream without seizing.
Step 6: Add the gelatin and finish whipping. Turn the mixer to low and slowly pour the gelatin mixture into the cream in a thin, steady stream. Once incorporated, increase to medium speed and beat until stiff peaks form, meaning the cream stands straight up when you lift the whisk. Stop the moment you reach this point. Overwhipped cream becomes grainy and cannot be saved.

How to Store Stabilized Whipped Cream
Refrigerator: Store in an airtight container for up to 48 hours. Unlike standard whipped cream, this one holds its shape and will not weep or separate. Make it the night before and it looks exactly the same the next day.
Freezer: This cream freezes well for up to 1 month. Store it in an airtight container or load it into a piping bag and freeze it that way so it is ready to pipe straight from the freezer after thawing. To use, move it to the refrigerator and let it thaw slowly overnight.
Fair warning: when you first open the container after a month in the freezer, it may look a little rough when you stir it, almost like cottage cheese. Do not panic. Load it into a piping bag and pipe it onto your dessert.
It pipes beautifully, holds its shape, and tastes just as good as fresh. I tested this myself, and it surprised me how well it held up.
Freeze like Cool Whip: If you have ever wondered whether you can make your own version of Cool Whip that you can pull from the freezer when you need it, the answer is yes. This is it.
Frequently Asked Questions
No. This was the thing I was most curious about when I first tested this recipe, and the answer is a clear no. Unflavored gelatin has no taste. The finished cream tastes exactly like fresh homemade whipped cream.
Yes, but then it is standard whipped cream without any stabilization. It will still taste great, but it will only hold for about 24 hours in the refrigerator and will not freeze well. If you need it to hold its shape for piping or make-ahead use, the gelatin is what makes that possible.
Soft peaks are when you lift the whisk and the cream forms a peak that droops down gently. Stiff peaks are when the peak stands straight up and holds firm. For this recipe, you whip to soft peaks first, add the gelatin, then finish to stiff peaks. You want to stop at stiff peaks. Going past that point makes the cream grainy.
A bain marie is a bowl set over a pan of simmering water. You are using gentle heat to dissolve the gelatin without burning it. You really do need to dissolve the gelatin fully before adding it to the cream. Undissolved gelatin can cause lumps or streaks. The good news is it only takes 5 to 7 seconds once the water is simmering.
Yes. It works as a direct substitute in any recipe calling for Cool Whip. Use the same amount. Because it freezes well, it also works in frozen no-bake desserts.
I tested this on cupcakes during recipe development. The piped cream held its shape when the cupcakes were turned upside down and held again when the cupcakes were sliced in half. For a dessert table or a decorated cake, this cream holds up far longer than standard whipped cream.

More No-Bake Desserts You May Enjoy

Homemade Whipped Cream Recipe (Stabilized)
Ingredients
- 2¼ tablespoons cold water
- 1½ teaspoons unflavored gelatin
- 1½ cup heavy whipping cream
- ⅜ cup powdered sugar
- 1½ teaspoons vanilla
- 1½ teaspoons heavy whipping cream
Instructions
- Chill a large mixing bowl and whisk attachment in the fridge.
- Add the water to a heat-safe bowl and sprinkle the unflavored gelatin on top. Let it sit for a few minutes.2¼ tablespoons cold water, 1½ teaspoons unflavored gelatin
- Place this bowl over a simmering pan of water (like a bain marie) until the gelatin is fully dissolved. It only takes 5-7 seconds. Stir the mixture and set it aside to cool.
- Remove your bowl and whisk attachment from the refrigerator. Combine the 1 ½ cups of heavy whipping cream, powdered sugar and vanilla in the bowl. Whip the mixture building up to a high speed until it thickens and soft peaks form.1½ cup heavy whipping cream, ⅜ cup powdered sugar, 1½ teaspoons vanilla
- Stir the 1 ½ teaspoons of heavy whipping cream into the gelatin mixture.1½ teaspoons heavy whipping cream
- Now turn the mixer to low. Slowly pour the gelatin mixture into the whipped cream and mix until well combined. Increase the mixer to medium speed and mix until stiff peaks form.
Jenn’s Notes
- Refrigerator: Keep it in an airtight container for up to 48 hours. Unlike regular whipped cream, this version holds its shape without weeping or separating — make it the night before and it will look exactly the same when you open the container the next day.
- Freezer: This cream freezes surprisingly well for up to a month. Store it in an airtight container, or go one step further and load it straight into a piping bag before freezing so it’s ready to use the moment it thaws. When you need it, just move it to the refrigerator and let it thaw slowly overnight.
- A heads up about the thaw: When you first open the container after a month in the freezer, it may look a little alarming — stirred up, almost grainy, a bit like cottage cheese. Don’t panic. Load it into a piping bag and pipe it onto your dessert anyway. It pipes beautifully, holds its shape, and tastes every bit as good as fresh. I tested this myself and was genuinely surprised by how well it came back.
- Your homemade Cool Whip: If you have ever wished you could pull a tub of whipped cream from the freezer whenever you needed it, this is exactly that. Make a batch, freeze it, and you have your own version on standby whenever dessert calls for it.
- Let the gelatin cool down before it goes anywhere near the cream. This is the step people rush most often, and it shows. Warm gelatin added to cold whipped cream will deflate it or cause it to partially melt. Set it on the counter for at least 5 to 10 minutes and let it cool completely before you start.
- Pour it in slowly with the mixer running on low. Don’t dump it in all at once. A thin, steady stream with the mixer on low gives the gelatin time to incorporate evenly throughout the cream. Too fast or too high a speed and you risk streaks and an uneven texture.
- Don’t step away once you start whipping. Soft peaks sneak up on you, and the window between perfectly whipped and overwhipped cream is genuinely just a matter of seconds. Stay close and check the consistency often during that final minute.
- Keep everything cold. Cold cream, cold bowl, cold whisk, all of it matters. If your kitchen runs warm, put the bowl and whisk in the freezer for 15 minutes rather than the fridge. The colder your setup going in, the better your cream will whip.
- Make it ahead without any stress. This whipped cream holds its shape in the refrigerator for up to 48 hours without weeping or separating, which makes it a great make-ahead option for any dessert you’re prepping in advance.
Nutrition Info
Generally, once I’ve tried something homemade and realized just how easy it can be to make for myself, I never go back to store-bought. This homemade whipped cream recipe is a perfect example of that.
Once you try it for yourself, you will always want to make it this way. It’s creamy, delicious, and makes for the perfect finishing touch to any dessert!









I love your recipes!
Awwwwww thank you so much!!
You make this statement – “However, whipped cream is not stabilized, meaning it will hold its shape without deflating.” Don’t you mean that it will NOT hold its shape without deflating?
I’ve been stabilizing whipped cream for several years now with Agar-Agar Powder. It’s very quick and easy to just add the powder w/ the 10X sugar, and it sets up very quickly. Vegans also prefer stabilizing food w/ Agar-Agar since it’s a plant based food, vs gelatin an animal based food.
I’ve found whipped cream still stable after 3 weeks in the fridge, and it’s great to use as a frosting, filling, or topping that won’t melt or separate.
To stabilize whipped cream for white frostings, toppings, & fillings, that stay firm & won’t weep or separate:
Whip 1 cup heavy whipping cream and desired flavoring (i.e. extract, emulsion, or flavoring oil), on medium speed, with the paddle attachment, til almost whipped.
On low speed, add 2 tablespoons sifted 10X confectioners’ sugar & 1 teaspoon Agar-Agar Powder, & continue whipping on low speed, til stiff peaks form – it will set up ‘very quickly’ so DON’T walk away or over beat.
Store in a closed container in the refrigerator up to 3 weeks, to top things like Strawberry Short Cake, pies, and other desserts.
Use as a cake filling or frosting that’s easy to decorate, color, and pipe; or in recipes calling for Cool Whip.
Agar-Agar is several times stronger, as a gelling agent, than gelatin (an animal by-product). Agar-Agar Powder is used to stabilize frostings – Rose’s Buttercreams & Mock Whip Frostings, meringues, whipped cream, etc. It has no flavor and is 1 of the 7 commonly used egg substitutes, i.e. as in vegetarian and vegan recipes.
Agar-Agar Powder dissolves instantly in cold food applications, i.e. whipped cream and frostings – Agar-Agar Flakes & Bars have to be hydrated and pulverized till smooth, and are most often used in high heat applications, i.e. jams and jellies.
Vegetarians and Vegans use Agar-Agar as a gelling agent since it’s plant-based, vs. gelatin which is derived from animal by-products – animal hides, calf/horse/pig hooves, etc.
Obviously a vegan wouldn’t be making homemade whipped cream, lol.
Thank you for catching the error – it has been corrected. And thank you for all of your information – you are a wealth of knowledge.