
This post may contain affiliate links. Please read our disclosure policy.
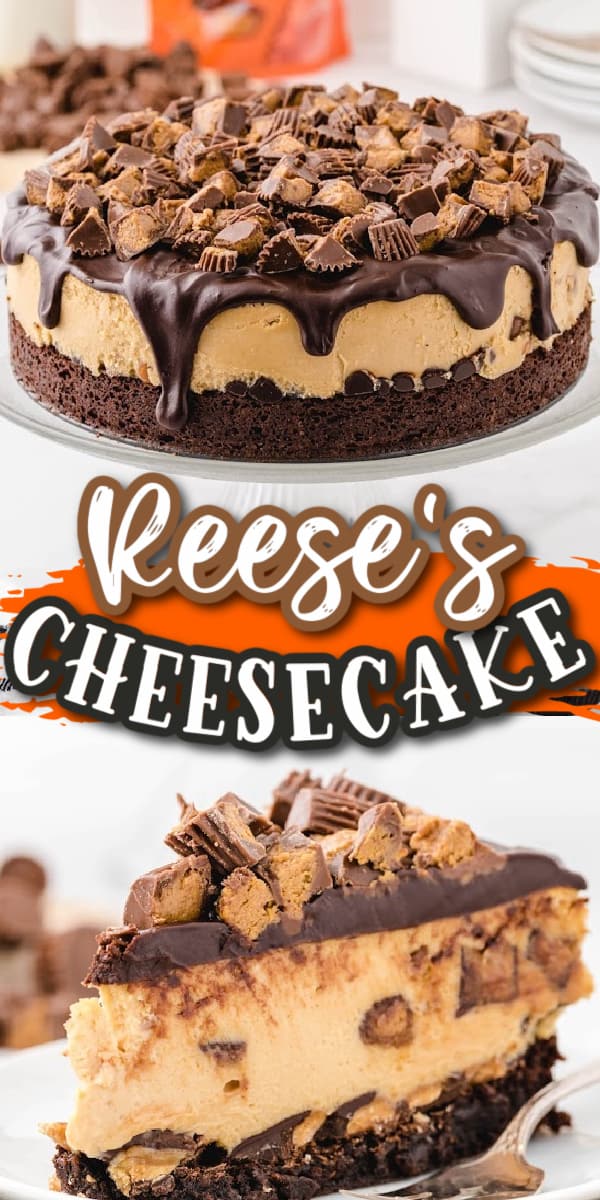
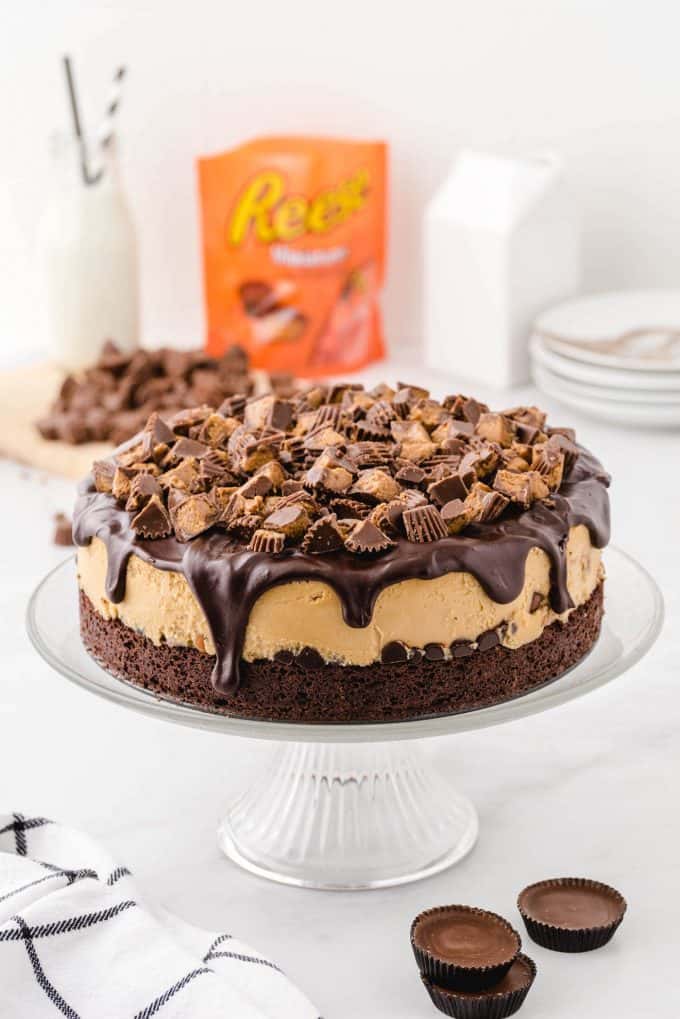
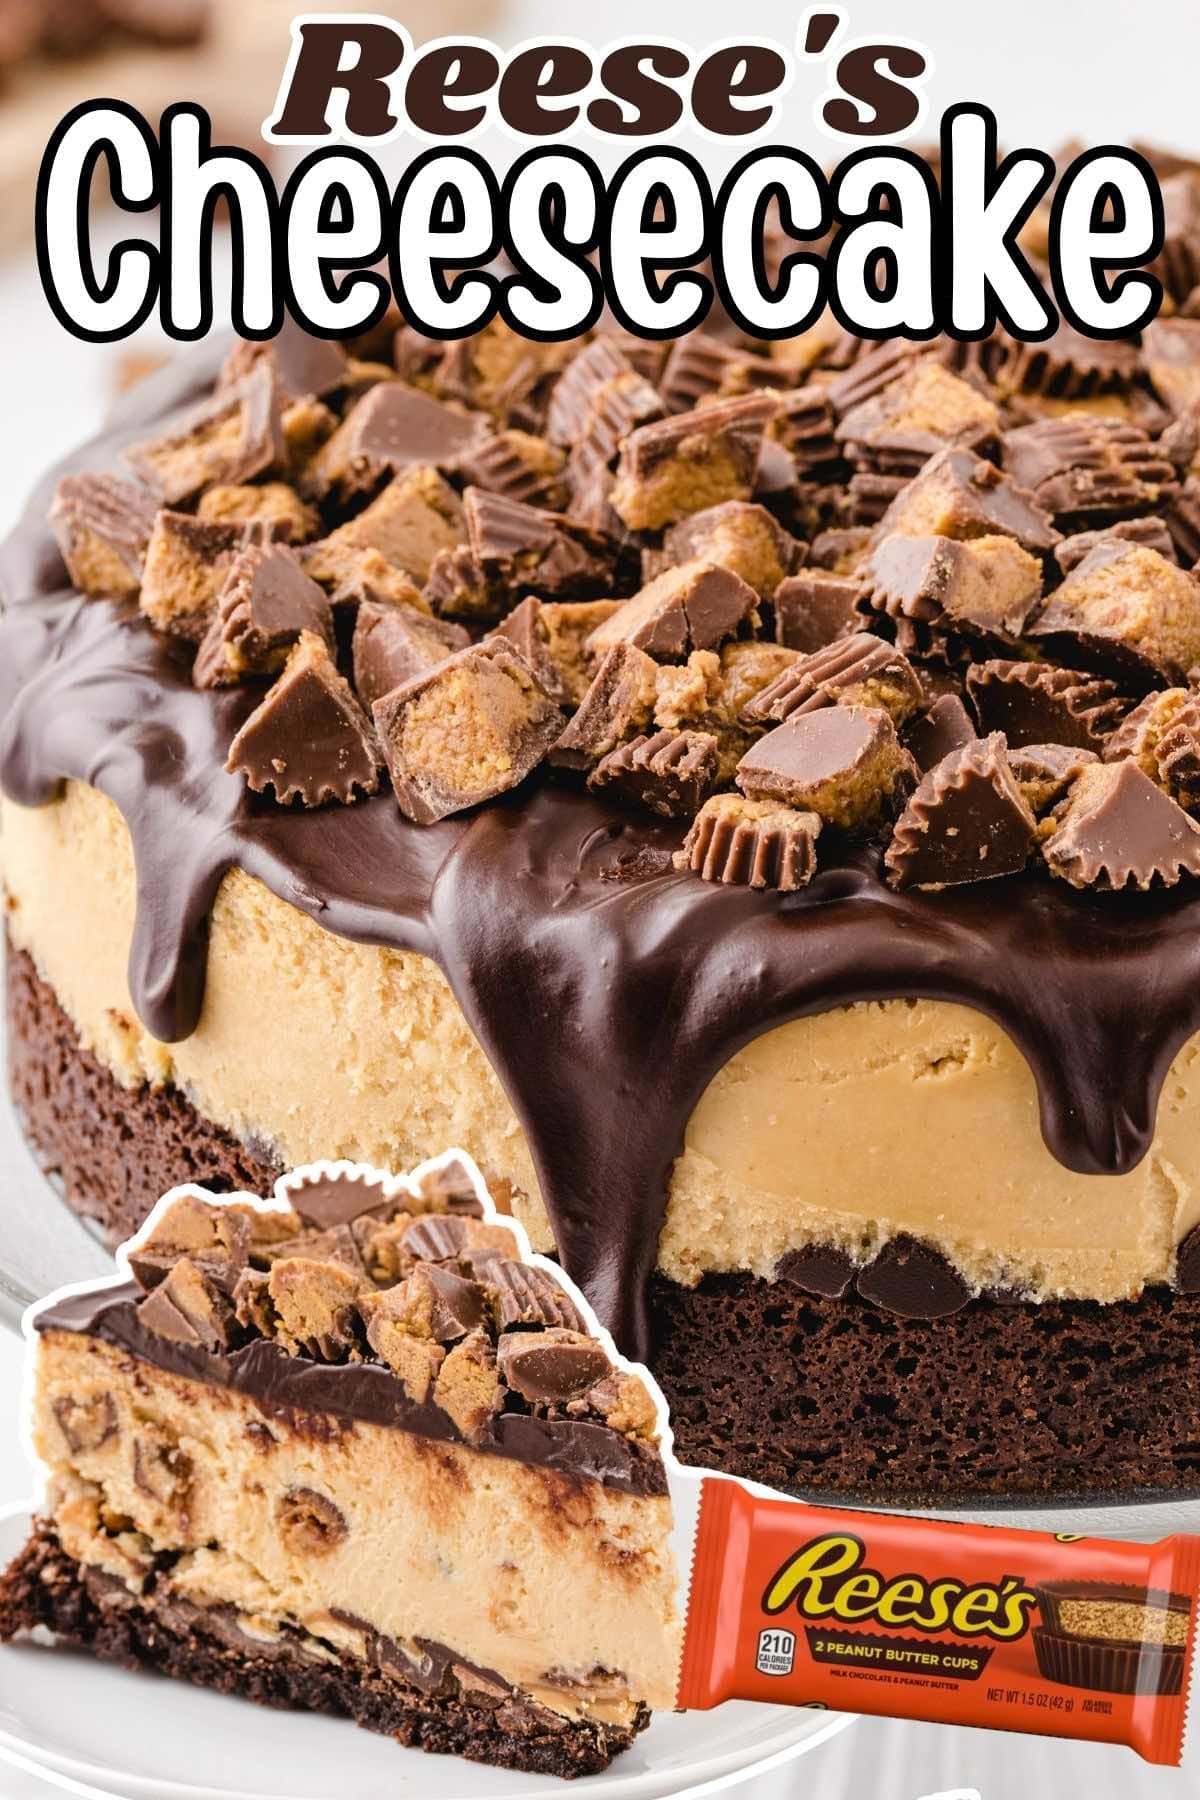
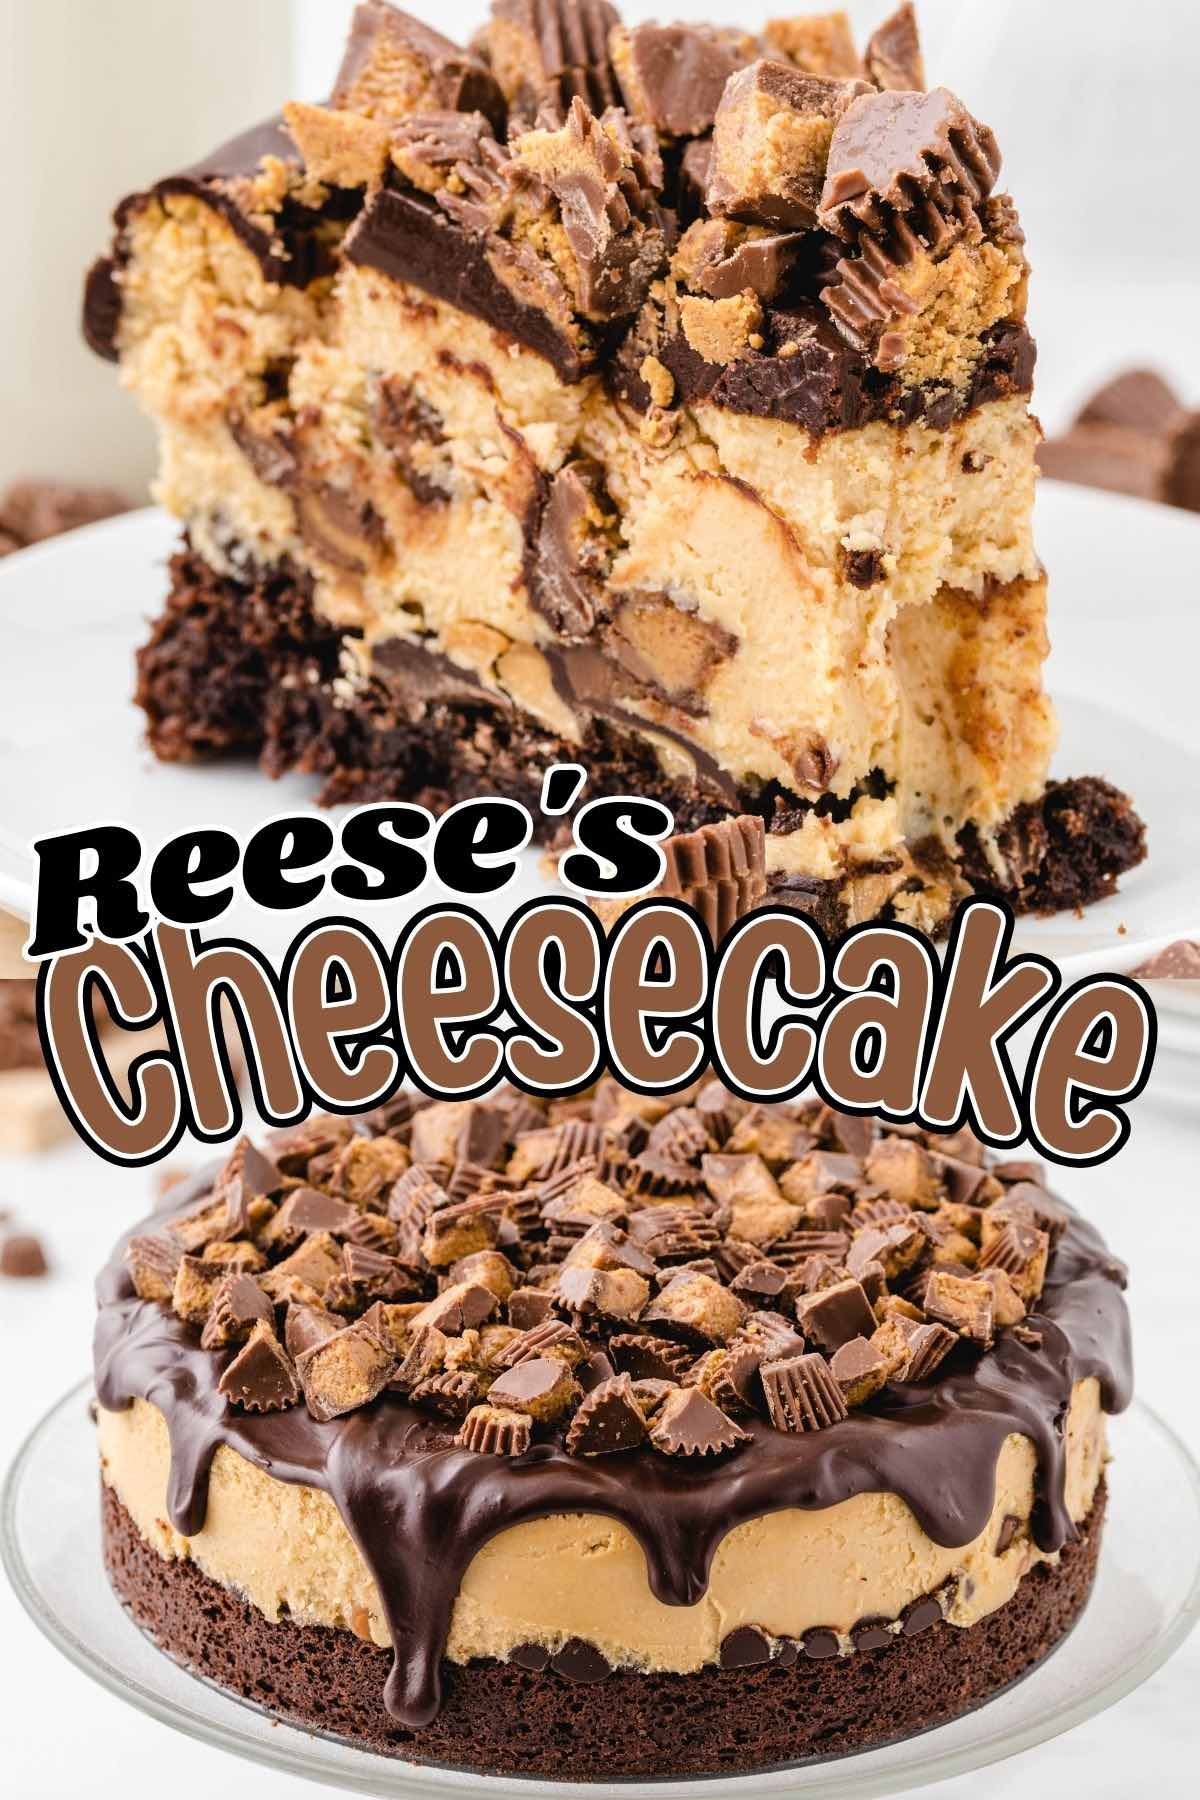
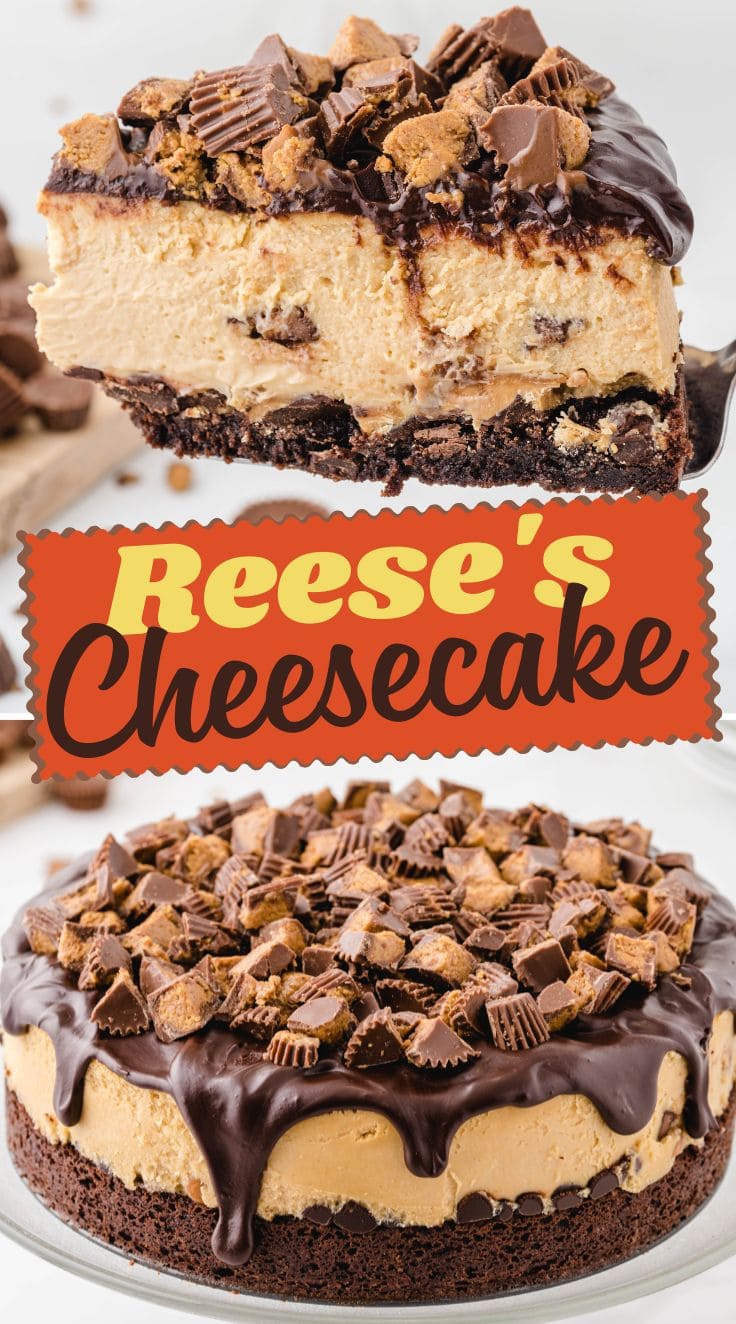
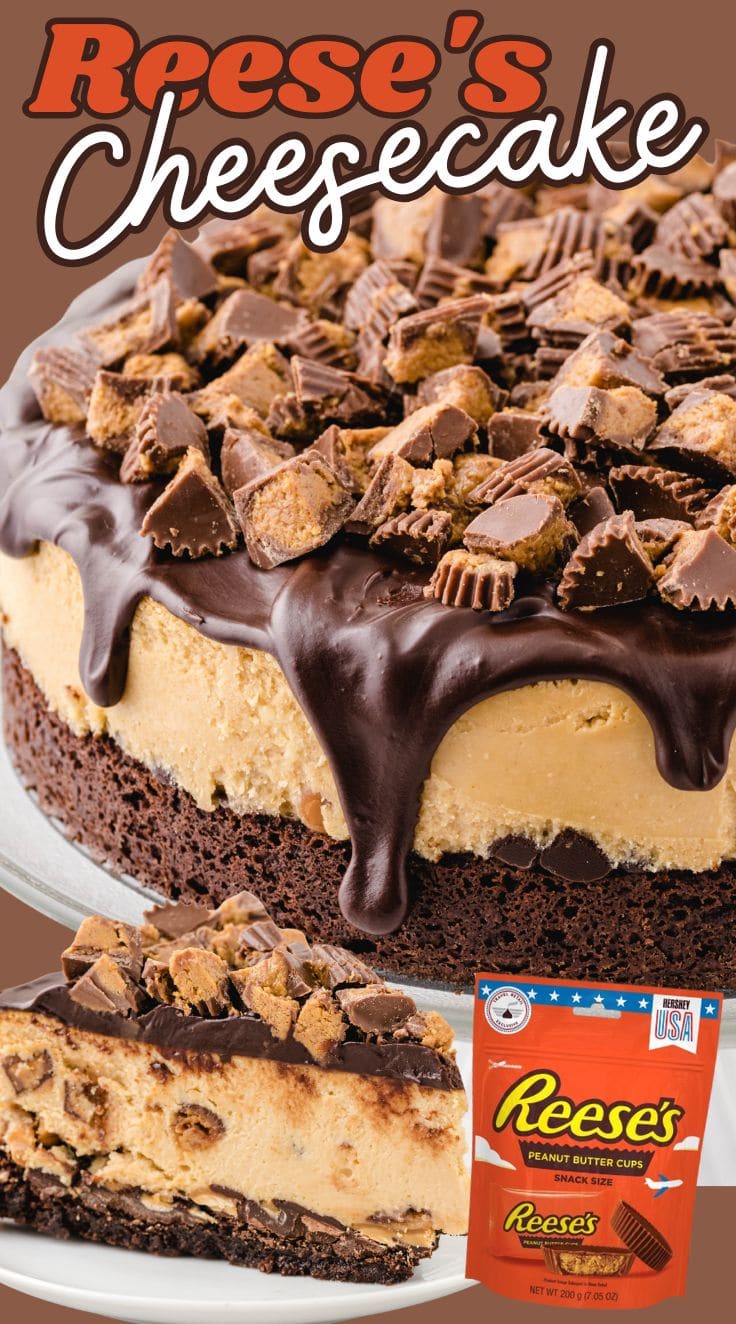
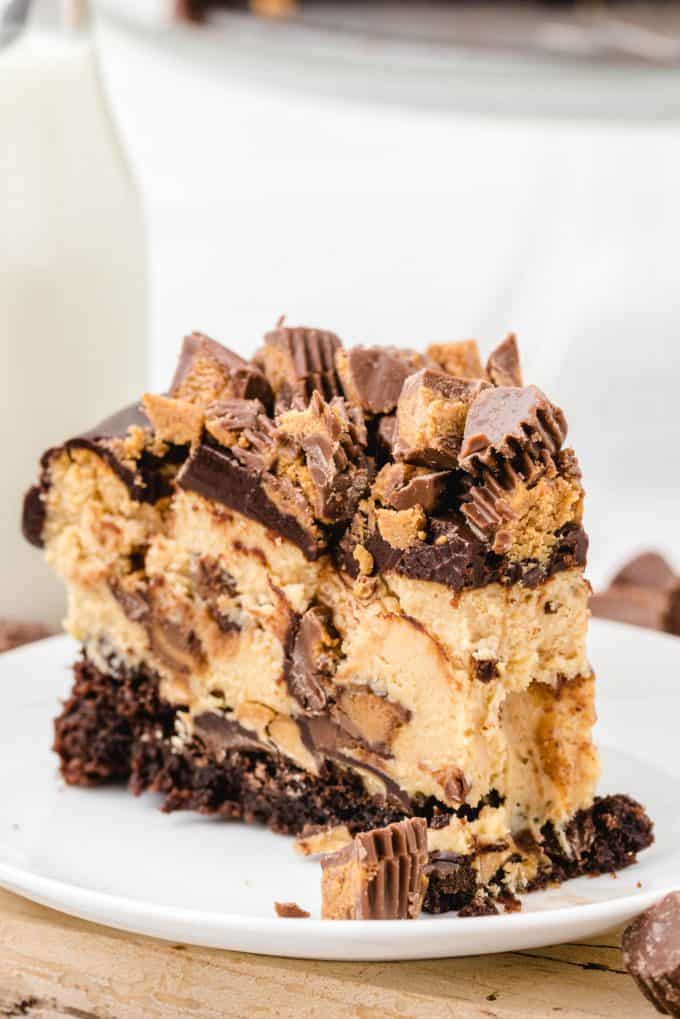
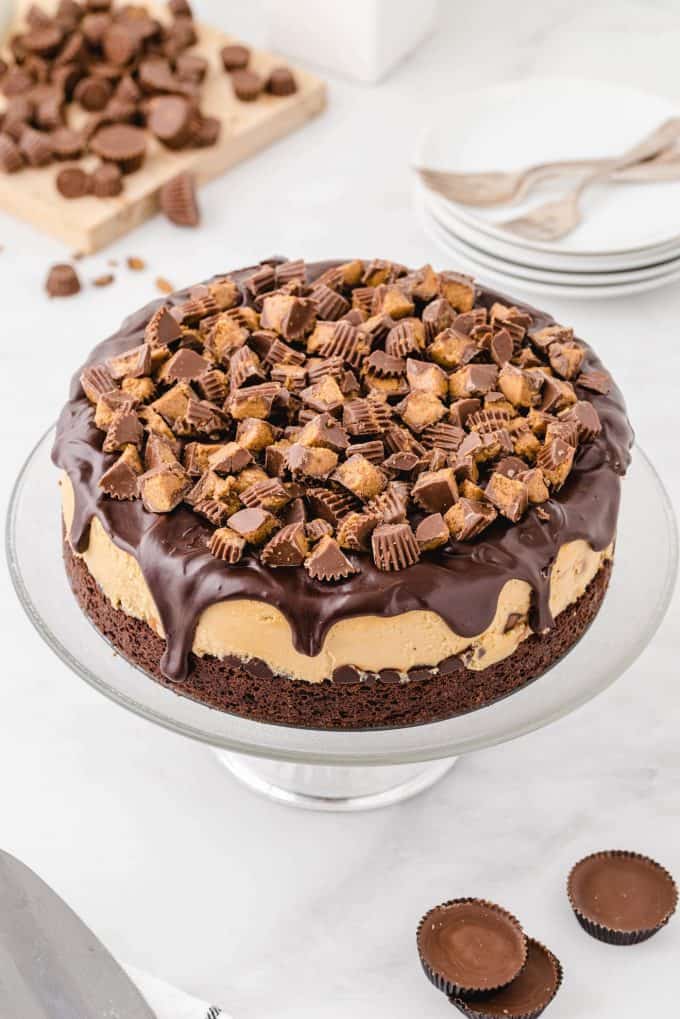
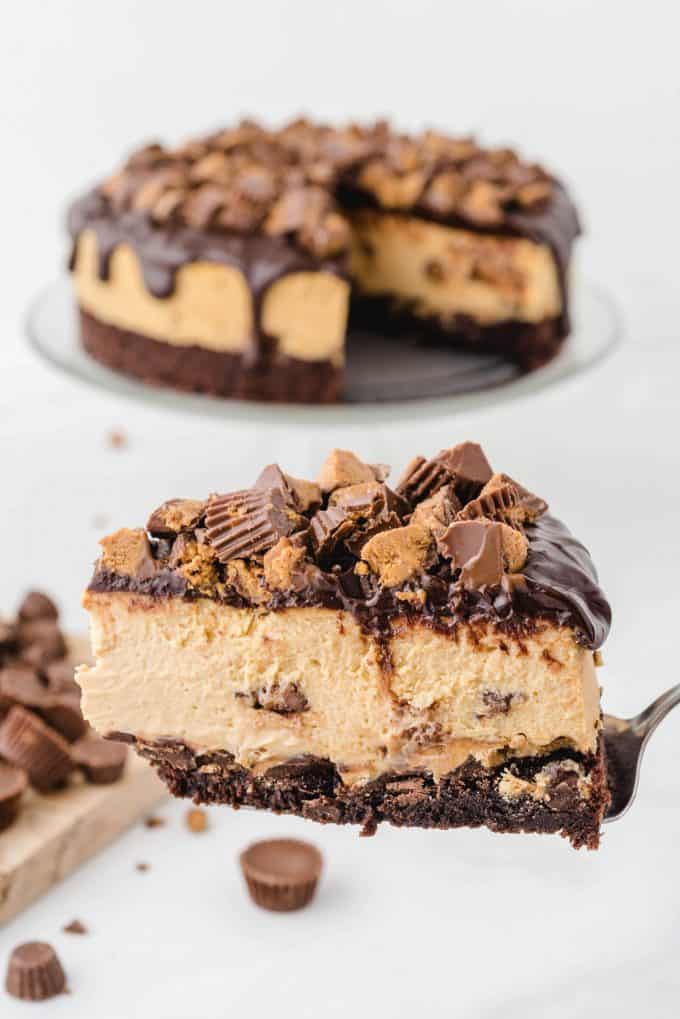
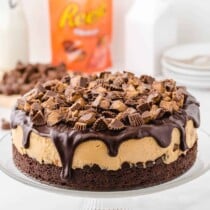
This Reese’s Cheesecake is as delicious as it sounds. It starts with a perfectly baked brownie crust that’s filled with chocolate and peanut butter chips followed by creamy peanut butter cream cheese filling and topped with Reese’s Peanut Butter Cups. Rich and decadent, it’s perfect for any occasion!

This was by far one of the best cheesecake recipes I’ve ever tried! The cake was a hit. Very rich and delicious 😋
Reese’s Peanut Butter Cheesecake With Brownie Crust
There’s no flavor combination quite like chocolate and peanut butter. I love desserts like my No-Bake Chocolate Peanut Butter Cookies and Peanut Butter Brownies. But combining that flavor profile in a creamy cheesecake? It’s genius!
I love bringing this Reese’s Cheesecake dessert to events and holiday parties. It’s always a huge hit. And it’s really quite simple to make. Trust me when I say, the decadent, irresistible flavors in every bite are totally worth breaking your diet for!
If you’re a peanut butter and chocolate person like me, don’t miss the rest of my easy cheesecake recipes.
Why We Love This Reese’s Peanut Butter Cheesecake Recipe
- Can be made ahead
- Freezer friendly dessert
- Easy to make brownie crust using a box mix
- Decadent and rich dessert
- Chocolate and peanut butter is always a fan favorite
- Simple ingredients list, includes many pantry staples
- Uniquely flavored cheesecake, a change from traditional
- Great for any occasion, holidays and get togethers alike

Ingredients/Shopping List
- Brownie mix – I used Betty Crocker ~ Milk Chocolate
- Vegetable oil
- Water
- Egg
- Semi-sweet chocolate chips
- Peanut butter chips
- Cream cheese
- Sugar
- Vanilla extract
- Creamy peanut butter
- Heavy cream
- Miniature peanut butter cups
SEE FULL PRINTABLE RECIPE CARD BELOW
How to Make Reese’s Cheesecake
There are 3 main layers to making this cheesecake. First, is the brownie crust. Next, is the cheesecake filling, and last is the chocolate ganache on top. The hardest part about making this is having the patience to wait for it to chill!
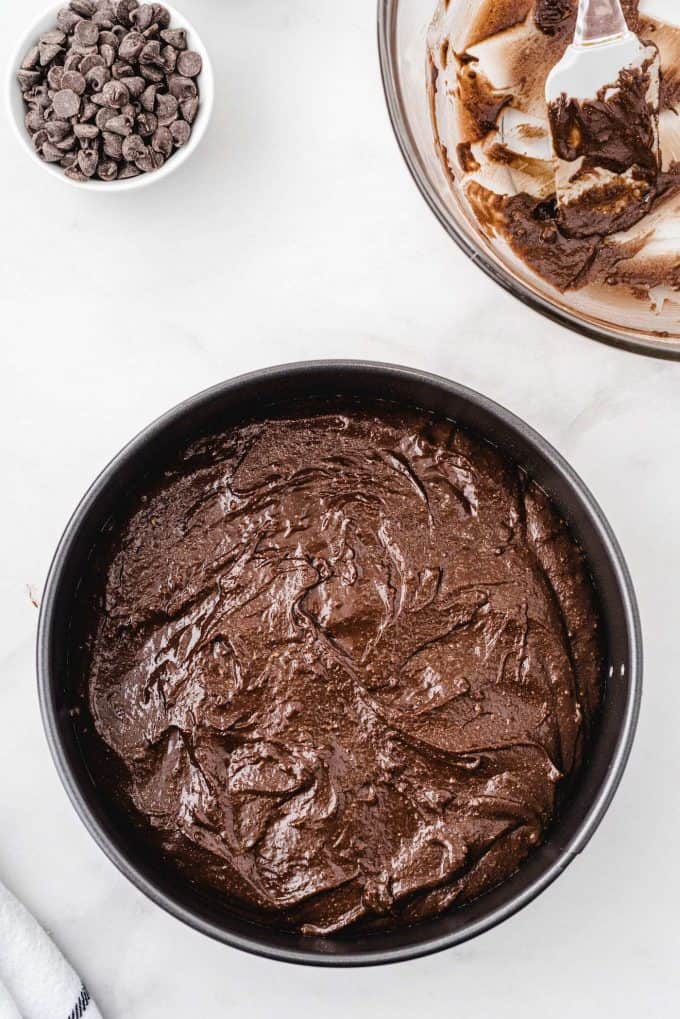
Mix together brownie mix, beaten egg, vegetable oil, and water.

Pour into springform pan and bake for 35 minutes in the preheated oven at 350*F.
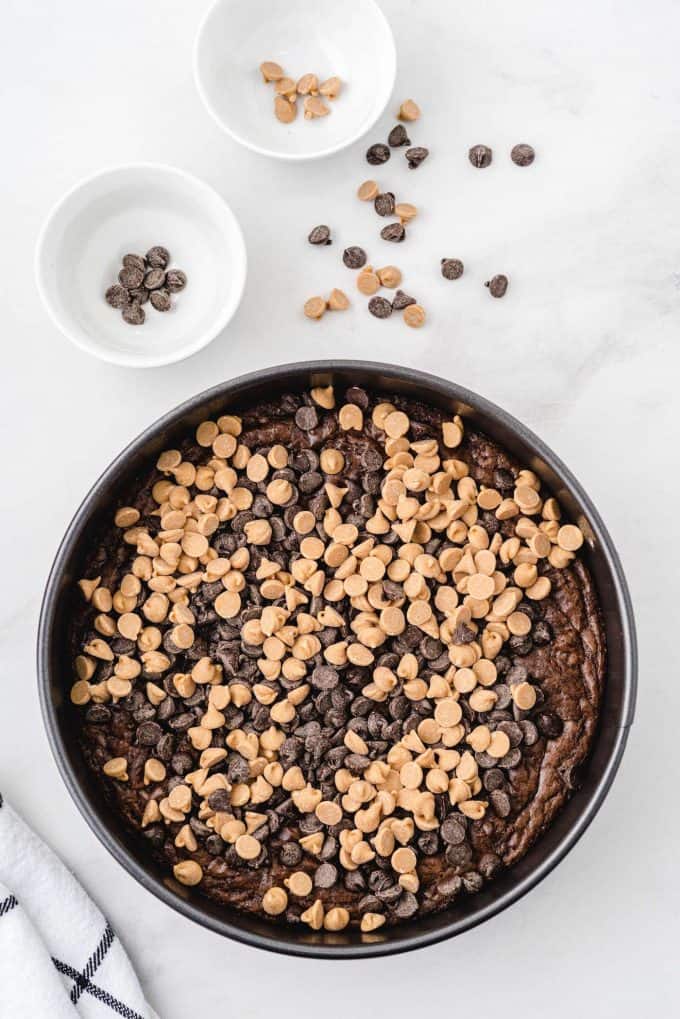
Remove from the oven and immediately sprinkle with both types of chips. Let cool.
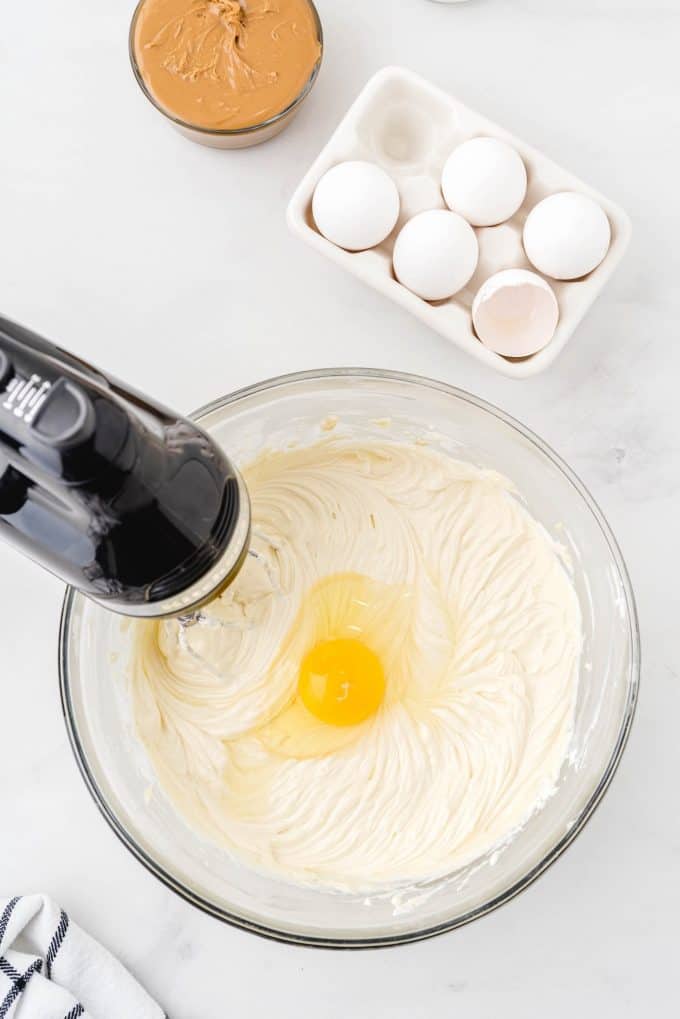
Cream together cream cheese until smooth.

Add in sugars and vanilla and continue mixing at medium-high speed until smooth.
Reduce speed to low, add the eggs, one at a time and mix well, but don’t overmix.
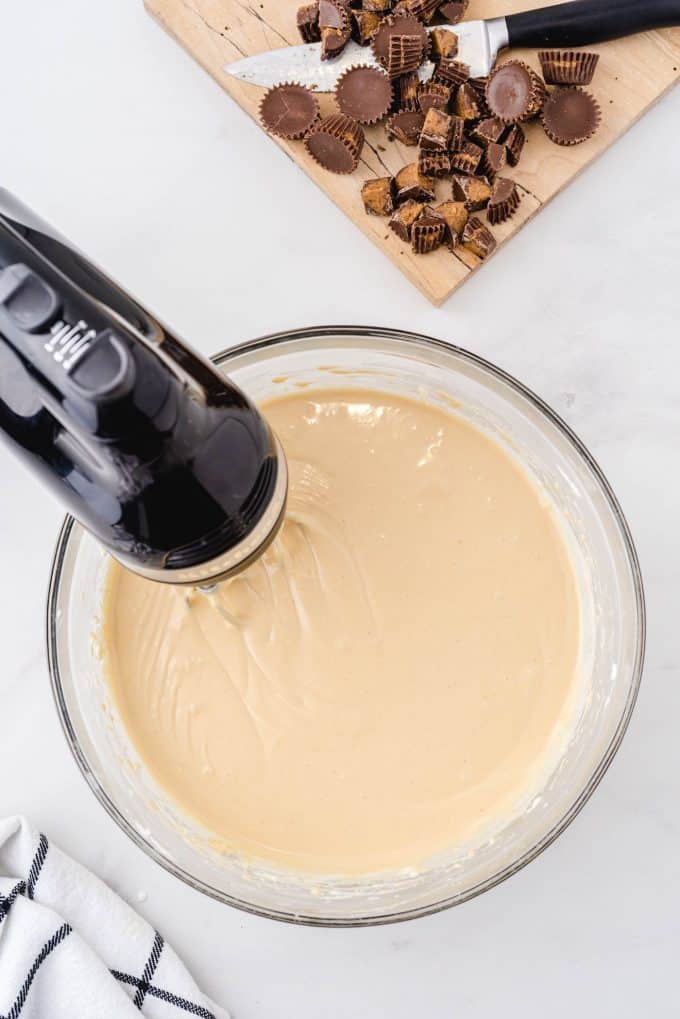
Add peanut butter and heavy cream and continue mixing until completely incorporated.
Pro-tip: I have found that my cheesecakes turn out the best if all of my ingredients are at room temperature and that I’m careful not to overmix any of the ingredients.
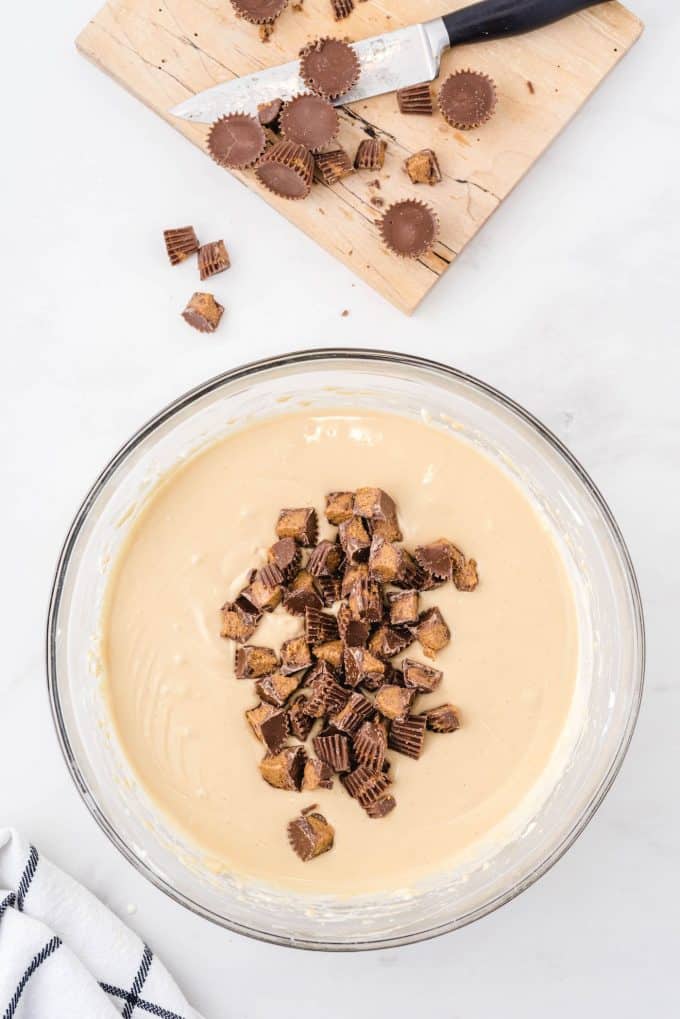
Fold in quartered peanut butter cups.
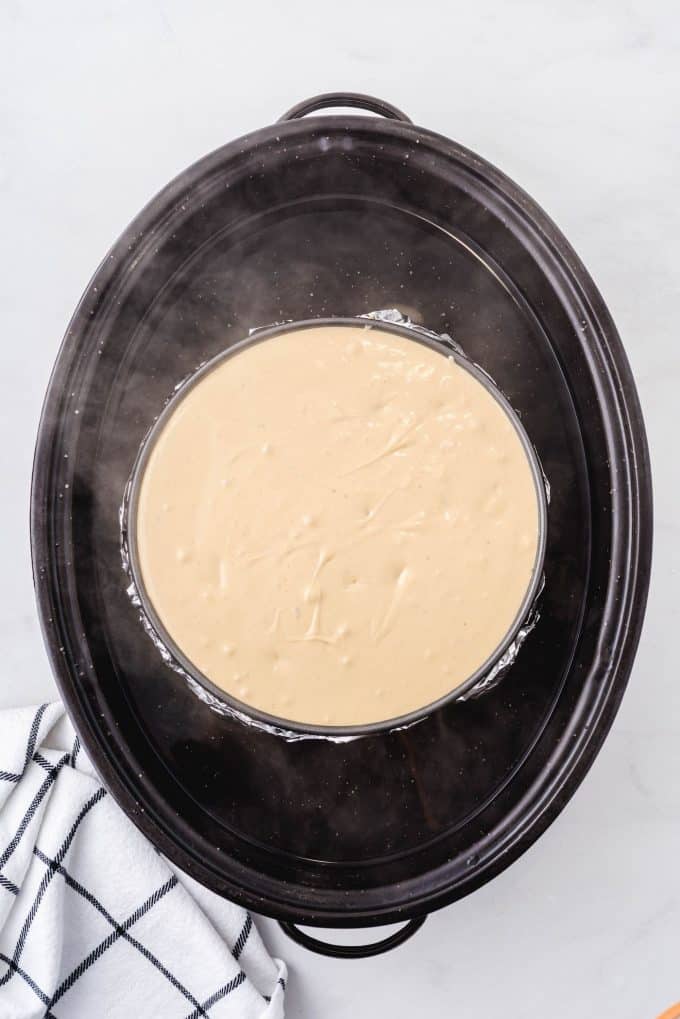
Wrap the springform pan with foil and spoon cheesecake batter on top of the brownie layer.
Pro-tip: Make sure to wrap your springform pan tightly in foil, so that water doesn’t leak into your cheesecake. If leaks get in, it can ruin your cheesecake!

Place the pan into a large roasting pan with 1 inch of hot water inside. Bake for 1 hour at 325 degrees. (See FAQ below)
After the cheesecake has cooked for 1 hour, turn off the oven and crack the oven door open about an inch and allow the cheesecake to cool in the oven for 30 minutes.
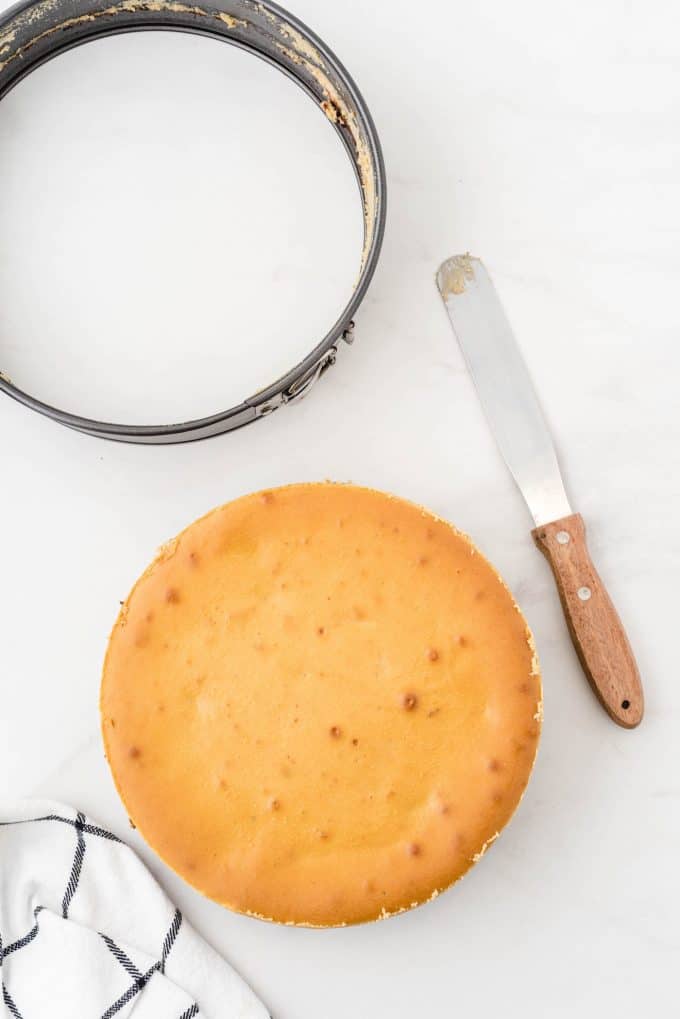
Remove the cheesecake from the oven, and remove the springform pan from the roasting pan/water bath. Allow the cheesecake to rest for 1 hour or until cool enough to place in your refrigerator overnight.
PRO-TIP: When you finish baking your cheesecake, it may appear not to be completely set. Do not worry! It will set in the refrigerator overnight.
After the cheesecake has chilled overnight, carefully run a knife along the inside edge of the pan to encourage the cheesecake to cleanly release from the pan.
Pro-tip: Letting your cheesecake cool down gradually in the oven will help to prevent it from cracking. But, since you’ll cover the top of it anyway, it’s not a big deal if you have a few cracks!
For the ganache: Combine chocolate chips with heavy cream and melt together in the microwave.
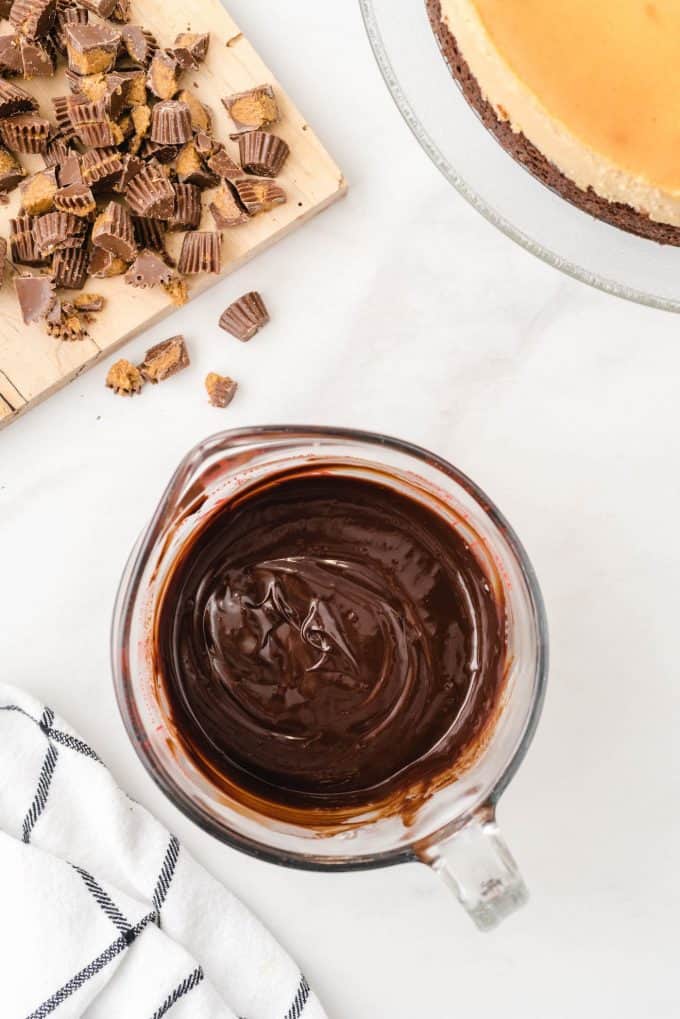
Pour and smooth the chocolate on top of the cheesecake.
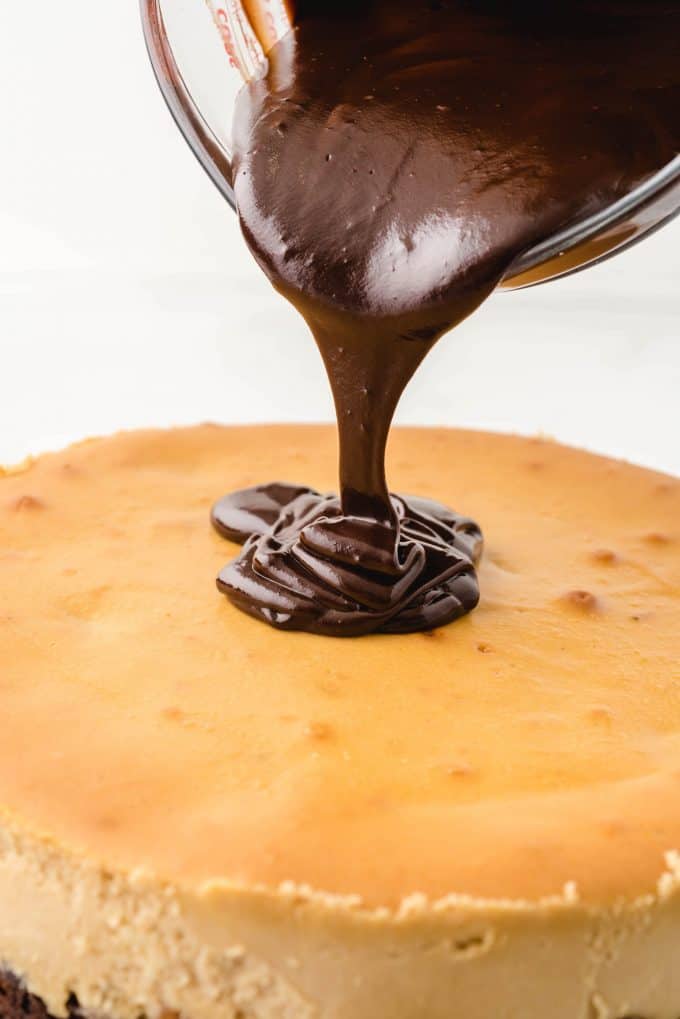
Sprinkle remaining peanut butter cups on top.
Variations / Options / Add-ins
- GARNISH: Instead of the quartered peanut butter cups, you could use the remaining peanut butter chips and remaining chocolate chips as your garnish.
- REESE’S PIECES: Another delicious option for a garnish is to top your cheesecake with Reese’s pieces. They add a great crunch!
- PEANUT BUTTER CHIPS: You could fold in 1 cup of peanut butter chips into the brownie layer to add extra peanut butter flavor.
- FULL SIZE PEANUT BUTTER CUPS: You can layer full size peanut butter cups on top of the brownie layer, and spoon the cheesecake layer on top of the full size peanut butter cups.
Frequently Asked Questions
Use full-fat (or regular) Philadelphia cream cheese. Low fat cream cheese usually has about 1/3 less fat than regular and more moisture content, therefore making the cooking and setting of the cheesecake inconsistent. It usually won’t firm up as much as a full fat version.
Using a springform pan for your cheesecake is not 100% necessary. However, you will have much better results if you do. The use of a springform pan allows you to remove the delicate cheesecake from the pan a lot easier. It helps to prevent damaging (or completely ruining) the cake when taking it out of its pan.
The reason for the water bath is to create a nice moist cooking environment for your cheesecake (eggs and dairy don’t like high/dry heat when baking). The water bath helps to prevent your cheesecake from cracking and allows it to bake more evenly.
To start, you will want to make sure that you have tightly wrapped your springform pan in foil, so that no water is able to leak in. Next, you want to place the springform pan into a large roasting pan. Then, carefully pour water into the bottom of the roasting pan, until it stands about 1 inch high. Be extra cautious when placing the pan in the oven, so that the water doesn’t splash onto your cheesecake.
It is important to keep the water until 1 inch high because if you put too much water in then you risk getting water into your springform pan and that would not make for a good cheesecake.
Natural peanut butter has more oils (than are separated from the nut butter) unlike the commercial brands (Peter Pan, Jif, Skippy) whose texture is completely smooth and emulsified. The dairy won’t really truly 100% blend with the oils. Chunky would give you little bits of peanuts and not that smooth cream cheese texture synonymous with a great cheesecake.
A 9″ springform holds approx. 10 cups & a 10″ holds approx. 12 cups by volume of batter. When you change pan sizes you will need to scale back on the bake time approx. 15-20mins and just keep checking for doneness. If you use the same volume batter then your cheesecake will essentially be shorter and wider.
We used a 9″ springform pan for this recipe.
Do a Wobble test ~ basically when your cook time is up, your cheesecake center will just ever so slightly jiggle, or wobble when you give your cheesecake a little jiggle – do NOT PANIC and overcook it. If it is really super jiggly, it needs more time. Note: Always make sure your oven temperature is accurate and some ovens just cook either at a higher/lower heat than others so it is best to not go completely by time on a recipe but go by if the cheesecake is cooked through. ** Temps and times will always vary depending on ovens**
You can definitely make this cheesecake ahead of time and store it in the fridge or freezer until you plan to serve it. In fact, I often make mine the day before I will serve it, so it can really set and chill down. It’s always delicious the day after baking it!
Keep any leftovers covered in the refrigerator for up to 7 days. The cheesecake can also be frozen, before adding the ganache, for up to 1 month.
When you put a hot cheesecake into a freezing cold freezer you get steam. Steam creates ice crystals aka freezer burn. Uneven cooling may affect the way it sets up also. If you want to put into freezer for a few hours make sure to wrap it tightly in plastic wrap after it has cooled down to room temperature. This may avoid having to do an overnight chill. Give it a test and see how it goes but I do not practice this method of chilling.
More Great Peanut Butter Desserts
Disneyland Peanut Butter Sandwich Bars | Peanut Butter Cup Brownies | No-Bake Peanut Butter Bars | Peanut Butter Truffles | Peanut Butter Blossom Cookies | No-Bake Peanut Butter Balls
More FAvorites from Princess Pinky Girl
Reese’s Cheesecake
Ingredients
Brownie Crust
- 1 18.4-ounce box brownie mix I used Betty Crocker ~ Milk Chocolate
- ½ cup vegetable oil
- ¼ cup water
- 1 egg slightly beaten
- ½ cup semi-sweet chocolate chips
- ½ cup peanut butter chips
Cheesecake Layer
- 3 8 ounce packages cream cheese (full fat) softened
- 1 cup granulated sugar
- 4 eggs room temperature
- 1 tablespoon vanilla extract
- ¾ cup creamy peanut butter
- ½ cup heavy cream
- 14 miniature peanut butter cups quartered
Chocolate Ganache and Peanut Butter Cup Topping
- 1 cup (8 ounces) semi-sweet chocolate chips
- ½ cup heavy cream
- 34 miniature peanut butter cups quartered
Instructions
- Preheat oven to 350*F. Line the bottom of a 9-inch springform pan with parchment paper cut into a circle to fit the inside bottom of the pan. Lightly spray the pan with non-stick spray and set aside.
- Using a medium sized mixing bowl, stir together the boxed brownie mix, vegetable oil, water and beaten egg just until ingredients are combined.
- Pour batter into prepared springform pan. Bake for 35 minutes.
- Remove the pan from the oven and immediately sprinkle the chocolate and peanut butter chips onto the top of the hot brownie, in an even layer. Allow the brownie crust to cool on the counter while preparing the cheesecake filling.
- Reduce the oven temperature to 325*F.
Cheesecake Layer
- Using a stand mixer, or a large mixing bowl with a hand held mixer on medium speed, cream together the cream cheese until smooth.
- Add the sugar and vanilla extract and continue to mix on medium-high speed for another 1-2 minutes, scraping down the sides of the bowl when needed, until the mixture is smooth.
- Reduce the speed to low and add the eggs, one at a time, mixing well after each egg. Do not overmix.
- Keep the mixer speed low, add the creamy peanut butter and the heavy cream. Continue mixing until everything is completely incorporated. Use a rubber spatula to fold in the quartered mini reese’s chocolate cups.
- Wrap the springform pan in a double layer of aluminum foil. Spoon the cheesecake batter on top of the brownie layer. Place the springform pan into a large roasting pan. Carefully pour hot water in the roasting pan, being very careful not to get any water in the cheesecake filling, about 1 inch up the side of the springform pan. Bake the cheesecake for 1 hour. PRO-TIP: It is important to keep the water until 1 inch high because if you put too much water in then you risk getting water into your springform pan. The reason for the water bath is to create a nice moist cooking environment for your cheesecake (eggs and dairy don't like high/dry heat when baking).
- Once the cheesecake has cooked for the hour, turn off the oven and crack the oven door open about an inch and allow the cheesecake to cool in the oven for 30 minutes. PRO-TIP: To make sure the cheesecake is done, do a Wobble test ~ basically when your cook time is up, your cheesecake center will just ever so slightly jiggle, or wobble when you give you cheesecake a little jiggle. DO NOT PANIC AND OVER COOK IT (it will set when it is in the refrigerator cooling over night)! If it is really super jiggly, you can give it a little more time. Note: Always make sure your oven temperature is accurate and some ovens just cook either at a higher/lower heat than others so it is best to not go completely by time on a recipe but go by if the cheesecake is cooked through. ** Temps and times will always vary depending on ovens**
- Remove the roasting pan from the oven then remove the cheesecake from the roasting pan and allow the cheesecake to cool on the counter for another 1 hour, or until cool enough to place into your refrigerator to continue to cool completely overmight.
- After the cheesecake has chilled overnight, gently run a knife along the sides of the cheesecake and gently release the sides of the springform pan and remove it from the cheesecake.
Chocolate Ganache and Peanut Butter Cup Topping
- Using a medium sized heat safe bowl, combine the heavy cream and semi-sweet chocolate chips. Heat in the microwave for 45 second intervals (or if your microwave has a melt setting), stirring after each interval until the chocolate is smooth.
- Pour the ganache slowly on to the top of the cheesecake and gently smooth it on top.
- Evenly sprinkle the top of the ganache covered cheesecake with the quartered reese’s chocolate candies.
Jenn’s Notes
- It is best to use full-fat (or regular) Philadelphia cream cheese for this recipe. Low fat cream cheese usually has about 1/3 less fat than regular and more moisture content, therefore making the cooking and setting of the cheesecake inconsistent. It usually won’t firm up as much as a full fat version.
- A 9″ springform holds approx. 10 cups & a 10″ holds approx. 12 cups by volume of batter. When you change pan sizes you will need to scale back on the bake time approx. 15-20mins and just keep checking for doneness. If you use the same volume batter then your cheesecake will essentially be shorter and wider.
- Make sure your cream cheese is at room temperature, so there are no lumps in your cheesecake.
- Refrigerating the peanut butter cups for 10 minutes makes them much easier to chop.
- Make sure you wrap the pan very well so that the water doesn’t leak in.
- You can save any leftover ganache in a sealed jar, like a mason jar, in the refrigerator for up to 1 month. It is delicious, warmed, and spooned over ice cream.
- Instead of the quartered peanut butter cups, you could use the remaining peanut butter and chocolate chips to top the ganache-covered cheesecake.
- You can layer full-sized Reese’s cups, in a single layer, on top of the hot brownie instead of the chips then spoon over the cheesecake batter.


Don’t forget to remove the wax paper before serving! 😉
I made this for my husband’s birthday. What a HIT! It is so rich and wonderful!
Sorry not sure if I understand correctly, so once the brownie is done and sits you then pour the cheesecake mixture on top of the brownie and cook the cheesecake?
Yup! You got it!
In the article it says you need light brown sugar in the shopping list but it’s not in the recipe. How much would you use?
Sorry, Naomi, when we redid the recipe, that must have been missed. Thanks for catching it! No brown sugar needed.
The recipe calls for 4 cream cheese and 5 eggs and your’s says 3 cream cheese and 4 eggs so which one is it?I would like to make this but not sure how many cream cheese and eggs to use?🤔
5 eggs. 1 in brownie mix, 4 in the cheesecake filling. I am only seeing 3 bricks called for, of cream cheese, but it turned out lovely.
I followed this recipe to a ‘T’, but the brownie only baked about halfway, leaving a layer of goo, and the choc and pb chips melted into a solid candy layer that we couldn’t slicethrough. The taste was excellent, though, and I will probably make it again with a few tweaks. Thanks for the recipe!
I accidentally got a 16 ounce box of brownie mix. Any suggestions as to how I can use that?
Is the brownie supposed to be fully cooked
Came out EXCELLENT. Easier to make than I thought it would be. I wish there was a way to include my picture. Recipe does not say when to add vanilla extract. I added it when adding both sugars.
Thank you so much – just fixed it! Thanks for that catch!
Did the original recipe call for more than the 1 cup of granulated sugar? I noticed one comment said “both sugars” and above the recipe, one part said “sugars”. It seemed like it could use a little more sugar. It was delicious otherwise!
Are you able to make this cheesecake without putting it in a water bath?