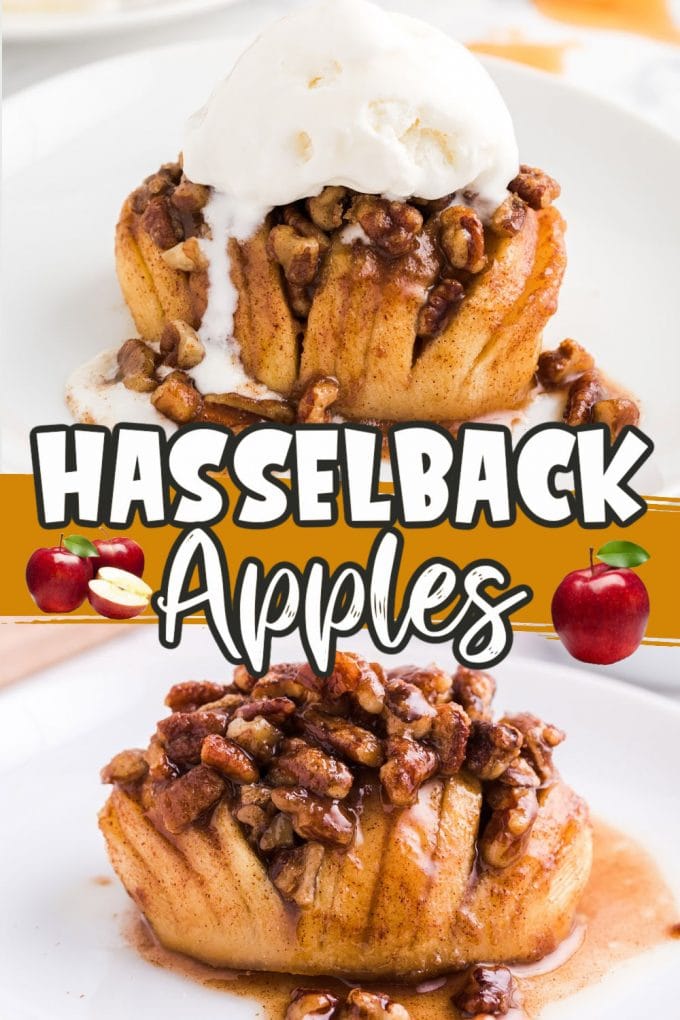
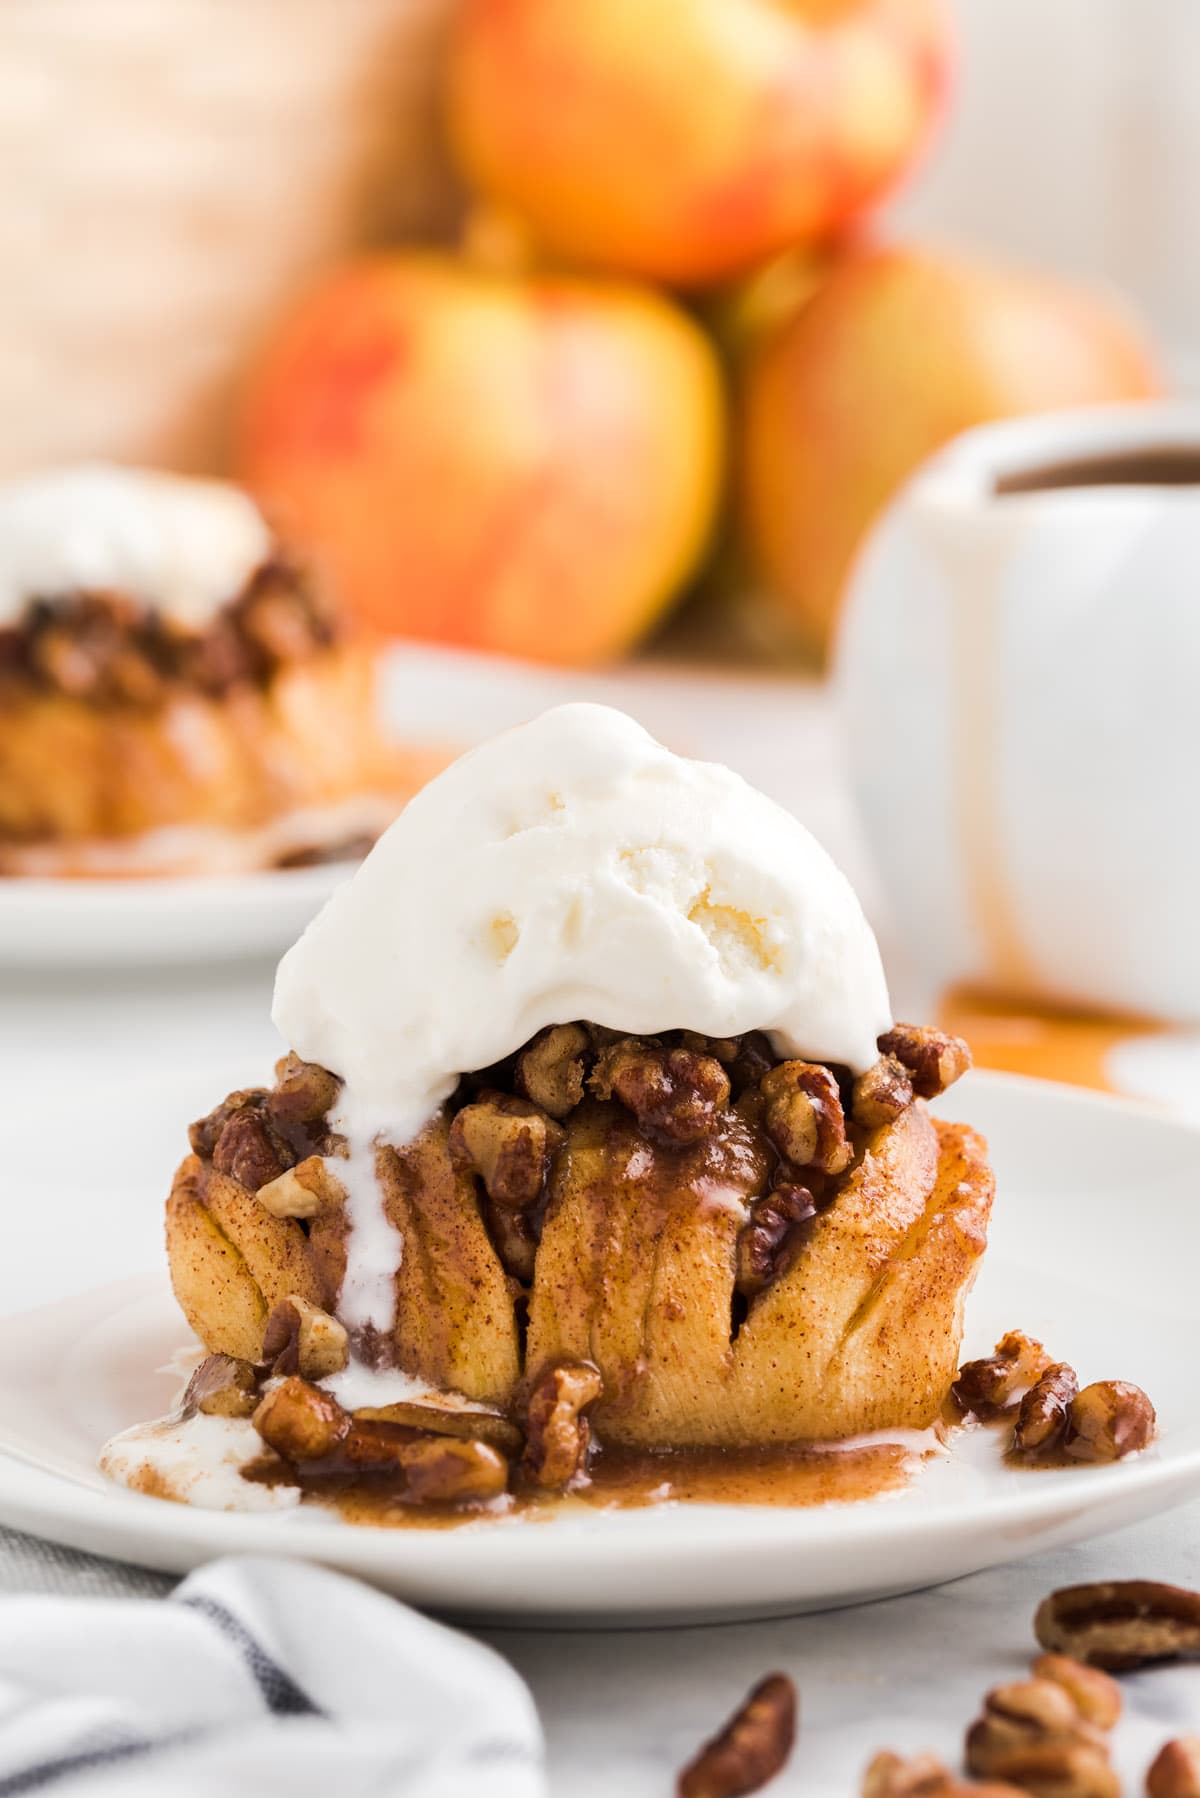
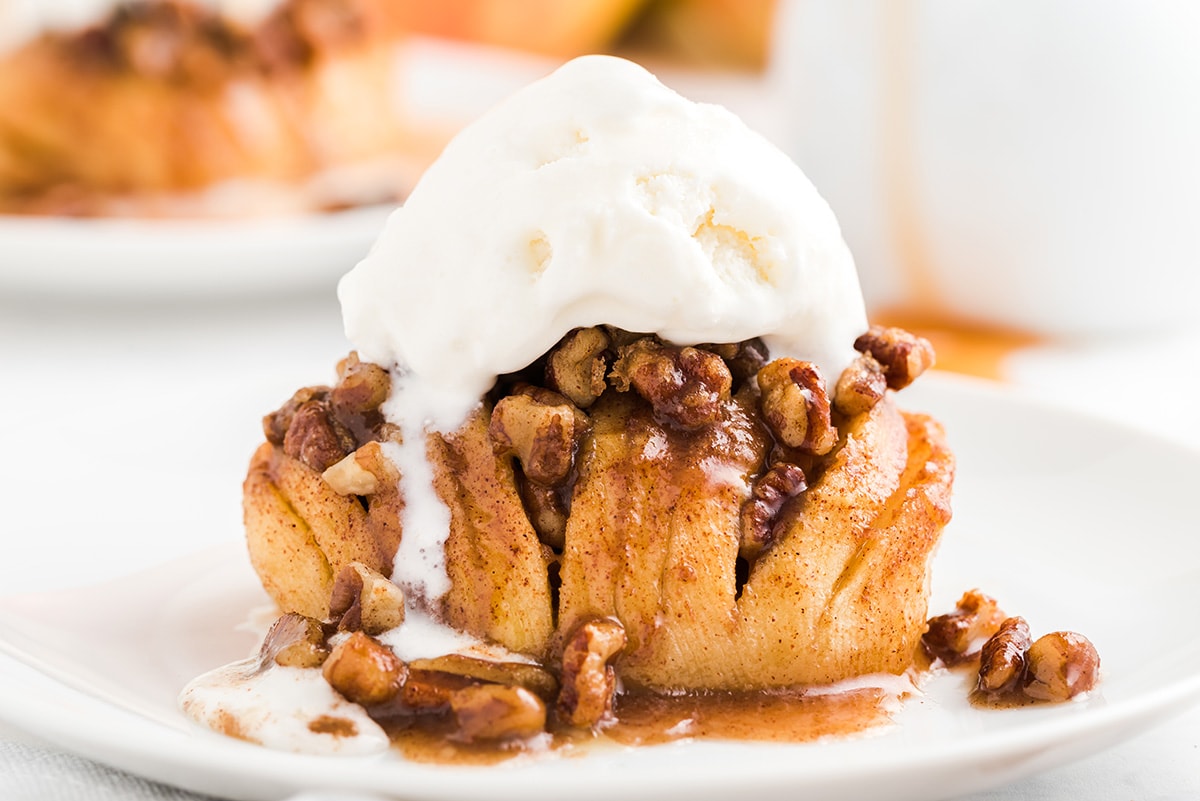
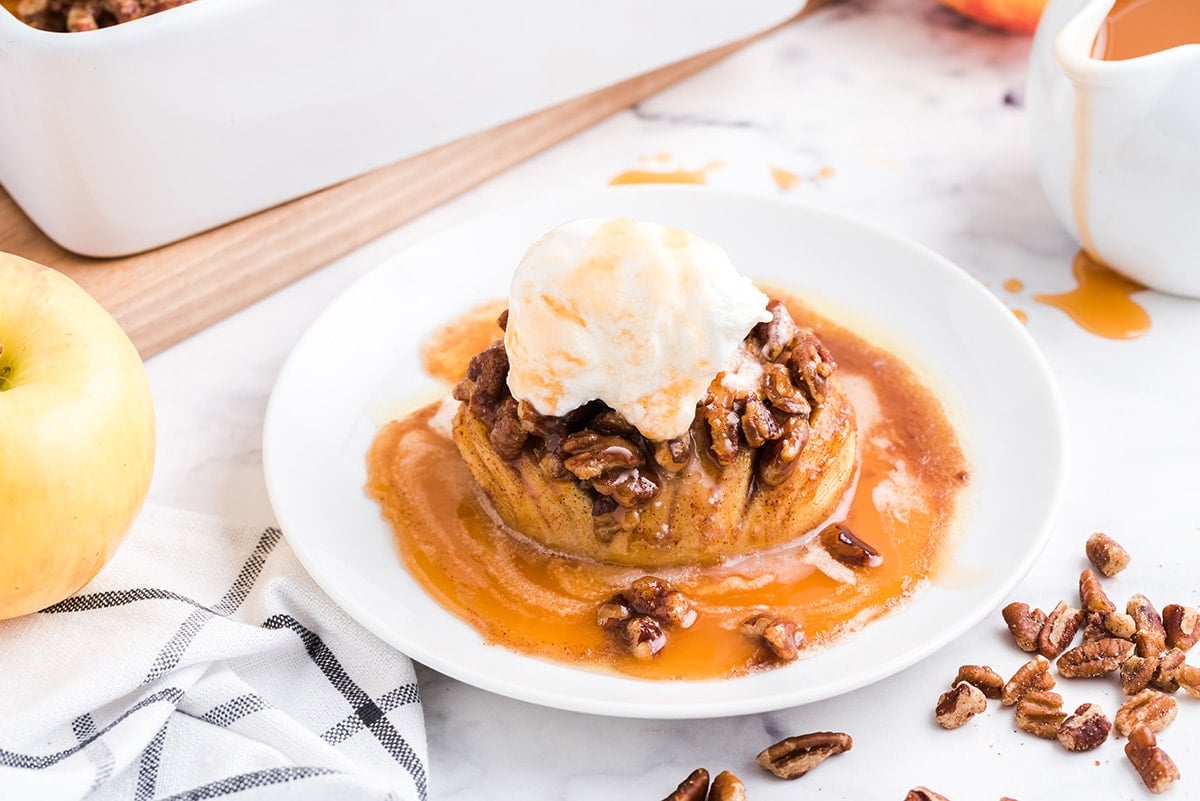
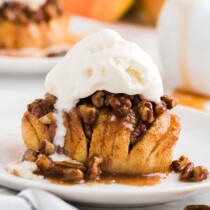
Hasselback Apples are super easy and quick to make using only 6 ingredients (plus a few optional ones). When baked In the oven, these thinly sliced apples open like a fan to allow the sweet cinnamon and brown sugar to sink between each slice–topped with a pecan crumble and a dollop of ice cream, it’s like eating a personal apple pie without the crust!
Better Than Baked Apples – Hasselback Apple Recipe!
If you like baked apples in any form, then you will LOVE this deliciously healthy Hasselback Apple dessert. While this recipe does include enough brown sugar and butter to make them taste sinful, one simple serving is only a fraction of the calories of your standard slice of apple pie (and is loaded with fiber and Vitamin C). And in my opinion, nothing beats a fuss-free version of your favorite pie or crisp!
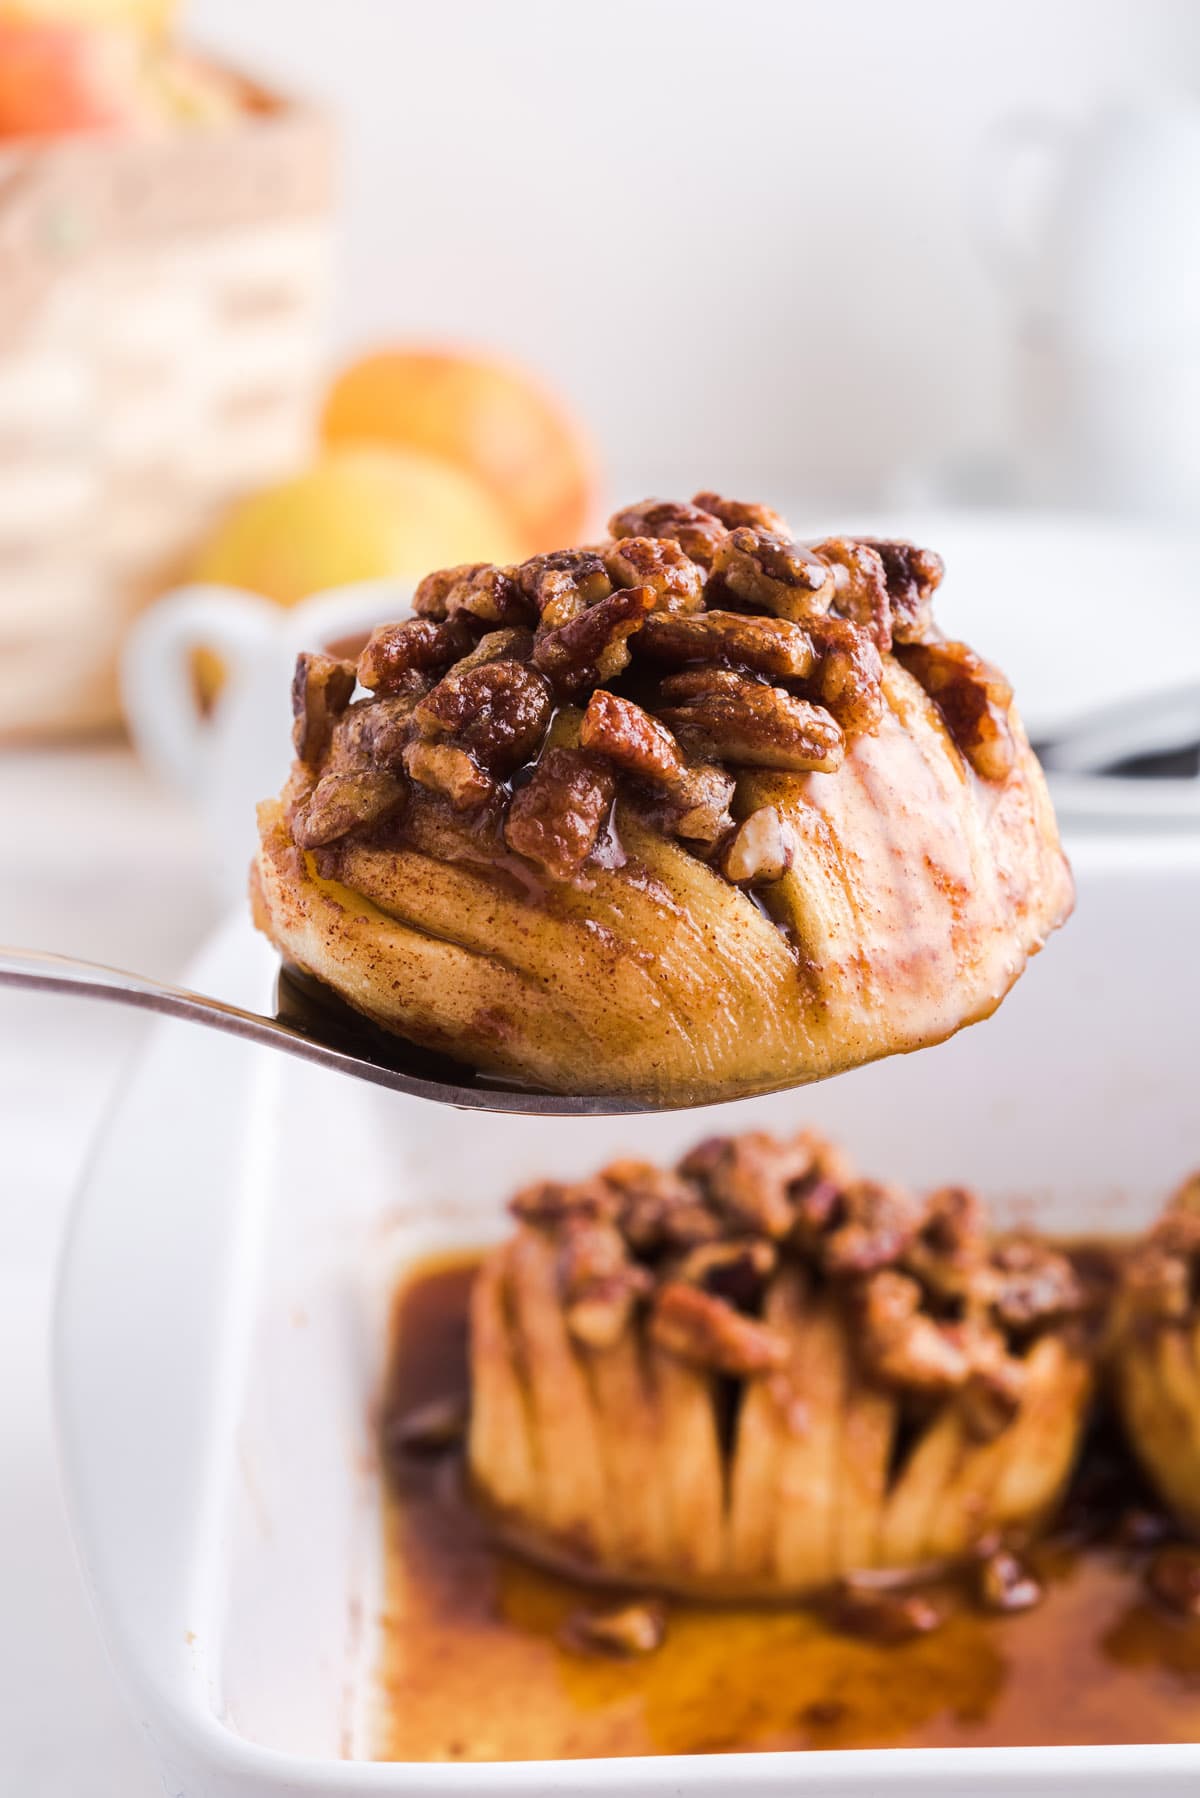
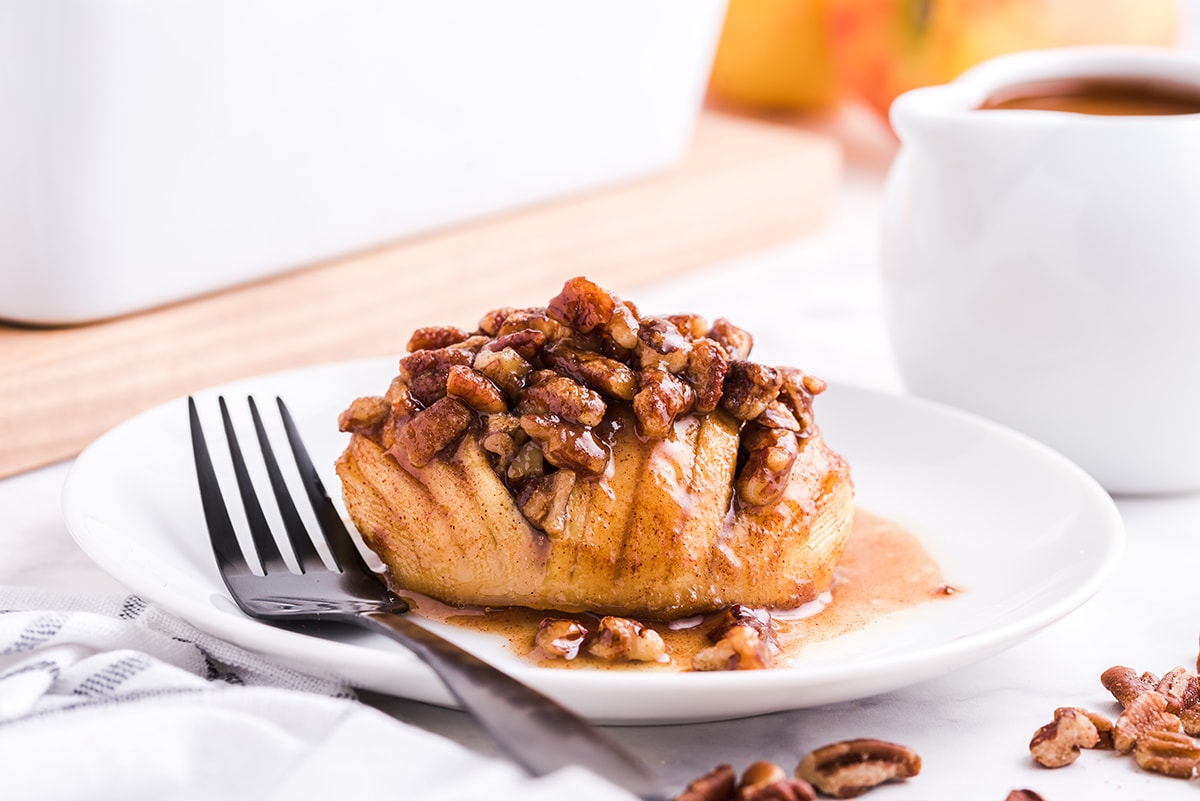
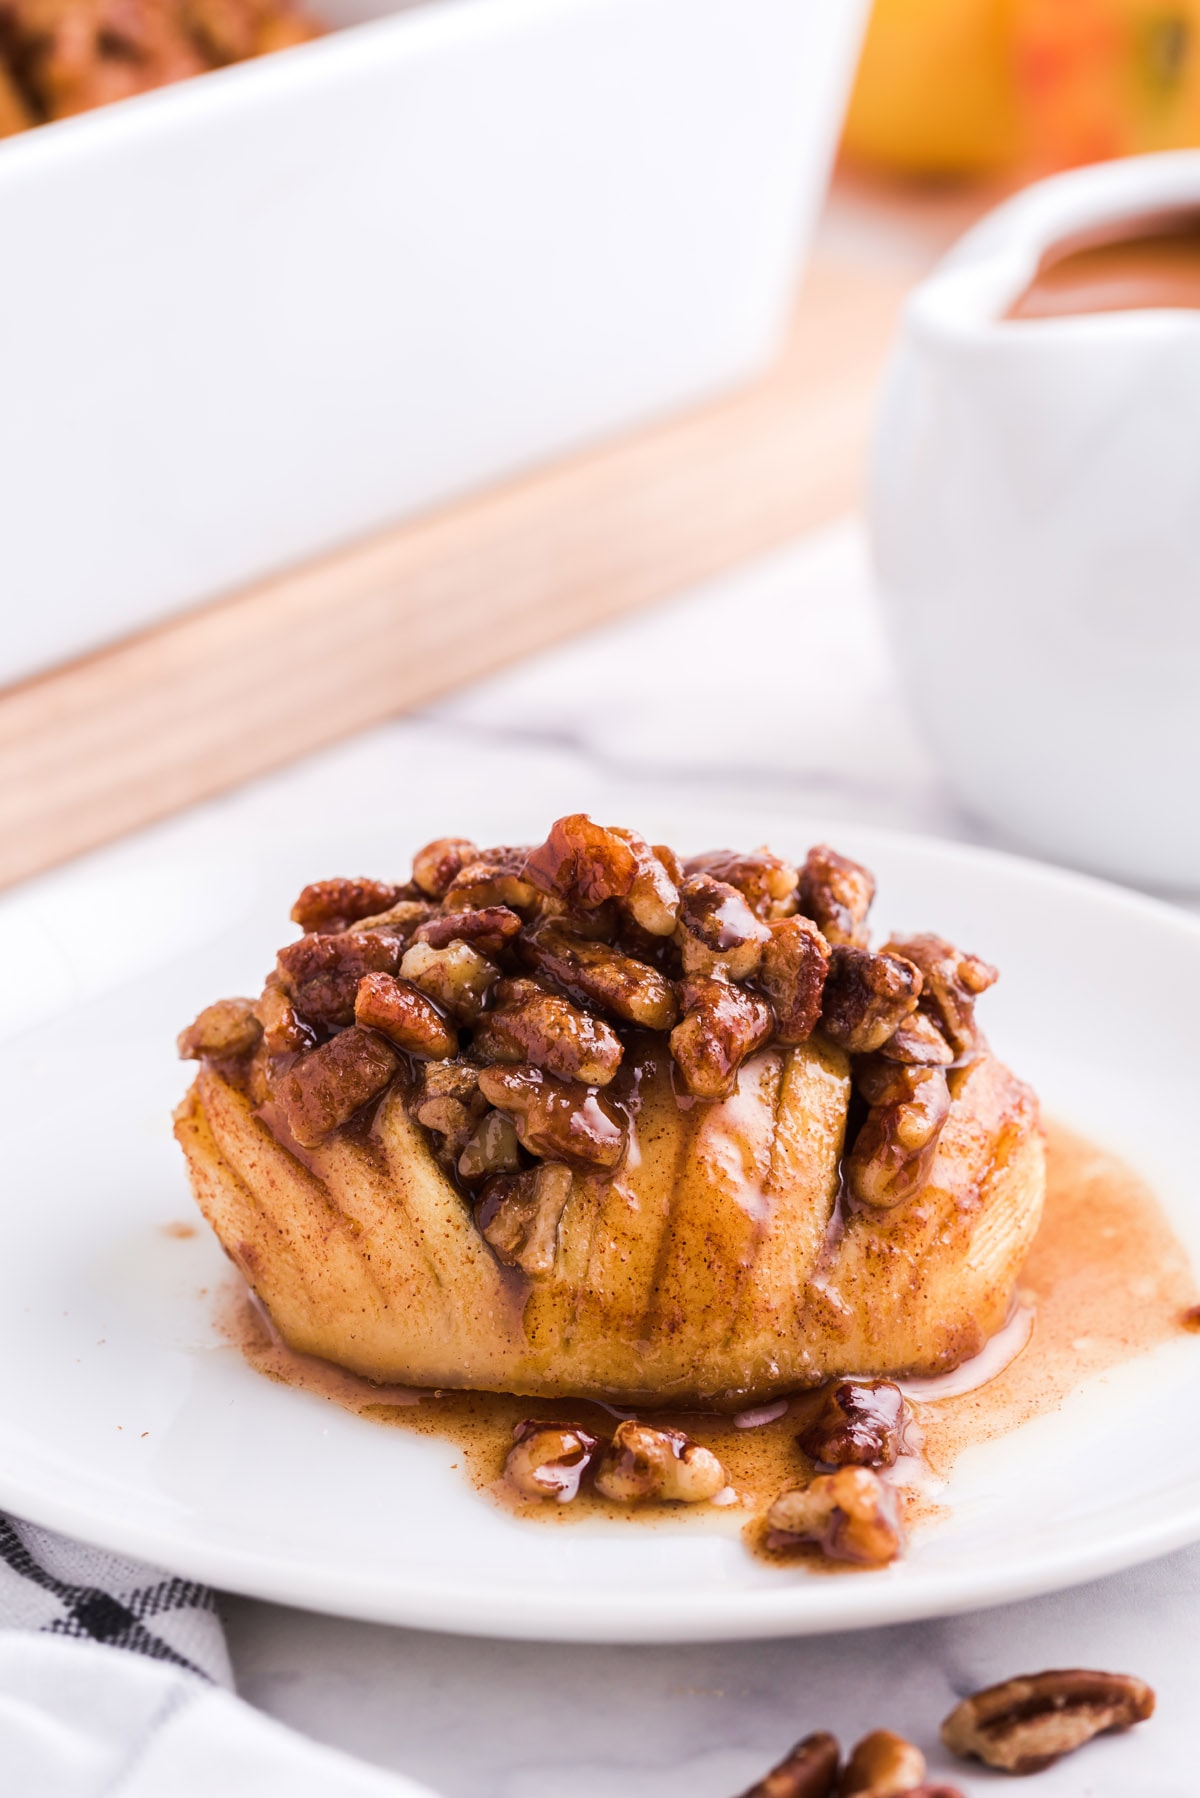
When baked, these apples sweeten and soften, while the pecan crumble carmelizes on top. What I love most about this treat is the heavenly flavor of cinnamon sugar that melts between each slice while the nuts on top turn crisp and golden. The thin, tender layers of fruit slice easily with a fork for a taste that is reminiscent of old-fashioned comfort food, but it looks fashionable and fresh!
Why We Love This Hasselback Apples Recipe
- Quick and easy to make.
- Only uses 6 simple ingredients.
- Apples have high amounts of fiber and Vitamin C, making this a healthy dessert option.
- Delicious cinnamon sugar flavor infused between each apple slice.
- A cozy fall sweet treat made without any fuss.
- Perfect for a weeknight treat or for a dinner-party dessert.
Ingredients / Shopping List
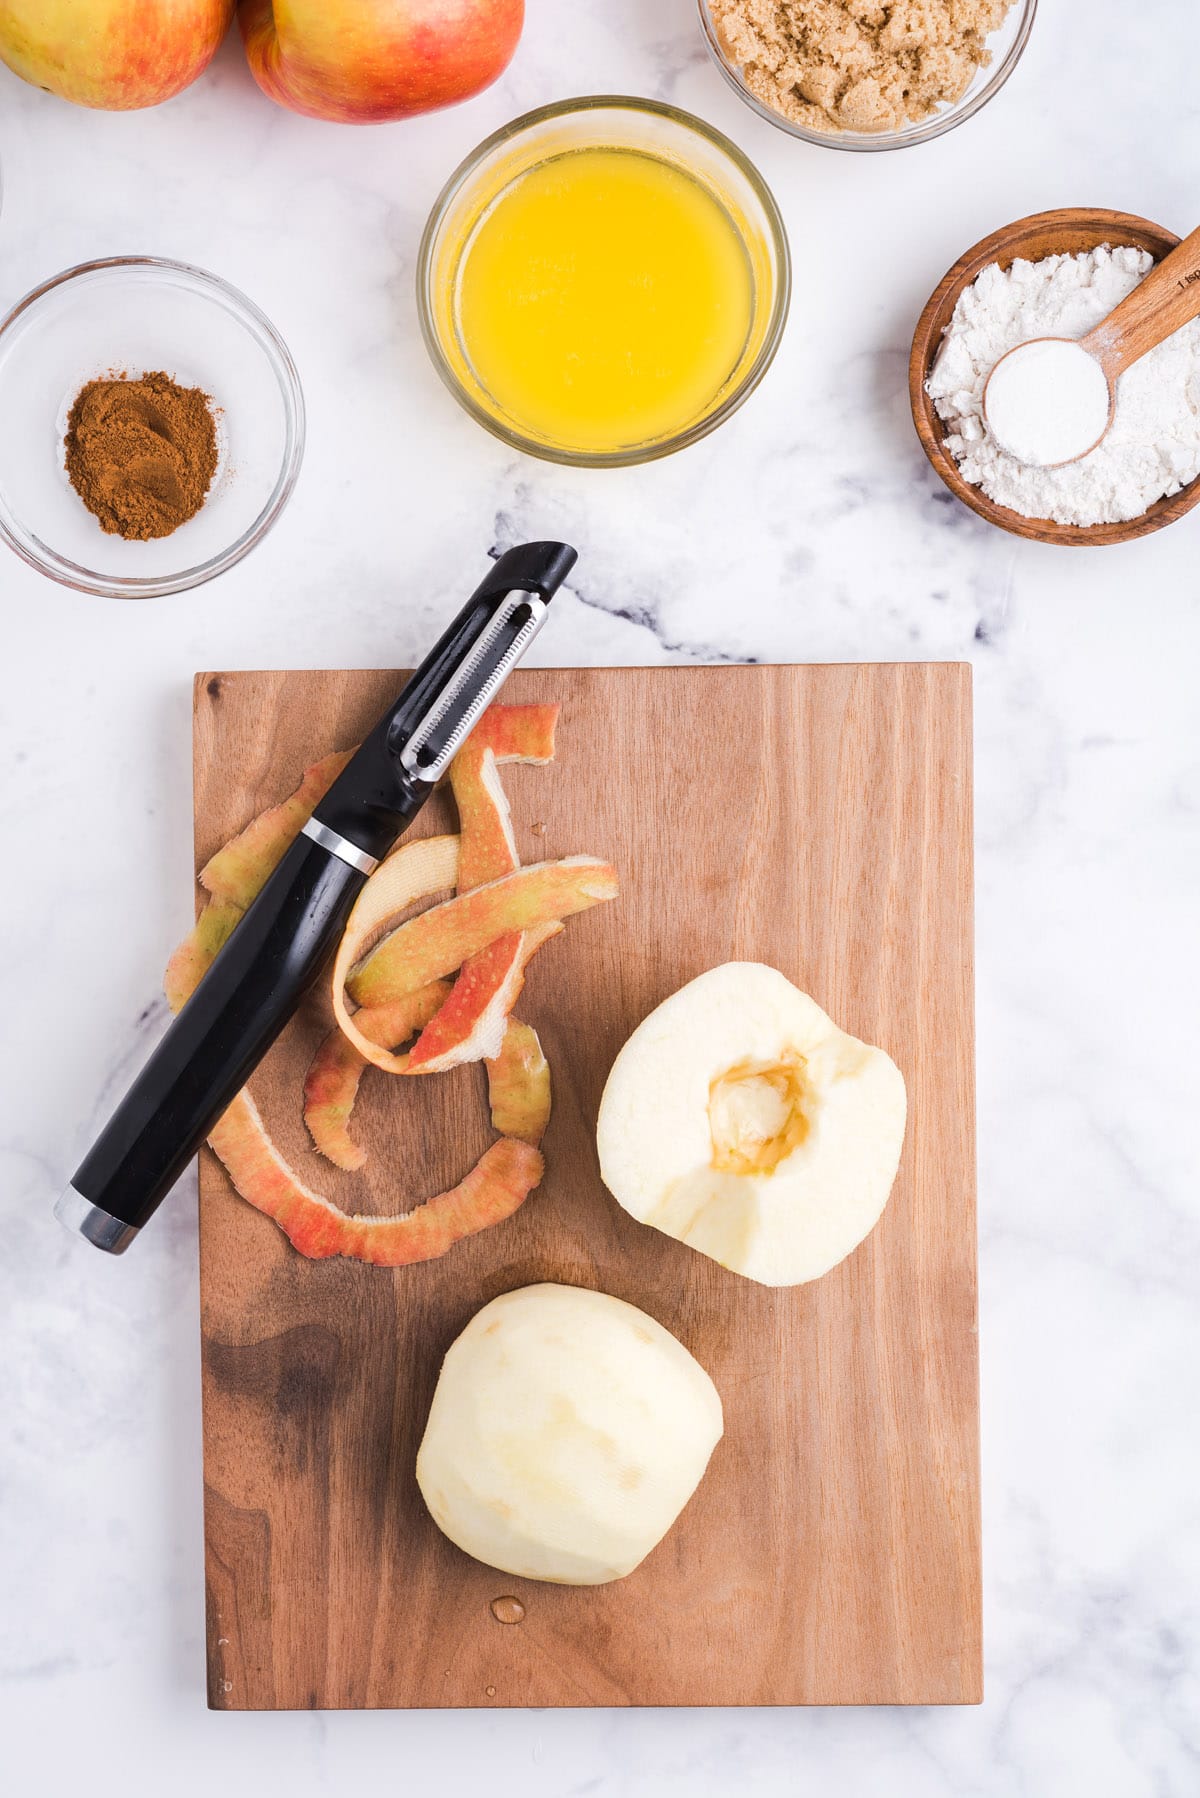
- Apples: You can use any variety of apple for this dish, but the honey crisp apple variety is my favorite. It does release quite a bit of juice which you can use to baste the apple after the first 20 minute round of baking. Granny smith apples are a good choice if you are going for a slightly tart flavor. The granny smith apples do not release as much juice as the sweeter varieties.
- Light brown sugar
- Salted sweet cream butter
- Chopped pecans: You can substitute walnuts for the pecans. Any nut can be substituted, but walnut and pecan just go so well with apples.
- All-purpose flour
- Ground cinnamon
- Vanilla ice cream (optional topping)
- Caramel sundae topping (optional topping)
Substitutions and Additions
- Vary the Apple Variety: Choose firm apples with sweet-tart flavor, such as Pink Lady, Fuji, Gala, or my favorites: Honeycrisp and Granny Smith.
- Spice It Up: Feel free to add some cardamom, allspice or nutmeg to your apples.
- Toppings: In addition to nuts, top your apple with raisins, whipped cream, oatmeal, or Greek yogurt.
- Add Texture and Crunch: A sprinkle of granola, pumpkin seeds, or flaxseeds will add extra texture and crunch to your apples.
Recommended Tools
- Baking dish
- Mixing Bowl and measuring tools
- Cutting board
- Sharp knife
- Pastry Brush
SEE FULL PRINTABLE RECIPE CARD BELOW
How to Make Hasselback Apples
It is so easy and quick to make this delicious Hasselback apple recipe. Once baked, these apples become soft and sweet without falling apart, making them ideal for scooping by the forkful!
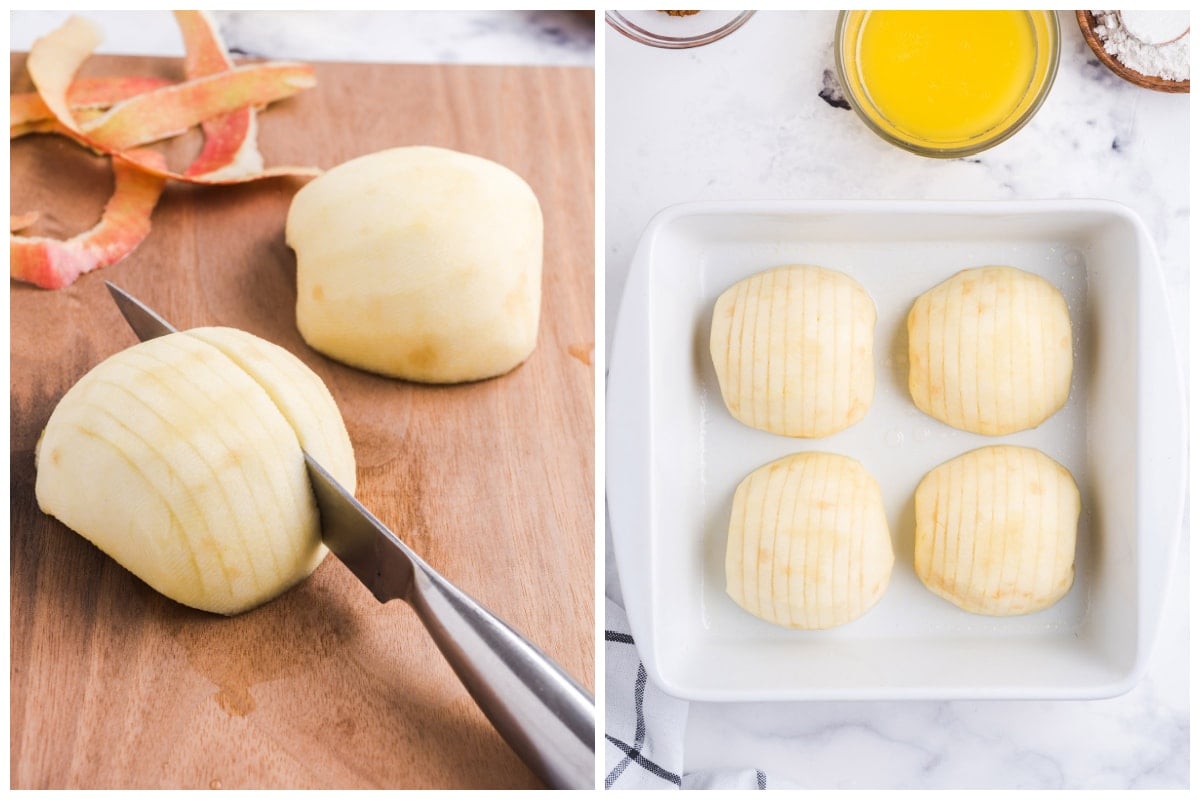
- Peel your apples, cut them in half, and core.

- Cored side down, cut slits through each apple. Place sliced apples in baking dish, cored side down.
PRO-TIPS: When making the slits in the apples, to help keep the knife from going through, you can lay chopsticks at the top and the bottom of the apple.
For the best results, cut slices about 1/8-inch apart. Even very firm apples will cook down a little bit during baking, and when the slices are too thin, they begin to melt into each other, leaving the apple more droopy than fan-like.
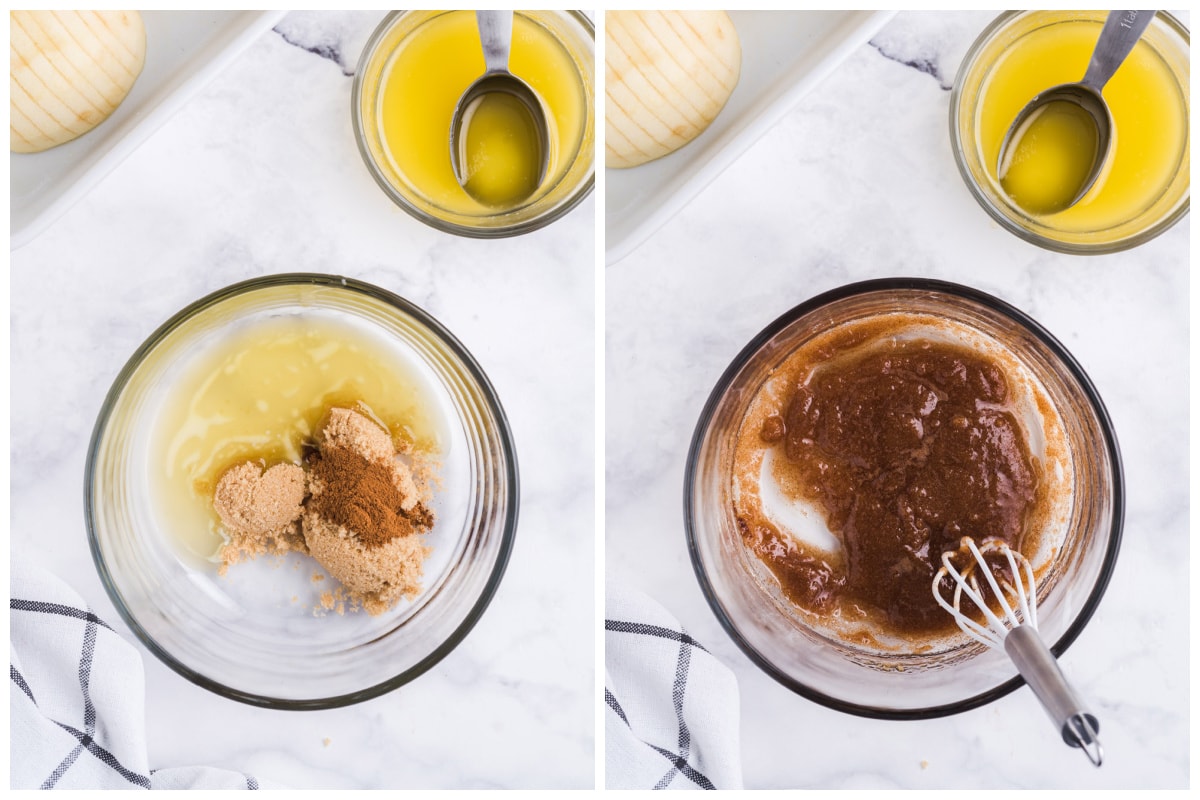
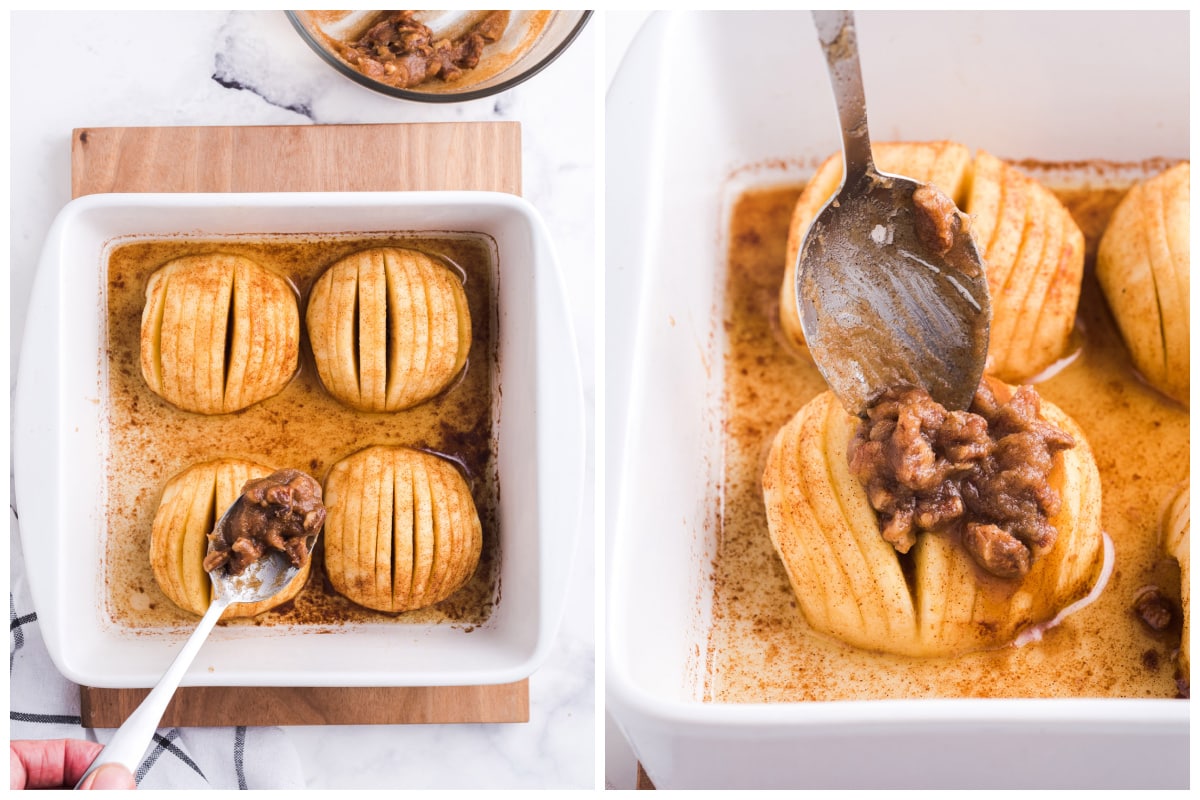
- Mix together brown sugar, butter, and ground cinnamon in a small bowl.
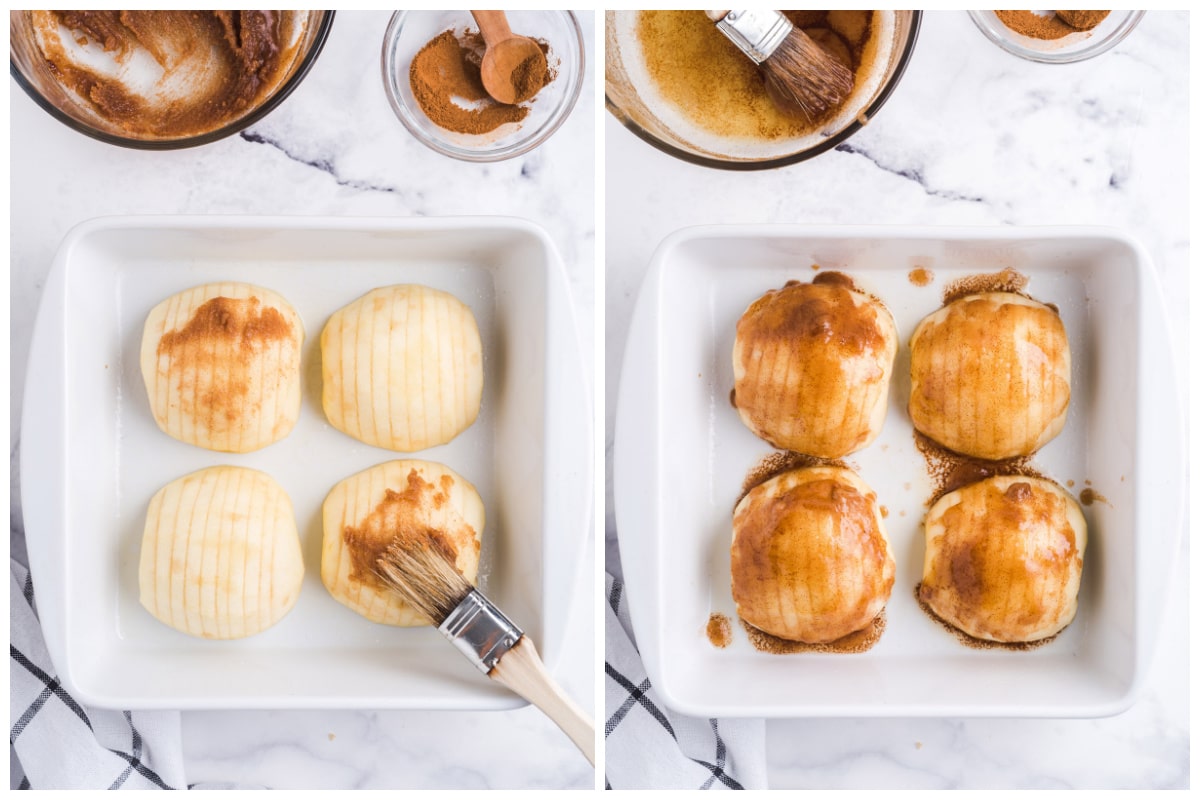
- Brush the sugar mixture over the apple halves.
- Cover with aluminum foil and bake.
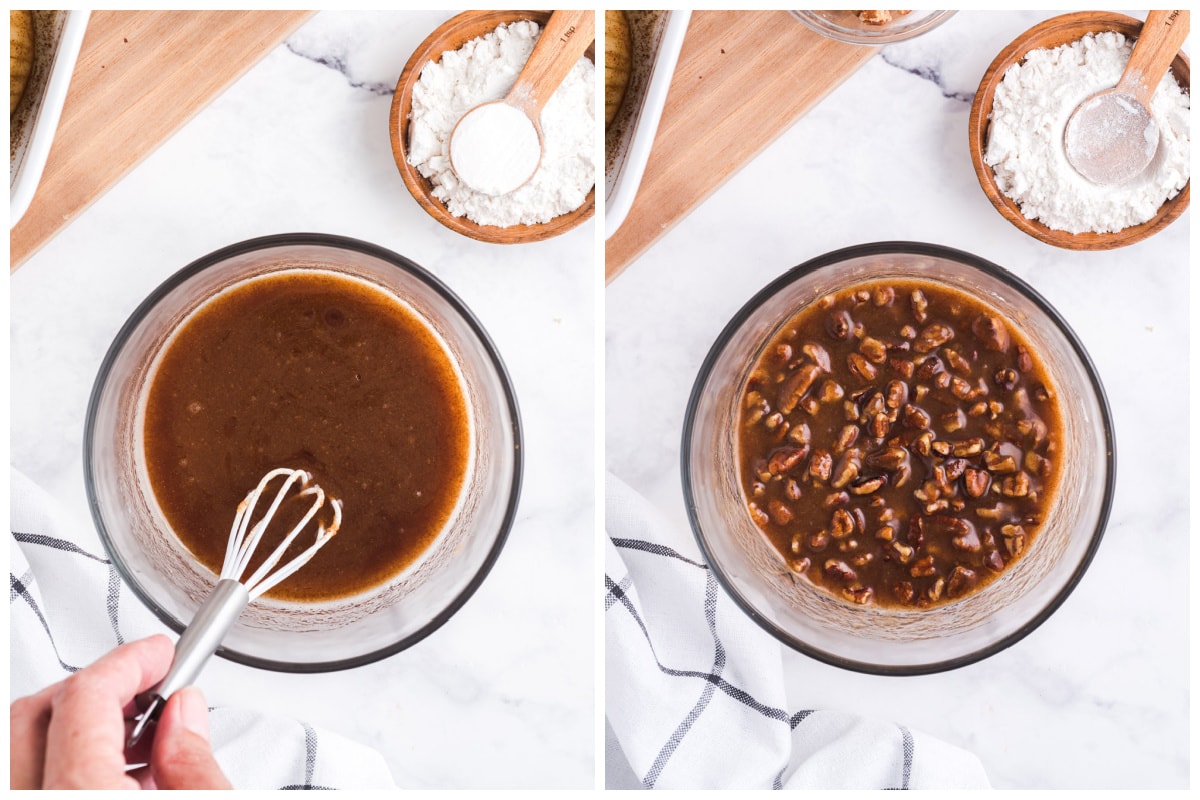
- Combine the remaining brown sugar, butter, and cinnamon and mix in the pecans and flour.
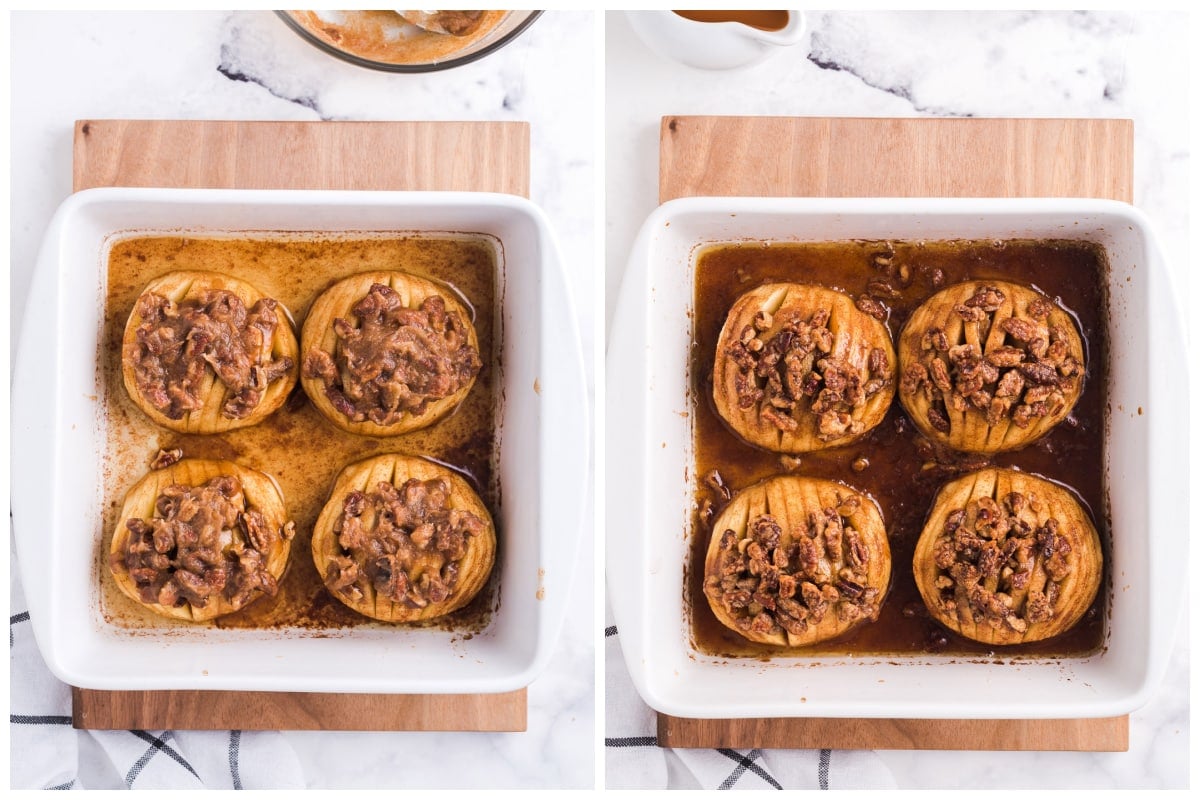
- Carefully fan out the slices in the apple and spoon the pecan mixture over the halved apples.
- Continue to bake apples uncovered.
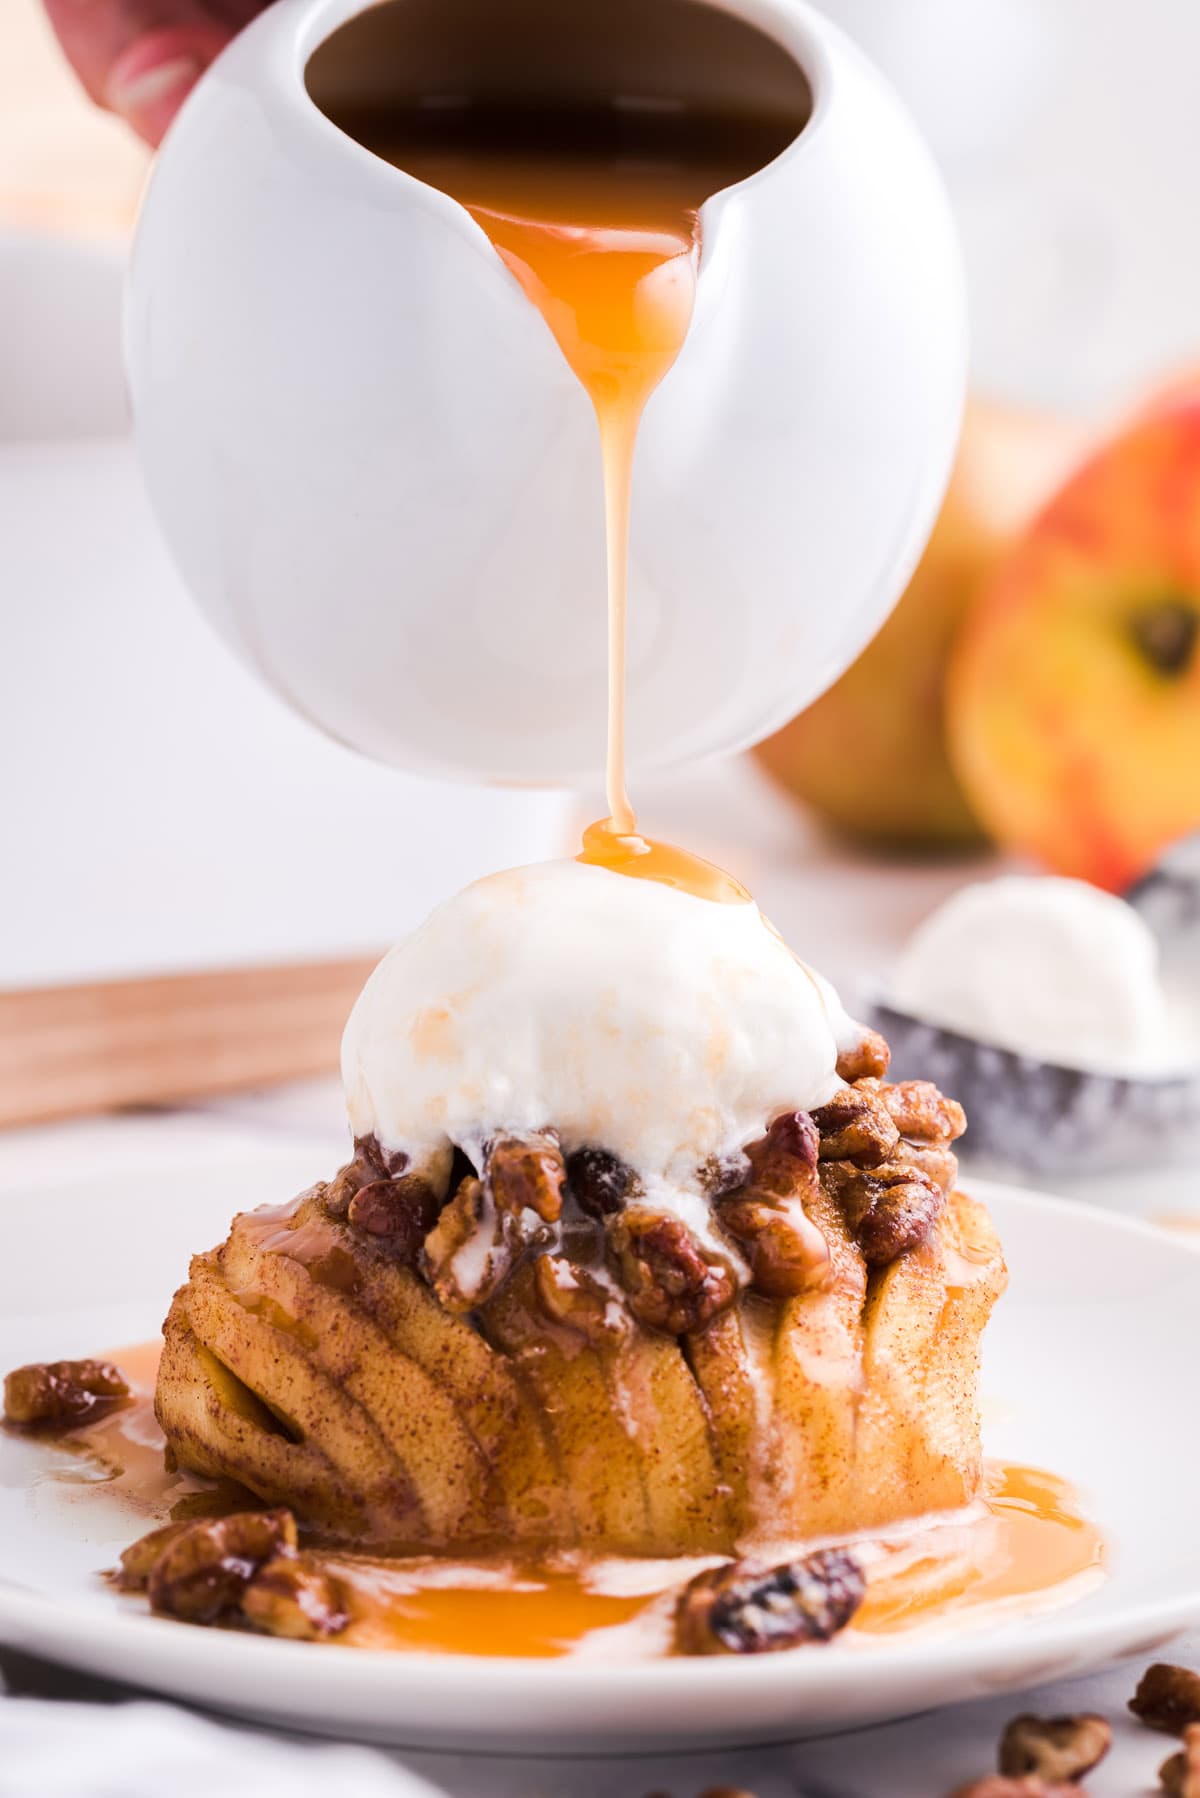
- Allow apples to rest, plate, and serve with a scoop of vanilla ice cream and a drizzle of caramel sundae topping. Enjoy!
Storage Tips
- To Store: Store any leftovers in an airtight container for up to 2 days.
- To Freeze: Freezing the apples is not recommended.
Frequently Asked Questions
You can easily make hasselback apples in advance. Assemble the apples in the baking dish up to the point of baking. Keep in the refrigerator, covered with foil and unbaked, for up to 4 hours. Bake just before serving.
Hasselback apples work best with very firm apple varieties, like Honeycrisp and Pink Lady. These apples are sturdy enough to hold their shape during baking, whereas other varieties, such as Cortland or McIntosh, will cook down too much during baking, leaving the thin apple slices to disintegrate and fall flat.
Hasselback is a way of preparing food that originated with potatoes; it just means thinly sliced, but only halfway through. It works really well for apples and it creates perfectly cooked petals!
Other Easy Apple Recipes
- Campfire Apple Crisp Foil Packets
- Air Fryer Apple Chips
- Apple Fritters
- Caramel Apple Pie Bombs
- Apple Crisp
- Caramel Apple Dump Cake
- Caramel Apple Bars
- Upside Down Apple Pie Cinnamon Rolls
- Caramel Apple Hand Pies
Hasselback Apples
Ingredients
- 2 large firm apples (your choice, see note) peeled, halved and cored
- 5 tbsp light brown sugar divided
- 4 tbsp salted sweet cream butter melted and divided
- 4 tbsp chopped pecans
- 2 tsp all-purpose flour
- 1 tsp ground cinnamon divided
- vanilla ice cream optional topping
- caramel sundae topping optional topping
Instructions
- Preheat the oven to 400 degrees. Generously spray an 8×8 baking dish. Set it aside.
- Using a cutting board and a sharp knife, place the halved apple cored side down. Starting on the outside of the apple, carefully cut slits almost, but not completely, through the apple. Space the slices ⅛ inches down the apple. Repeat for the remaining apple halves.
- Place the slitted apple halves, cored side down, into the prepared baking dish.
- Using a small mixing bowl, combine 2 ½ tablespoons brown sugar, 2 tablespoons melted butter and ½ teaspoon ground cinnamon.
- Using a pastry brush, brush the sugar mixture evenly over the 4 apple halves.
- Cover the baking dish with aluminum foil, and bake for 20 minutes.
- Using a small mixing bowl, combine the remaining brown sugar, melted butter and ground cinnamon. Add the pecans and flour. Mix until smooth.
- Remove the foil from the baking dish. Using 2 forks, carefully fan out the slices in the apple.
- Spoon the pecan mixture over the halved apples.
- Return the uncovered baking dish to the oven, and bake for a further 15 minutes.
- Remove the baking dish from the oven, and allow the apples to rest for 5 minutes. Serve with a scoop of vanilla ice cream and a drizzle of caramel sundae topping.
Jenn’s Notes
- To Store: Store any leftovers in an airtight container for up to 2 days.
- To Freeze: Freezing the apples is not recommended.
- When making the slits in the apples, to help keep the knife from going through, you can lay chopsticks at the top and the bottom of the apple.
- For the best results, cut slices about 1/8-inch apart. Even very firm apples will cook down a little bit during baking, and when the slices are too thin, they begin to melt into each other, leaving the apple more droopy than fan-like.