This post may contain affiliate links. Please read our disclosure policy.
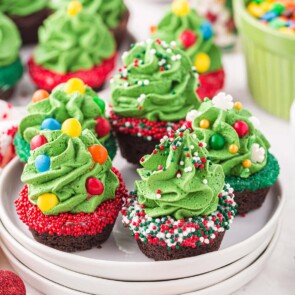
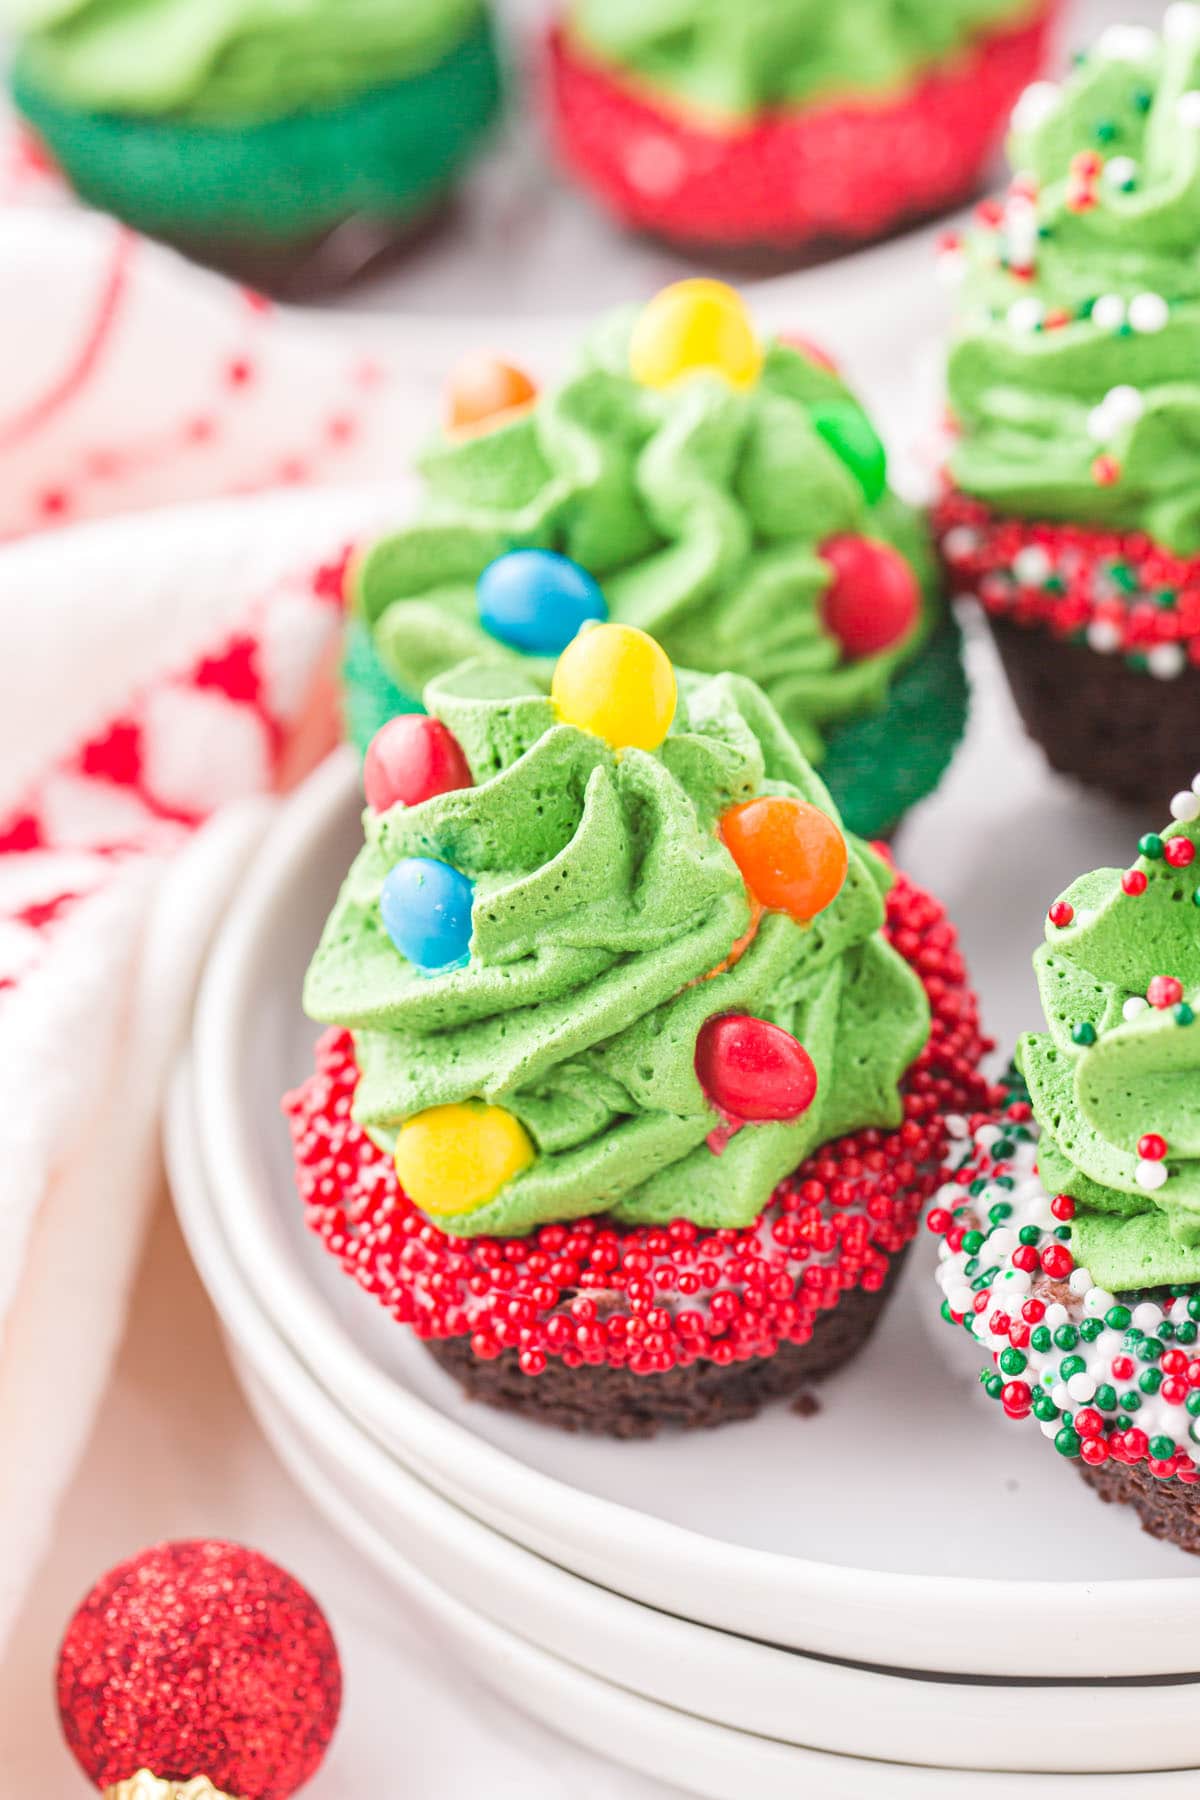
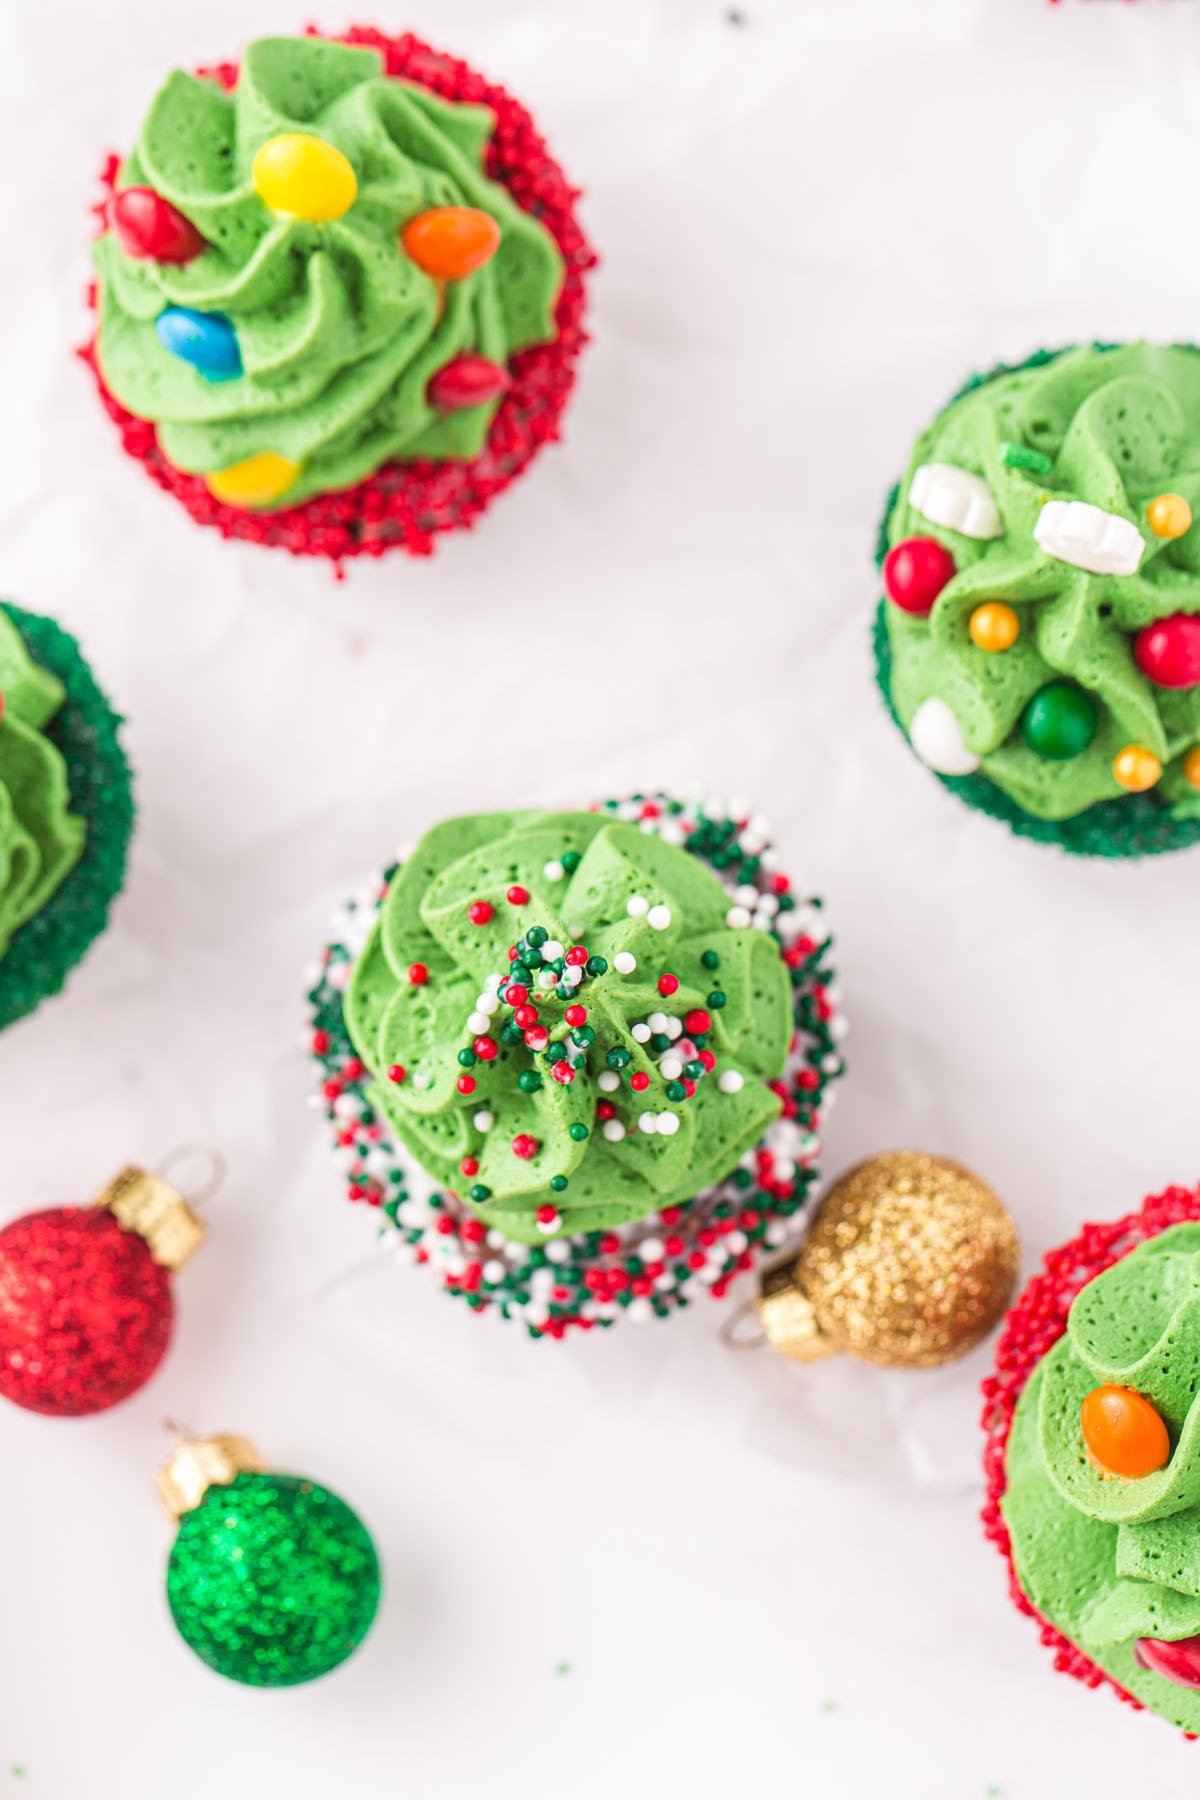
It is so easy to turn a box of brownies into adorable Christmas Tree Brownie Cups. In a matter of minutes, your whole family can have fun transforming a fudgy brownie batter and whipped topping into these festive holiday edible trees–they are the sweetest mini treats that look almost too cute to consume!
The Cutest Christmas Tree Brownies
This Christmas Tree Brownie Cups recipe makes it easy and fun to decorate your holiday tree, and then eat it! It’s as simple as baking your favorite brownie batter according to a box, dipping them in melted chocolate and colorful sprinkles, piping the trees on the trunks, and then decorating them with ornaments–in no time, you’ve created the cutest Christmas trees that are perfectly sized for any cookie platter or cookie swap.
The holidays are always so hectic in my house and I’m constantly searching for simple recipes that easily turn my favorite foods into beautiful and tasty treats. These moist and chocolatey brownie bases make the perfect brownie cups for housing a customized tree topping that little helping hands will have fun decorating (unless they devour them first)!
Why We Love This Mini Christmas Tree Brownie Cups Recipe
- Quick and easy to make and so much fun to decorate.
- Baked from a box of brownie mix.
- Kids love helping and creating their own custom Christmas trees.
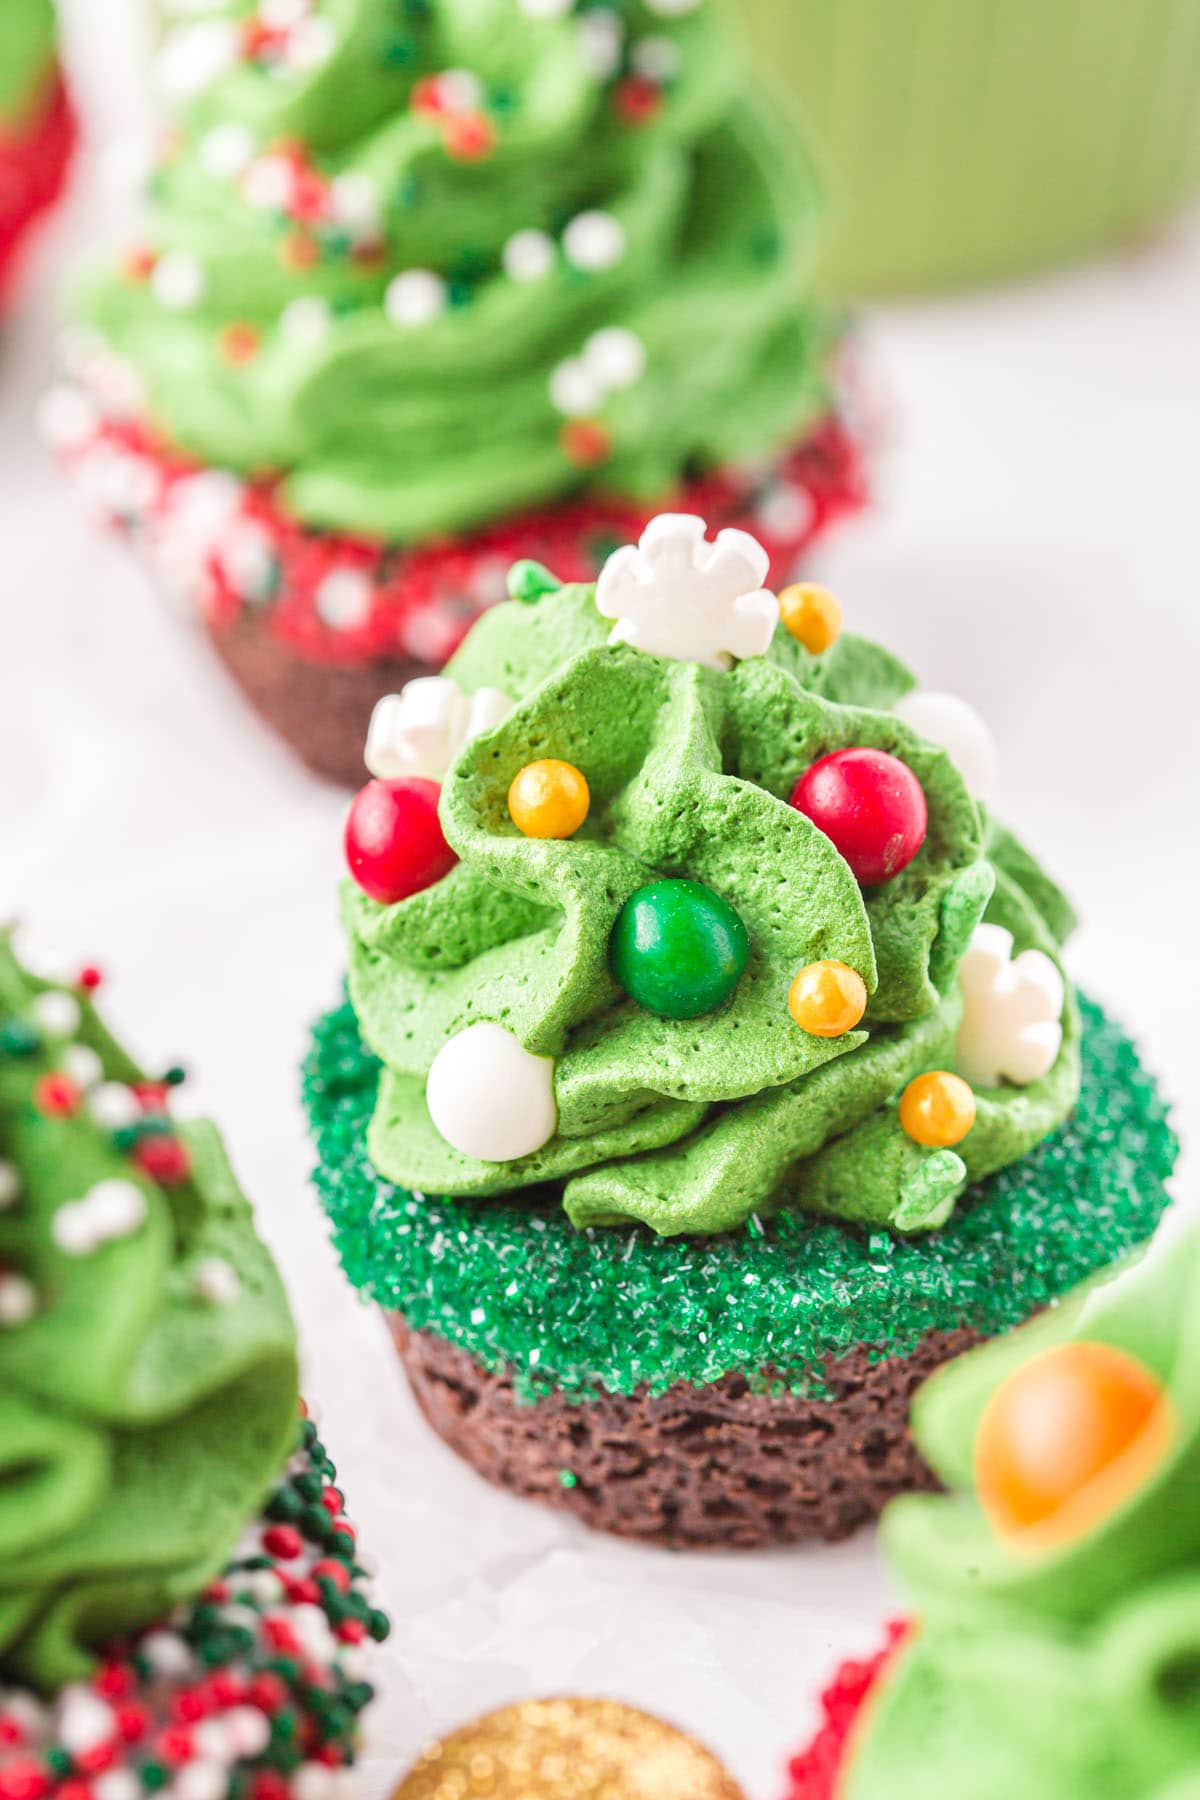
- Deliciously fudgy brownie base topped with a sweet, creamy peak.
- Festive treat that looks almost too cute to eat.
- Perfectly portioned size for holiday parties and cookie trays.
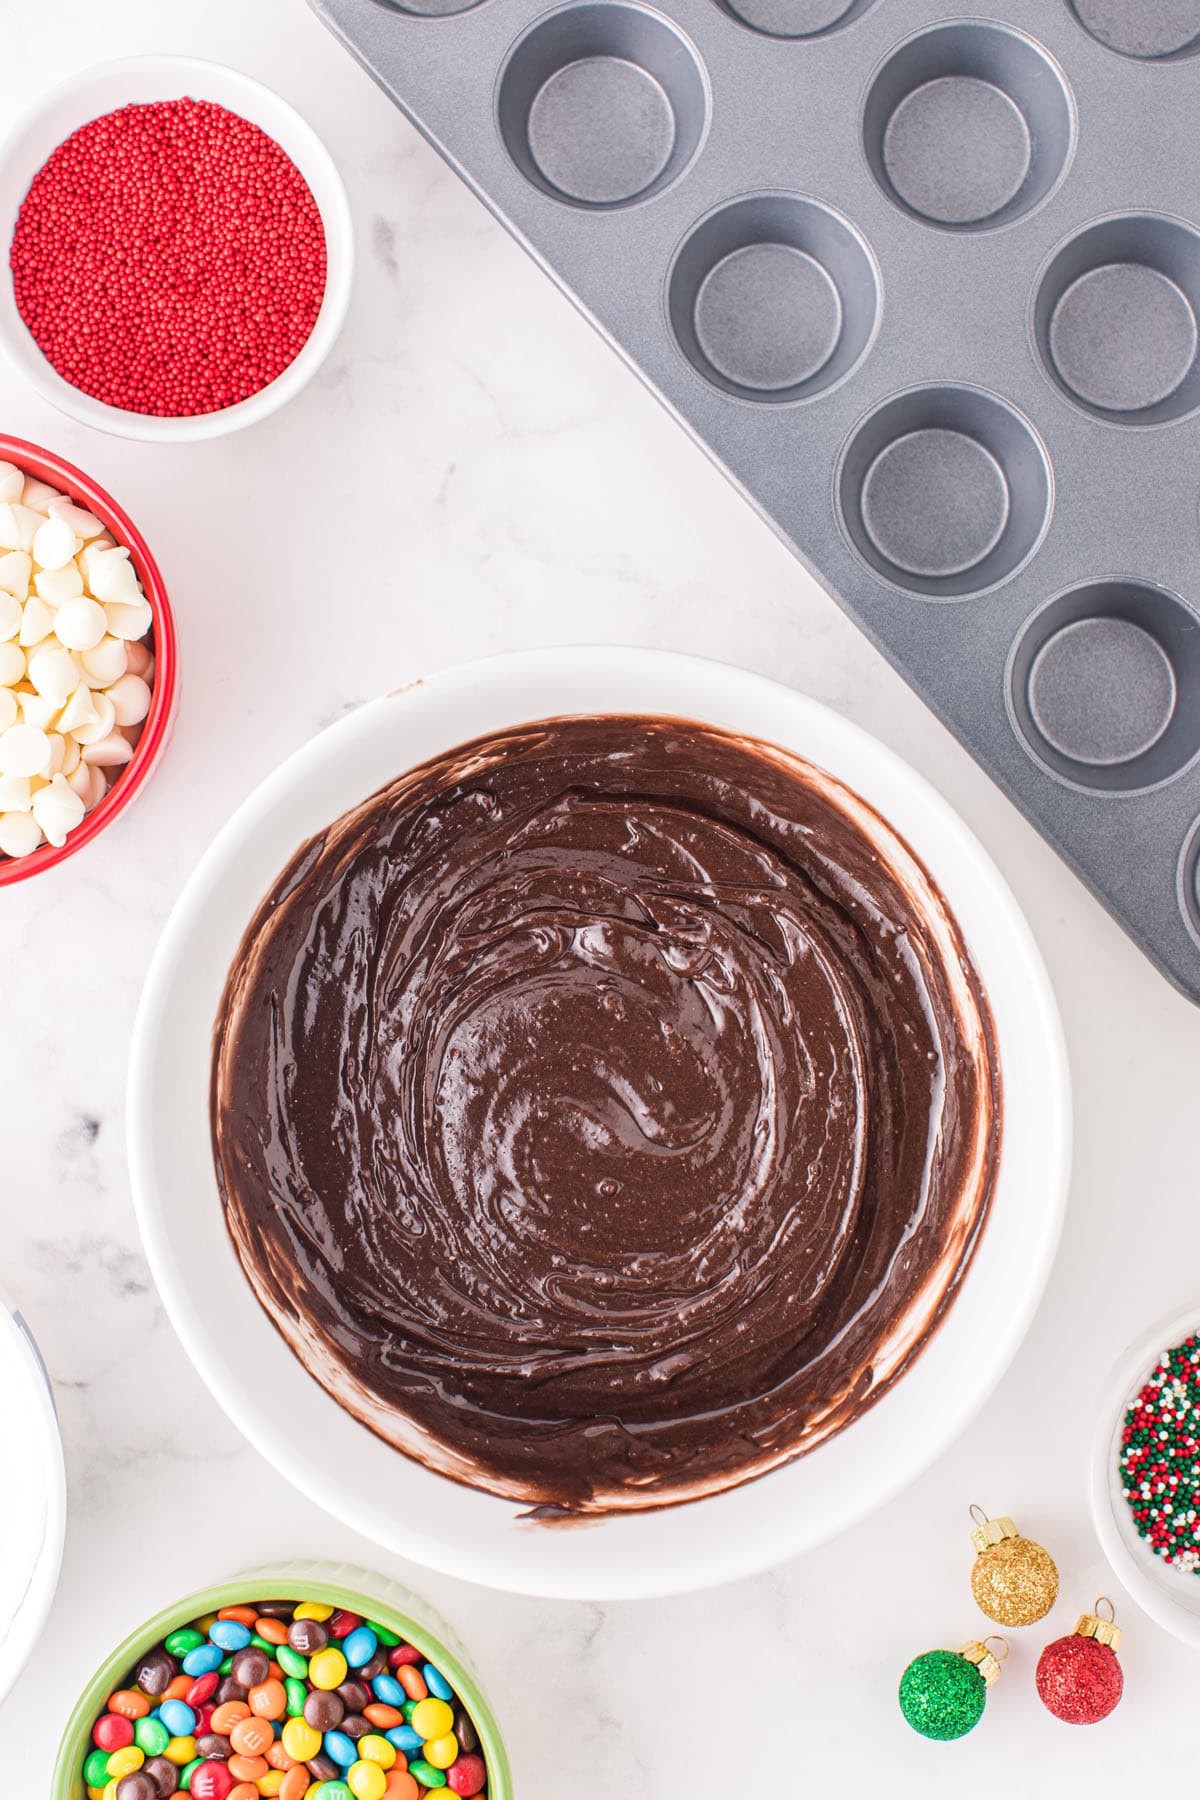
Ingredients / Shopping List
- Brownie mix, prepared according to the box
- White chocolate chips
- Sprinkles: I used red and green nonpareils, red pareils, and green sanding sugar sprinkles
- Whipped topping: If you prefer to make your own whipped topping you can certainly do that. You will need about 6 cups of topping.
- Green food coloring:Gel coloring tends to require less to achieve your desired color but be sure to use a deep green colored gel or you will have lime colored trees!
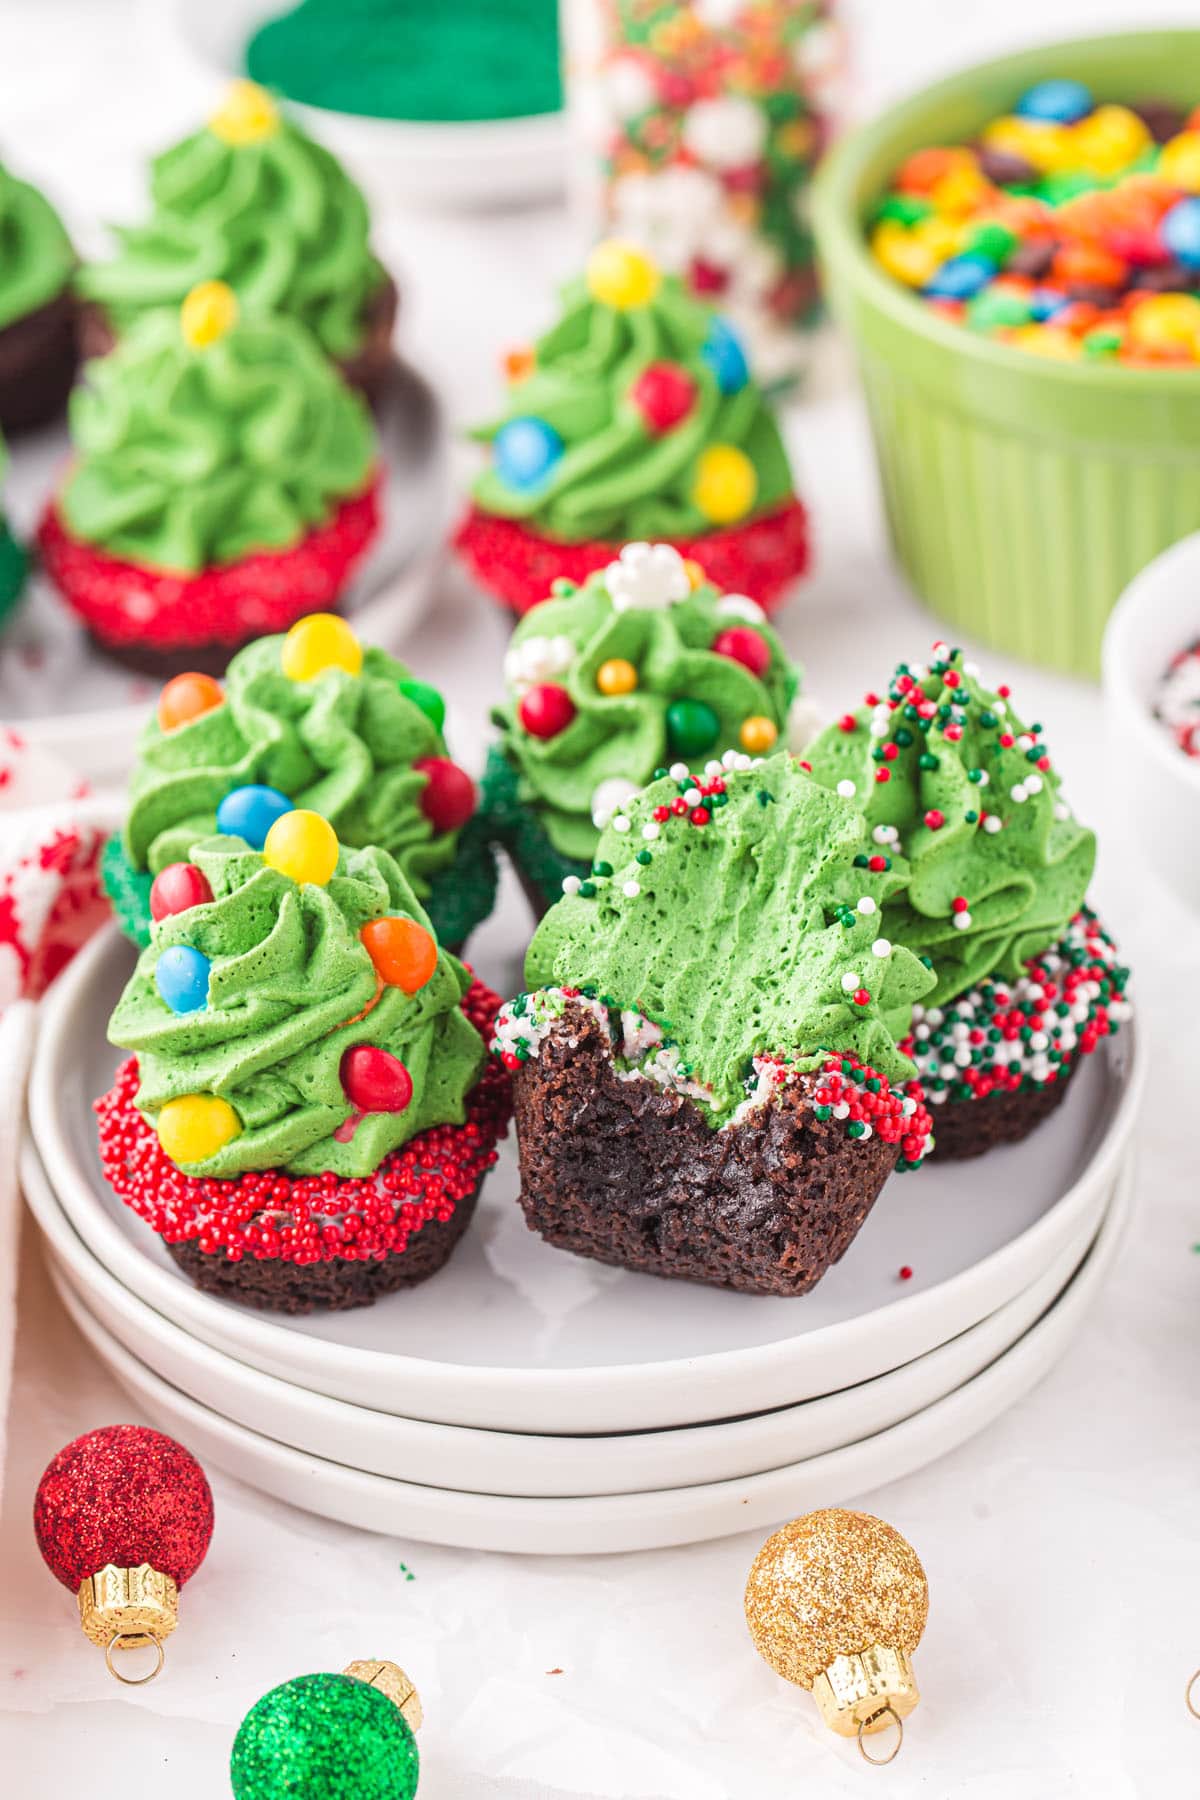
- Mini M&Ms
Substitutions and Additions
- Brownie Box: I used a dark chocolate brownie mix for this recipe and prepared it according to the cake-like brownie instructions. You can use any type of brownie mix that you like and prepare it in your favorite way. Different sized boxes may make a different number of Christmas Trees.
- Original Ornaments: Instead of using mini M&Ms, you can substitute sprinkles or another type of mini candy you prefer to create your own original ornaments.
- Mix-Ins: Feel free to add your favorite mix-ins to the brownie batter after it’s been prepared. Walnuts, pecans, and almonds are great nutty additions. These treats also taste delicious with any type of chocolate chip–try out some peanut butter chips, white chocolate chips, butterscotch chips, mini chocolate chips, or add even more mini M&Ms into the batter!
- Other Fun Fillings: Feel free to add other fun fillings to your baked brownie cups. You can easily fill a cup with a rich chocolate ganache and top it with mini marshmallows, fill it with a mousse mixture and top it with a strawberry, or simply press a Hershey kiss into the center. Get creative!
Recommended Tools to Make this Recipe
- Mixing bowl and tools
- Measuring tools
- Mini muffin tins
- Piping bag and large sized piping tip (I used a Wilton 1M)
SEE FULL PRINTABLE RECIPE CARD BELOW
How to Make the Christmas Tree Brownie Cups
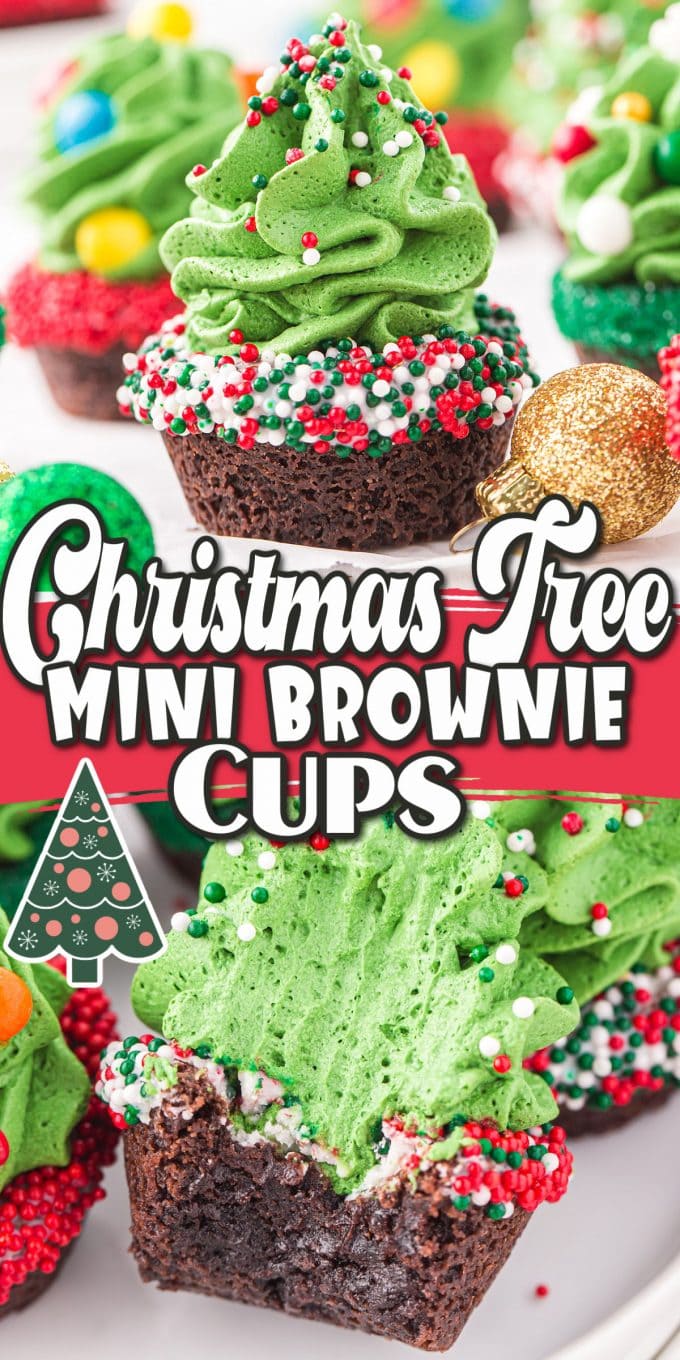
It is so easy to turn a box of brownies into adorable Christmas Tree Mini Brownie Cups. In a matter of minutes, your whole family can have fun transforming a fudgy brownie batter and whipped topping into these festive holiday edible trees–they are the sweetest treats that look almost too cute to consume!
- Prepare brownie batter according to instructions on the box.

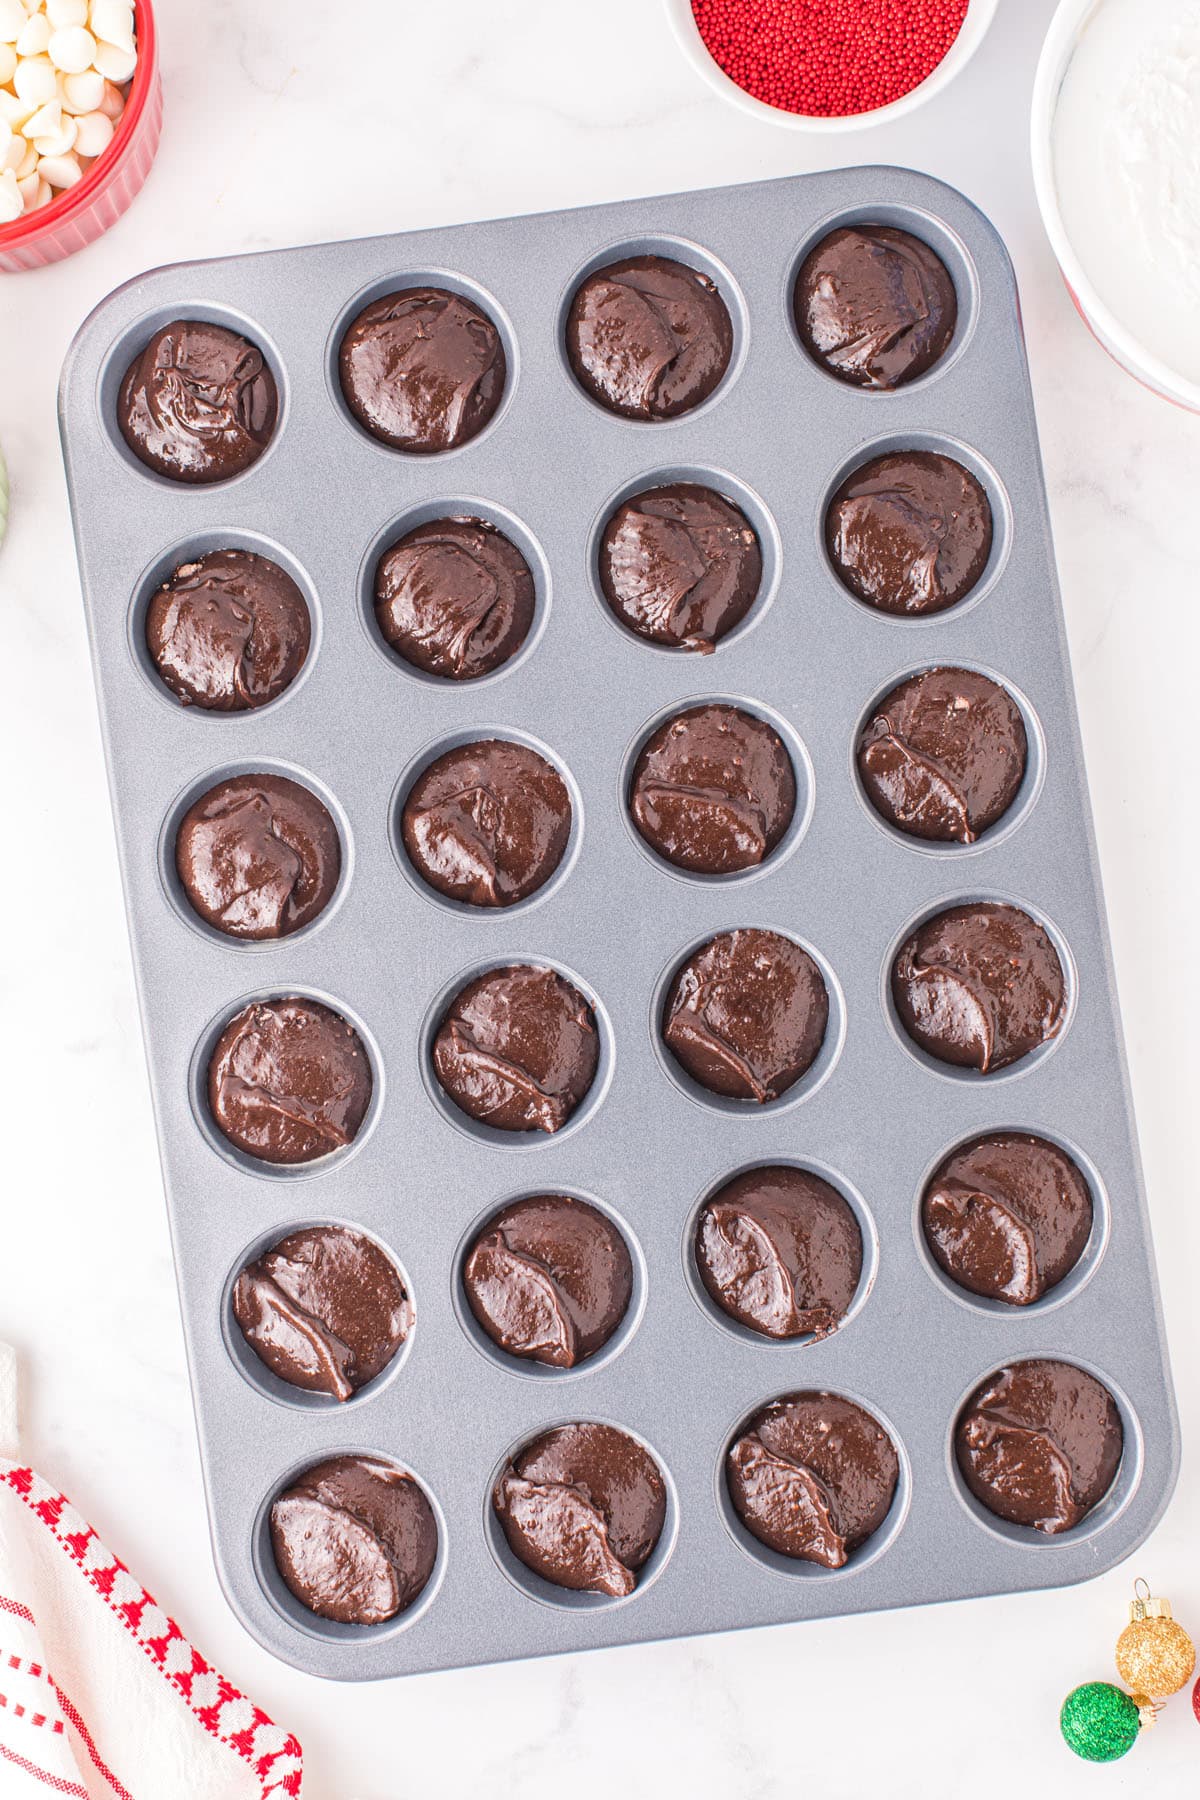
- Fill mini muffin tins with brownie batter, about 2/3 full.
- Bake for 12-15 minutes according to temperature on the box.
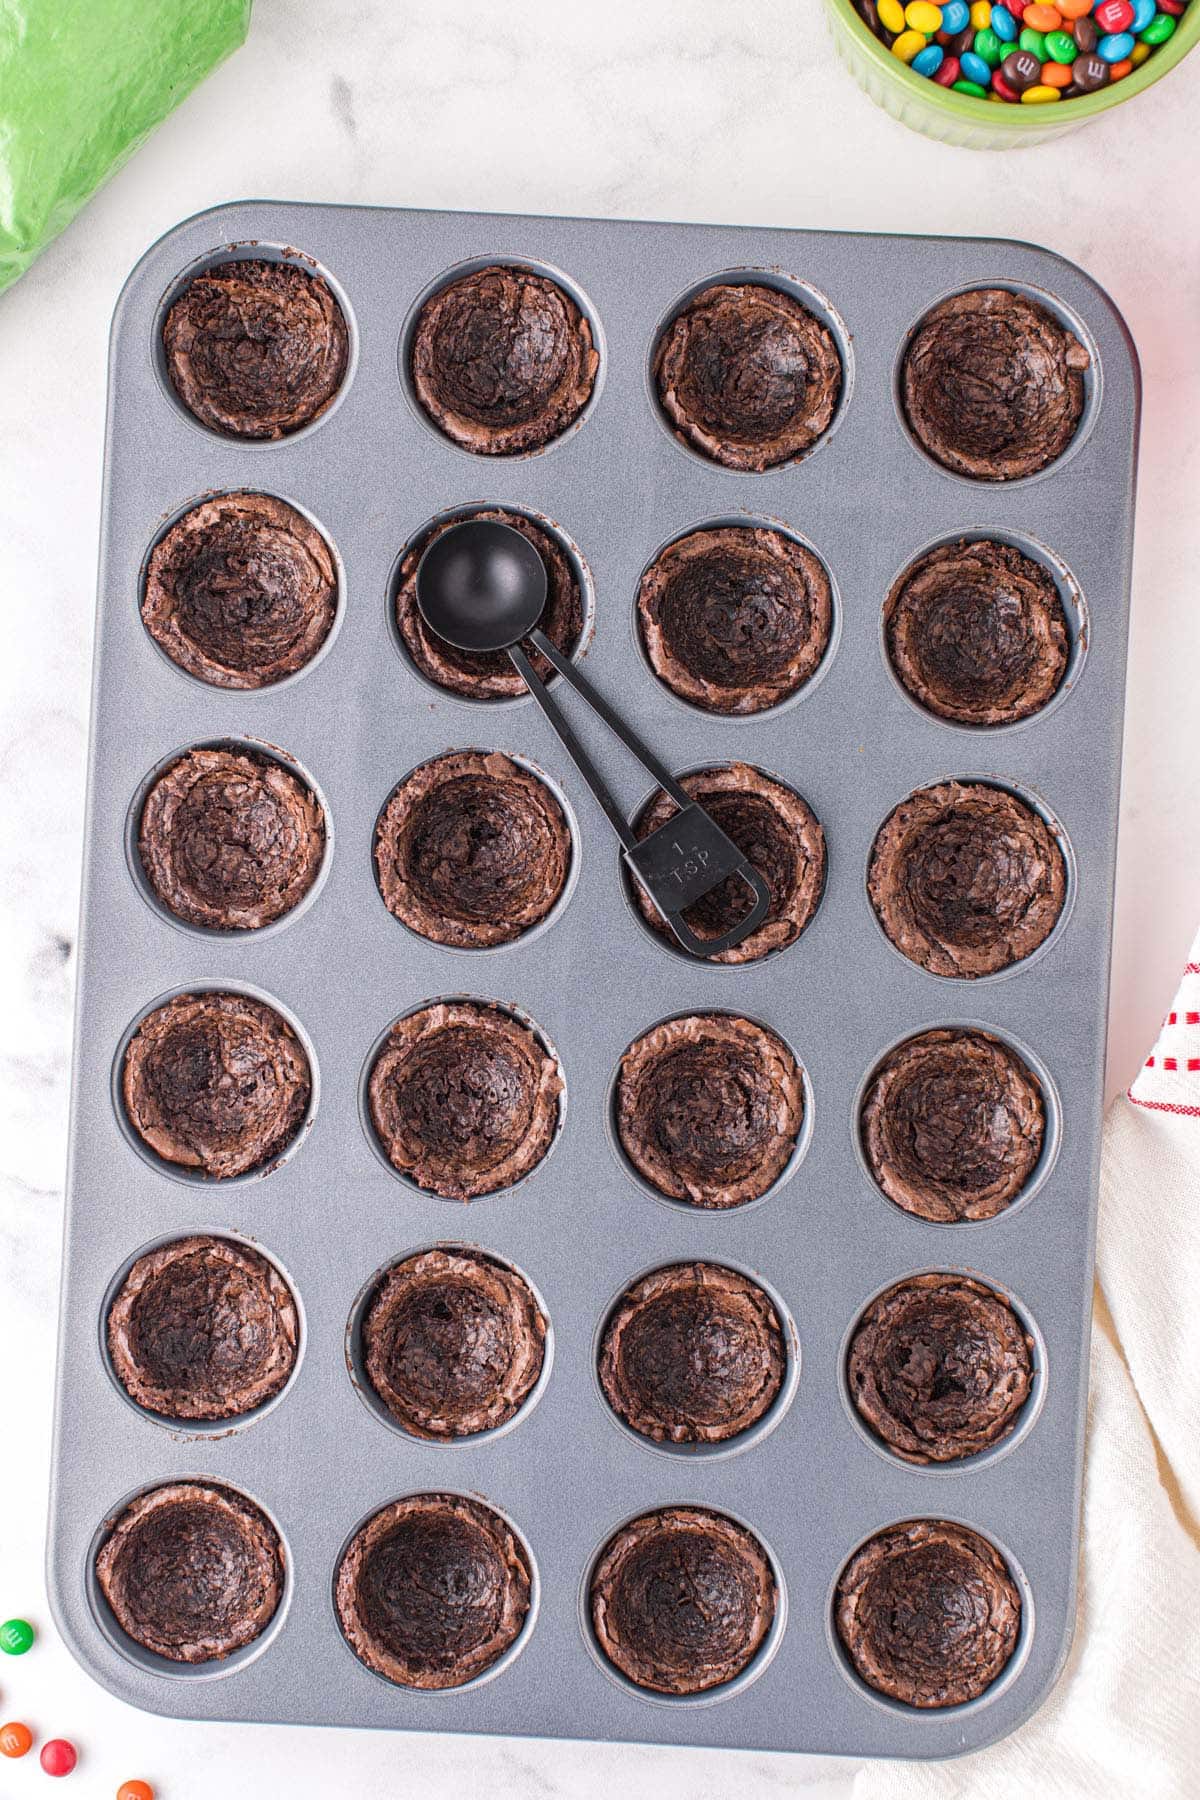
Pro Tip: Brownies are done with they are firm on the edges and the top becomes crinkly. If you push a toothpick into the center of a brownie it should come out with just a few moist crumbs on it. - Use a teaspoon to create an indentation on the top of each baked brownie.
- Allow brownies to cool before removing from muffin tins.
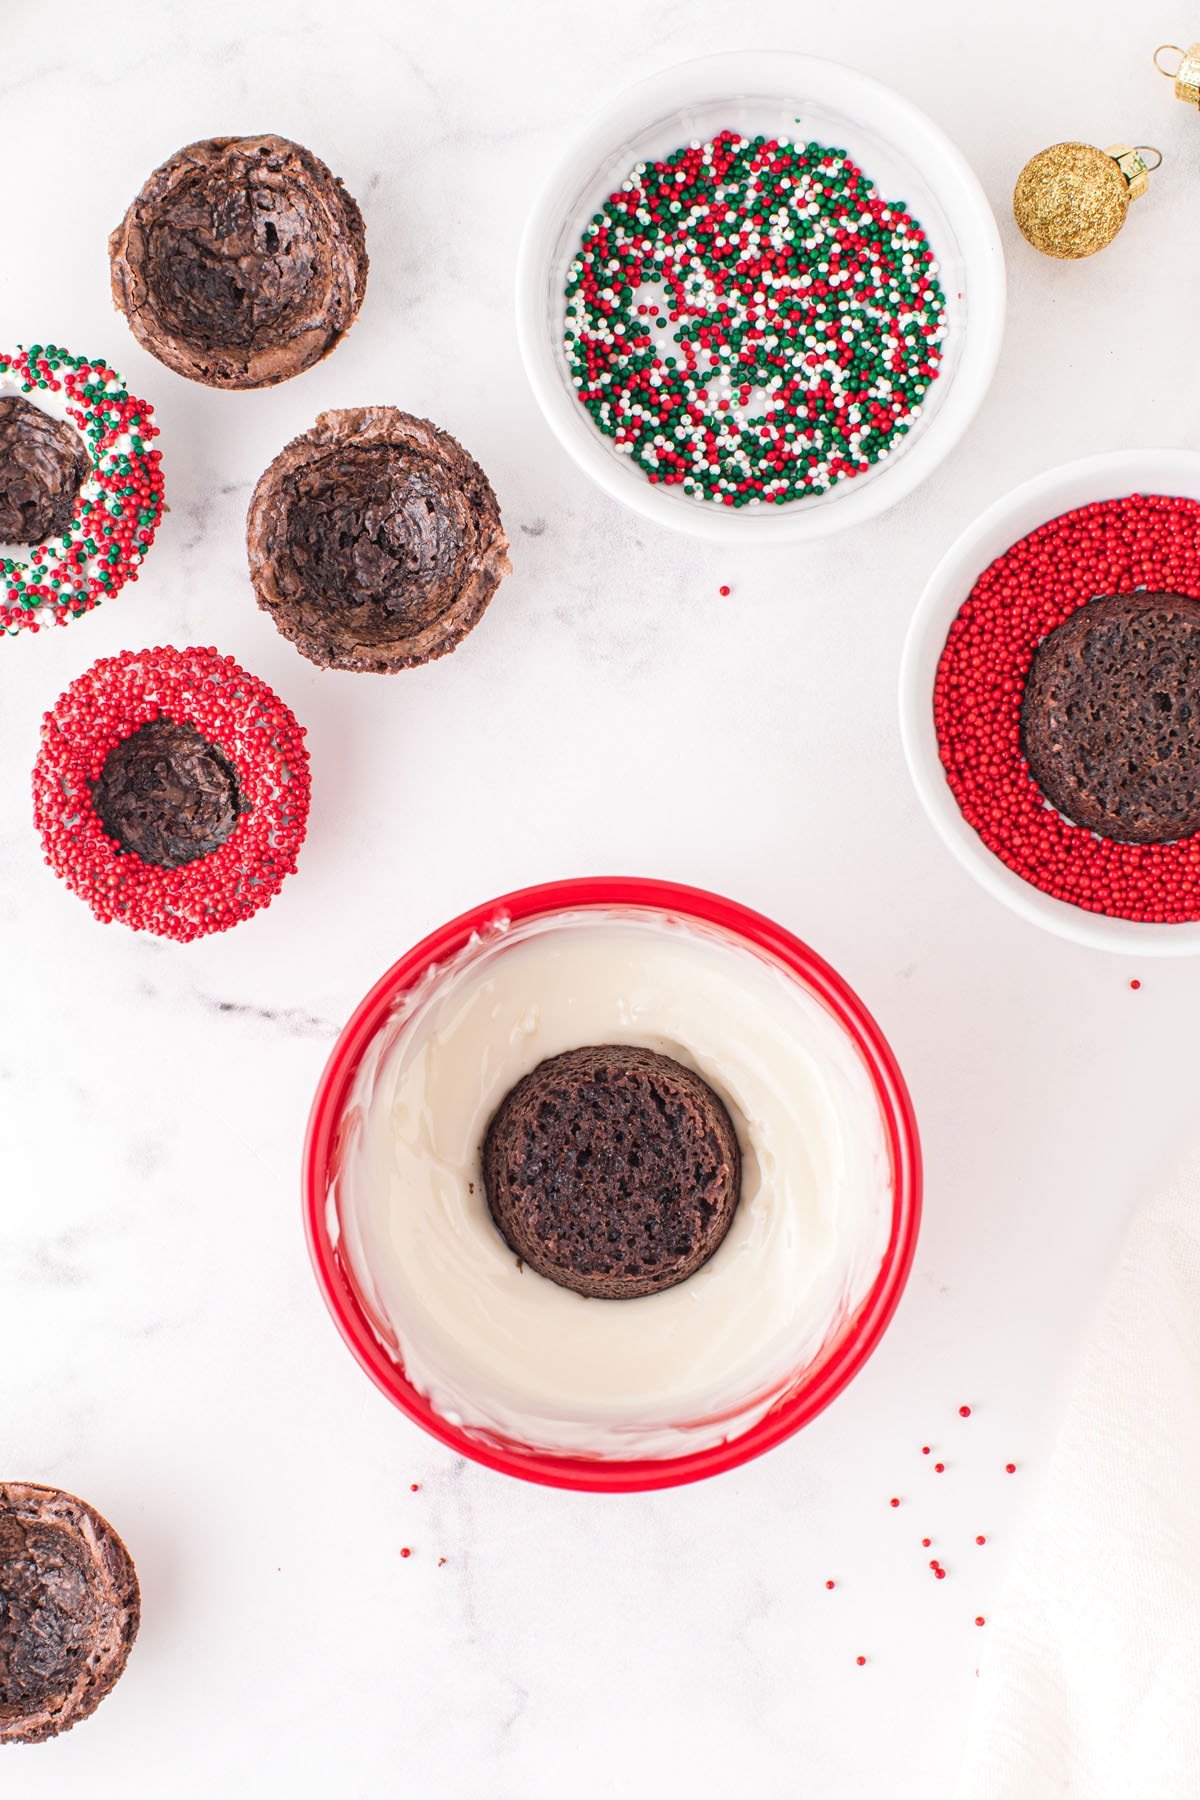
- Melt white chocolate chips in the microwave.
Pro Tip: Heat for 40 seconds, stir, and continue heating in 10 second increments, stirring well between each heating, just until all the chips have melted. Do not overheat. - Dip cooled brownies, top down, into the melted white chocolate and then immediately into the sprinkles.
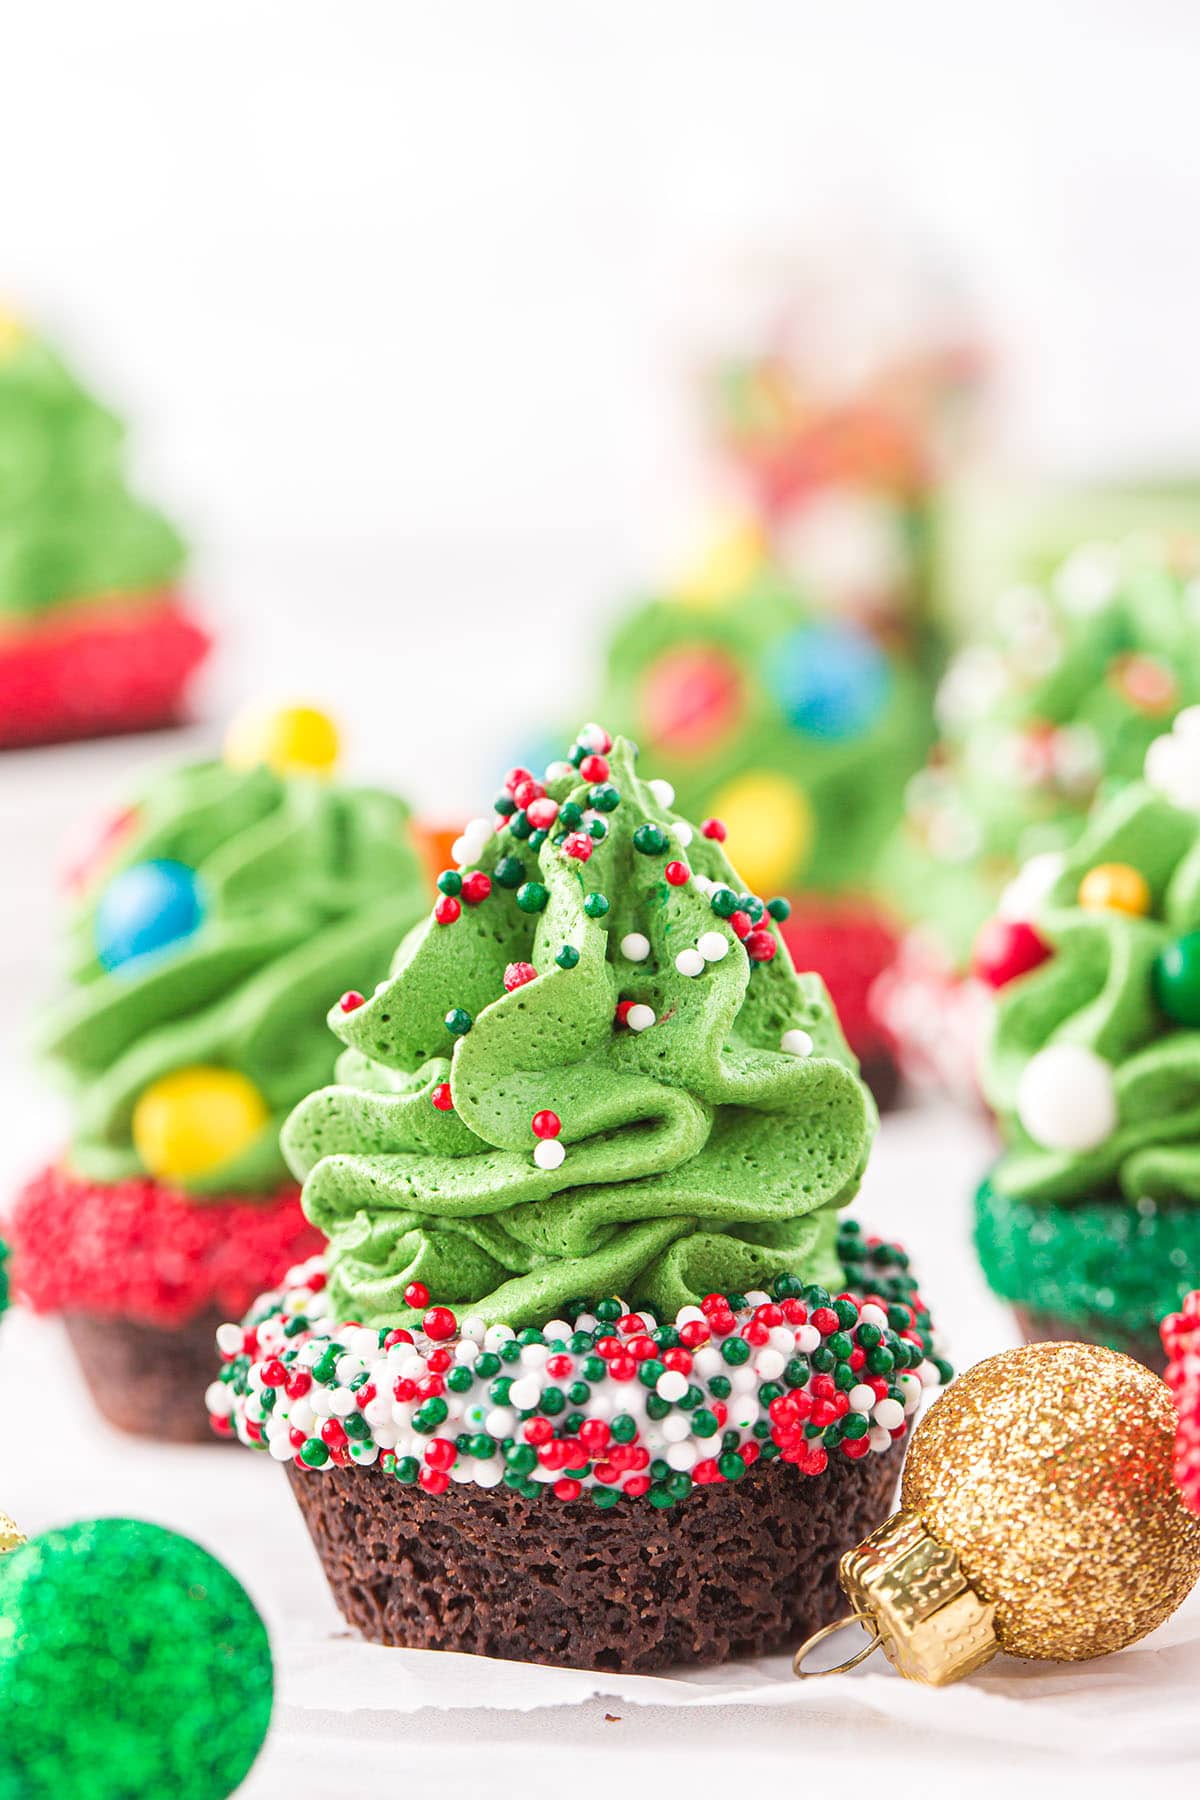
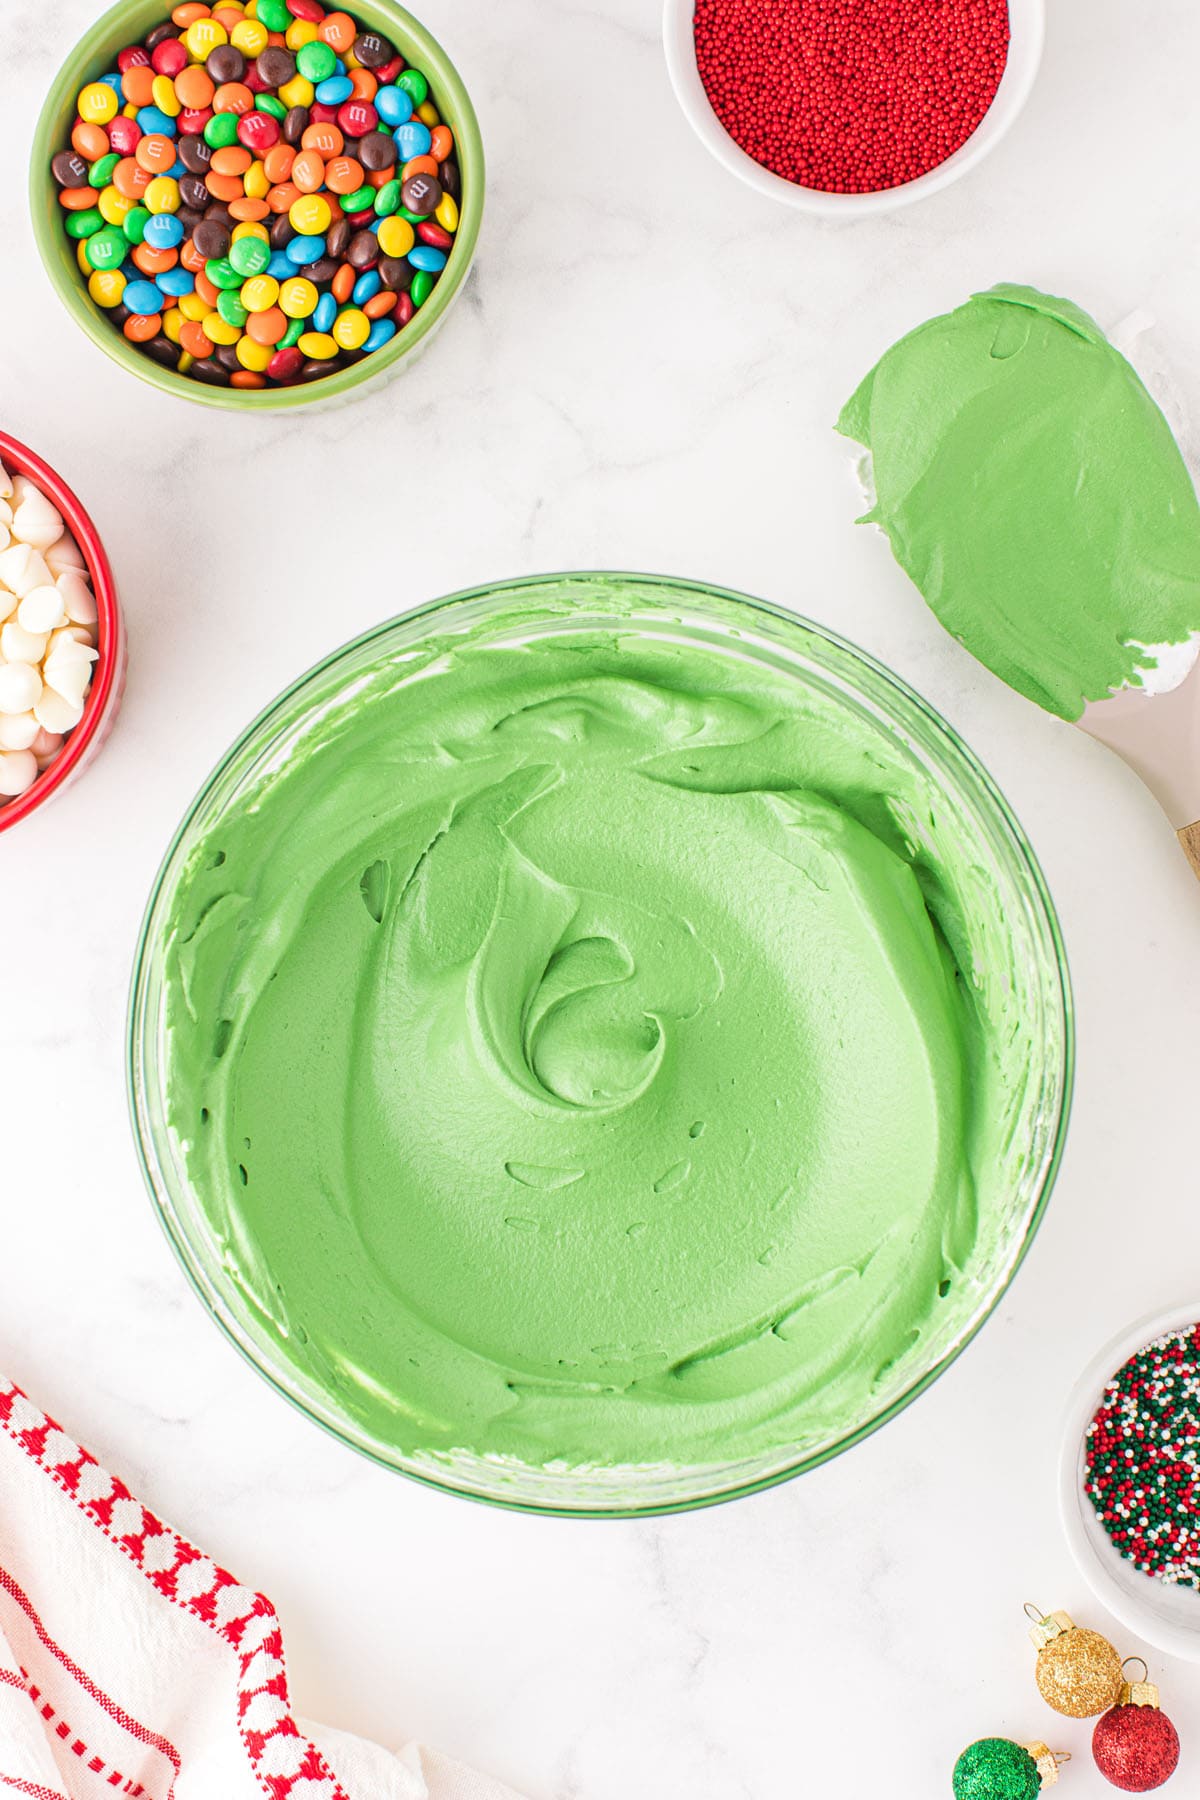
Pro Tip: I recommend placing sprinkles in a shallow bowl. Feel free to get creative with the sprinkles! - Prepare frosting by combining green food coloring with the whipped topping.
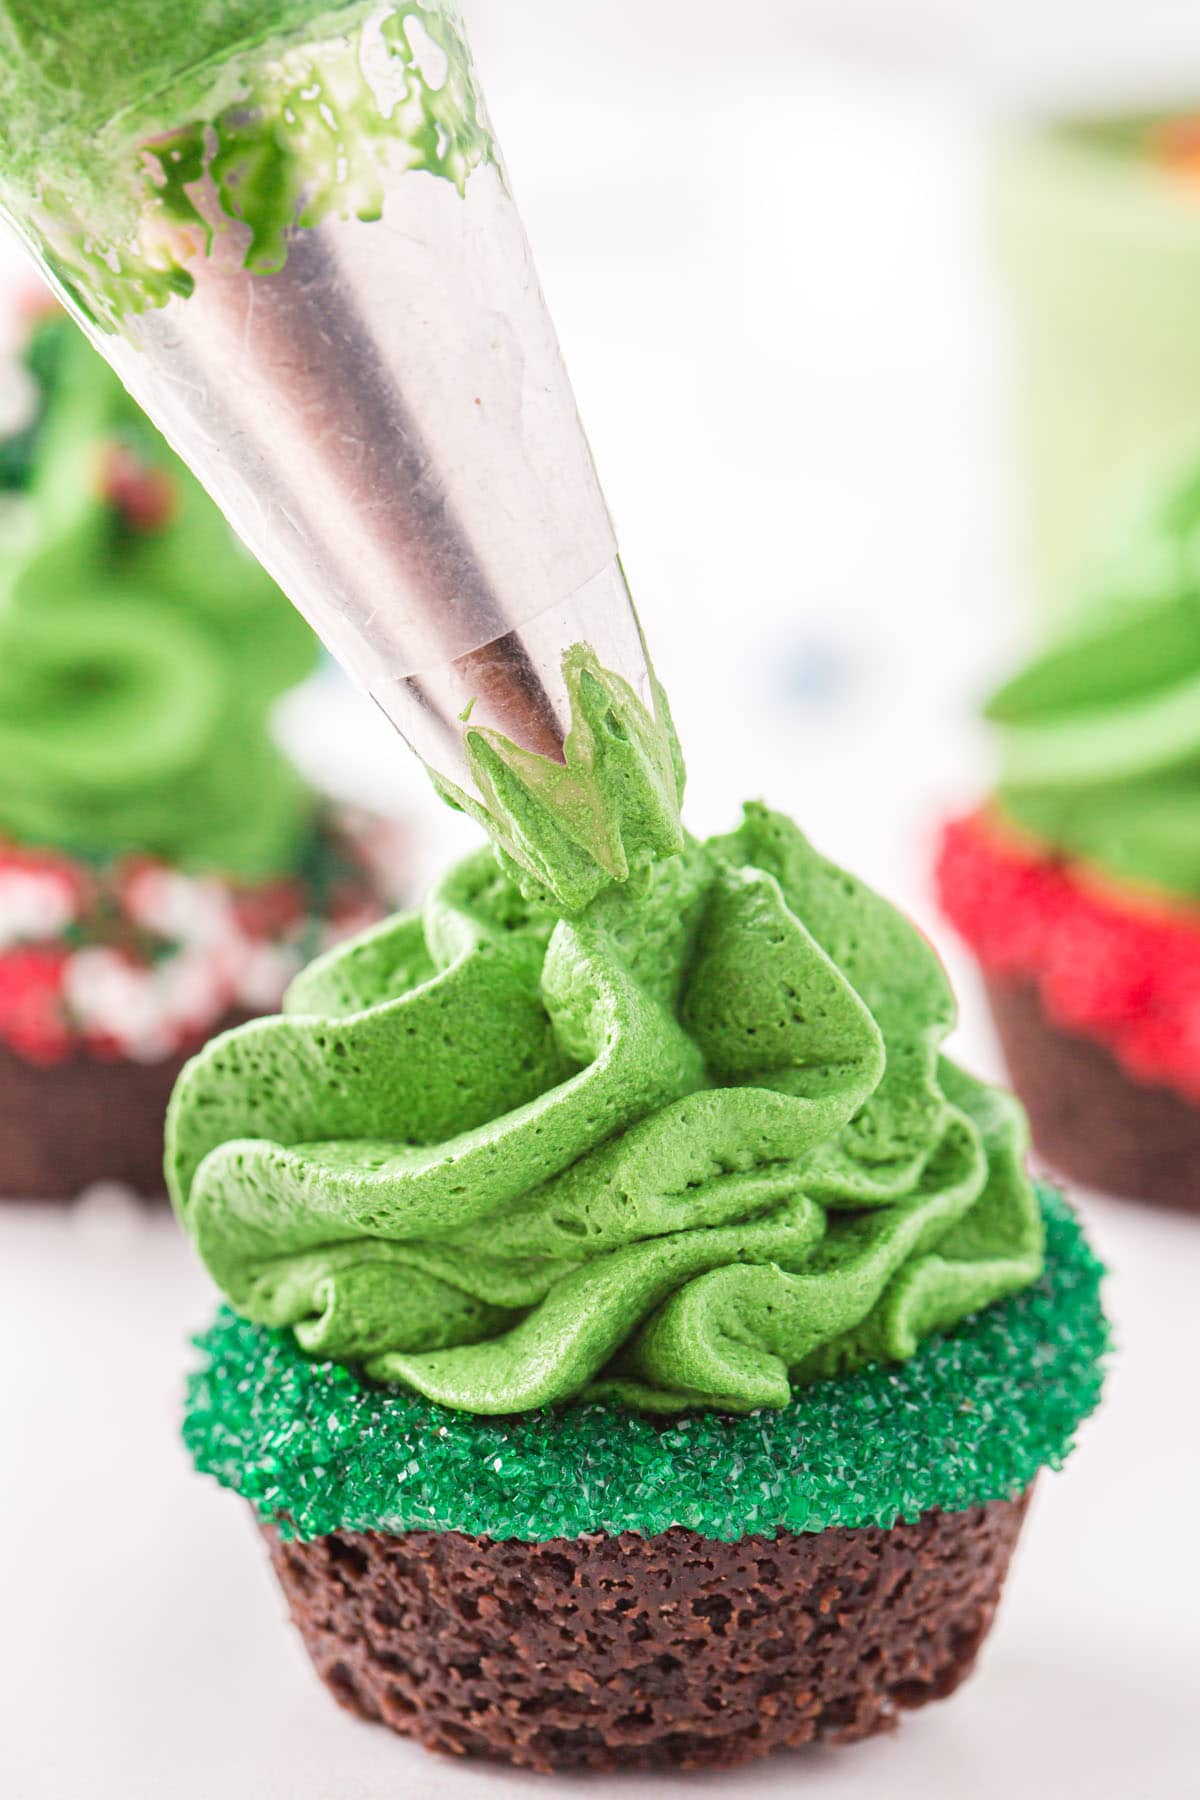
Pro-Tip: If you are making homemade frosting, use green gel food color instead of liquid food color so the consistency doesn’t change. - Pipe trees onto the brownie trunks.
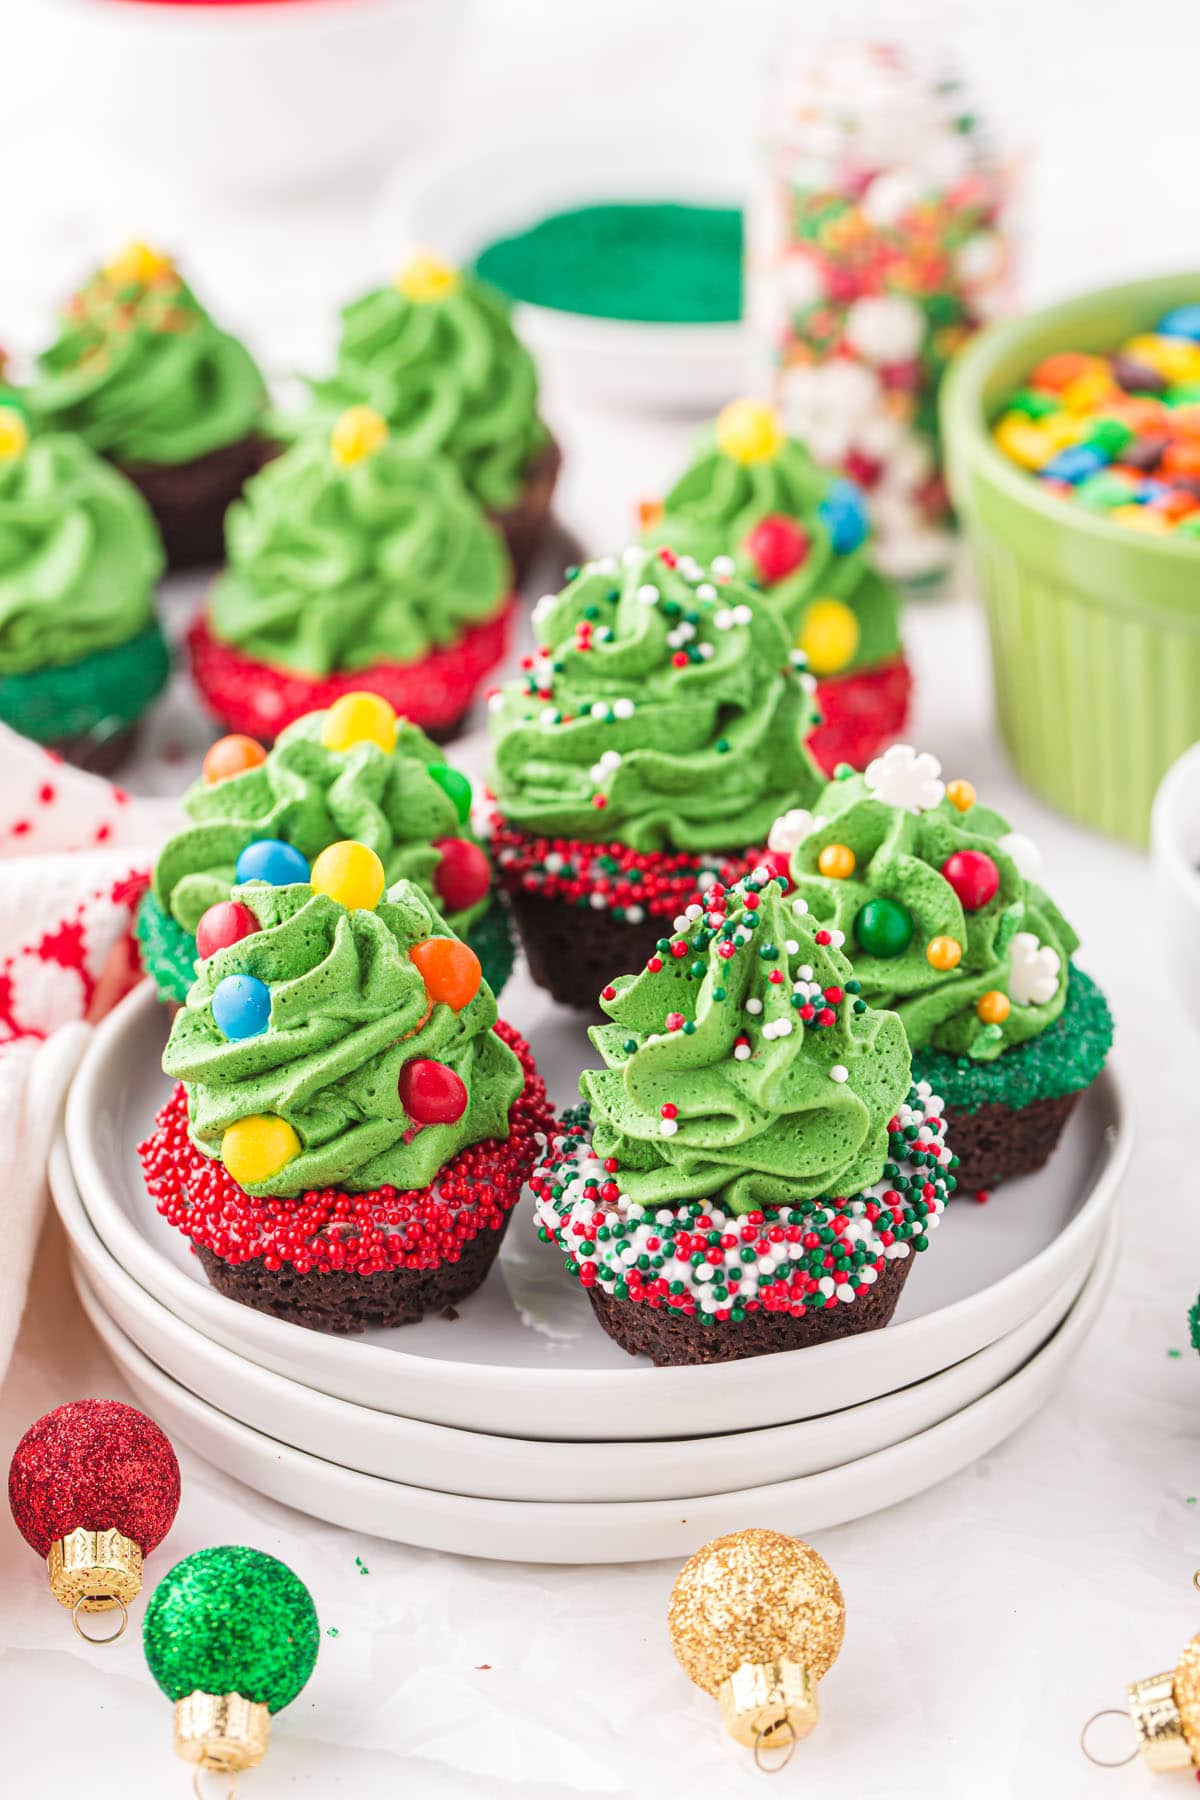
Pro Tip: I recommend using a piping bag and a 1M Wilton piping tip (or any large piping tip). - Decorate and enjoy!
Pro-Tip: Feel free to decorate the tree with your favorite toppings. Remember that you are decorating with whipped topping so keep your “ornaments” light and small.
Storage Tips
- To Store The Brownie Bottoms: These Christmas brownies store best before they are decorated. The brownie bottoms should be stored in an airtight container, at room temperature for 3-5 days.
- To Store The Whipped Topping: The whipped topping can be stored, unopened, in the refrigerator until the use by date.
- To Freeze: I do not recommend freezing this recipe.
Frequently Asked Questions
Once the trees have been topped and decorated they should be stored, uncovered, in the refrigerator. The topping will only maintain its shape and consistency for 1-2 days.
These Christmas Tree Mini Brownie Cups are the perfect recipe to make together as a family! Little kids can help mix up the brownie mix and decorate the trees once the whipped topping has been piped on top. Older kids can help scoop the batter into the muffin tins, dip the brownies, and pipe on the trees. With something for everyone, these are bound to become one of your traditional holiday treats and a family favorite!
You can absolutely make your own homemade brownie batter! This recipe bakes from a box for ease and simplicity.
Other Easy Christmas Recipes
- Christmas Fudge
- Chex Mix Christmas Crack
- Melted Snowman Chocolate Bark
- DIY Peppermint Candy Bowls
- The Best Christmas Sugar Cookie Recipe
- Grinch Punch
- Christmas Red Velvet Poke Cake
- Reindeer Pretzel Rods
- M&M Christmas Cookies
- Cinnamon Ornaments

Christmas Tree Brownie Cups
Ingredients
- 18.3 ounce brownie mix prepared according to the box
- 1 cup white chocolate chips
- 16 ounce container whipped topping
- Sprinkles I used red and green nonpareils, red pareils, and green sanding sugar sprinkles
- Green food coloring
- 1 cup 1 cup mini M&Ms
Instructions
- Preheat the oven according to the brownie box instructions and grease two mini muffin tins with cooking spray.
- Prepare the brownie batter according to the instructions on the box.
- Pour the brownie batter into the prepared mini muffin tins, filling each mini muffin about ⅔ full.
- Bake for 12-15 minutes or until firm on the edges and the top becomes crinkly. If you push a toothpick into the center of a brownie it should come out with just a few moist crumbs on it.
- Remove the mini muffin tins from the oven and press a teaspoon into the brownies to create an indentation.
- Allow them to cool to room temperature before gently removing the brownies from the pans.
- Place the white chocolate chips in a microwave safe bowl and heat for 40 seconds. Stir and return to the microwave. Heat in 10 second increments, stirring well between each heating, just until all the chips have melted. Do not overheat.
- Dip the cooled brownies, top down, one at a time, into the melted white chocolate and then immediately into the sprinkles (I recommend placing them in a shallow bowl), to create a sprinkled rim. Feel free to get creative with the sprinkles here!
- Prepare frosting by adding several drops of green food coloring to the whipped topping and gently fold it in until you reach your desired Christmas Tree color.
- Use a piping bag and a 1M Wilton piping tip (or any large piping tip) to pipe trees onto the brownie trunks.
- Decorate with mini M&M “ornaments” or additional sprinkles and enjoy!
Jenn’s Notes
- To Store The Brownie Bottoms: These Christmas Tree Mini Brownie Cups store best before they are decorated. The brownie bottoms should be stored in an airtight container, at room temperature for 3-5 days.
- To Store The Whipped Topping: The whipped topping can be stored, unopened, in the refrigerator until the use-by date.
- To Freeze: I do not recommend freezing this recipe.
- If you are making homemade frosting, use green gel food color instead of liquid food color so the consistency doesn’t change.
- Feel free to decorate the tree with your favorite toppings. Remember that you are decorating with whipped topping so keep your “ornaments” light and small.


This was super easy to follow!! Can I add a photo?
L am new to baking beyond the basic … by whipped topping do you mean like cool whip or canned frosting?
Yup! Cool Whip is perfect!