
This post may contain affiliate links. Please read our disclosure policy.
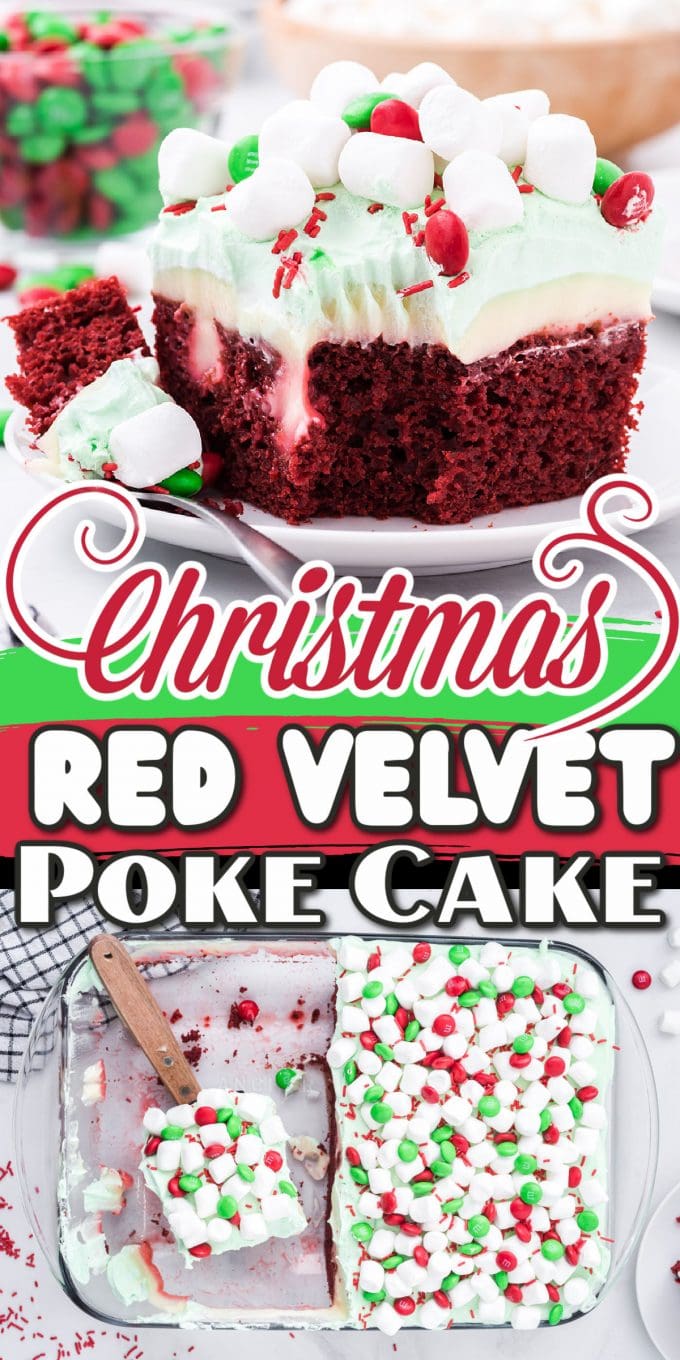
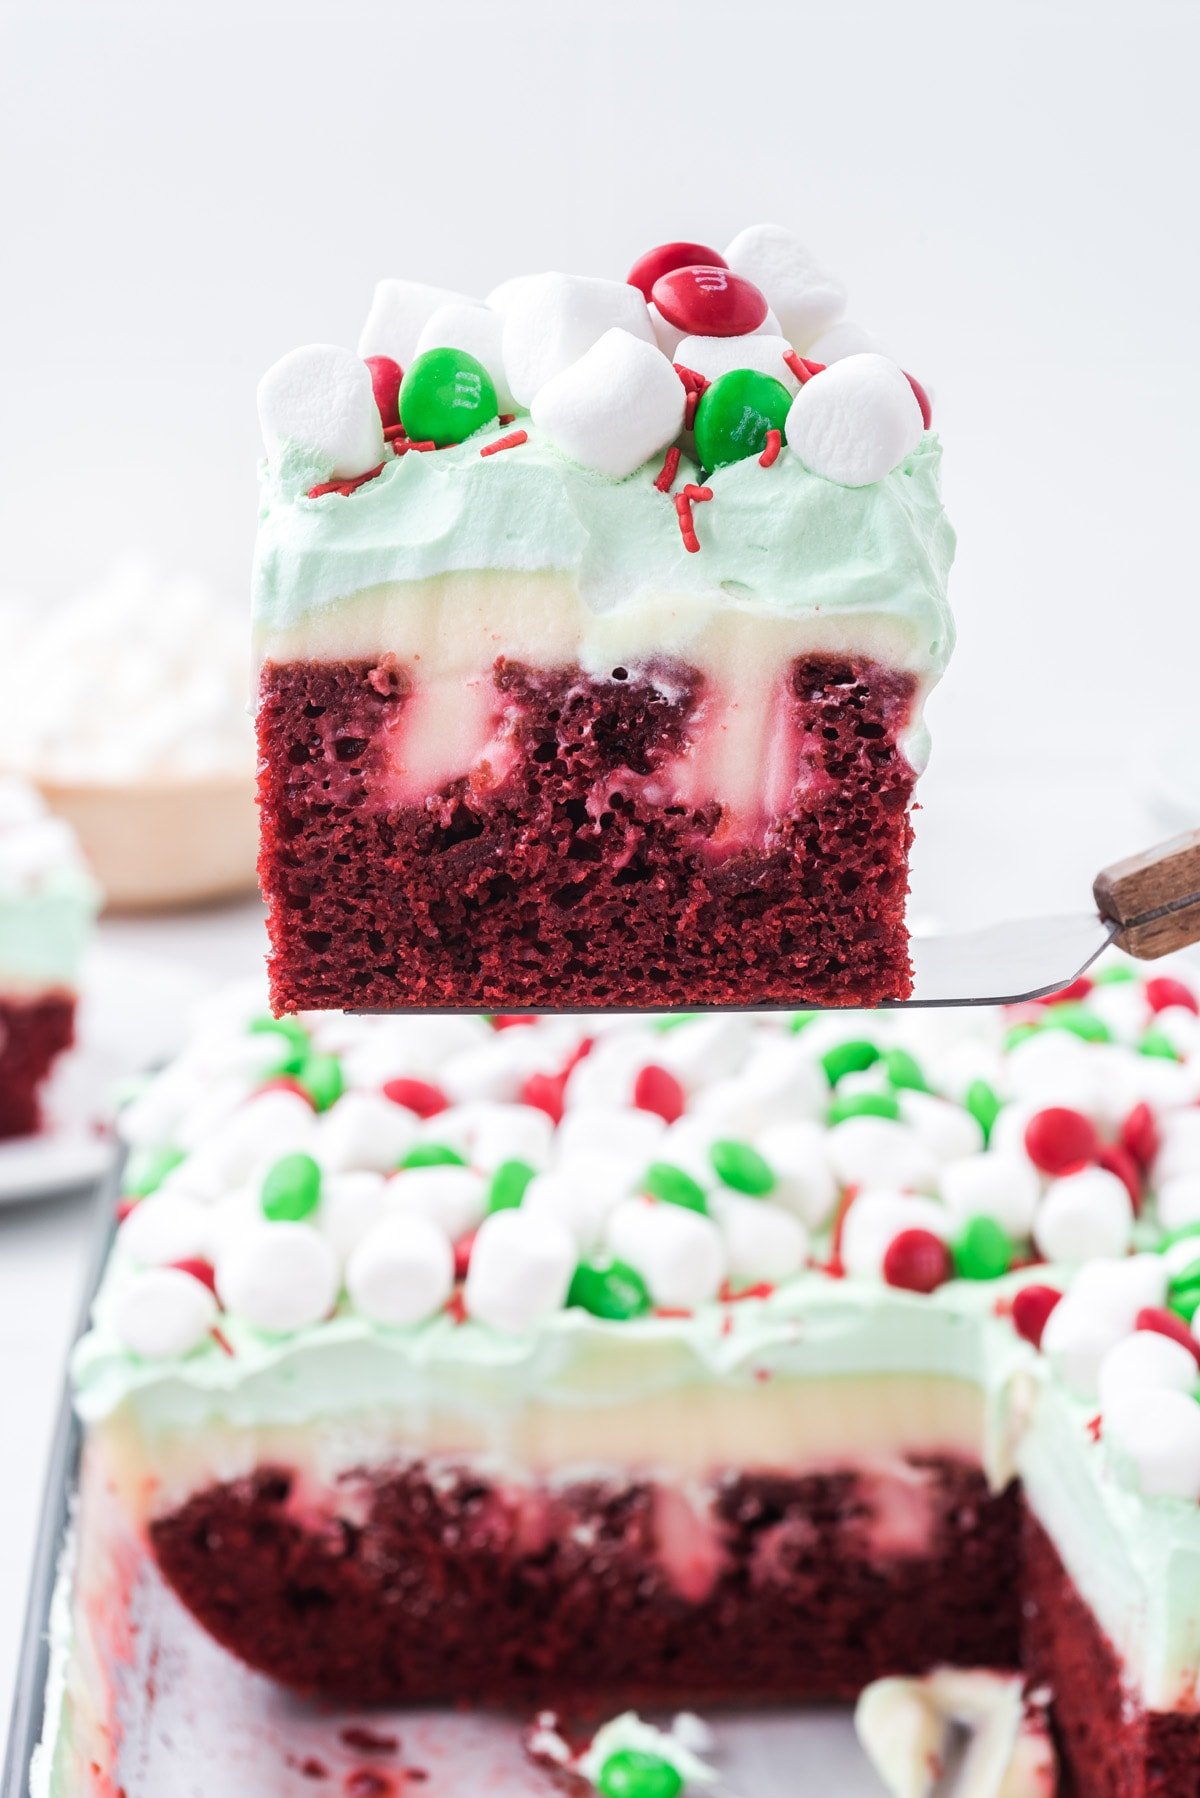
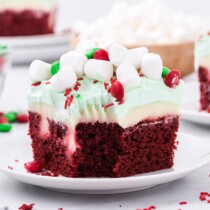
Our Christmas Red Velvet Poke Cake is a delicious, moist holiday cake that is easily made with a boxed cake mix, pudding, and whipped topping. It takes only 10 quick minutes to prepare this simple recipe and creates a no-fuss, festive dessert with spirited seasonal colors and fabulous flavors.

Festive and Fuss-Free Christmas Red Velvet Poke Cake
‘Tis the season for holiday cooking and baking, when the most wonderful time of the year often becomes the most stressful commitment on the calendar. That’s why I love this simple Christmas Red Velvet Poke Cake recipe because it makes managing my menu so much easier by combining a boxed cake mix with a few additional pantry staples.
Once baked, I literally poke holes all over the cake and top it with a delicious creamy pudding mixture that sinks into each hole and infuses the entire creation with extra flavor and moisture.
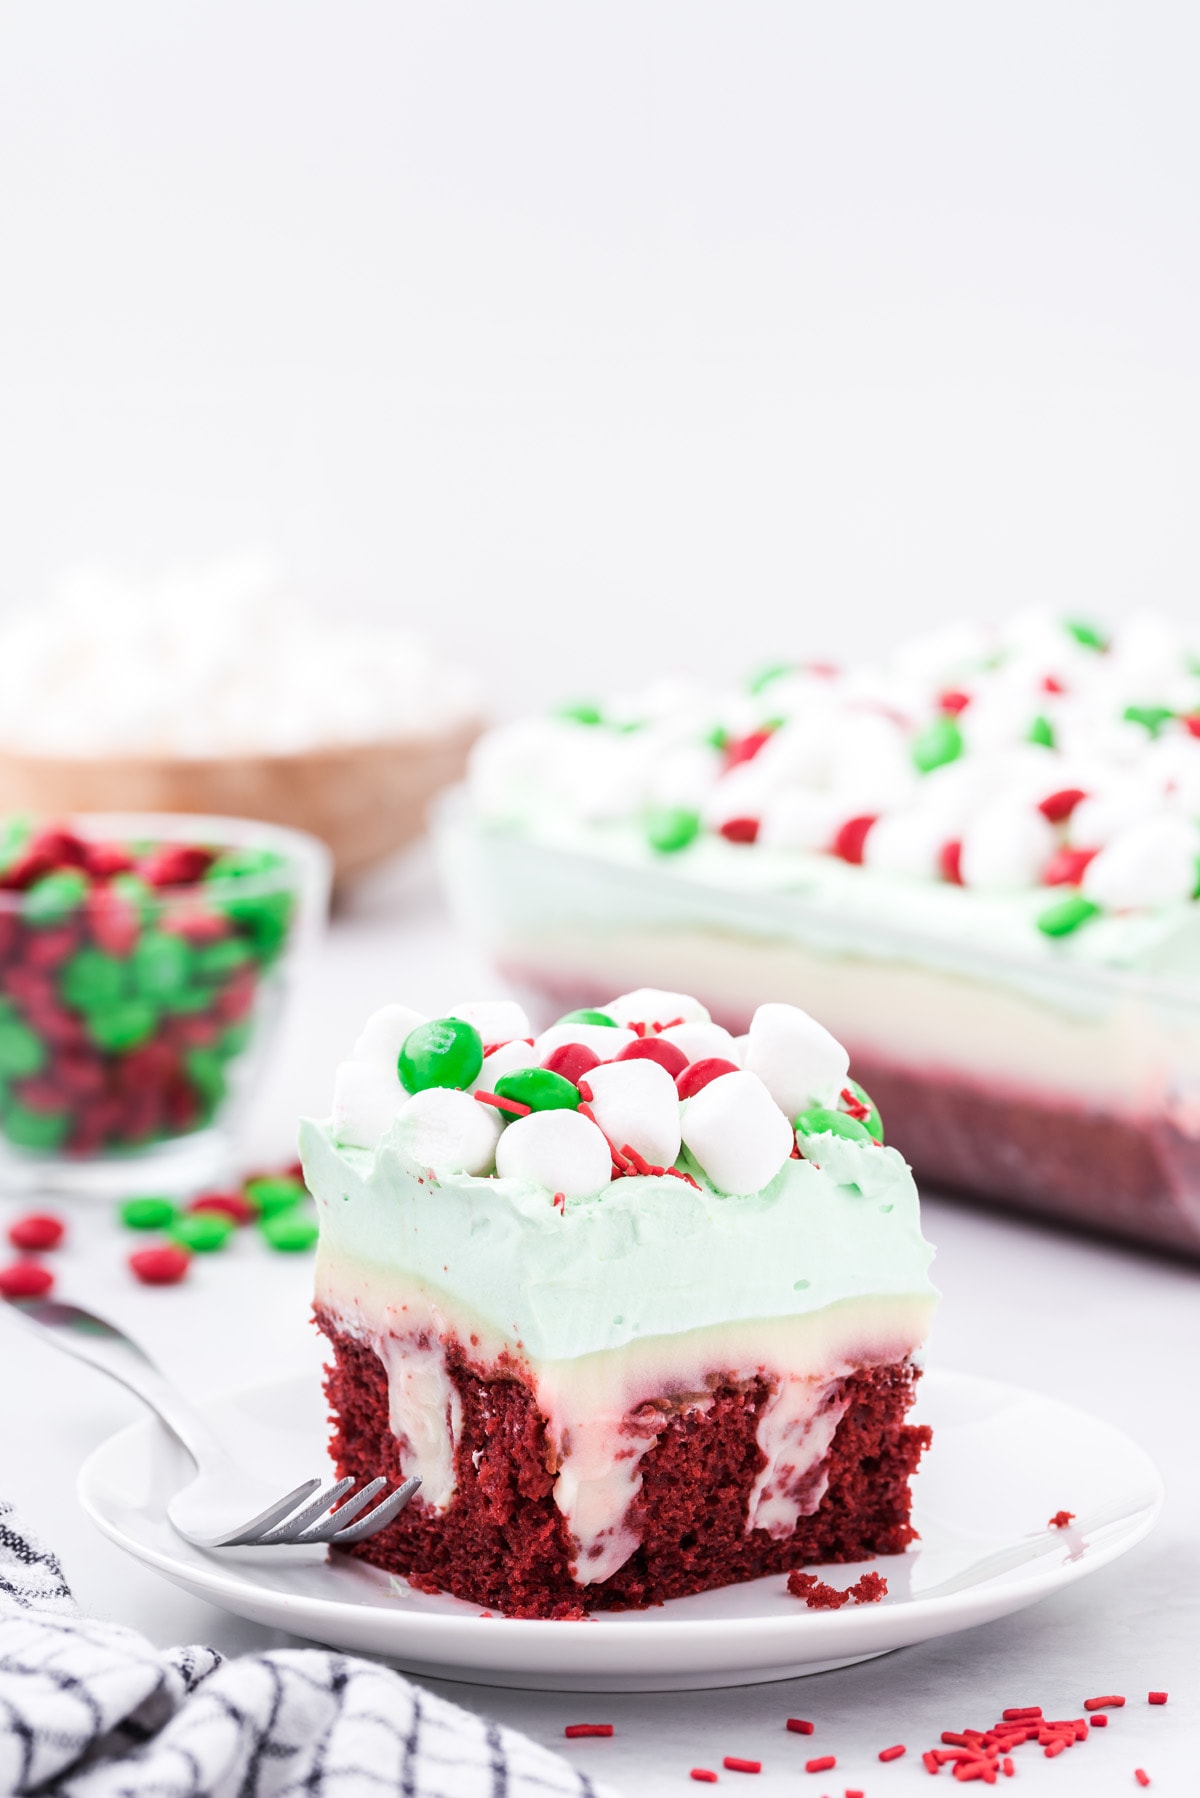
Unlike a traditional poke cake that’s made with a sweetened condensed milk filling, this recipe is tweaked with a cheesecake pudding that perfectly complements the red velvet flavor and captures the essence of the holiday season.
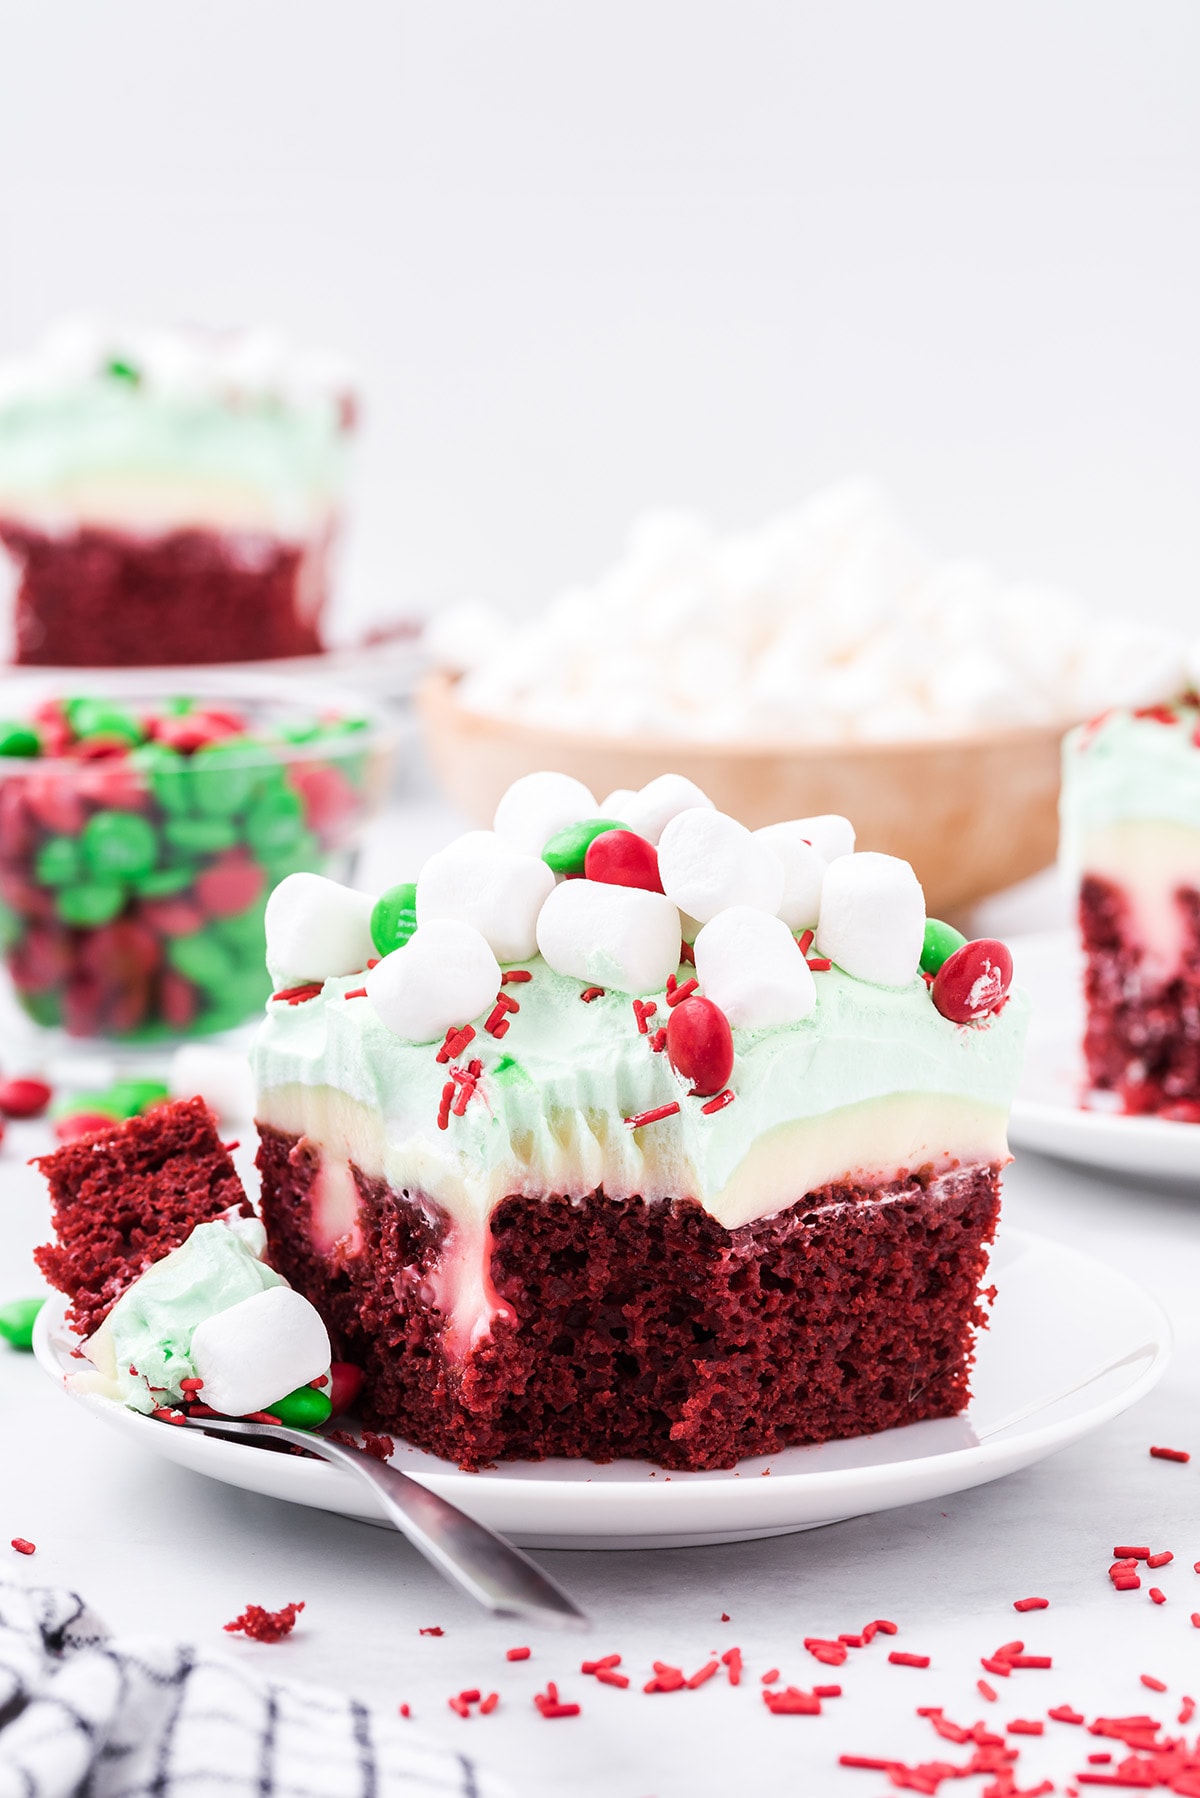
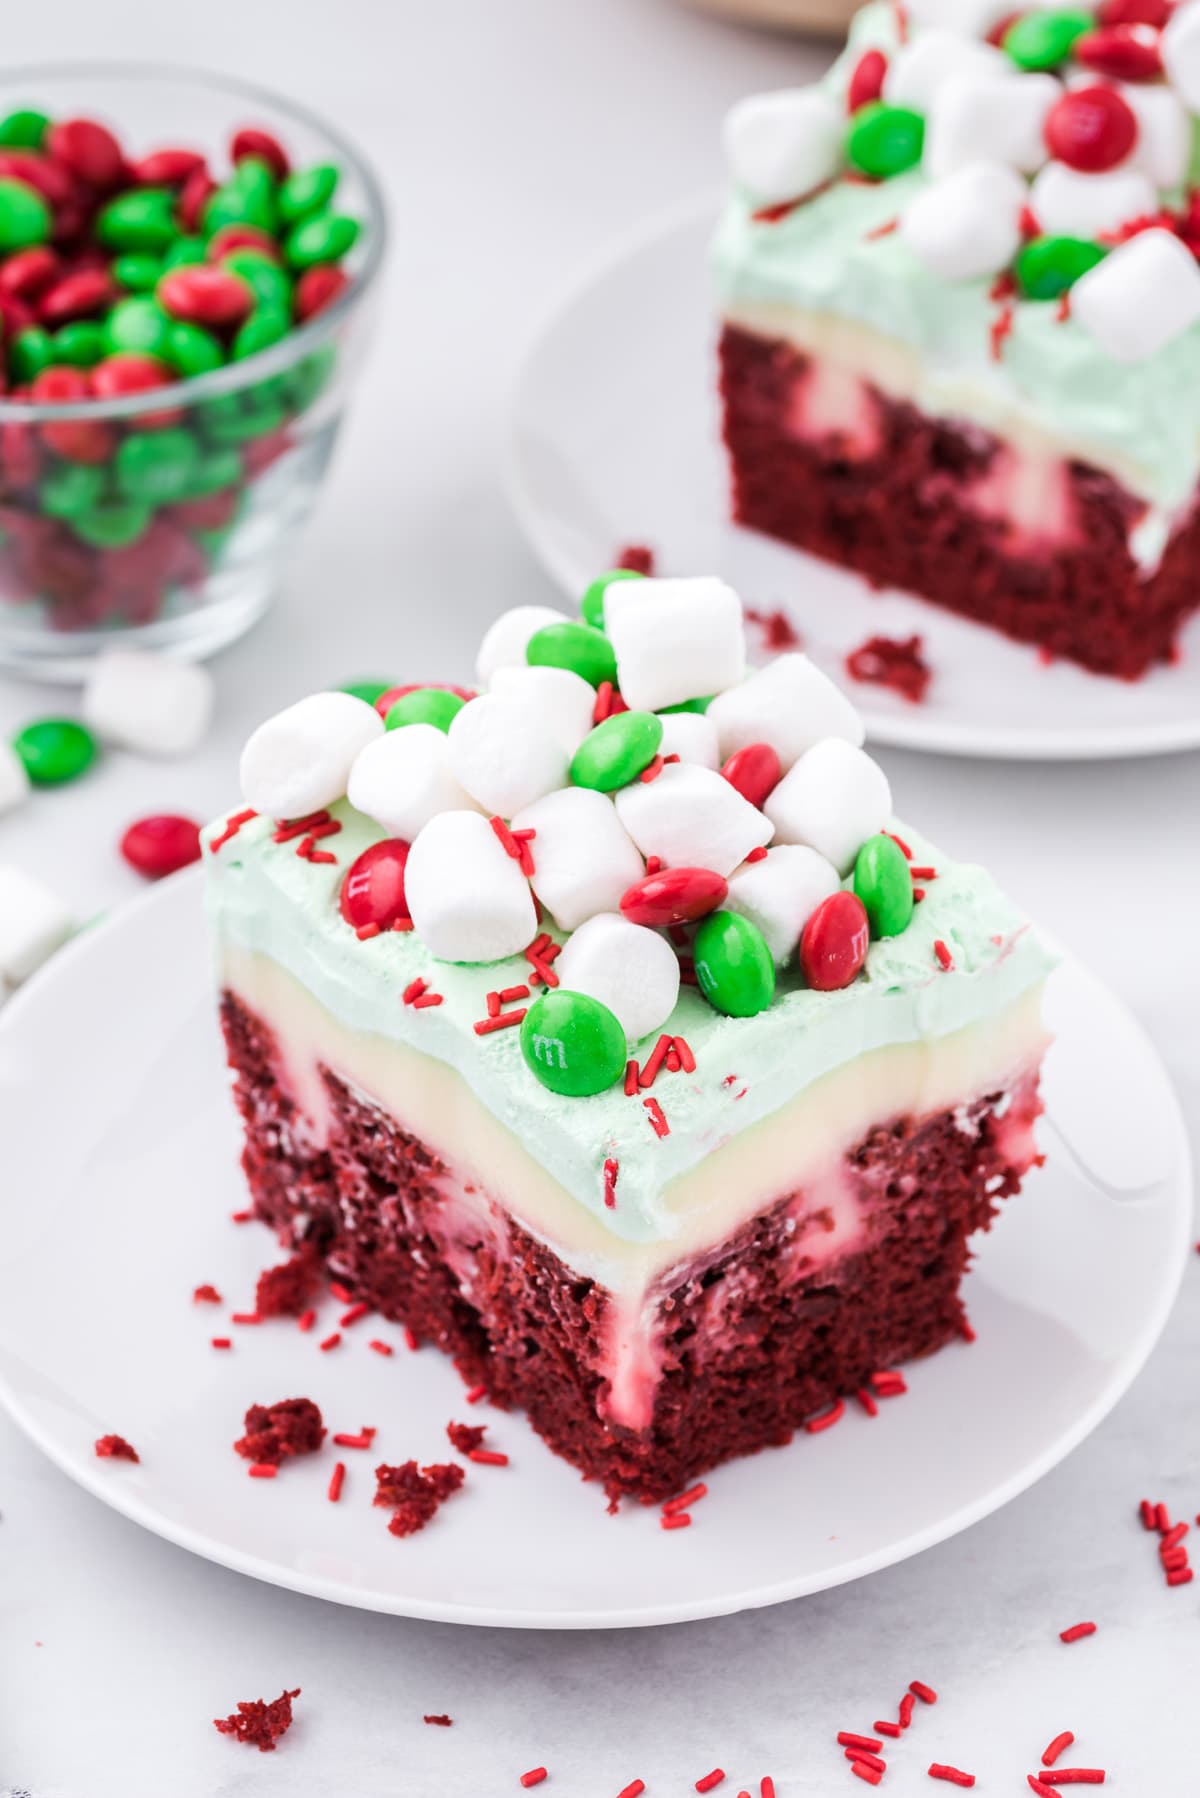
Top it with a green-tinted whipped cream and festive-colored candy, and you’ve created a soft, moist, and beautifully decorated cake to serve on Christmas Eve or Christmas day–it’s fabulously festive in every forkful!
Why We Love This Christmas Red Velvet Poke Cake Recipe
- Quick and easy to prepare.
- Delicious, moist holiday cake.
- A boxed cake mix makes this recipe so simple!
- Festive holiday desert with colors that represent the season.
- Beautiful cake to serve on Christmas Eve or Christmas day.
- Fun to bake and decorate with kids.
- Perfect for holidays, parties, and special events.

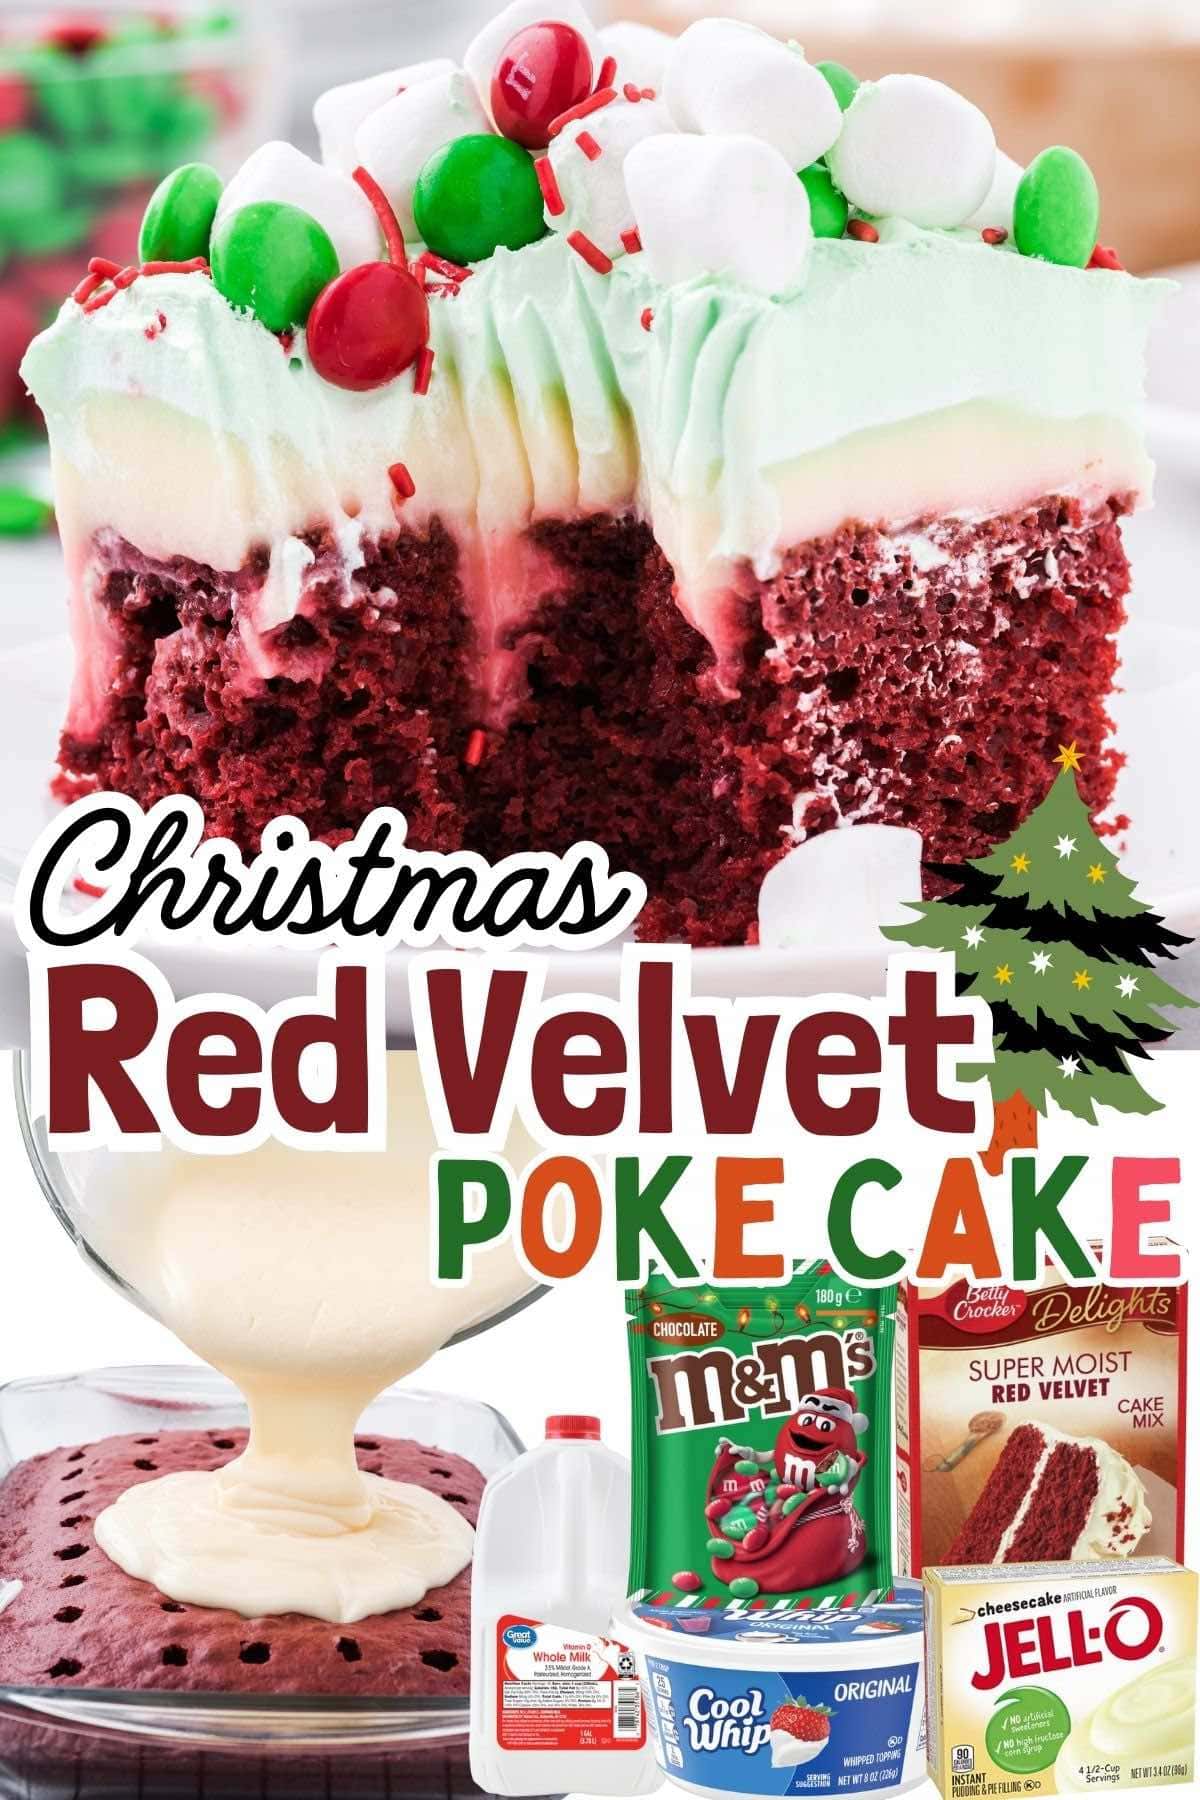
Ingredients / Shopping List
- Red velvet cake mix
- Water
- Vegetable oil
- Eggs
- Whole milk
- Cheesecake flavored instant pudding mix
- Whipped topping (thawed)
- Green food color
- Mini marshmallows
- Red M&M’s
- Green M&M’s
- Red sprinkles
Substitutions and Additions
- Create Your Own Cake: You can have a lot of fun with poke cakes by switching out the cake mix, pudding, and topping flavors!
- Valentine’s Day: It is so easy to make a beautiful Valentine’s Day poke cake by mixing pink food color into the whipped topping instead of green and decorating the top with your favorite red candies and sprinkles.
- Festive 4th of July: Make it red, white, and blue! Mix blue food color into the whipped topping or simply keep it white. Then decorate your cake with your favorite red and blue candies and sprinkles.
- Dessert Decorations: Feel free to decorate your Christmas cake with your own topping ideas. You can add crushed peppermints, candy canes, red berries, fresh holly leaves, or white chocolate shavings for a festive appearance.
Recommended Tools to Make this Recipe
- Handheld mixer
- 9×13 baking pan
- Mixing bowl and measuring tools
- Wooden spoon
SEE FULL PRINTABLE RECIPE CARD BELOW
How to Make the Red Velvet Poke Cake for Christmas
Christmas Red Velvet Poke Cake is a delicious, moist holiday cake that is easily made with a boxed cake mix, pudding, and whipped topping. It takes only 10 quick minutes to prepare this festive dessert with spirited seasonal colors and fabulous flavors.
- Prepare cake mix according to the instructions on the box.
- Pour batter into cake pan and bake (see box for baking times).

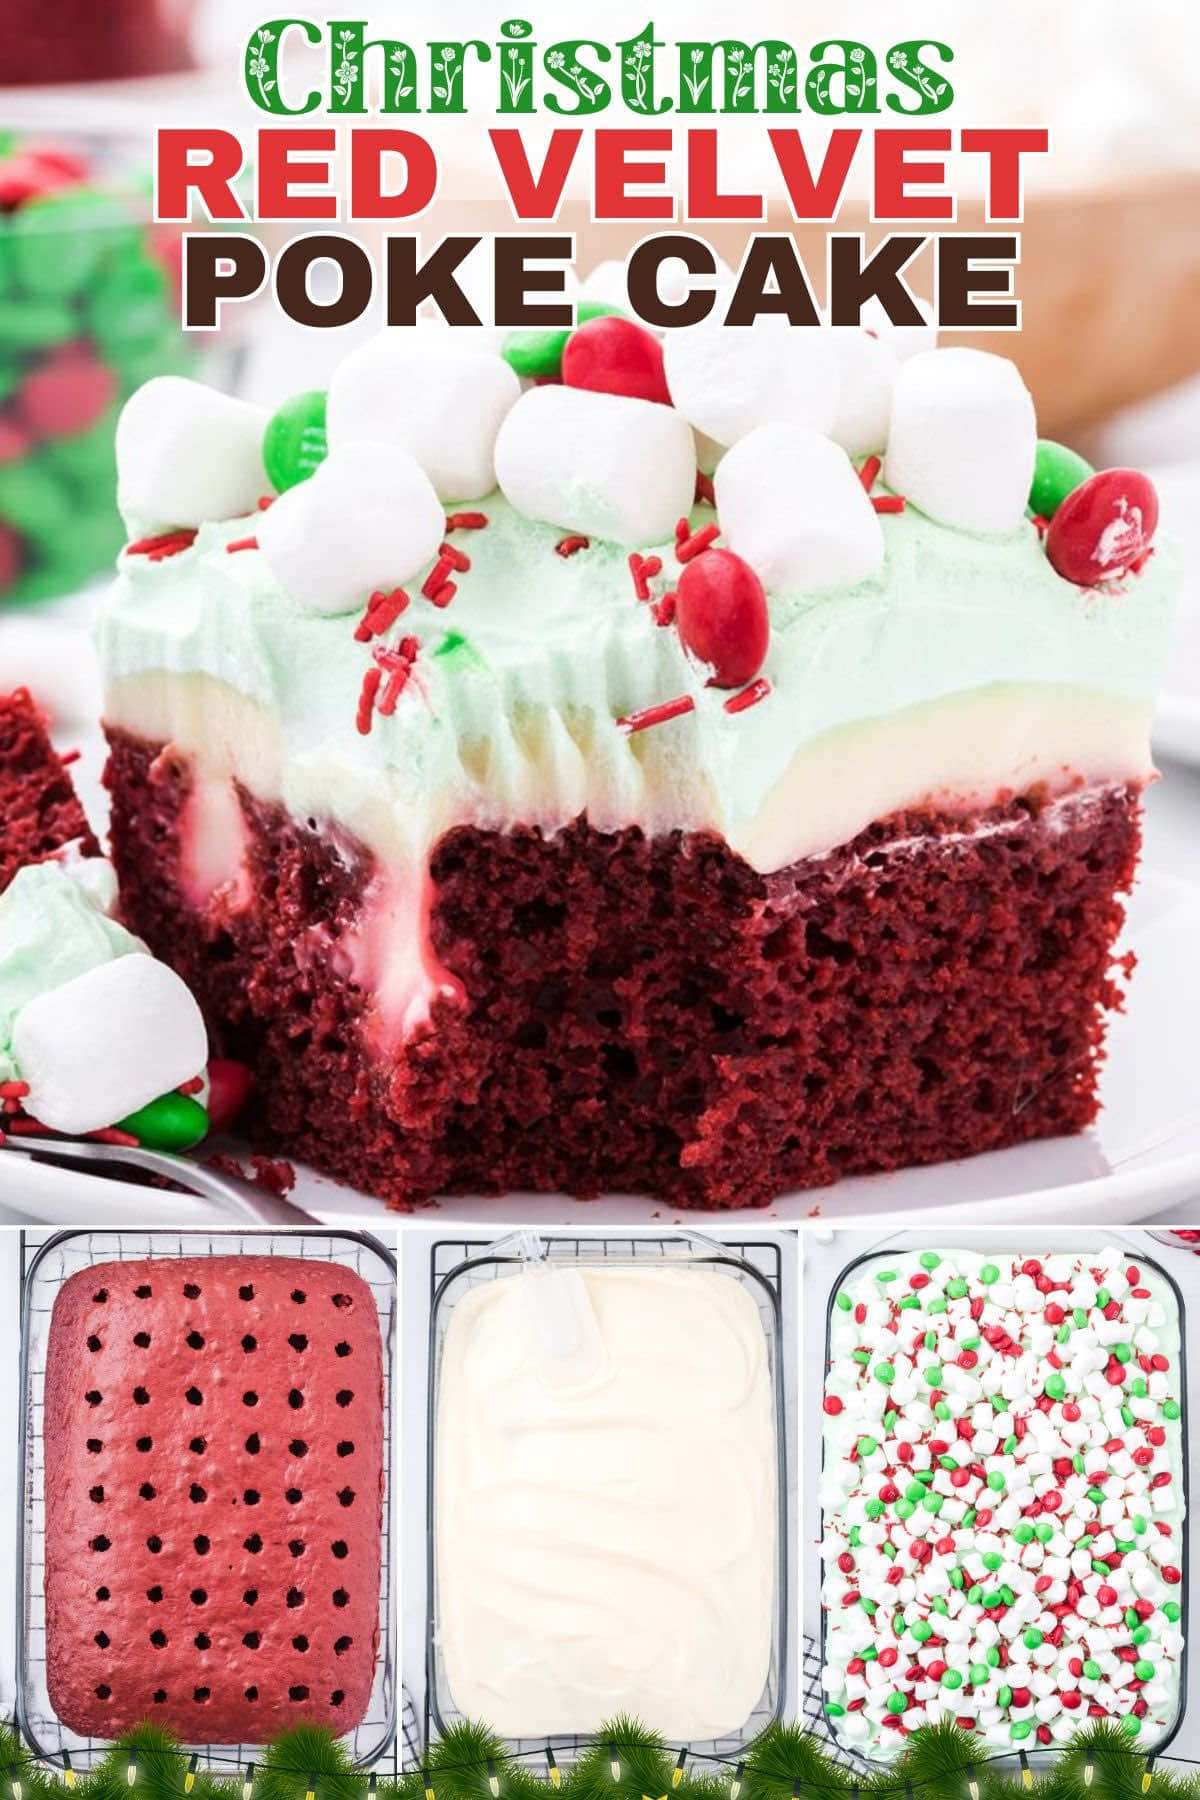
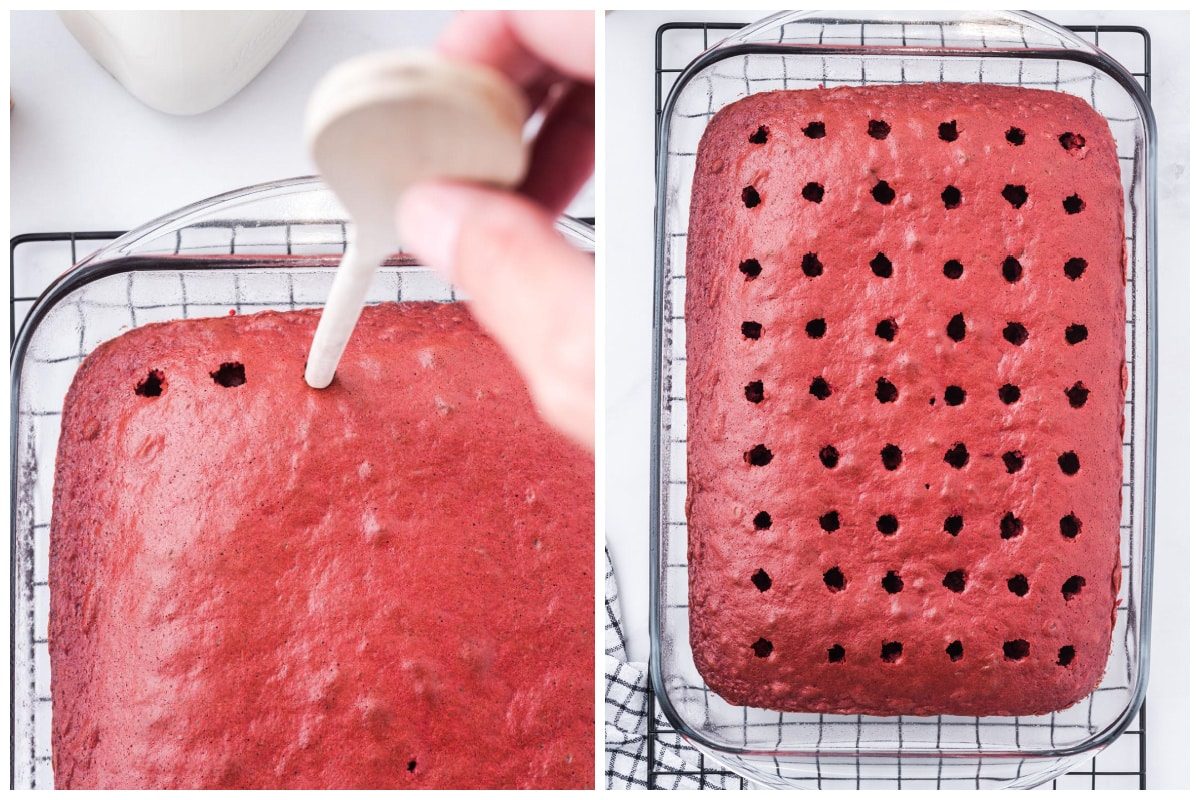
- Poke holes in the cake with the handle of a wooden spoon and set aside to cool.
Pro Tip: Holes should be approximately 1/2 inch apart. To poke holes, I recommend using a large round wooden spoon handle or other similar sized object so that the holes are fairly big and the pudding has plenty of room to seep down in between. Be sure to poke right down to the bottom of the cake. - Whisk together pudding mixes with the milk, just until the pudding begins to thicken.
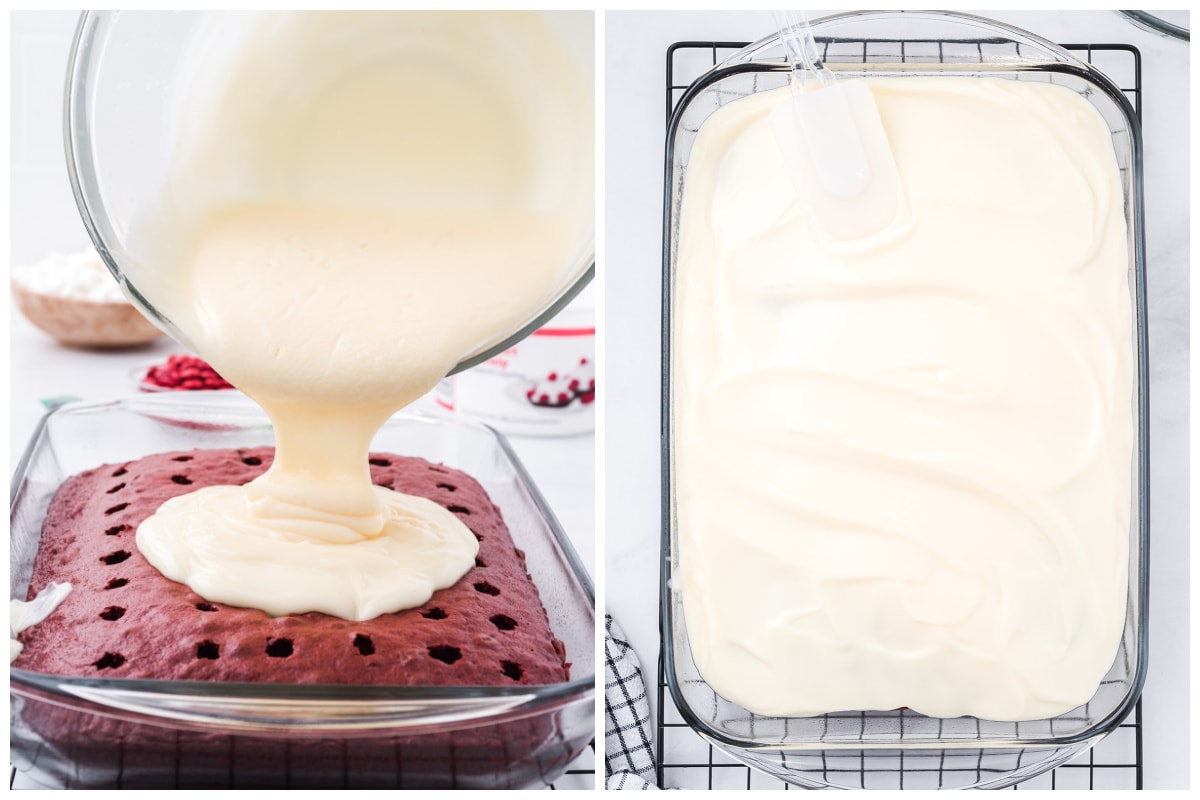
- Pour the pudding over the baked cake and smooth with a spatula to cover completely.
Pro-Tip: Don’t let the pudding set before pouring onto cake. Whisk the pudding well for a minute or two then start pouring straight into the holes of the cake. - Cover cake and place in the refrigerator to chill for 30 minutes.
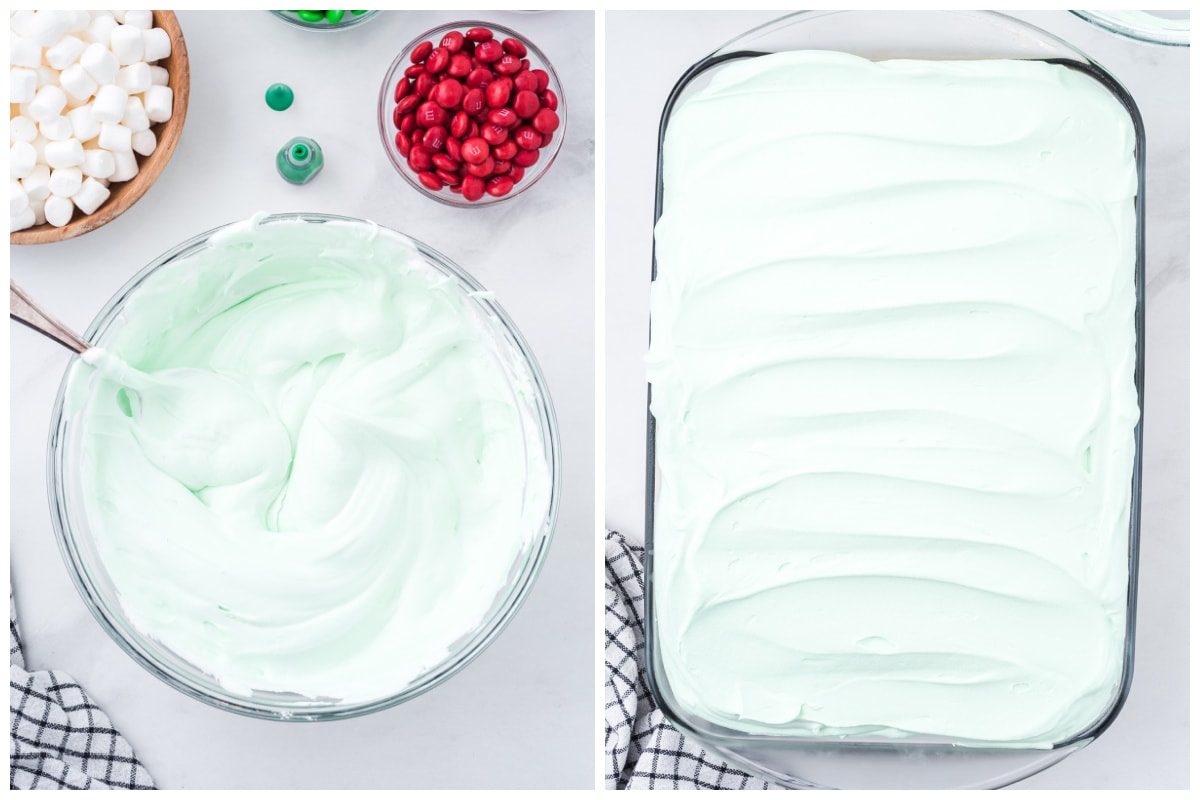
- Stir food color into whipped topping until green color is uniform.
- Spread green whipped topping over the chilled pudding layer.
Pro-Tip: Depending on how dark or light you prefer the tinted whipped topping layer, you can use green food gel. Gel food coloring is very concentrated and not as “liquidy” as liquid food coloring. Therefore, gel food coloring is good to use when you want very vibrant colors. - Spread mini marshmallows, M&M’s, and sprinkles over the whipped topping layer.
Pro-Tip: If you choose to decorate your cake with white chocolate shavings, you can use a white chocolate candy bar or white almond bark and a vegetable peeler. Carefully use gentle downward pressure against the side of the candy bar. - Tightly cover the cake and chill in the refrigerator for 4 hours.
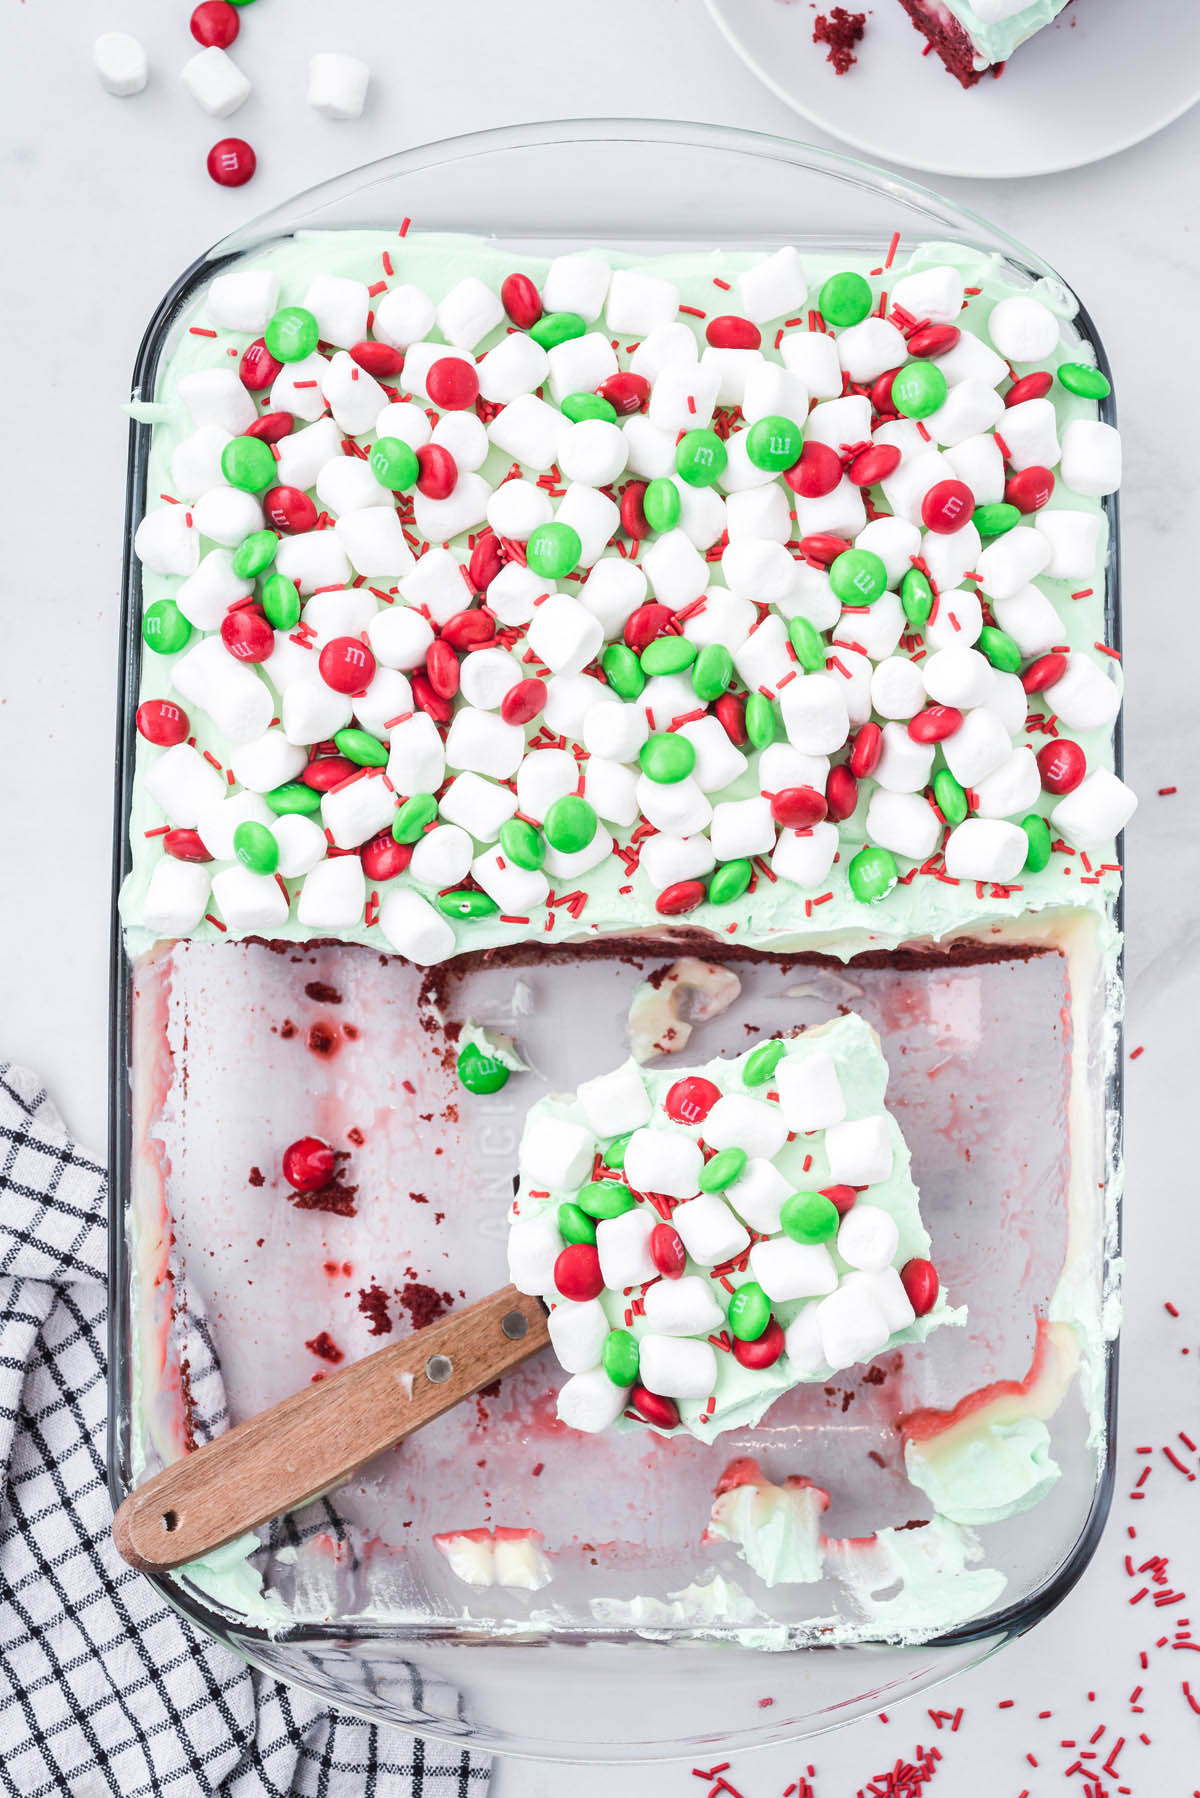
Pro-Tip: You can shorten the chill time to 2 hours, but keep in mind that the longer you leave the cake in the refrigerator, the longer the pudding has to set properly. - Cut, serve, and enjoy!
Pro Tip: This cake makes 12- 3×3 inch squares.

Tips
- To poke holes, I recommend using a large round wooden spoon handle or other similar sized object so that the holes are fairly big and the pudding has plenty of room to seep down in between. Be sure to poke right down to the bottom of the cake.
- Don’t let the pudding set before pouring onto cake. Whisk the pudding well for a minute or two then start pouring straight into the holes of the cake.
- Depending on how dark or light you prefer the tinted whipped topping layer, you can use green food gel. Gel food coloring is very concentrated and not as “liquidy” as liquid food coloring. Therefore, gel food coloring is good to use when you want very vibrant colors.
- You can shorten the chill time to 2 hours, but keep in mind that the longer you leave the cake in the refrigerator, the longer the pudding has to set properly.
- If you choose to decorate your cake with white chocolate shavings, you can use a white chocolate candy bar or white almond bark and a vegetable peeler. Carefully use gentle downward pressure against the side of the candy bar.
Storage Tips
- To Store: Keep any leftovers covered in the refrigerator for up to 3 days.
Frequently Asked Questions
A poke cake is a cake that you poke holes in after baking it. The holes then are filled with a liquid or filling. Popular fillings include condensed milk, pureed fruit, chocolate cream, caramel or chocolate sauce, or pudding, like in this recipe.
If you prefer homemade whipped cream (we have a delicious recipe for one), you can absolutely make your own whipped topping. Homemade whipped cream often doesn’t stay stabilized for long though, so it won’t hold up as well as Cool Whip or a store-bought whipped topping.
While it certainly has a chocolate flavor and cocoa powder as the main ingredient, a red velvet cake is not a chocolate cake! It has far less cocoa powder in it than a traditional chocolate cake recipe.
Other Easy Christmas Recipes
- The Best Christmas Sugar Cookie Recipe
- Melted Snowman Fudge
- Hot Chocolate Cookie Cups
- Christmas Peanut Butter Blossom Cookies
- Christmas Pinwheel Cookies
- Christmas Tree Brownies
- Ugly Christmas Sweater Cake
- Reindeer Chow Chex Mix
- Candy Cane Dip
- Snowball Cookies
Christmas Red Velvet Poke Cake
Ingredients
Red Velvet Cake
- 15.25 ounce red velvet cake mix
- 1¼ cup water
- ½ cup vegetable oil
- 3 large eggs
Cheesecake Flavored Instant Pudding Mix
- 3¾ cups cold whole milk
- 6.8 ounce cheesecake flavored instant pudding mix
Whipped Topping and Decoration
- 16 ounce (2 tub) whipped topping thawed
- 10-12 drops green food color
- 3 cups mini marshmallows
- ¼ cup red M&M’s
- ¼ cup green M&M’s
- red sprinkles
Instructions
Red Velvet Cake
- Preheat the oven to 350*. Spray a 9×13 with bakers spray (Baker's Joy or generic version). Set it aside.
- Using a medium size mixing bowl and a handheld mixer on medium speed, prepare the cake mix according to the box directions.
- Bake for 25 minutes.
- Using a rounded handle of a wooden spoon, poke holes into the cake about ½ inch apart. Set it aside to cool.
Cheesecake Flavored Instant Pudding
- Using a medium size mixing bowl, whisk together the pudding mixes and the cold milk for 1 – 1 ½ minutes, just until the pudding starts to thicken.
- Evenly pour the pudding over the prepared cake. Use a spatula to smooth the pudding over the prepared cake.
- Tightly cover the cake and chill in the refrigerator for 4 hours.
Whipped Topping Layer
- Using a spoon, stir in the green food color into the thawed whipped topping. Stir until the color is uniform.
- Remove the cake from the refrigerator. Evenly spread the tinted whipped topping over the pudding layer.
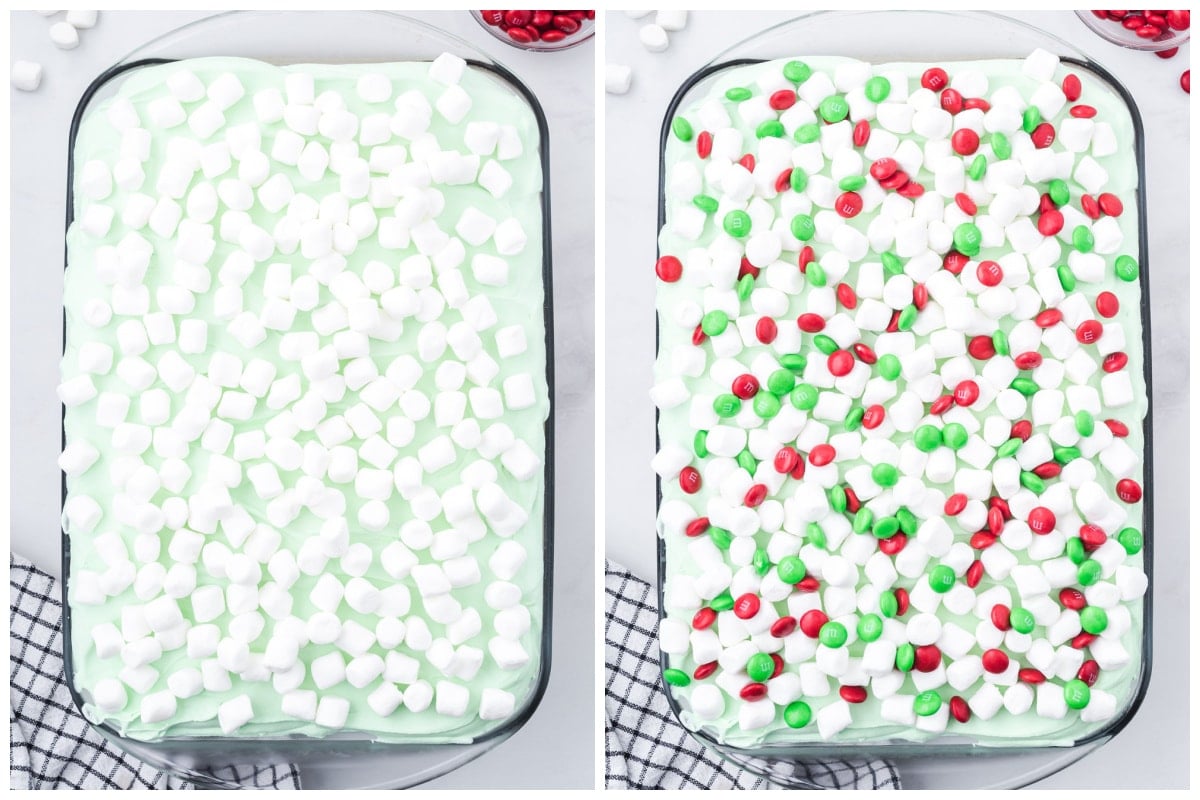
- Evenly sprinkle the mini marshmallows over the tinted whipped topping layer.
- Evenly sprinkle the red and green m and m’s and the red sprinkles.
- Cut 12 – 3 inch x 3 inch squares.
Jenn’s Notes
- To poke holes, I recommend using a large round wooden spoon handle or other similar sized object so that the holes are fairly big and the pudding has plenty of room to seep down in between. Be sure to poke right down to the bottom of the cake.
- Don’t let the pudding set before pouring onto cake. Whisk the pudding well for a minute or two then start pouring straight into the holes of the cake.
- Depending on how dark or light you prefer the tinted whipped topping layer, you can use green food gel. Gel food coloring is very concentrated and not as “liquidy” as liquid food coloring. Therefore, gel food coloring is good to use when you want very vibrant colors.
- You can shorten the chill time to 2 hours, but keep in mind that the longer you leave the cake in the refrigerator, the longer the pudding has to set properly.
- If you choose to decorate your cake with white chocolate shavings, you can use a white chocolate candy bar or white almond bark and a vegetable peeler. Carefully use gentle downward pressure against the side of the candy bar.


Can you just omit the whipped topping – would it still be good?
Not a cool whip fan
Yes you can skip the whipped topping if you’re not a fan and it will still be tasty, it just won’t have that light, creamy layer on top that the recipe calls for. The whipped topping in this poke cake gives it a soft finish and helps balance the pudding-soaked cake texture, but the cake and pudding layers themselves are still delicious without it. 
If you want an alternative, you could spread homemade whipped cream on top right before serving or even try a cream cheese frosting for a richer finish. Both will change the experience just a little but still taste great. 
So go ahead and skip the Cool Whip if it’s not your thing. The cake will still be good, just a bit less creamy on top.
This is just a red cake. Not red velvet.
What? You’re literally using red velvet cake mix…. When you really need something to complain about 🙄
do you send Free cook books