This post may contain affiliate links. Please read our disclosure policy.

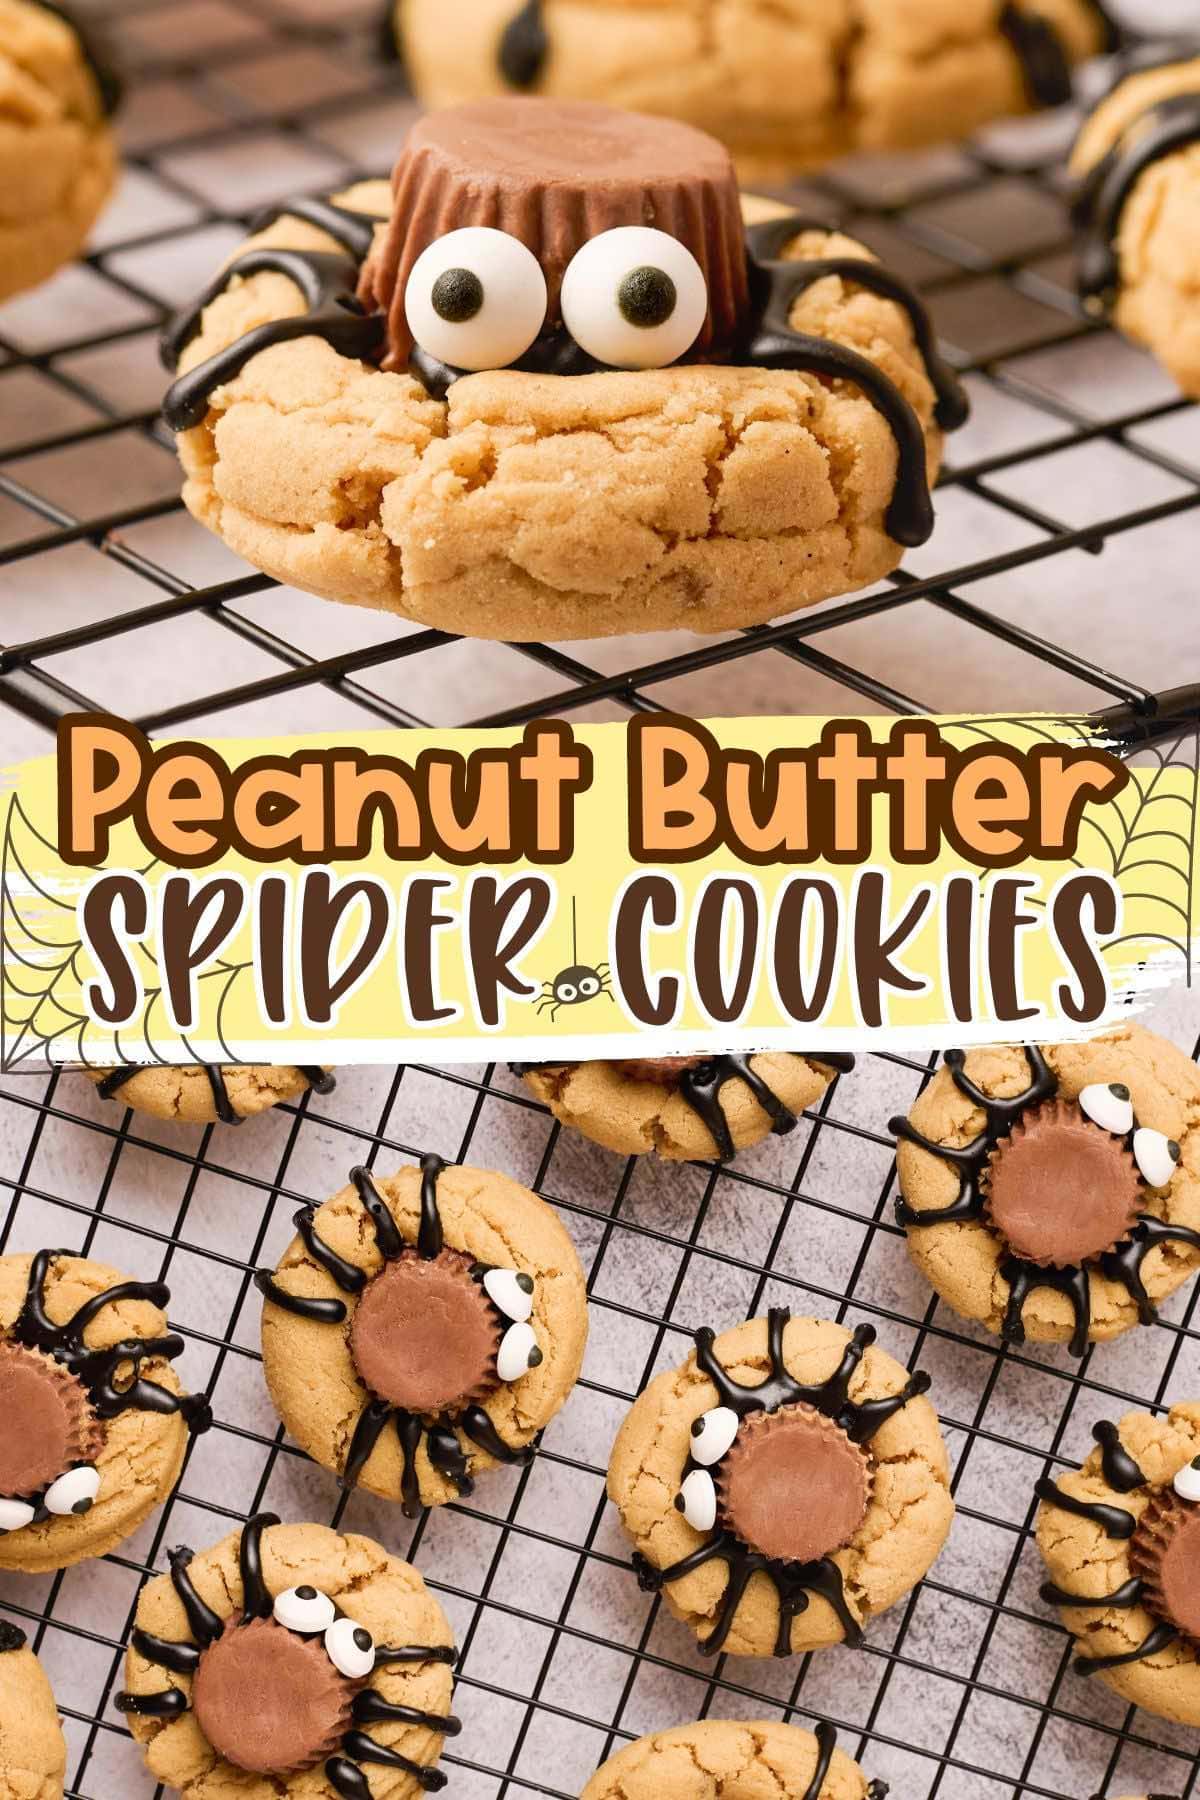
Peanut Butter Spider Cookies recipe is the perfect cookie for your Halloween dessert! Fun to make with the kids and easy to prepare using basic pantry staples that bake into the best soft and chewy peanut butter cookie ever.
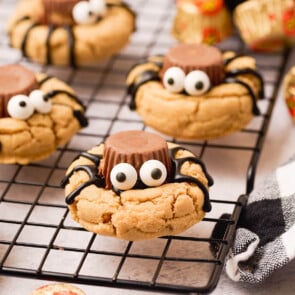
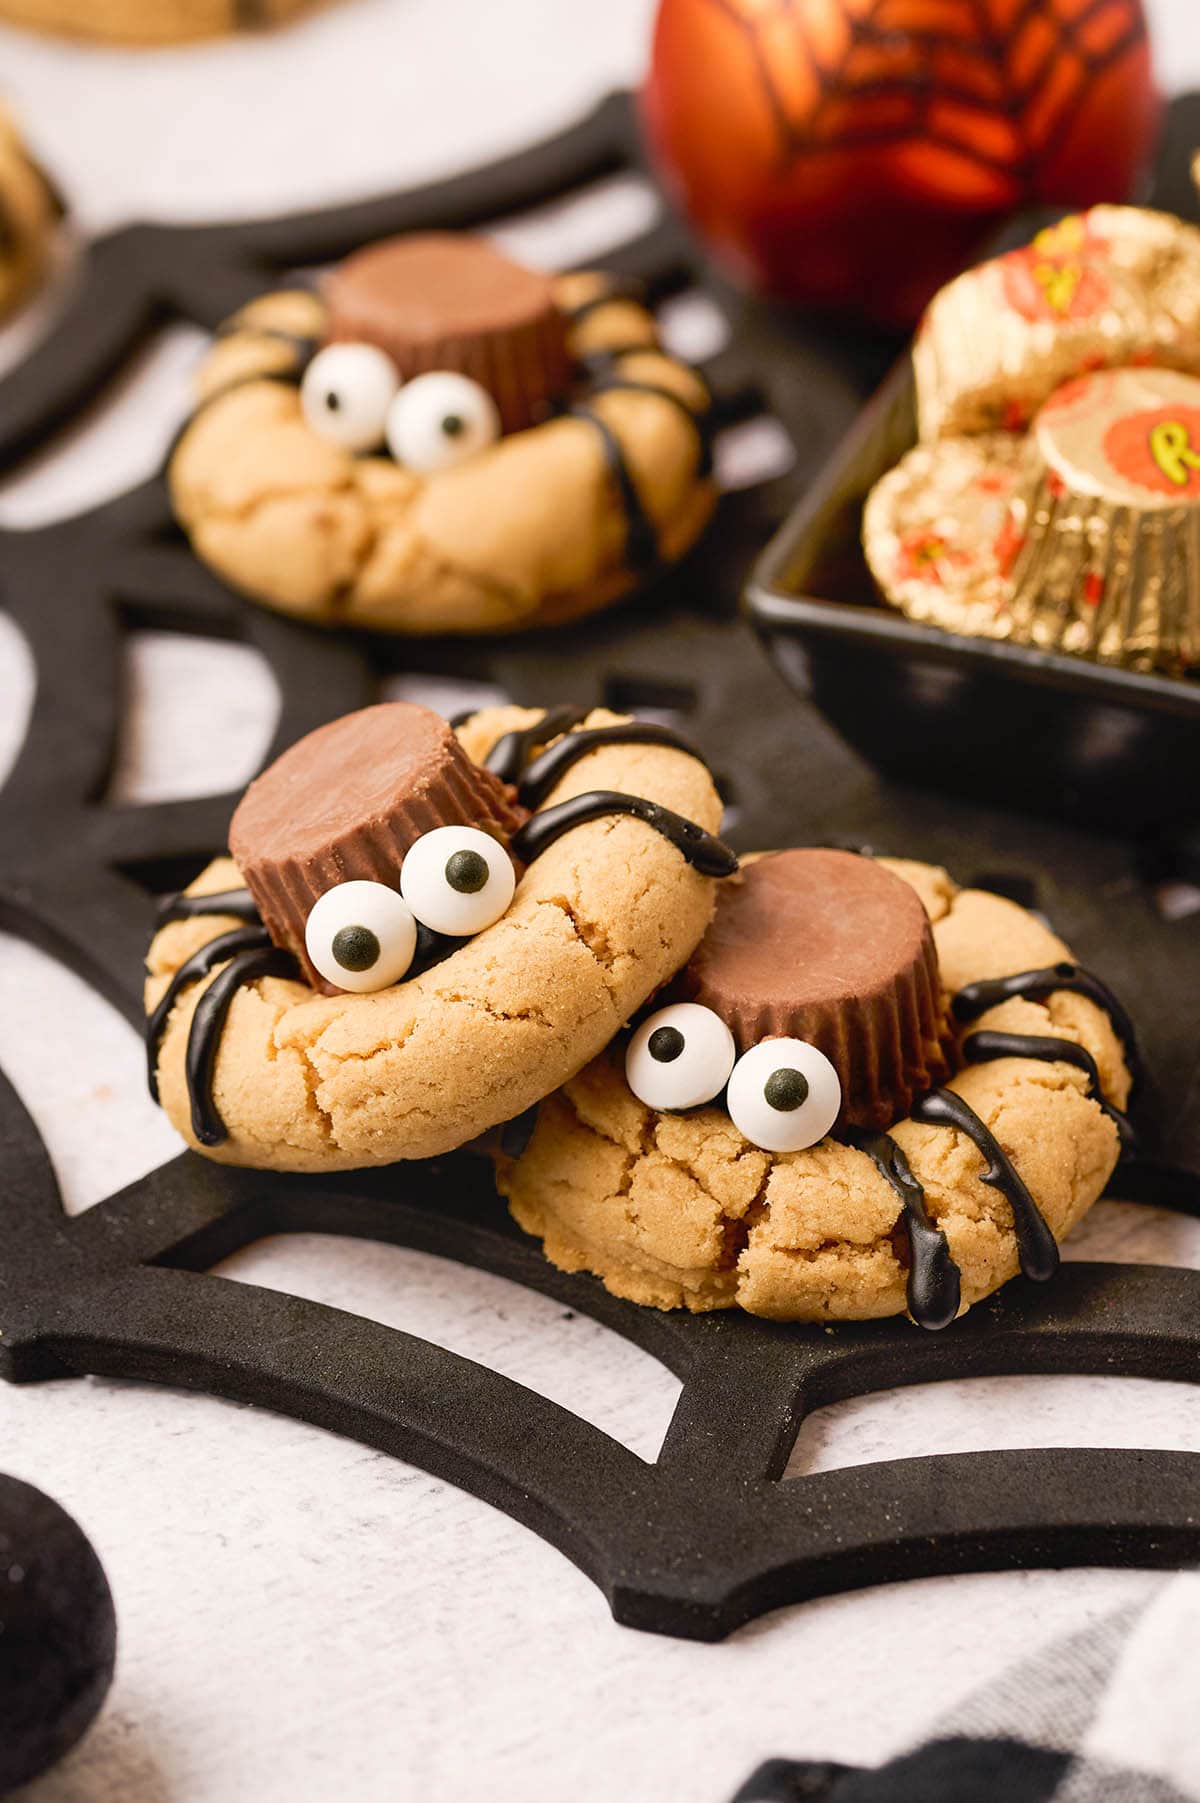
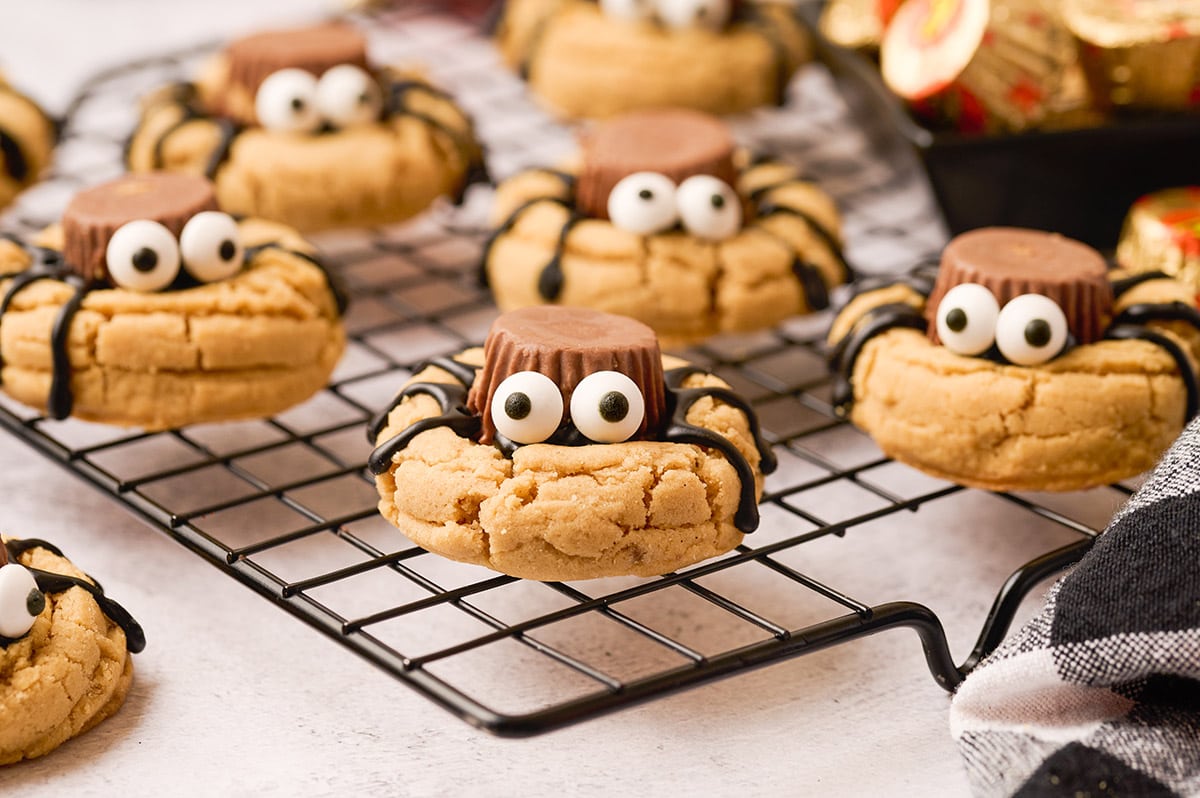
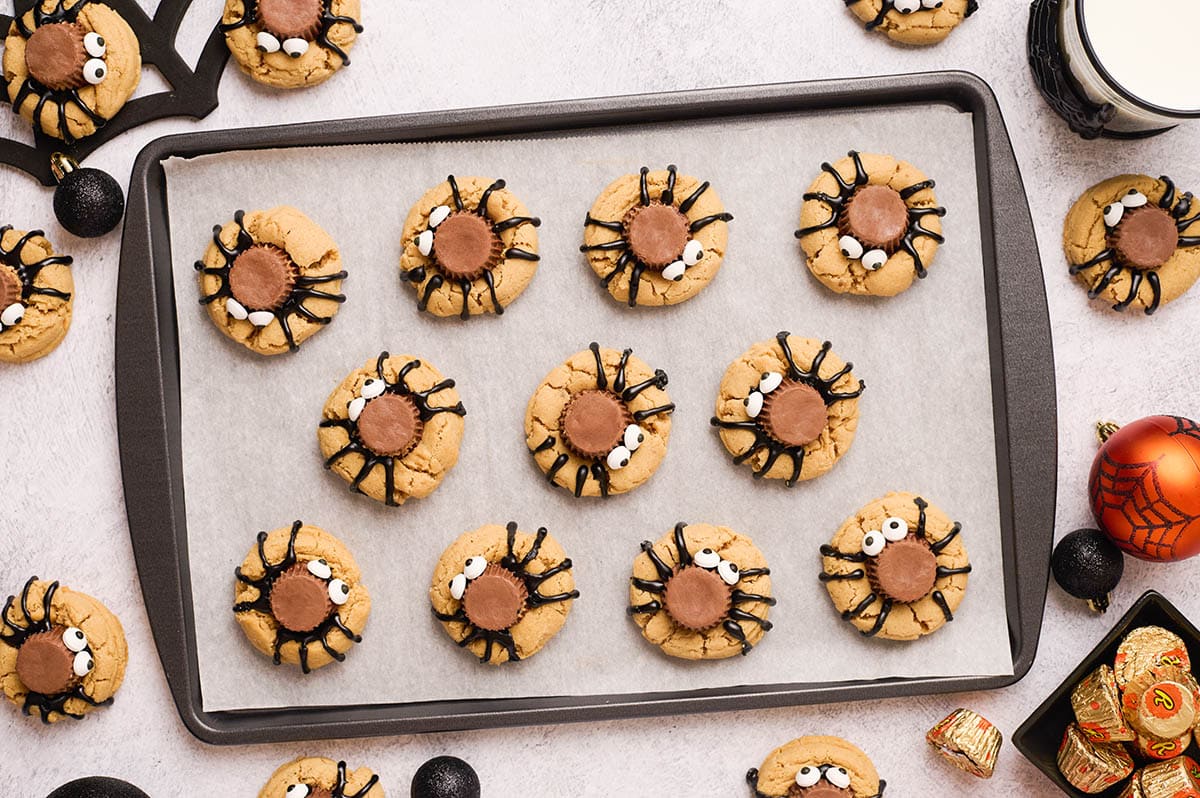
All dressed up for Halloween, these spooky spider cookies are decorated with mini Reese’s cups, eyes, and 8 legs – they make a fun dessert to feed your favorite costumed crowd.

Halloween Peanut Butter Spider Cookies
Our Peanut Butter Spider Cookies recipe takes a classic peanut butter blossom cookie and dresses it up as a cute and creepy treat, but rather than topping it with a chocolate kiss, it uses a Reese’s cup to create an adorable edible animal.
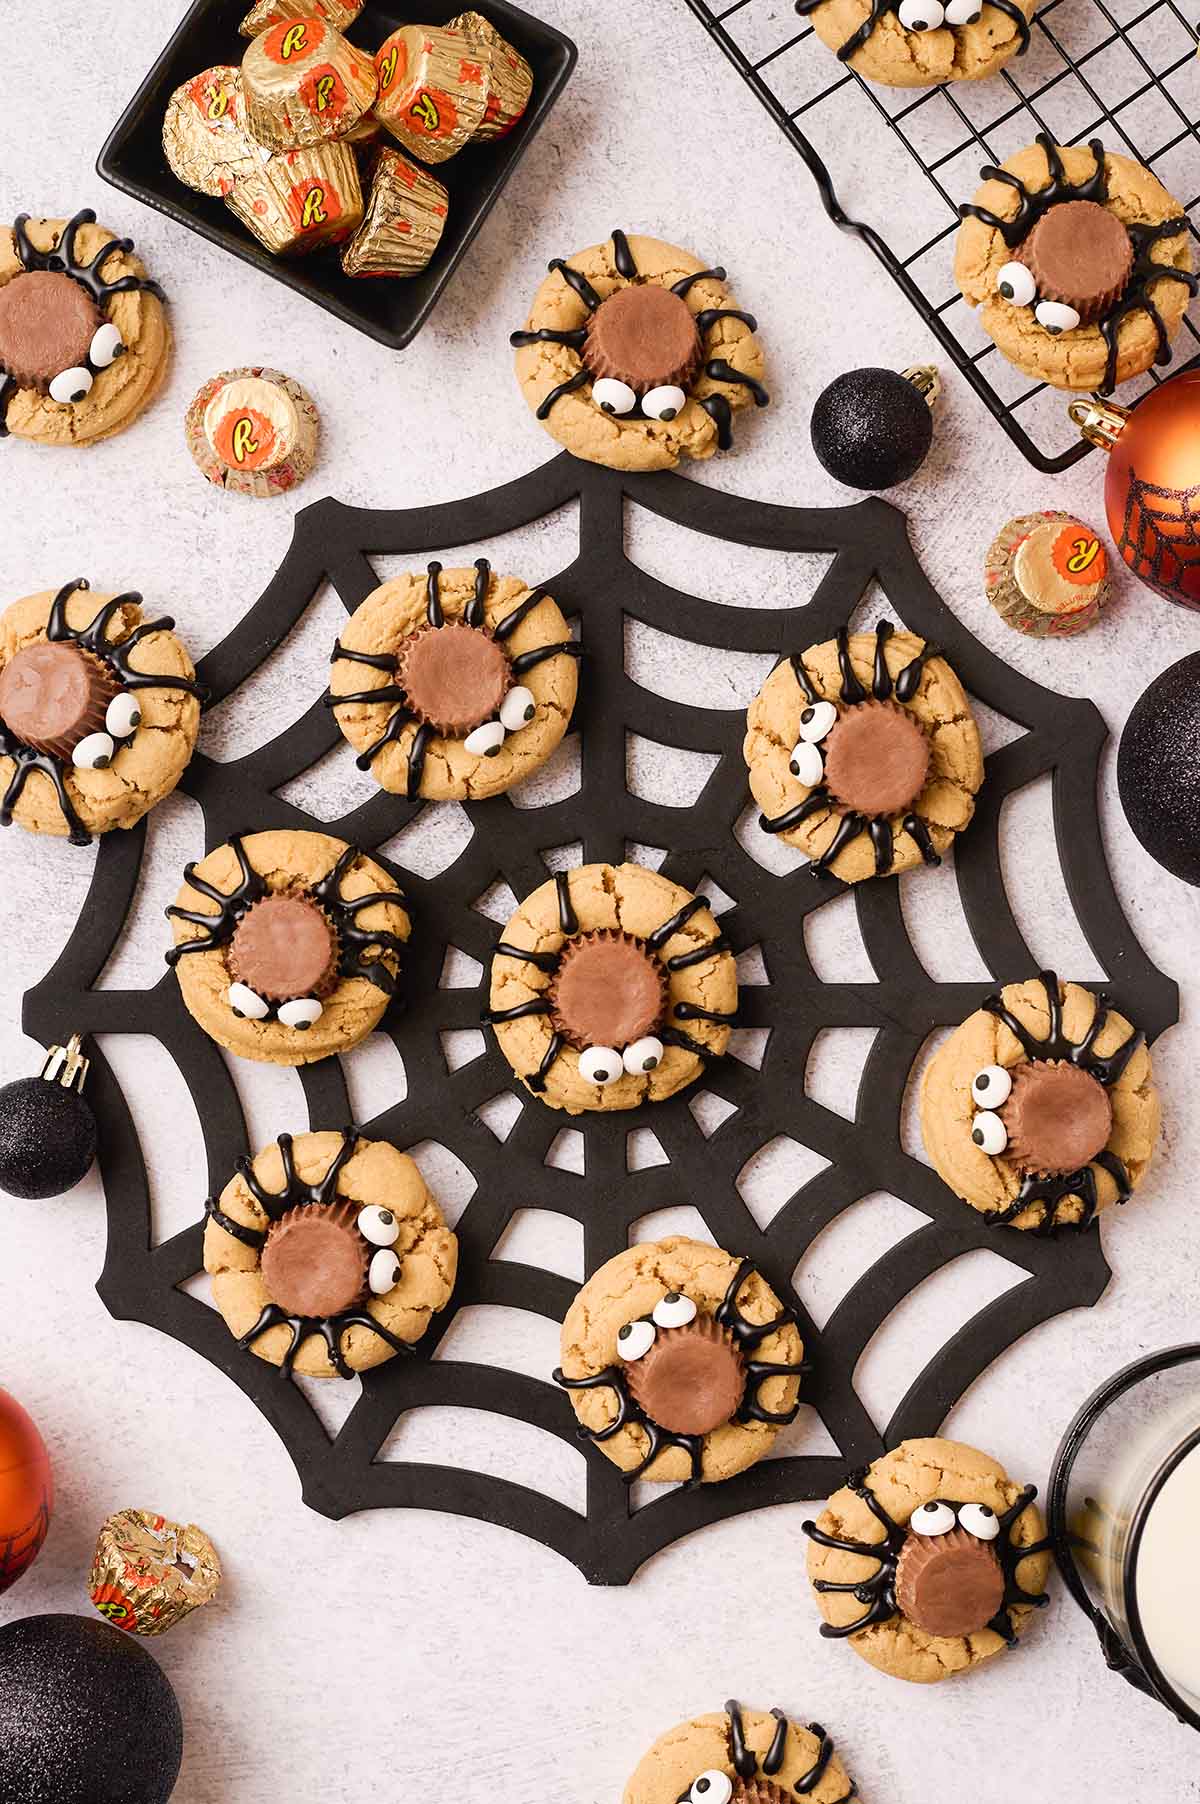
Perfect for a Halloween party, it’s always a fun Halloween treat when decorating with candy doubles as kids’ crafts and delicious desserts.
This recipe for spider cookies starts with a simple homemade dough; it’s rolled into balls, baked for 10 minutes, and topped with candy in the center cavity.
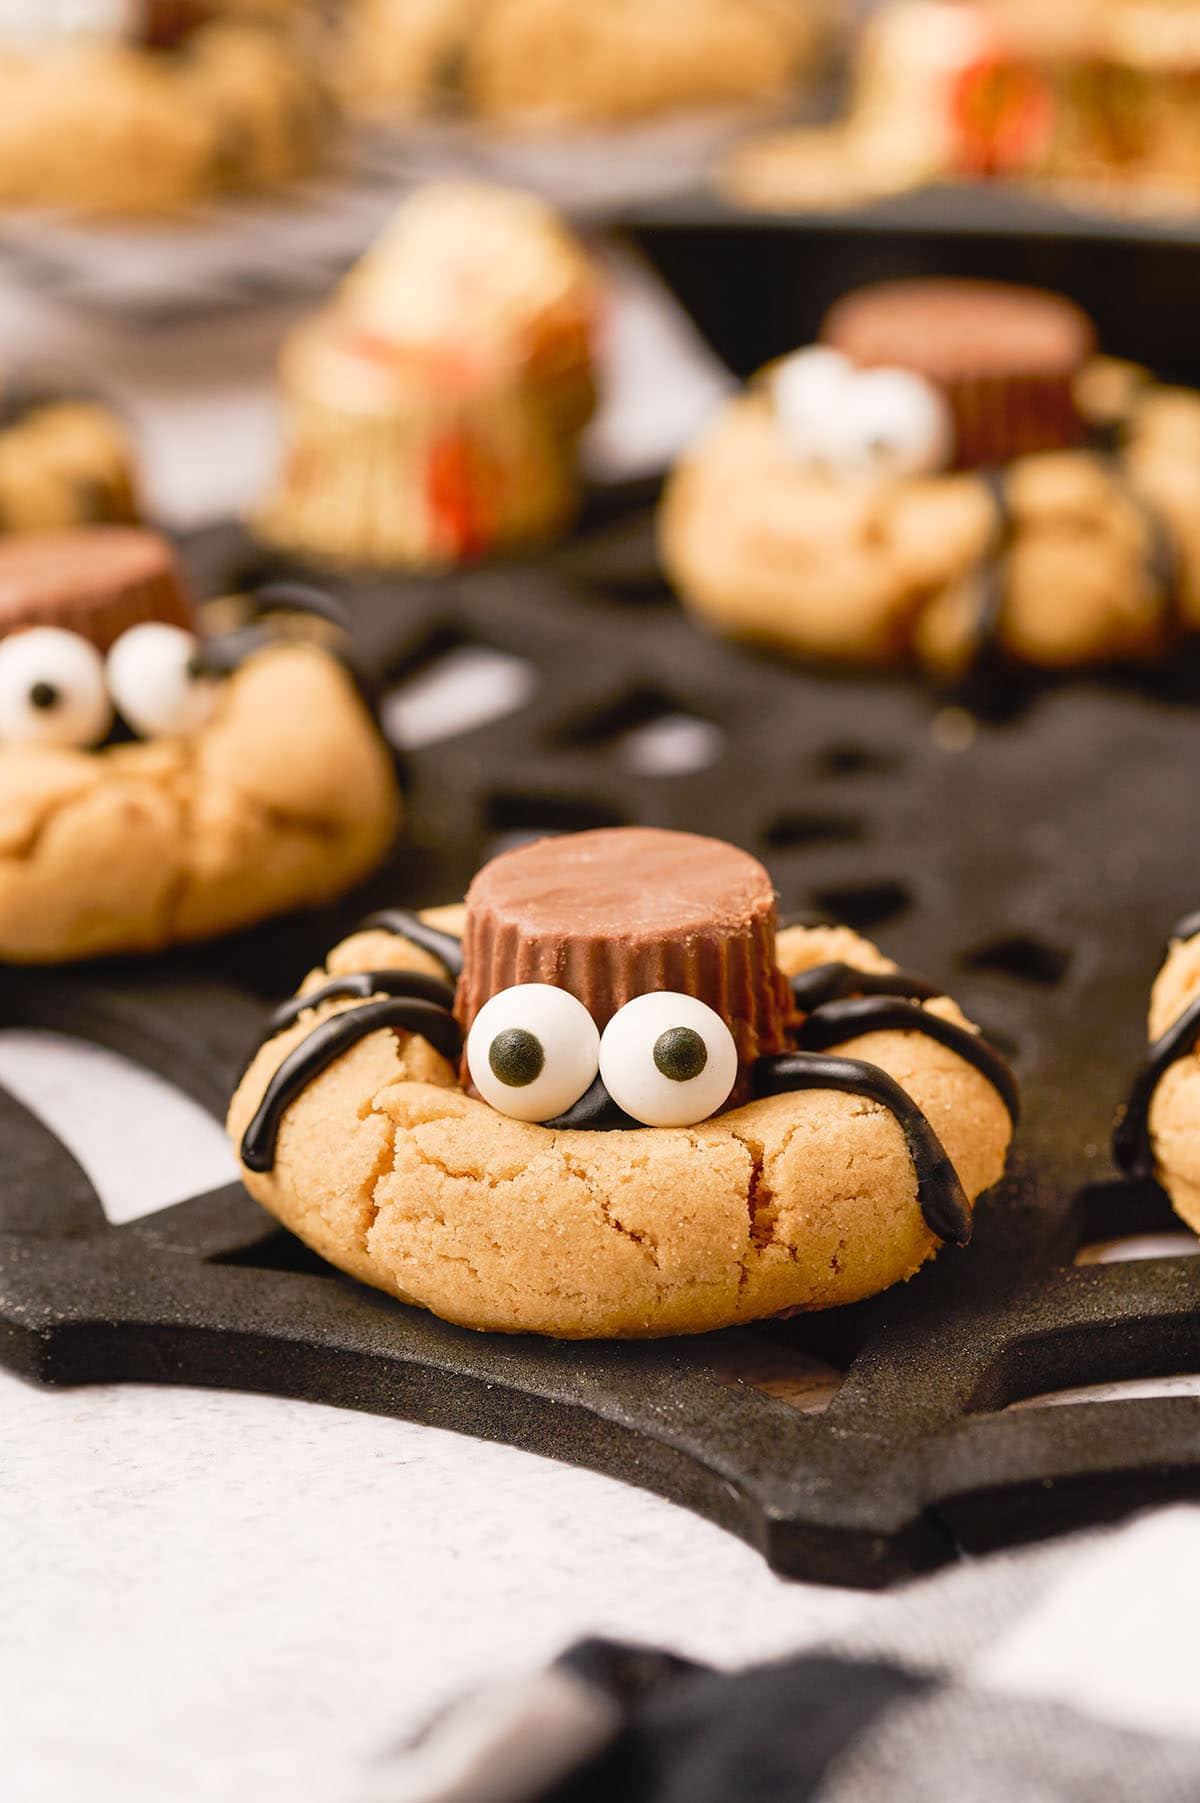
Once cooled, it’s time to bring the creepy creature to life by creating spider legs and adding eyes – don’t let this Halloween spider recipe scare you because it only takes a few simple steps to create perfect Halloween peanut butter cookies.
Why We Love This Halloween Spider Cookies Recipe
- Quick and easy to prepare in 25 minutes (including making the cookie dough and decorating).
- Uses simple pantry ingredients.
- Peanut butter and chocolate just belong together!
- Fun activity for kids to make their own spider Halloween food.
- Reese’s peanut butter cups add the perfect touch on top of the soft and chewy bottom.
- Perfect sweet treat for Halloween parties, holiday celebrations, or handing out to friends.
Other Easy Halloween Recipes


Ingredients
- Unsalted butter: If you want to use salted butter instead of unsalted, omit the added salt.
- Granulated sugar
- Brown sugar
- Creamy peanut butter: Use processed peanut butter, like Jif, Skippy, or any peanut butter that doesn’t have a layer of oil on top.
- Egg
- Vanilla extract
- All-purpose flour
- Baking soda
- Salt: Make sure to use iodized table salt.
- Mini Reese’s cups
- Black cookie icing: I love the convenience of a writing tip that attaches to a store-bought package of cookie icing. It makes it so easy to draw on the spider legs!
- Candy eyes
Substitutions and Additions
- Build The Body: Feel free to use Rolo’s, a Ferroro Roche chocolate ball, chocolate truffles (such as Lindt Lindor Truffles), Whoppers, or any other kind of round chocolate candy to form the spider’s body.
- Change The Cookie Icing: Instead of using cookie icing, you can draw on the spider’s legs with melted chocolate or chocolate frosting by piping it through a small round tip.
Recommended Tools
- Baking sheets
- Parchment paper
- Mixing bowl
- Electric mixer (handheld or standing)
- Measuring cups and spoons
- Cookie scoop (optional)
How to Make Peanut Butter Spider Cookies
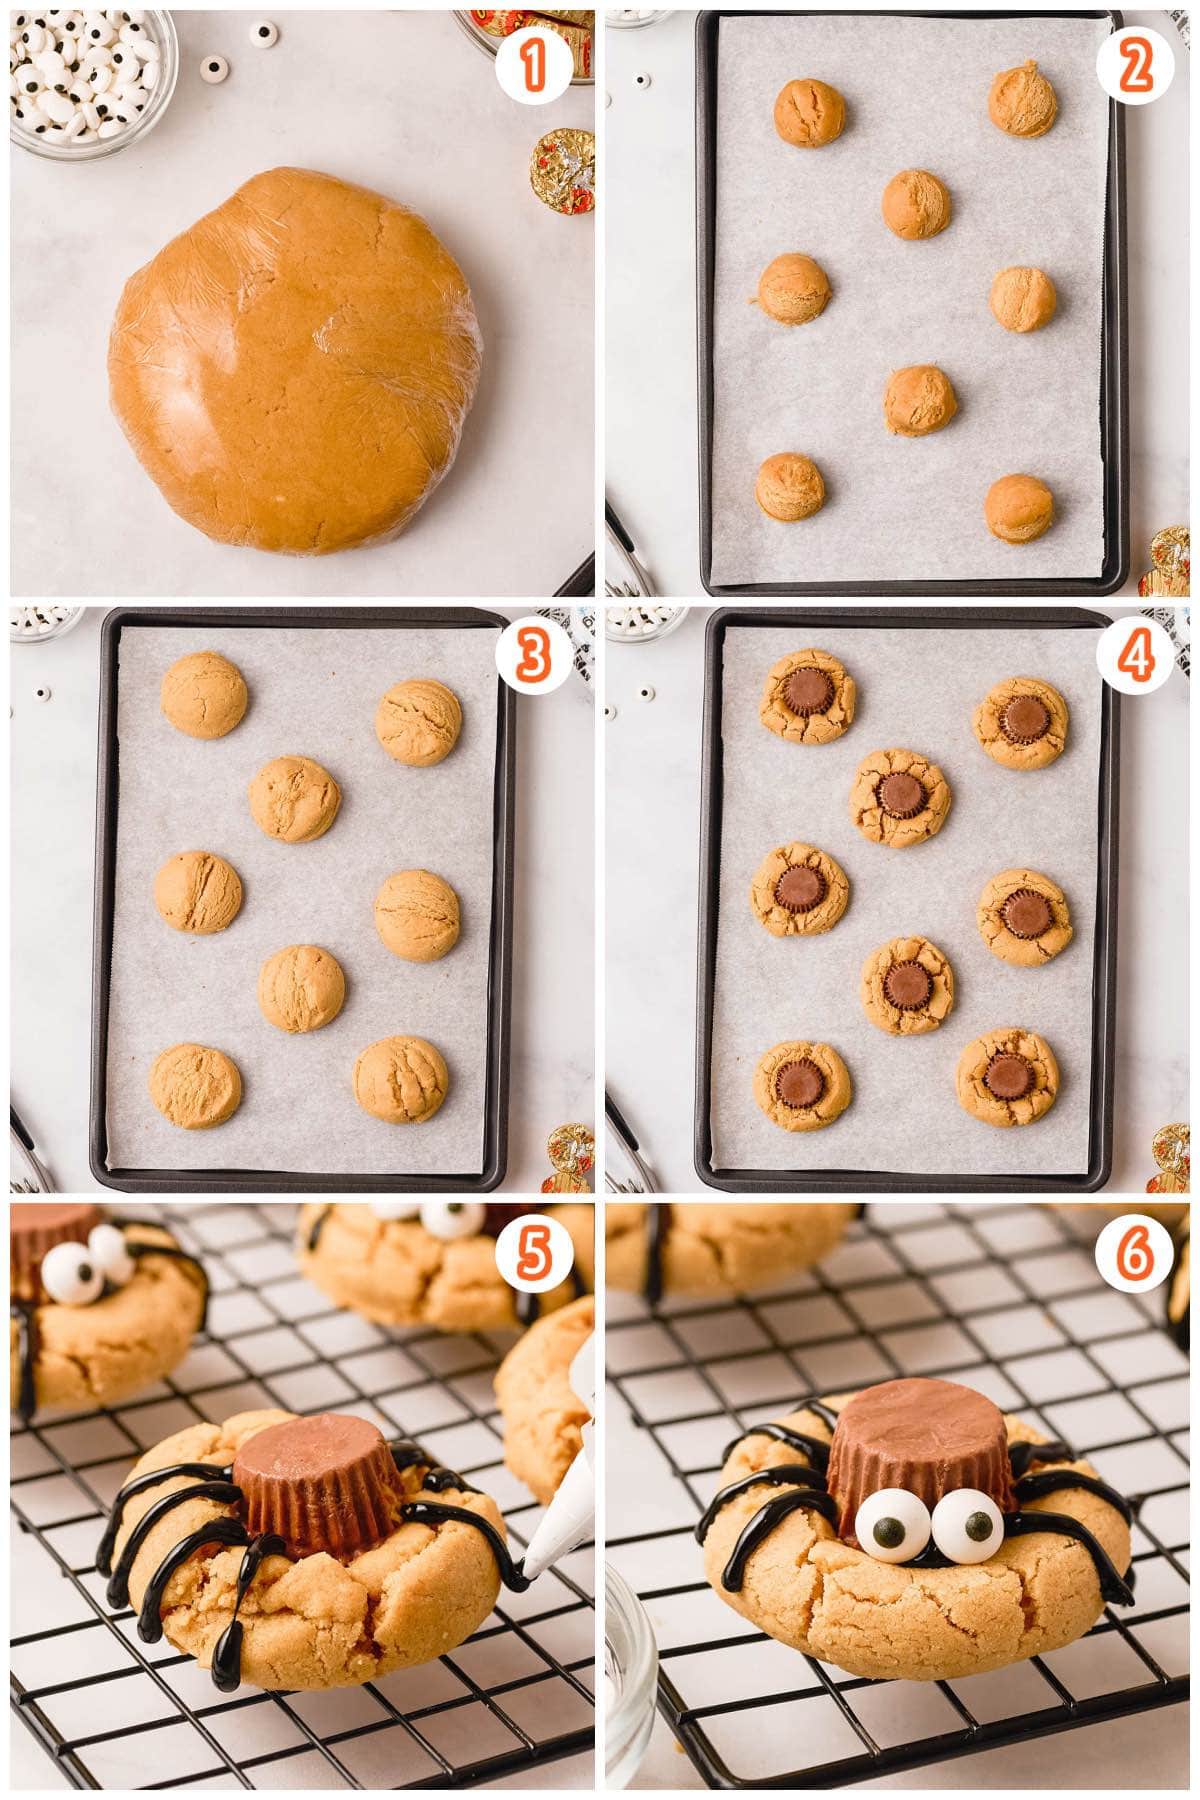
- Make The Dough: Beat together the butter and sugars until creamed, then mix in the peanut butter. Add the egg and vanilla extract and beat until just combined. Mix in the flour, baking soda and salt.
- Chill: Shape the cookie dough into a disc and wrap in plastic wrap. Chill in the refrigerator for one hour. At the same time, chill the mini Reese’s cups in the refrigerator.
- Bake: Roll the dough into 1-inch balls and place them on the baking sheet about two inches apart. Bake at 350 degrees Fahrenheit for 10-11 minutes, just until the cookies begin to crack.
Pro Tip: Bake each sheet of cookies separately on the middle rack. - Add Candy And Cool: As soon as the cookies come out of the oven, press a Reese’s cup into the center of each cookie and move to a cooling rack.
Pro Tip: While the cookies bake, unwrap the Reese’s cups and then keep in the refrigerator until use. - Decorate: Pipe on the spider’s legs and glue two eyes to the body of the Reese’s cups. Enjoy!
Tips From Our Recipe Developer
- If using a handheld electric mixer or a mixing bowl with low sides, start mixing the butter and sugar together on a low speed for 30 seconds, until the butter and sugar begin to hold together. Then, increase to medium speed. You want to start on a low speed so that the sugar doesn’t fly out of the bowl.
- For a more moist cookie, lower the flour amount to 1 ¾ cups of flour. However, the reduced amount of flour won’t produce the same lifted dome that you’ll get from the extra couple tablespoons.
- Don’t skip on chilling the Reese’s cups. If you add room temperature Reese’s onto a warm cookie, it will melt.
- Wait to unwrap the Reese’s until after they’ve been chilled in the refrigerator. Some of the chocolate will peel away with the wrapper of the mini Reese’s cups when you unwrap them. The Reese’s will stay more intact if they are unwrapped chilled vs unwrapped at room temperature.
- If you forget to chill the Reese’s cups for an hour in the fridge, pop them in the freezer for 10 minutes. Either way, just make sure that they’re chilled and not room temperature!
- Room temperature butter is ideal for this recipe.
- The cookies will still be soft when they come out of the oven. It’s OK if the tops haven’t cracked when you take them out, but if they’re cracked at 10 minutes, they’re ready. They’ll continue to cook for a minute or two more while you’re placing the Reese’s cups in them, and then will firm up as they cool.
- Make sure the cookies are fully cooled down before decorating them with the icing.
Storage
- To Store: Store cookies in an airtight container at room temperature for 3 -5 days.
- To Freeze: Once cooled, store cookies in a freezer-safe bag or container for up to 3 months.
Other Easy Cookie Recipes
- S’more Cracker Cookies
- Chocolate Pudding Cookies
- Rainbow Sprinkle Cookies
- Halloween Monster Sprinkle Cookies

Peanut Butter Spider Cookies
Ingredients
- ½ cup unsalted butter (1 stick)
- ½ cup granulated sugar
- ½ cup brown sugar
- ½ cup creamy peanut butter
- 1 large egg
- 1 teaspoon vanilla extract
- 1¾ cups + 2 tablespoons all-purpose flour
- 1 teaspoon baking soda
- ½ teaspoon salt
- 25 mini reese’s cups
- Black cookie icing
- 25 pairs of candy eyes
Instructions
- Add the butter and sugars to a large mixing bowl. Use an electric mixer to beat them together on medium speed for about 2-3 minutes. Once creamed, add in the peanut butter and mix again on medium speed until combined.
- Then, add the egg and vanilla extract and beat on a low speed until just combined.
- Add in the flour, baking soda and salt. Mix again on a low speed.
- Shape the cookie dough into a disc and wrap in plastic wrap. Place in the refrigerator for one hour to chill. Place the mini reese’s cups in the refrigerator to also chill.
- After the cookie dough has been chilling for one hour, preheat the oven to 350℉ and line two baking sheets with parchment paper.
- Create 1-inch balls of dough and place them on the baking sheet about two inches apart. Bake each sheet of cookies one at a time one the middle rack for 10-11 minutes, just until the cookies begin to crack. While the cookies bake, unwrap the reese’s cups and then keep in the refrigerator until use.
- As soon as the cookies come out of the oven, gently press a reese’s cup into the center of a cookie. Then, move the cookies to a cooling rack.
- Once the cookies are cool, pipe on the spider’s legs. Create eight legs by drawing four lines from the reese’s cup outward and down the cookie on each side. Dab two spots of icing to glue the eyes to the body of the reese’s cups.
Jenn’s Notes
- To Store: Store cookies in an airtight container at room temperature for 3 -5 days.
- To Freeze: Once cooled, store cookies in a freezer-safe bag or container for up to 3 months.
- If using a handheld electric mixer or a mixing bowl with low sides, start mixing the butter and sugar together on a low speed for 30 seconds, until the butter and sugar begin to hold together. Then, increase to medium speed. You want to start on a low speed so that the sugar doesn’t fly out of the bowl.
- For a more moist cookie, lower the flour amount to 1 ¾ cups of flour. However, the reduced amount of flour won’t produce the same lifted dome that you’ll get from the extra couple tablespoons.
- Don’t skip on chilling the Reese’s cups. If you add room temperature Reese’s onto a warm cookie, it will melt.
- Wait to unwrap the Reese’s until after they’ve been chilled in the refrigerator. Some of the chocolate will peel away with the wrapper of the mini Reese’s cups when you unwrap them. The Reese’s will stay more intact if they are unwrapped chilled vs unwrapped at room temperature.
- If you forget to chill the Reese’s cups for an hour in the fridge, pop them in the freezer for 10 minutes. Either way, just make sure that they’re chilled and not room temperature!
- Room temperature butter is ideal for this recipe.
- The cookies will still be soft when they come out of the oven. It’s OK if the tops haven’t cracked when you take them out, but if they’re cracked at 10 minutes, they’re ready. They’ll continue to cook for a minute or two more while you’re placing the Reese’s cups in them, and then will firm up as they cool.
Make sure the cookies are fully cooled down before decorating them with the icing.


They look so cute
Thank you! We make them every Halloween!
Hi, can I make the dough ahead of time like the night before and let it sit in the fridge overnight?
I don’t see why not!
Why does your photo show 6 legs but the directions say to pipe 8 legs? Spiders have 6 legs, not 8.
reply to Bunny,
Insects have 6 legs, Spiders have 8.
I enjoyed making/baking these delicious spider cookies. So much fun. 🎉🎉♥️
Love these!! Delicious and super cute!
5 stars!!! Family loves these!!