This post may contain affiliate links. Please read our disclosure policy.
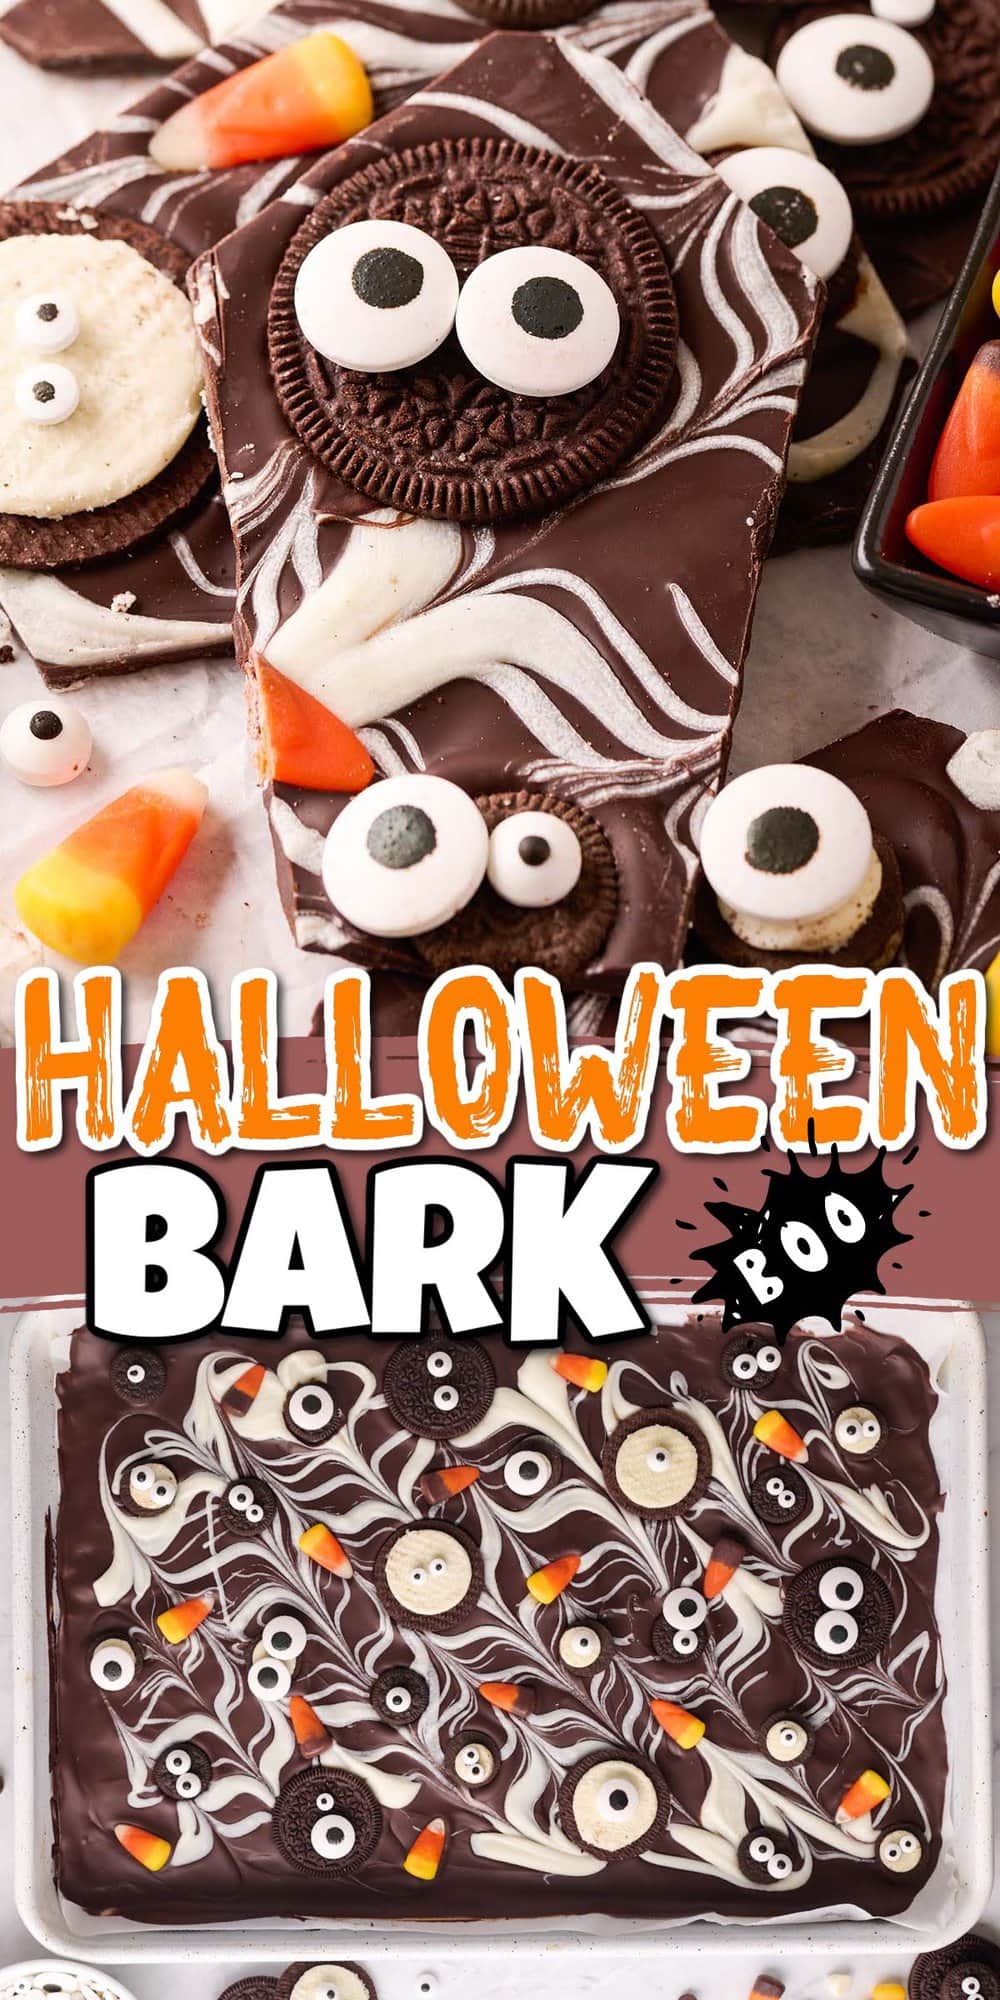
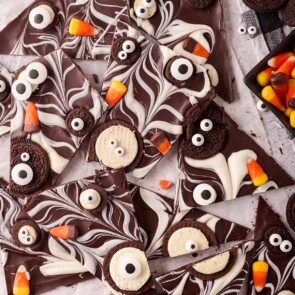
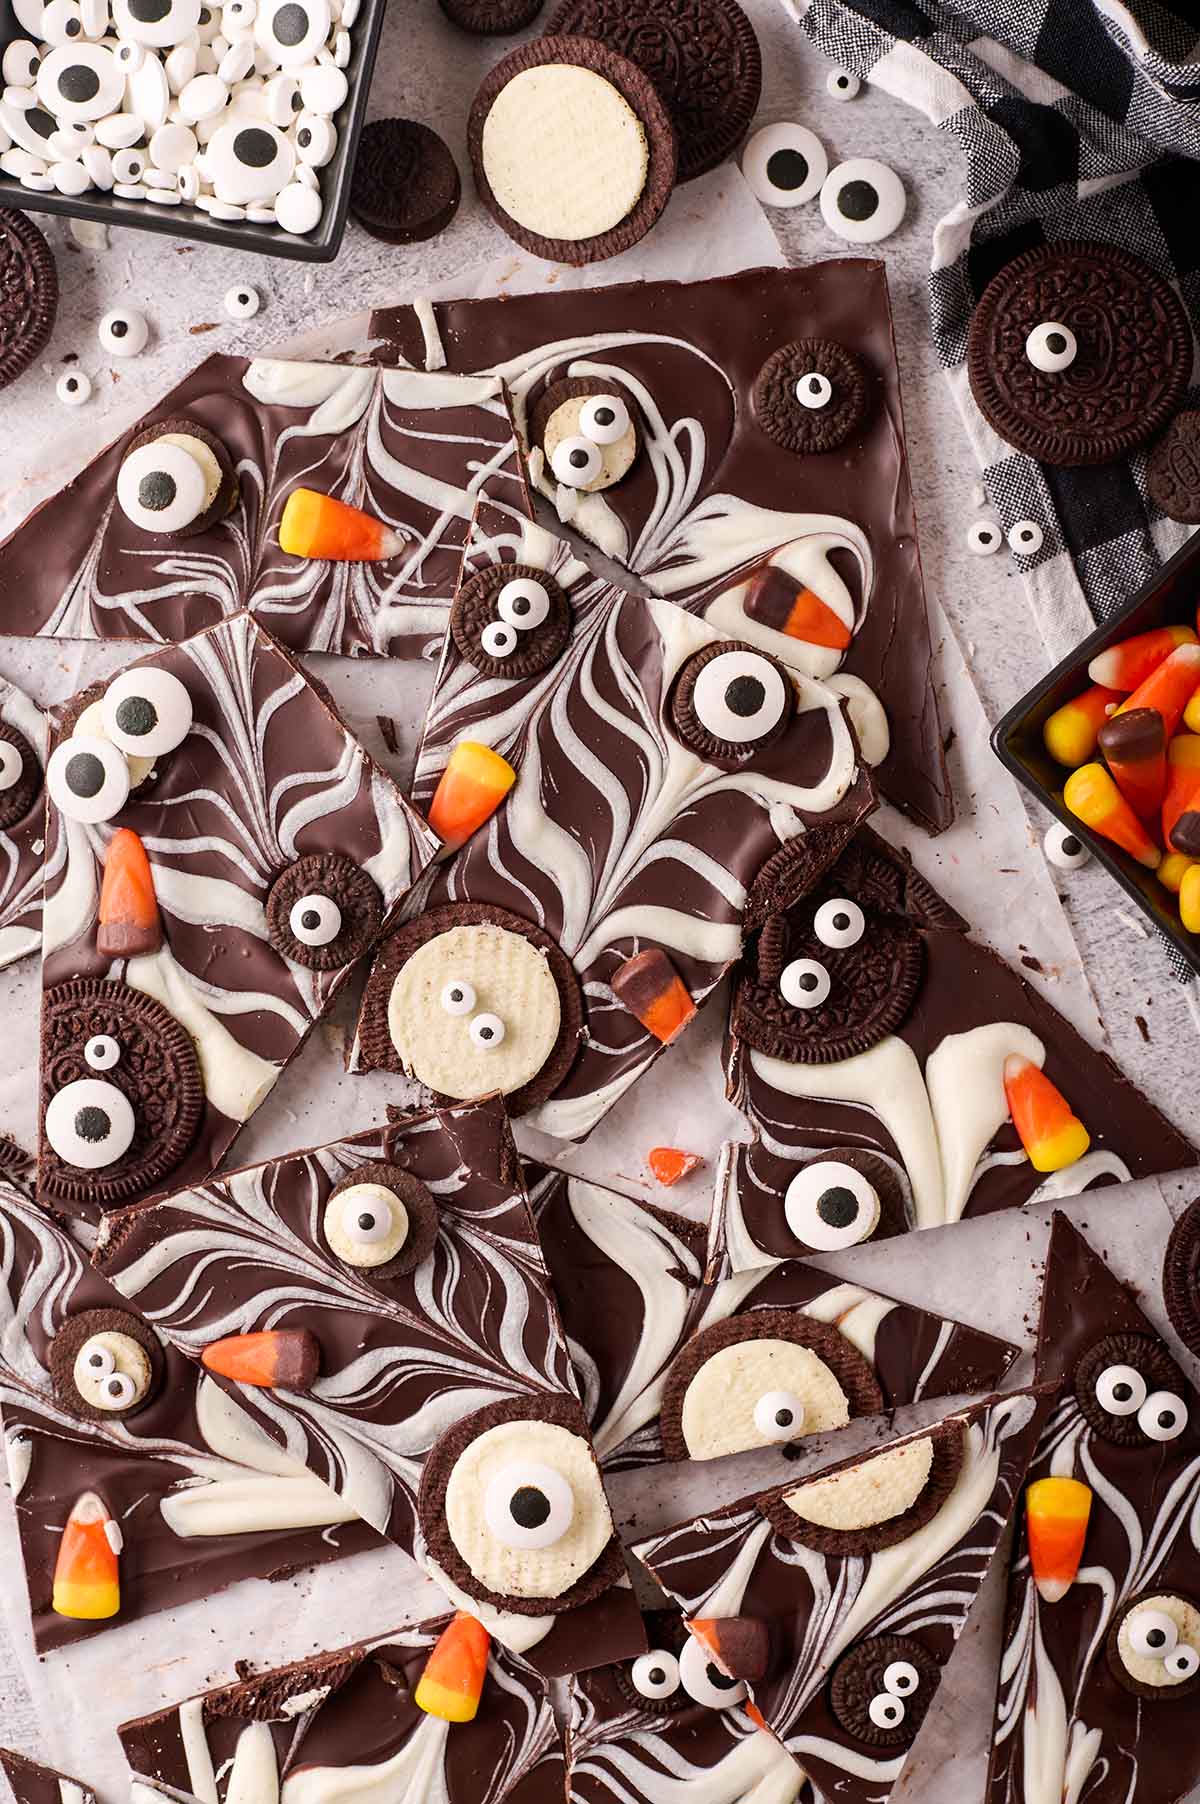
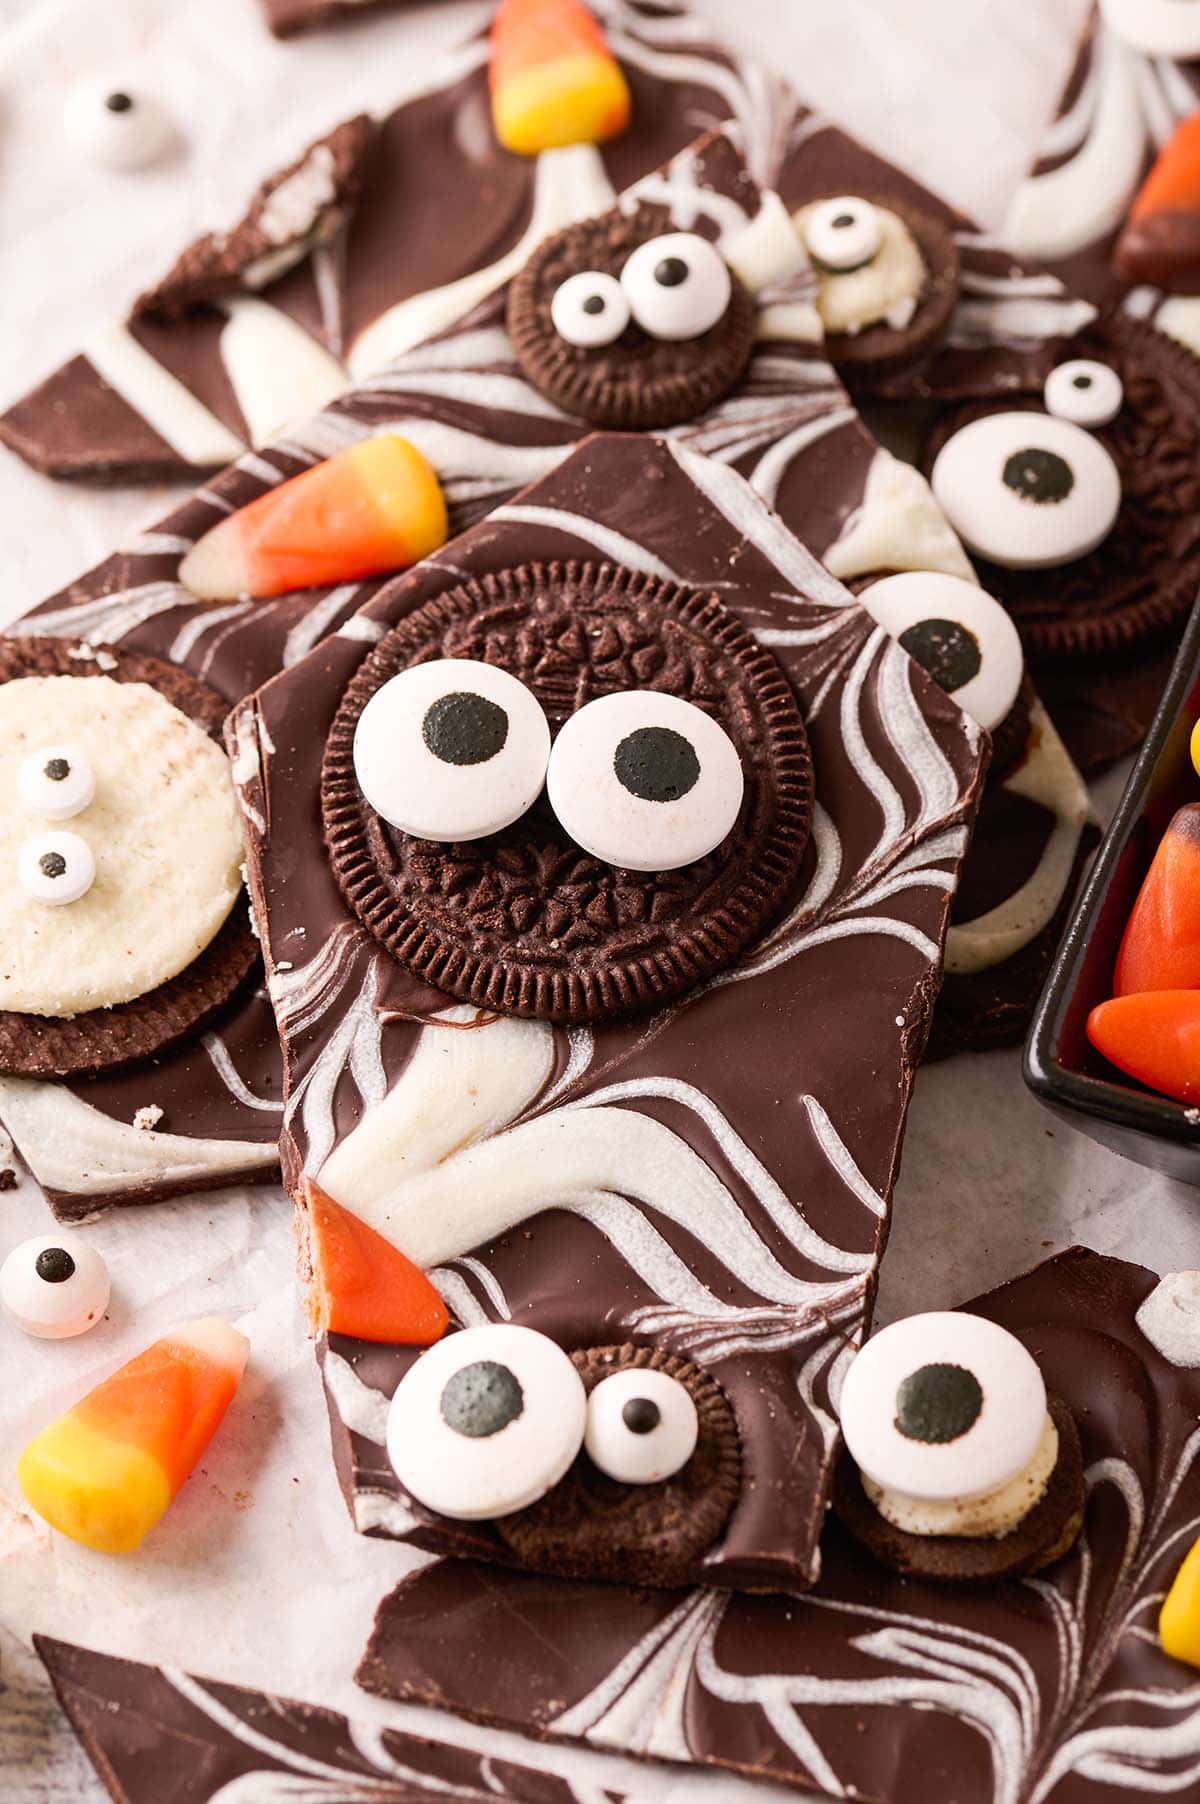
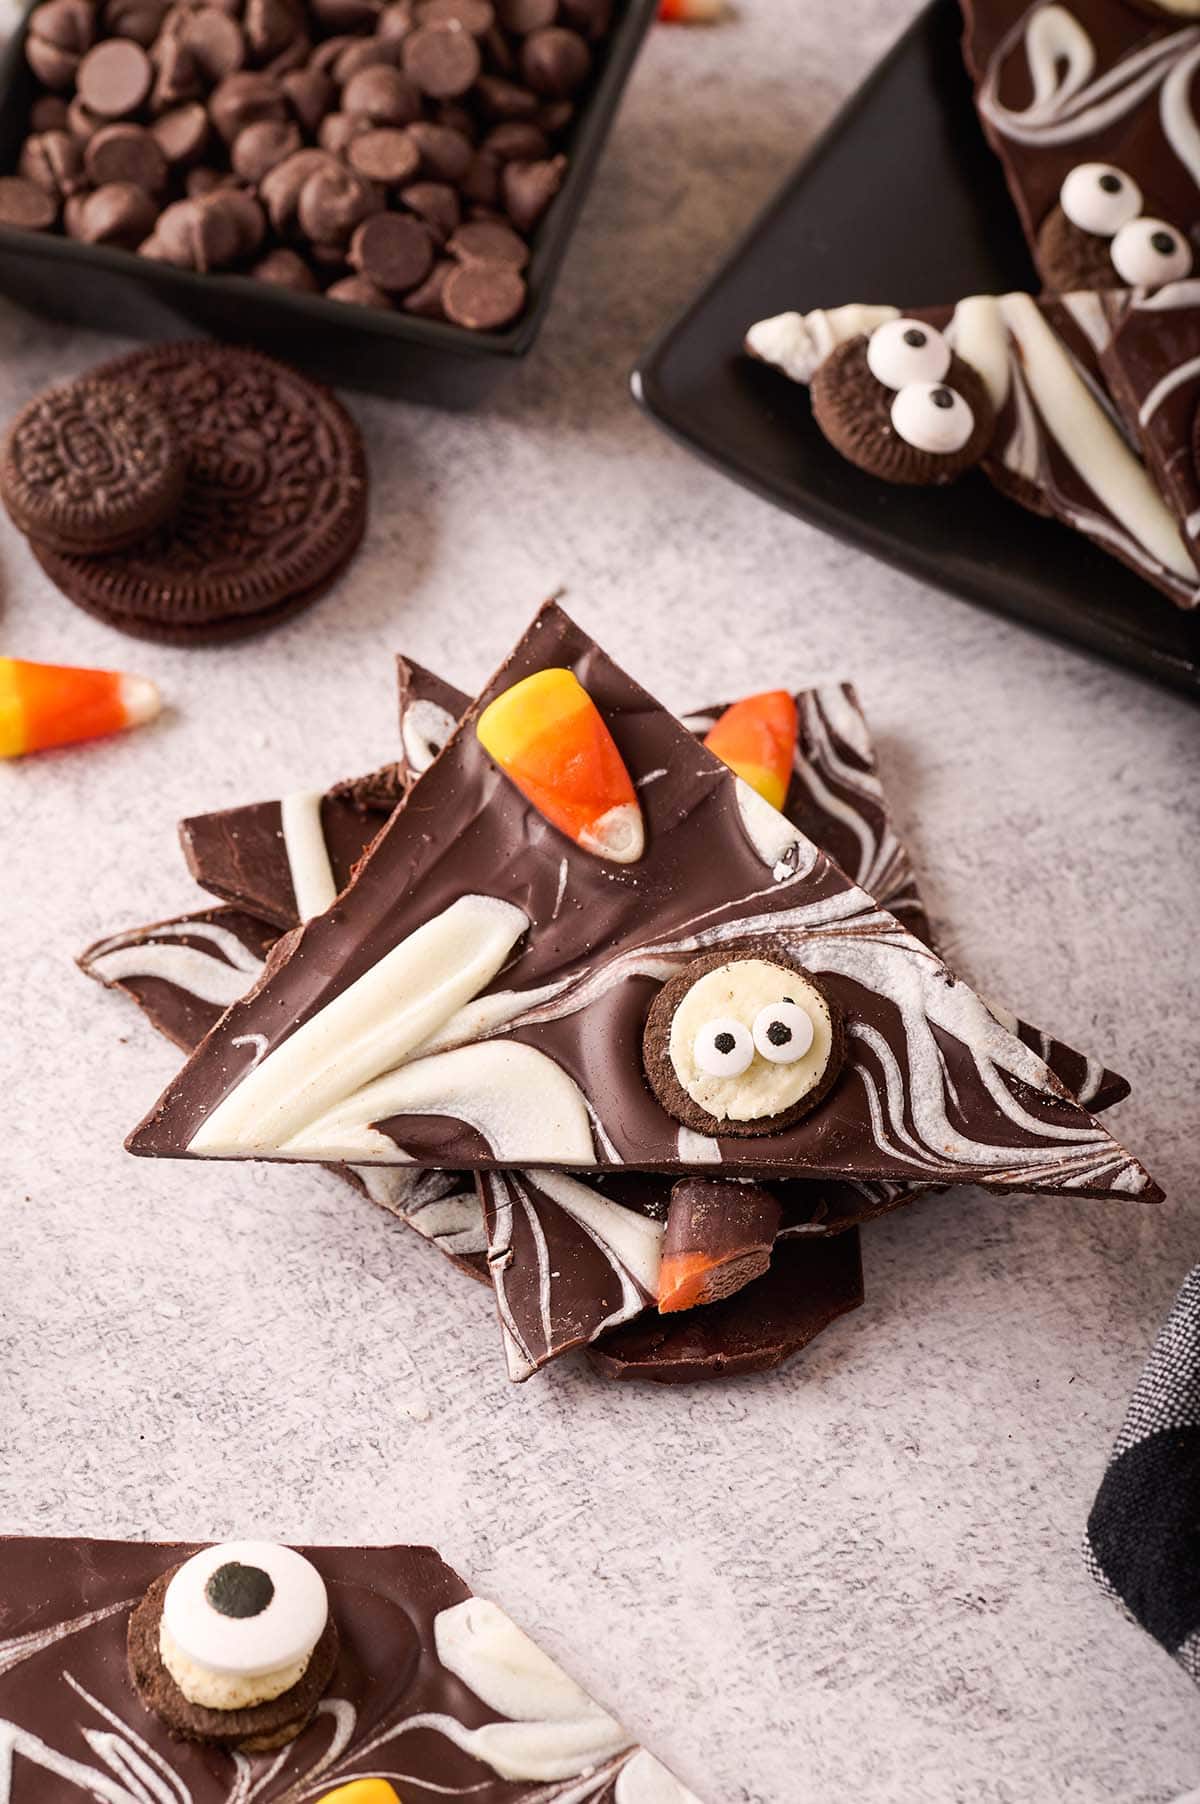
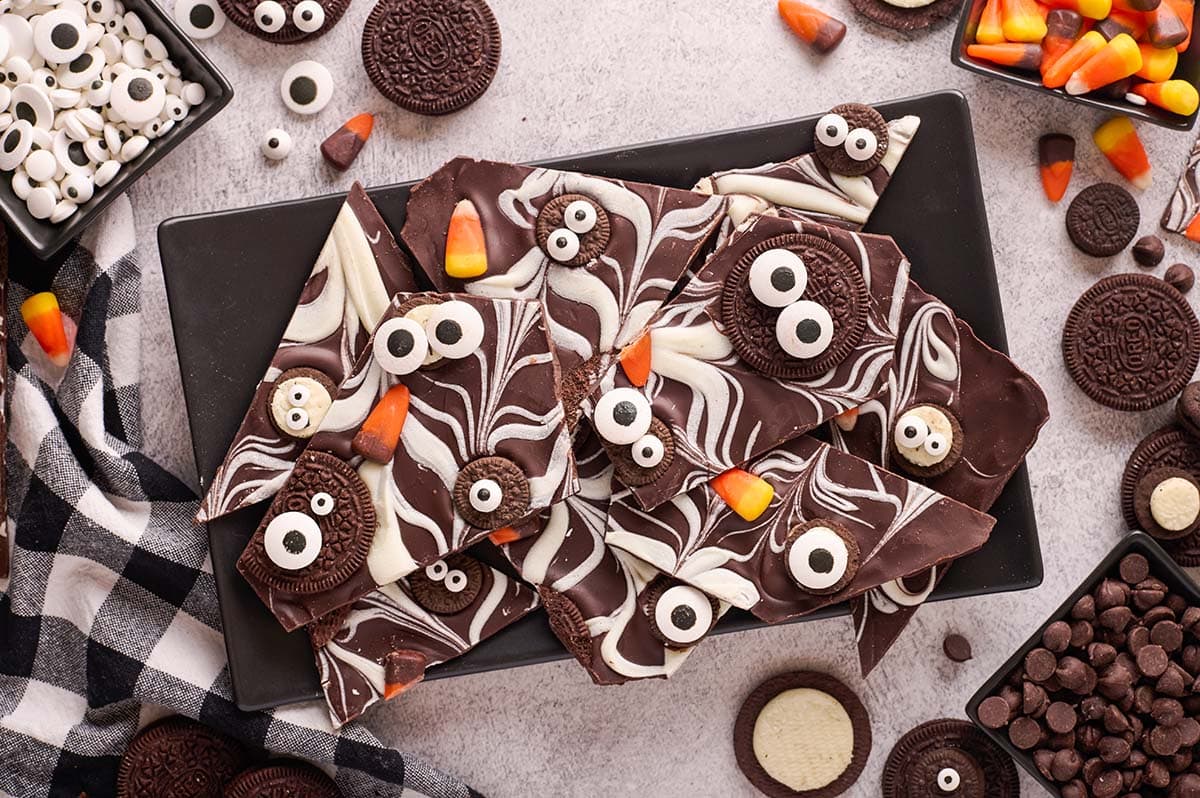
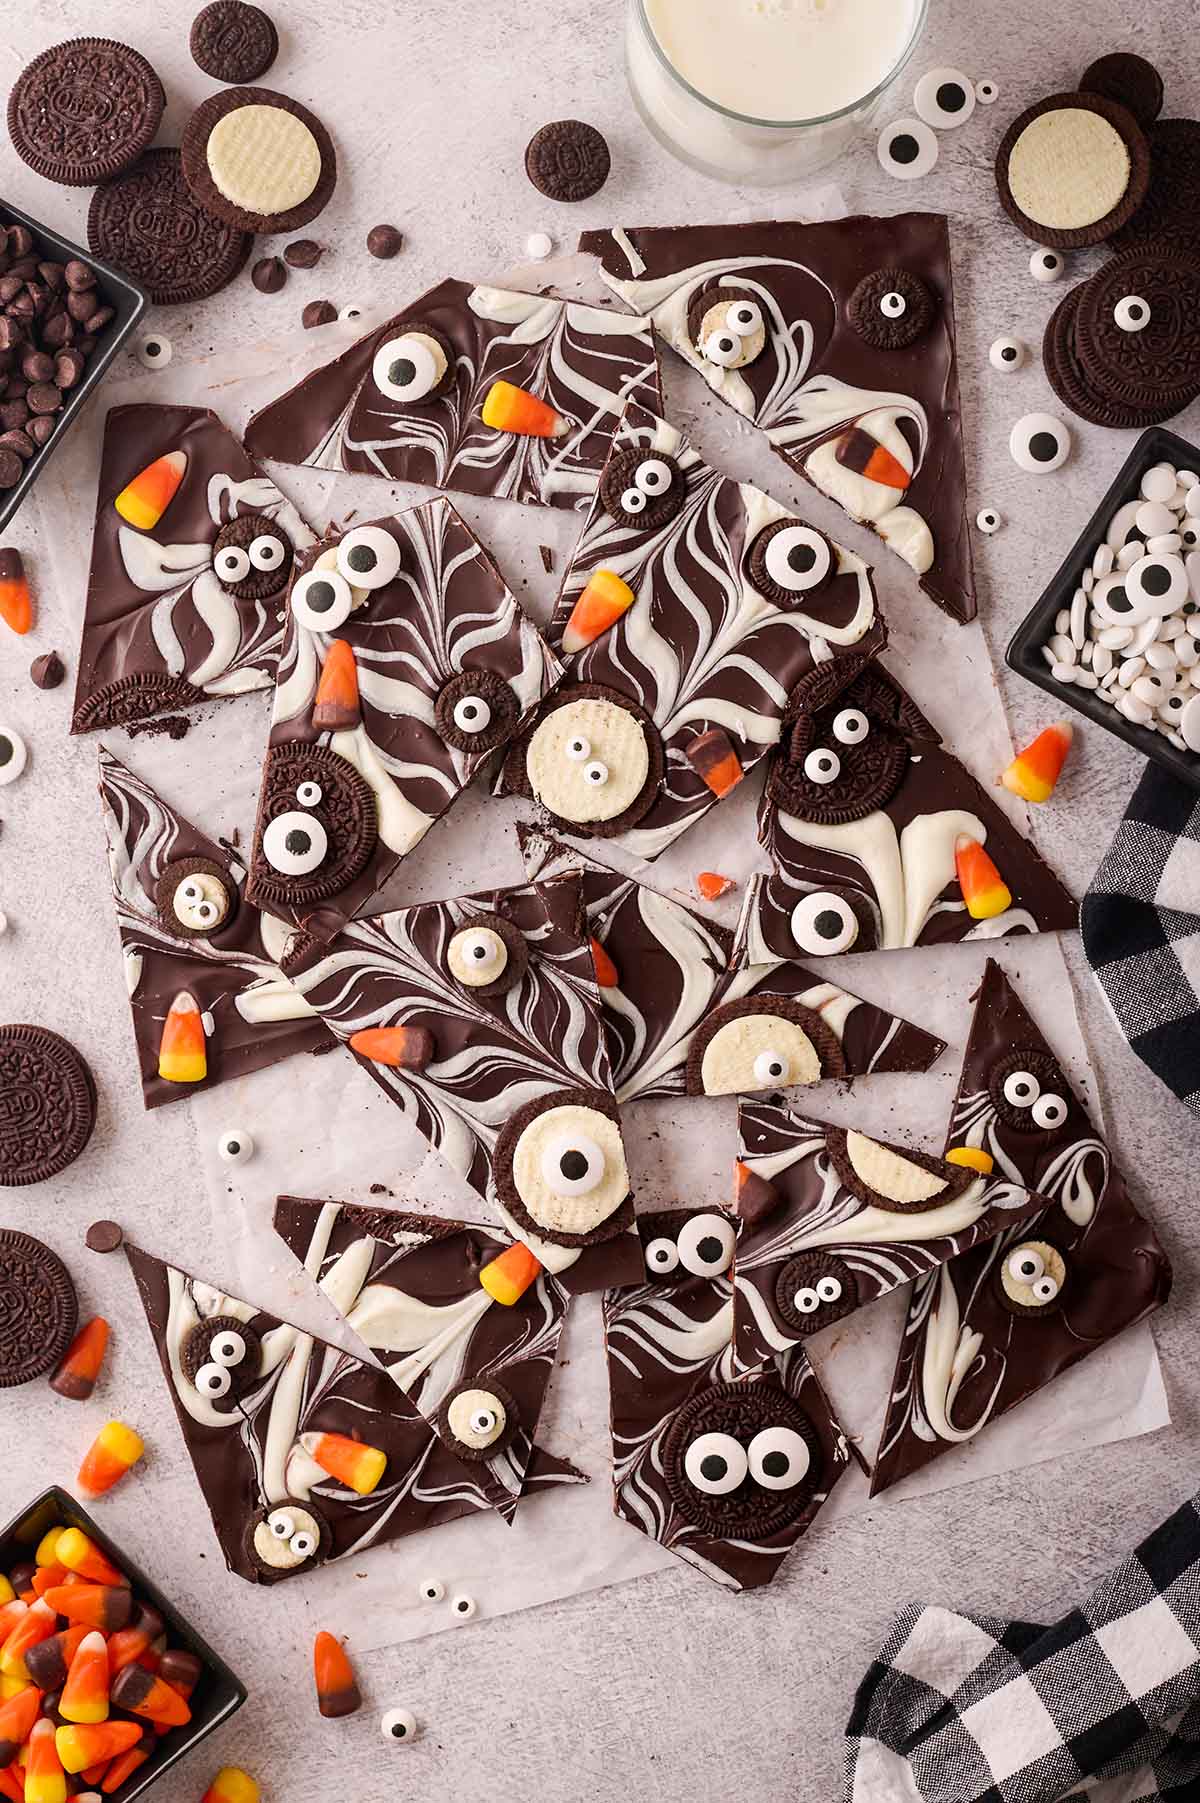
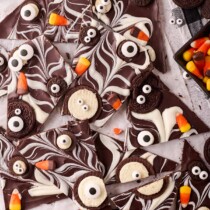
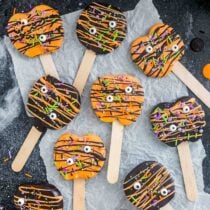
Homemade Halloween Candy Bark is a fun and festive way to customize a creepy chocolate confection, complete with Oreo cookies, candy corn, and eyeballs that never blink.
It takes less than 15 minutes to make this easy Halloween dessert and decorate it with your favorite foods to dress it up for the holiday.


Halloween Chocolate Bark
Halloween Candy Bark recipes are the best because there are no rules, requirements, or tricks to make this sweet treat. Perfect for a Halloween Party or Halloween treat.
The steps are so simple: start with a base of melted chocolate chips, then add a bunch of bite-size chopped candy, like peanut butter cups, Kit Kats, leftover Halloween candy, or any ghoulish goodies.
Perfect for feeding a group of trick-or-treating kids, each piece of bark is deliciously different and anything but boring, especially when spooky eyes stare back at you.
Why We Love This Halloween Bark Recipe
- Quick and easy to make in minutes.
- You only need chocolate chips plus any combination of candy and cookies.
- Fun for kids to customize by using their favorite sweet and savory toppings.
- Great way to use up any leftover candy from too much time trick-or-treating.
- Perfect treat for Halloween parties, dessert platters, or packaging in bags for gifts.
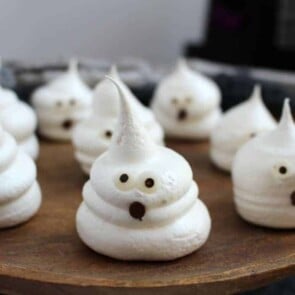
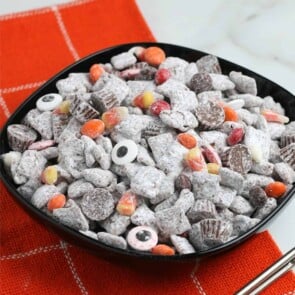
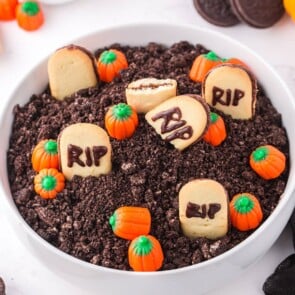
Other Easy Halloween Recipes
Ingredients
- Dark chocolate chips: I used Hershey’s special dark chocolate chips to create an extra dark chocolate flavor and appearance.
- White chocolate chips
- Candy corn: Feel free to substitute the candy corn with any of your favorite Halloween candies.
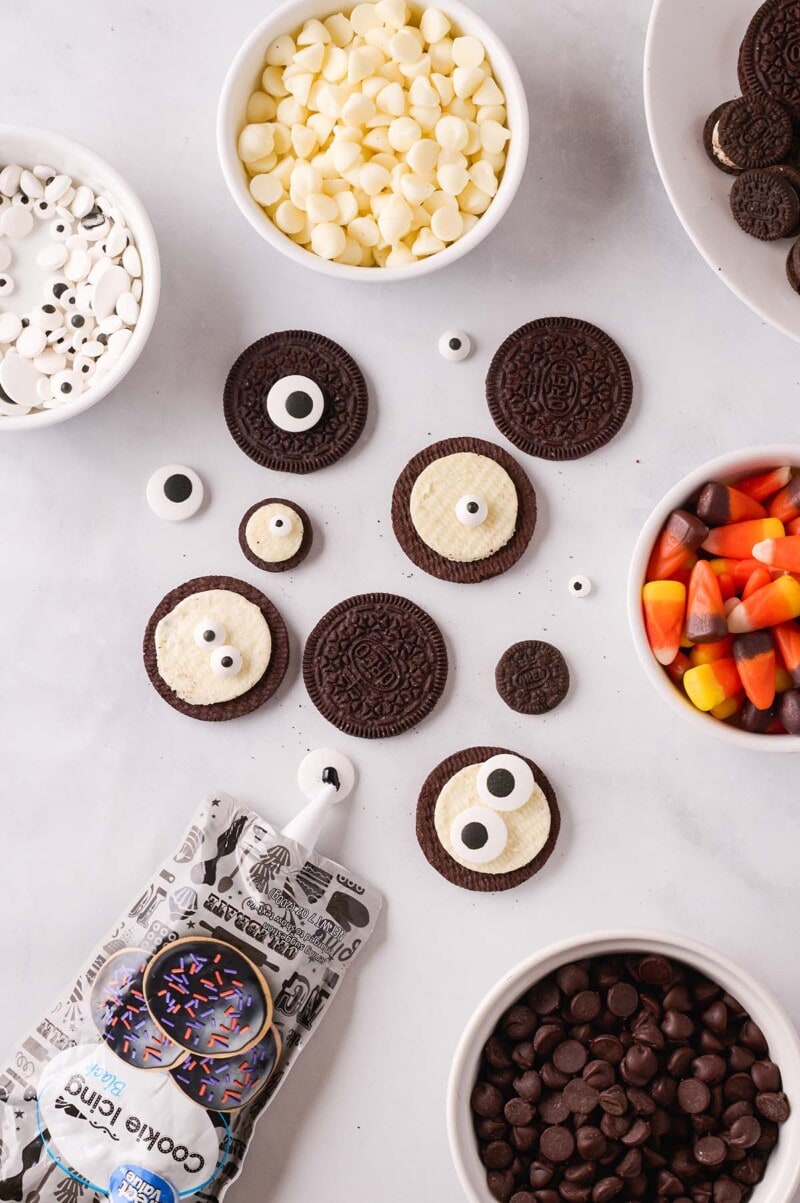
- Oreos: I used both regular and mini-sized Oreos.
- Black icing: The icing helps secure the eyes to the Oreo halves. You can also dab some extra melted chocolate on the back of the eyes to glue them to the Oreos.
- Candy eyes: I like to use a mix of small, medium and large eyes to create fun Oreo monsters! You can add some eyes to the chocolate bark directly to create more creepy crawlers “peaking” through the bark.
Substitutions and Additions
- Choose Your Chocolate: Feel free to make this with bittersweet chocolate, milk chocolate, or semi-sweet chocolate chips, white chocolate chips, peanut butter chips, or butterscotch chips. You can also swap the chocolate chips for melting wafers or almond bark. If using chopped up chocolate bars instead of chocolate chips, make sure to chop them into small pieces so that they melt easier.
- Tasty Toppings: There is no right or wrong way to top your chocolate treat. Try Reese’s pieces, M&Ms, gummy worms, mini marshmallows, colored sprinkles, or any Halloween novelty items, like edible bones, Hershey’s tombstone chocolate bars and Reese’s pumpkins and ghosts for more festive fun.
- Add Some Salt: For some, chocolate bark can be very sweet. You can add some salty snacks to your candy, like peanuts, pretzels, potato chips, sunflower or pumpkin seeds. A sprinkle of flaky sea salt is also delicious.
- Customize Your Candy: Chocolate candy bark can be made any time of year and customized with holiday colors and seasonal snacks. Some of my favorite ideas include Oreo Peppermint Bark, Easter Bunny Bark, Frozen Yogurt Bark With Berries, Melted Snowman Chocolate Bark, and so many more.
Recommended Tools
- Microwave-safe bowls
- Rubber or offset spatula
- Toothpick
- 10.5” x 15.5” baking sheet
- Parchment Paper
How to Make Halloween Candy Bark
- Melt The Chocolate: Melt the chocolate in the microwave for 1 minute, stir, microwave for another thirty seconds, stir, and repeat again.
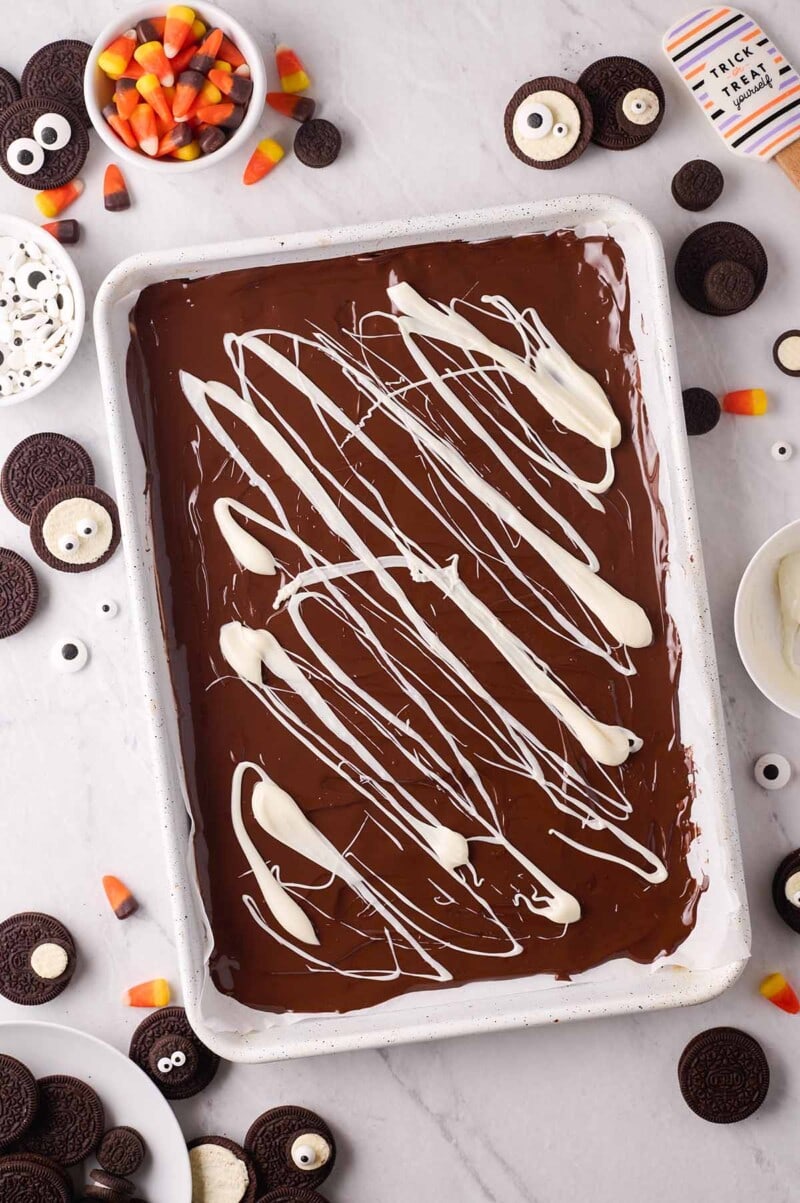
Pro Tip: The chocolate should be smooth at this point, but if not, continue in 15-second intervals. - Pour Into The Pan: Spread the melted chocolate across the baking pan into a smooth even layer.
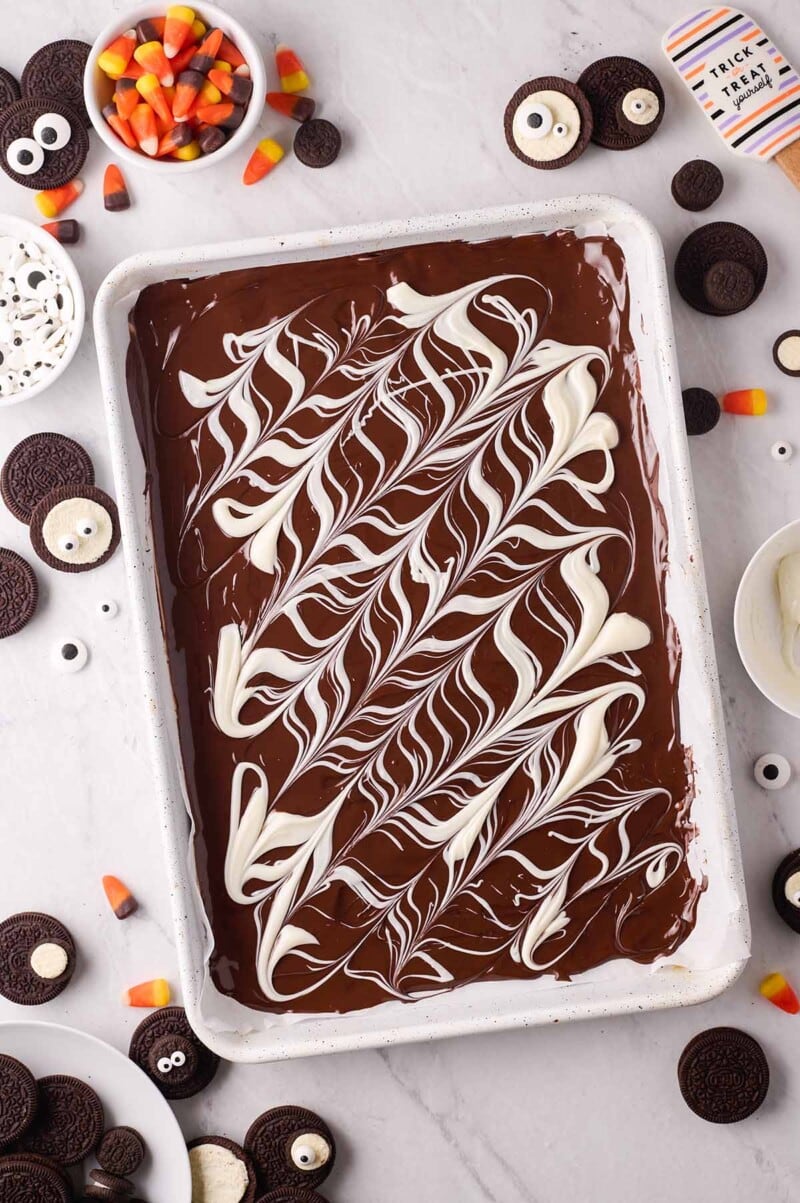
- Add A White Chocolate Swirl: Melt the white chocolate chips for 1 minute, and stir until smooth. Drizzle the white chocolate diagonally across the melted dark chocolate and then drag a toothpick across the white chocolate in an opposite diagonal.
Pro Tip: If the white chocolate needs more time to melt, repeat microwaving and stirring in 15-second increments until smooth. - Decorate: Decorate with candy corn and Oreo cookie halves. Press the pieces into the chocolate.
Pro Tip: To add candy eyes to the Oreos, split the cookies in half and use the black icing to create a small circle on the back of the candy eyes. Place the eyes onto the cookie halves (with the icing side down). - Chill: Place the chocolate in the refrigerator for one hour to harden.
- Serve: Once hard, break the slab of chocolate into pieces of bark. Serve and enjoy!

Tip From Our Recipe Developer
- Depending on how small or large the pieces of bark are broken into, the servings can easily be adjusted.
- Make sure to leave an overhang (extra parchment paper) when preparing the baking sheet so that you can easily lift the hardened chocolate out of it. It is helpful to crease where the bottom of the pan meets the edges for a defined shape.
- For a thicker bark, double or triple the amount of dark chocolate chips.
Storage
- To Store: Once the chocolate is set completely and broken into pieces, store your Halloween candy bark in an airtight container in the refrigerator for 2-3 weeks. If you prefer to leave the Halloween candy bark on the counter at room temperature it will last for about 5 days.
- To Freeze: Place pieces of Halloween candy bark in a freezer bag and keep it in the freezer. It will last a long time, maybe even until next Halloween!
Other Easy Chocolate Bark Recipes
- Peppermint Bark
- Melted Snowman Chocolate Bark
- Rudolph the Red Nosed Reindeer Bark
- Frozen Yogurt Bark With Berries
Halloween Candy Bark
Ingredients
- 2 cups dark chocolate chips (12 oz package)
- ⅓ cup white chocolate chips
- ¼ cup candy corn
- 3 regular-sized oreos
- 10 mini oreos (1 oz package of mini oreos)
- Black icing
- Candy eyes
Instructions
- Line a 10.5” x 15.5” baking sheet with parchment paper or aluminum foil leaving overhang on at least two sides.
- Add the chocolate chips to a microwave-safe bowl and microwave for 1 minute. Stir with a spoon. Microwave for another thirty seconds, stir, and repeat again. The chocolate should be smooth at this point, but if not, continue in 15-second intervals.
- Spread the melted chocolate across the prepared baking sheet and use a rubber or offset spatula to smooth into an even layer.
- Melt the white chocolate chips in a separate bowl for 1 minute. Stir with a spoon until smooth. If it needs more time, repeat microwaving the chocolate in 15-second increments, followed by stirring, until smooth.
- To create the white chocolate swirl: drizzle the white chocolate diagonally across the baking sheet of melted dark chocolate. Then, drag a toothpick across the white chocolate in an opposite diagonal.
- Place the candy corn pieces evenly across the sheet of chocolate.
- Split the oreos in half so that one side is bare and one has the cream filling. Use the black icing to create a small circle on the back of the candy eyes. Place the eyes onto the cookie halves (with the icing side down), however you’d like them arranged. Gently press the cookie halves, eyes side up, into the chocolate.
- Place the baking sheet in the refrigerator for one hour to harden. Once hard, use a knife or your hands to break the slab of chocolate into pieces of bark.
Jenn’s Notes
- To Store: Once the chocolate is set completely and broken into pieces, store your Halloween candy bark in an airtight container in the refrigerator for 2-3 weeks. If you prefer to leave the Halloween candy bark on the counter at room temperature it will last for about 5 days.
- To Freeze: Place pieces of Halloween candy bark in a freezer bag and keep it in the freezer. It will last a long time, maybe even until next Halloween!
- Depending on how small or large the pieces of bark are broken into, the servings can easily be adjusted.
- Make sure to leave an overhang (extra parchment paper) when preparing the baking sheet so that you can easily lift the hardened chocolate out of it. It is helpful to crease where the bottom of the pan meets the edges for a defined shape.
- It’s easy to overheat chocolate, which can cause it to lose some of it’s shiny appearance. Once the chocolate gets to a stage where it is mostly melted but a few lumps of chocolate chips remain, stir with a spoon until the chocolate is smooth. It can take up to 30 seconds of stirring, so give it a decent try before putting the chocolate back in the microwave. If it’s seems close to almost smooth, but needs a boost, shorten the time to ten second intervals in the microwave. You can also melt the chocolate in a double-boiler.
- To get a clean separation when splitting the oreos: gently and slowly twist the two halves apart. If you rip them in half, you’re more likely to break the oreo or end up with the filling on both sides.
- For a thicker bark, double or triple the amount of dark chocolate chips.


I’ve yet to try it. But like the fact I can use chocolate chips and white chocolate chips versus almond bark.
I hope you enjoy it! We love this recipe!
so easy and so cute