
This post may contain affiliate links. Please read our disclosure policy.

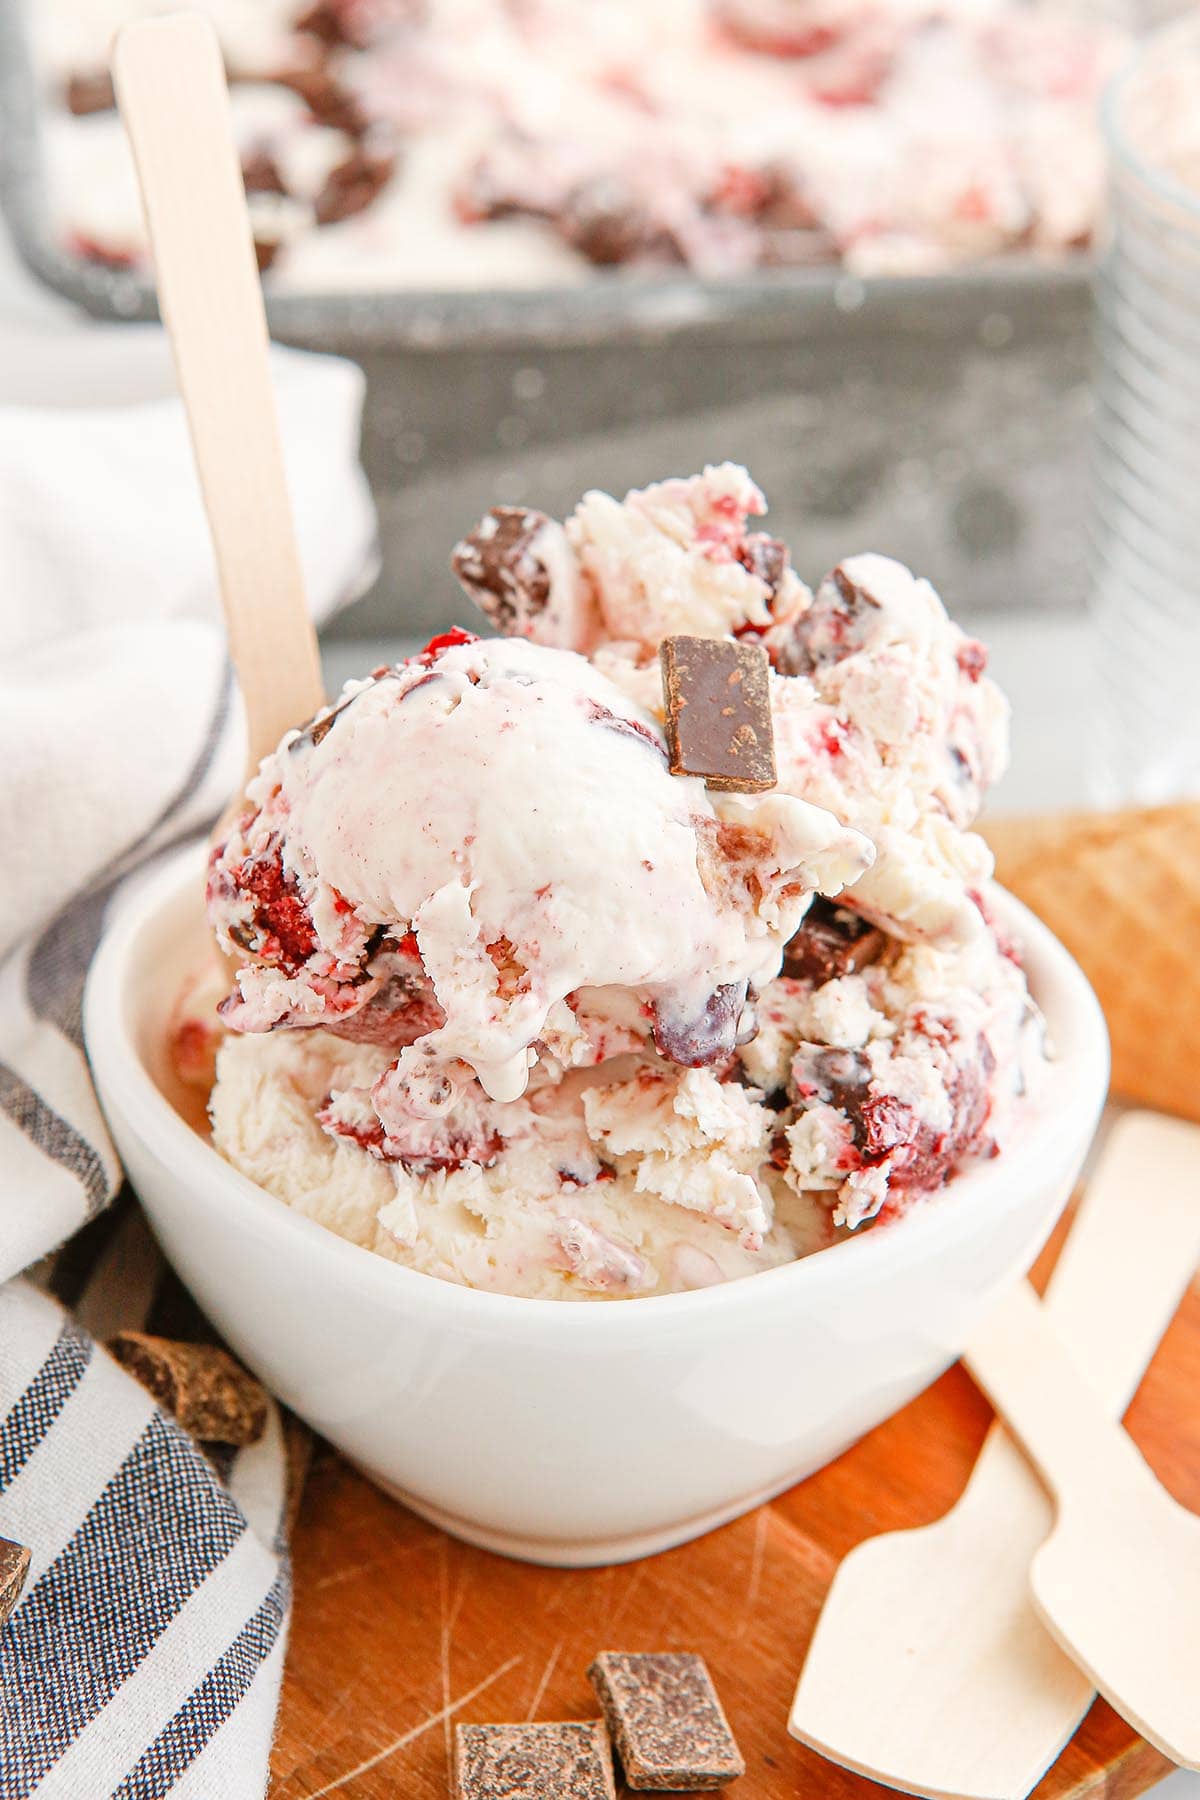
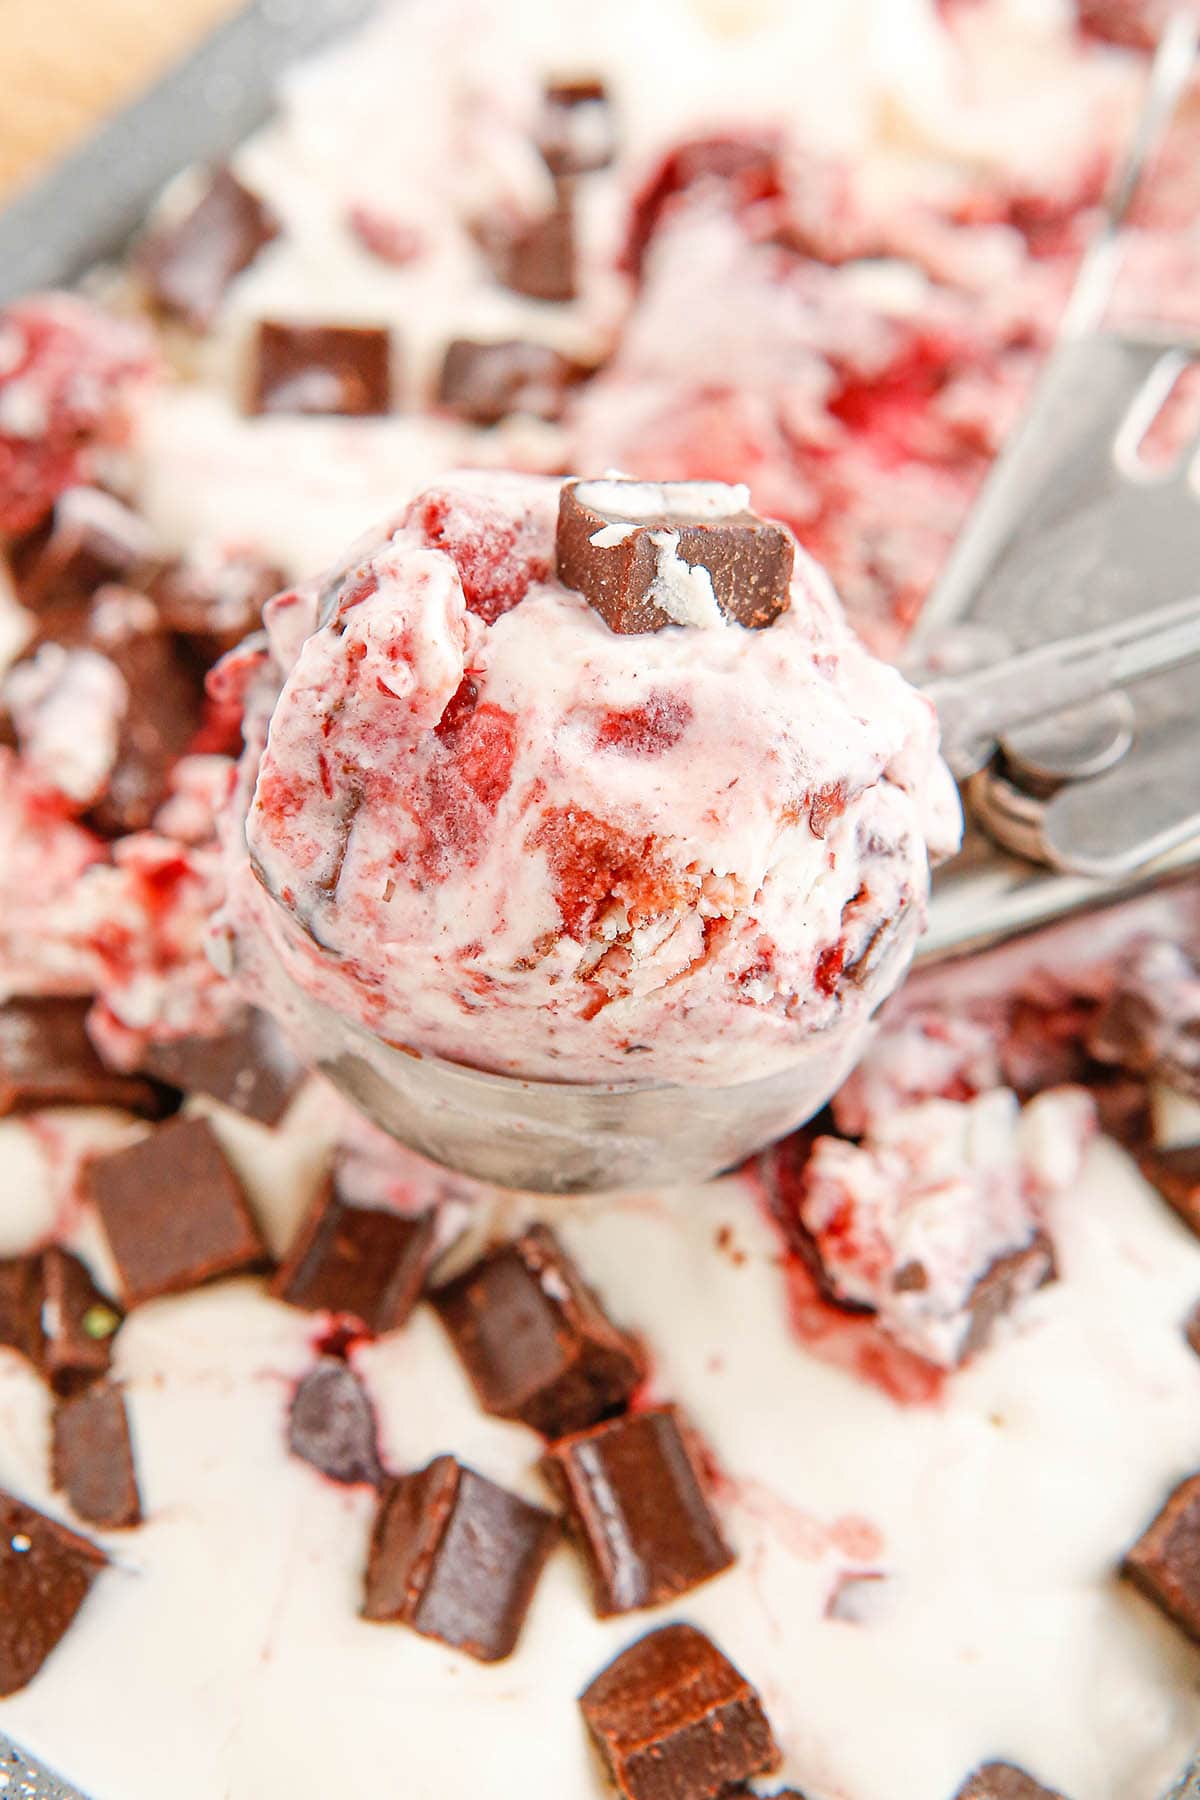
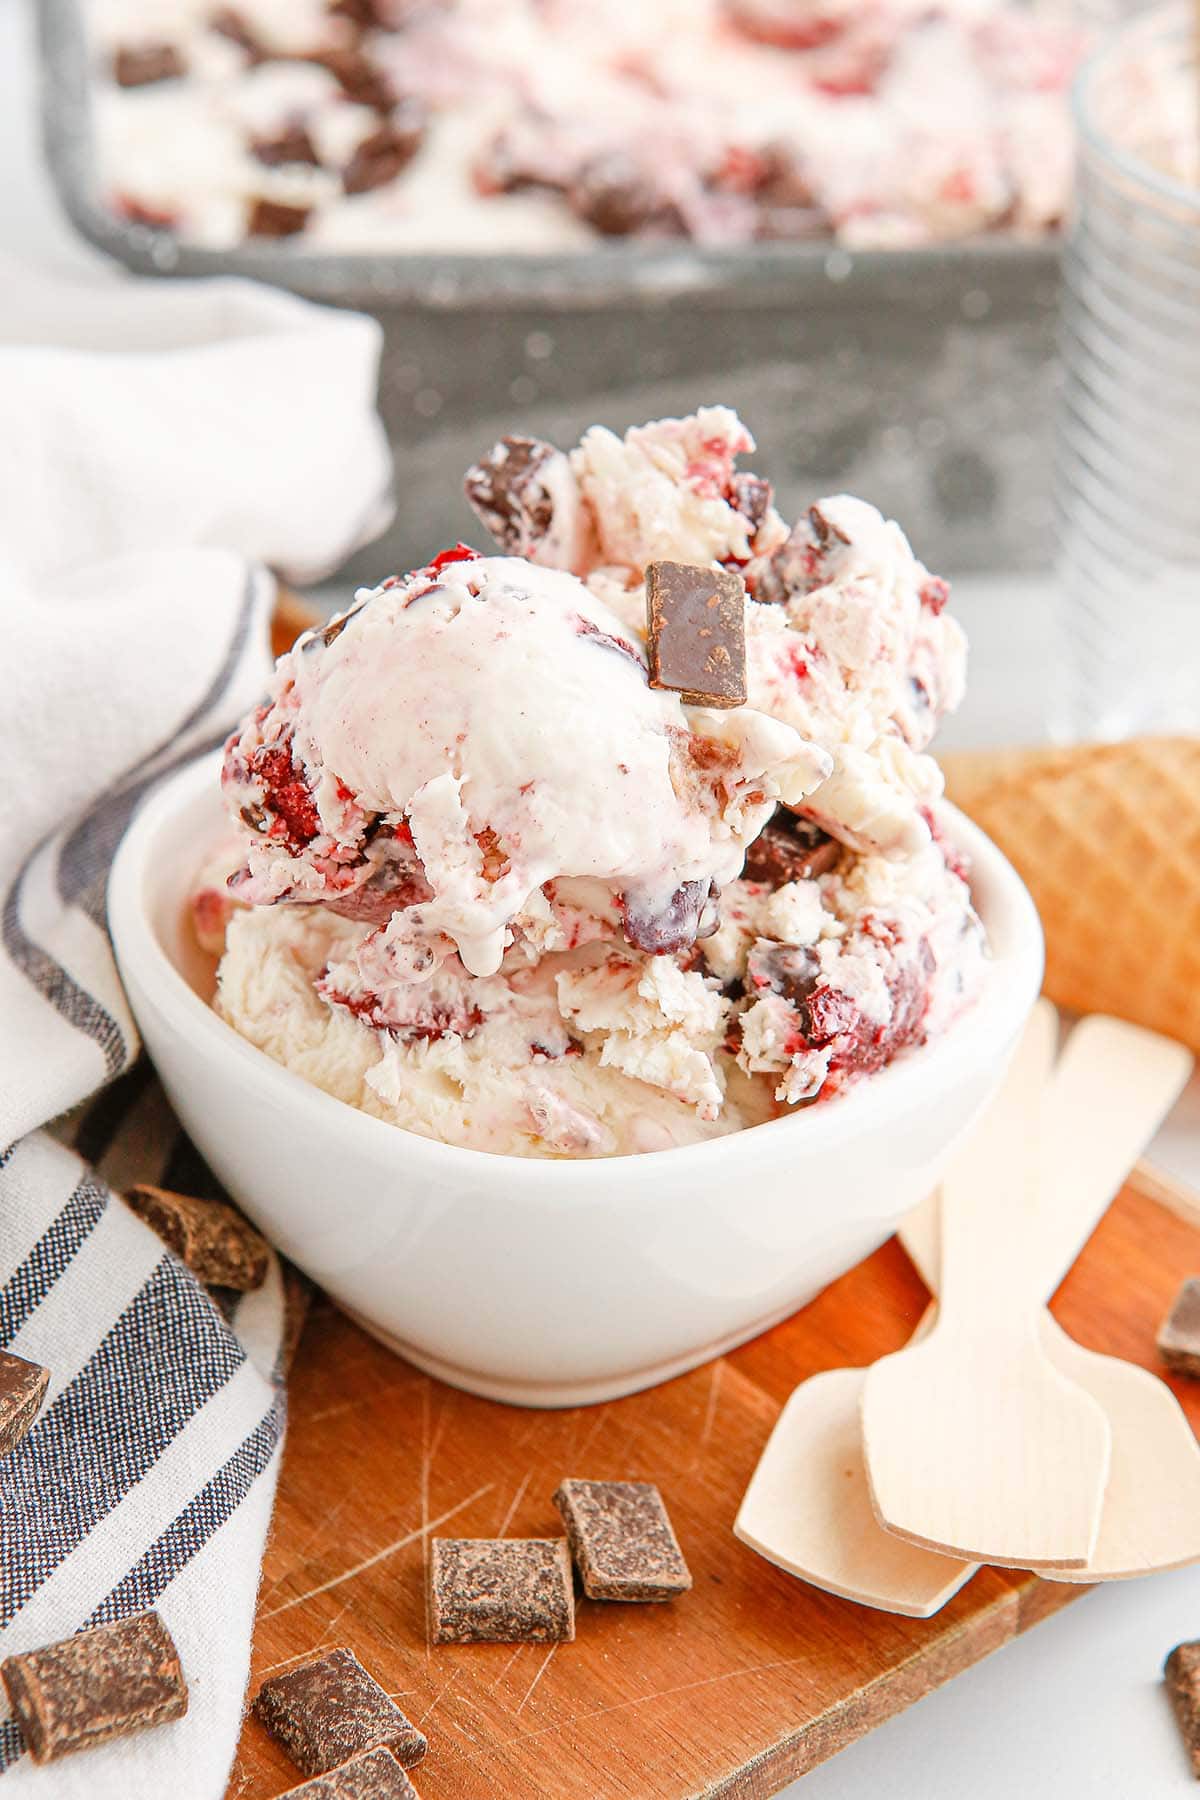
Homemade Cherry Garcia Ice Cream is the ultimate Ben & Jerry’s copycat recipe that can easily be made at home without a machine. This simple no-churn ice cream recipe creates a smooth and creamy frozen treat in 15 minutes, with the same cherry swirl and chocolate chunks as the original classic.
Homemade Cherry Garcia Ice Cream–Ben & Jerry’s Copycat
No-Churn Cherry Garcia Ice Cream is a quick and easy way to recreate the famous ice cream flavor at home without an ice cream maker.
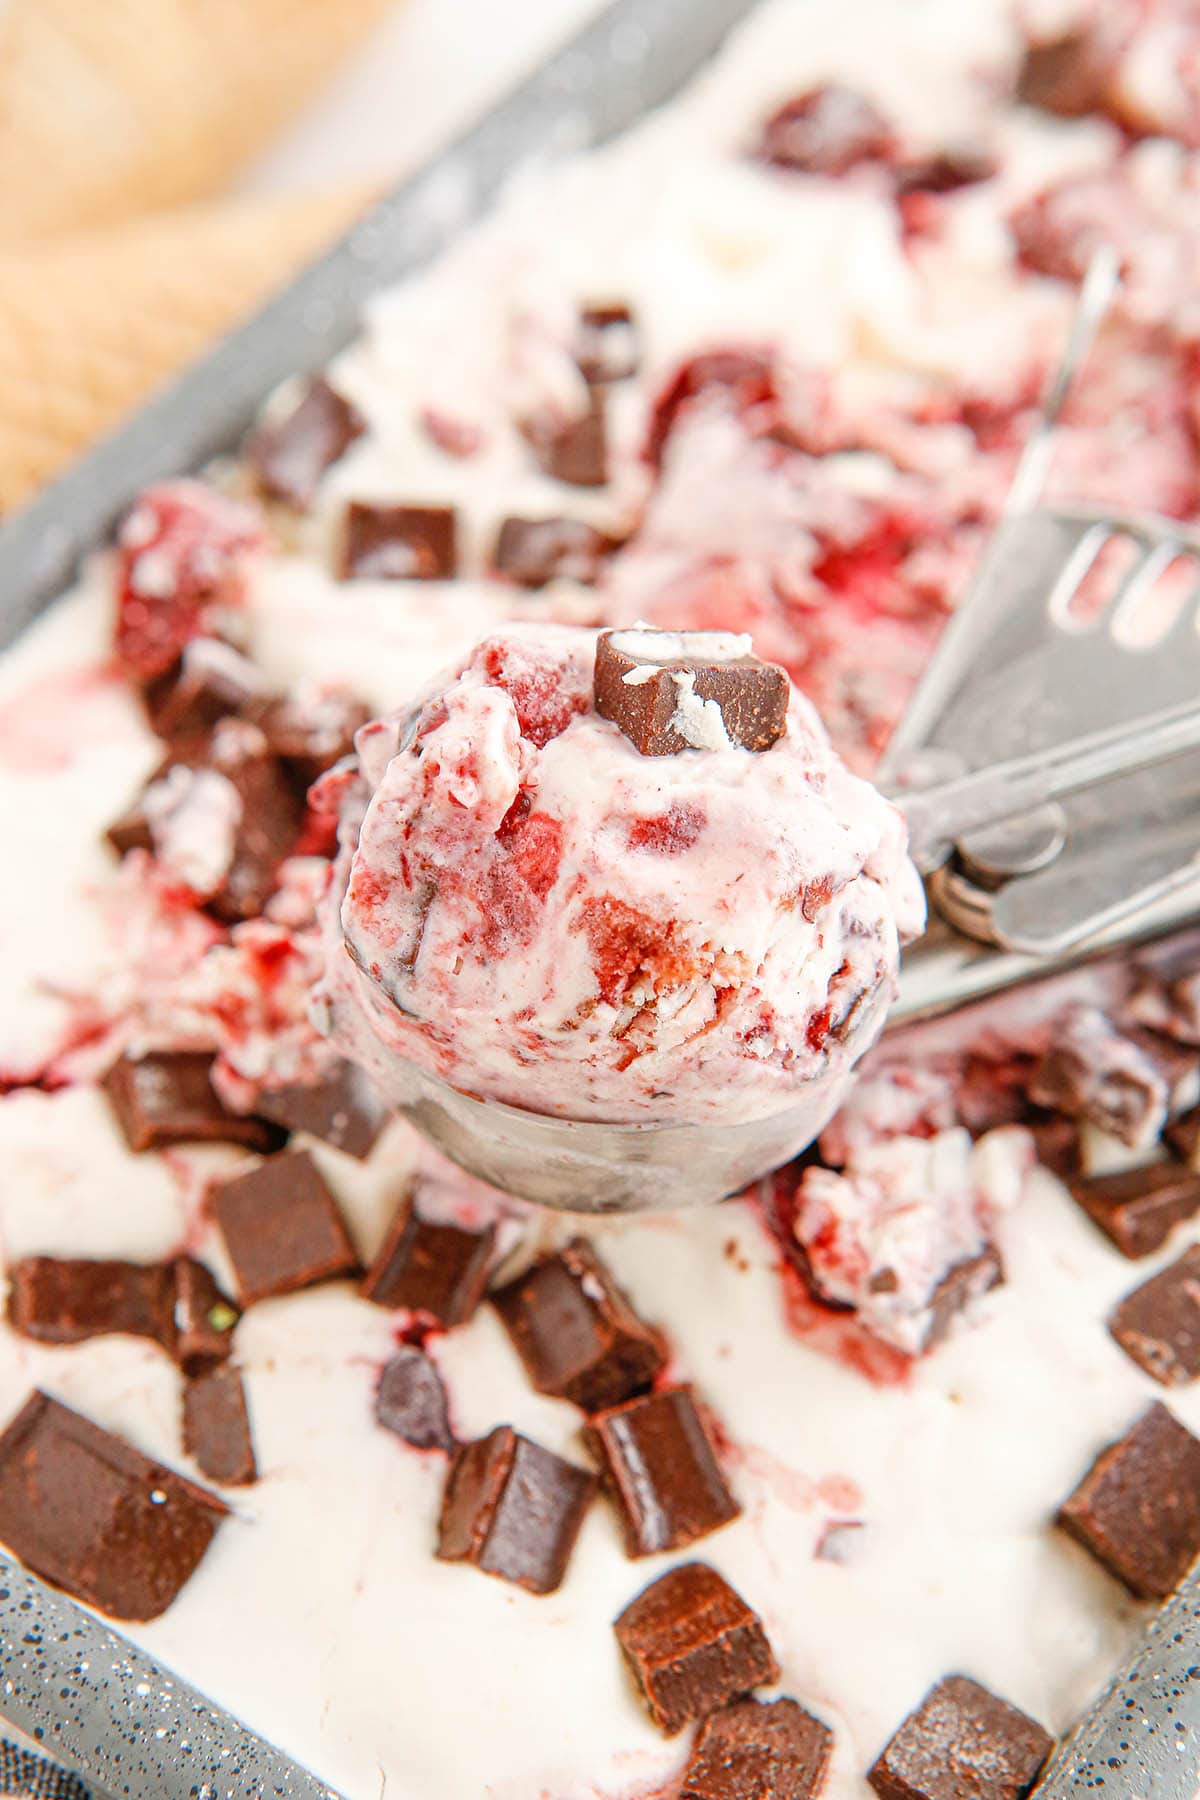
It takes mere minutes to make the soft and velvety vanilla-flavored base that’s loaded with chopped sweet cherries and chunks of chocolate, then put the mixture in a loaf pan to freeze and set until firm.
This cool and creamy ice cream is a homemade take on the original flavor with a twist: the vanilla base is made with heavy cream and sweetened condensed milk and the final product is just as rich and smooth as Ben & Jerry’s version, and it’s made without all the work.
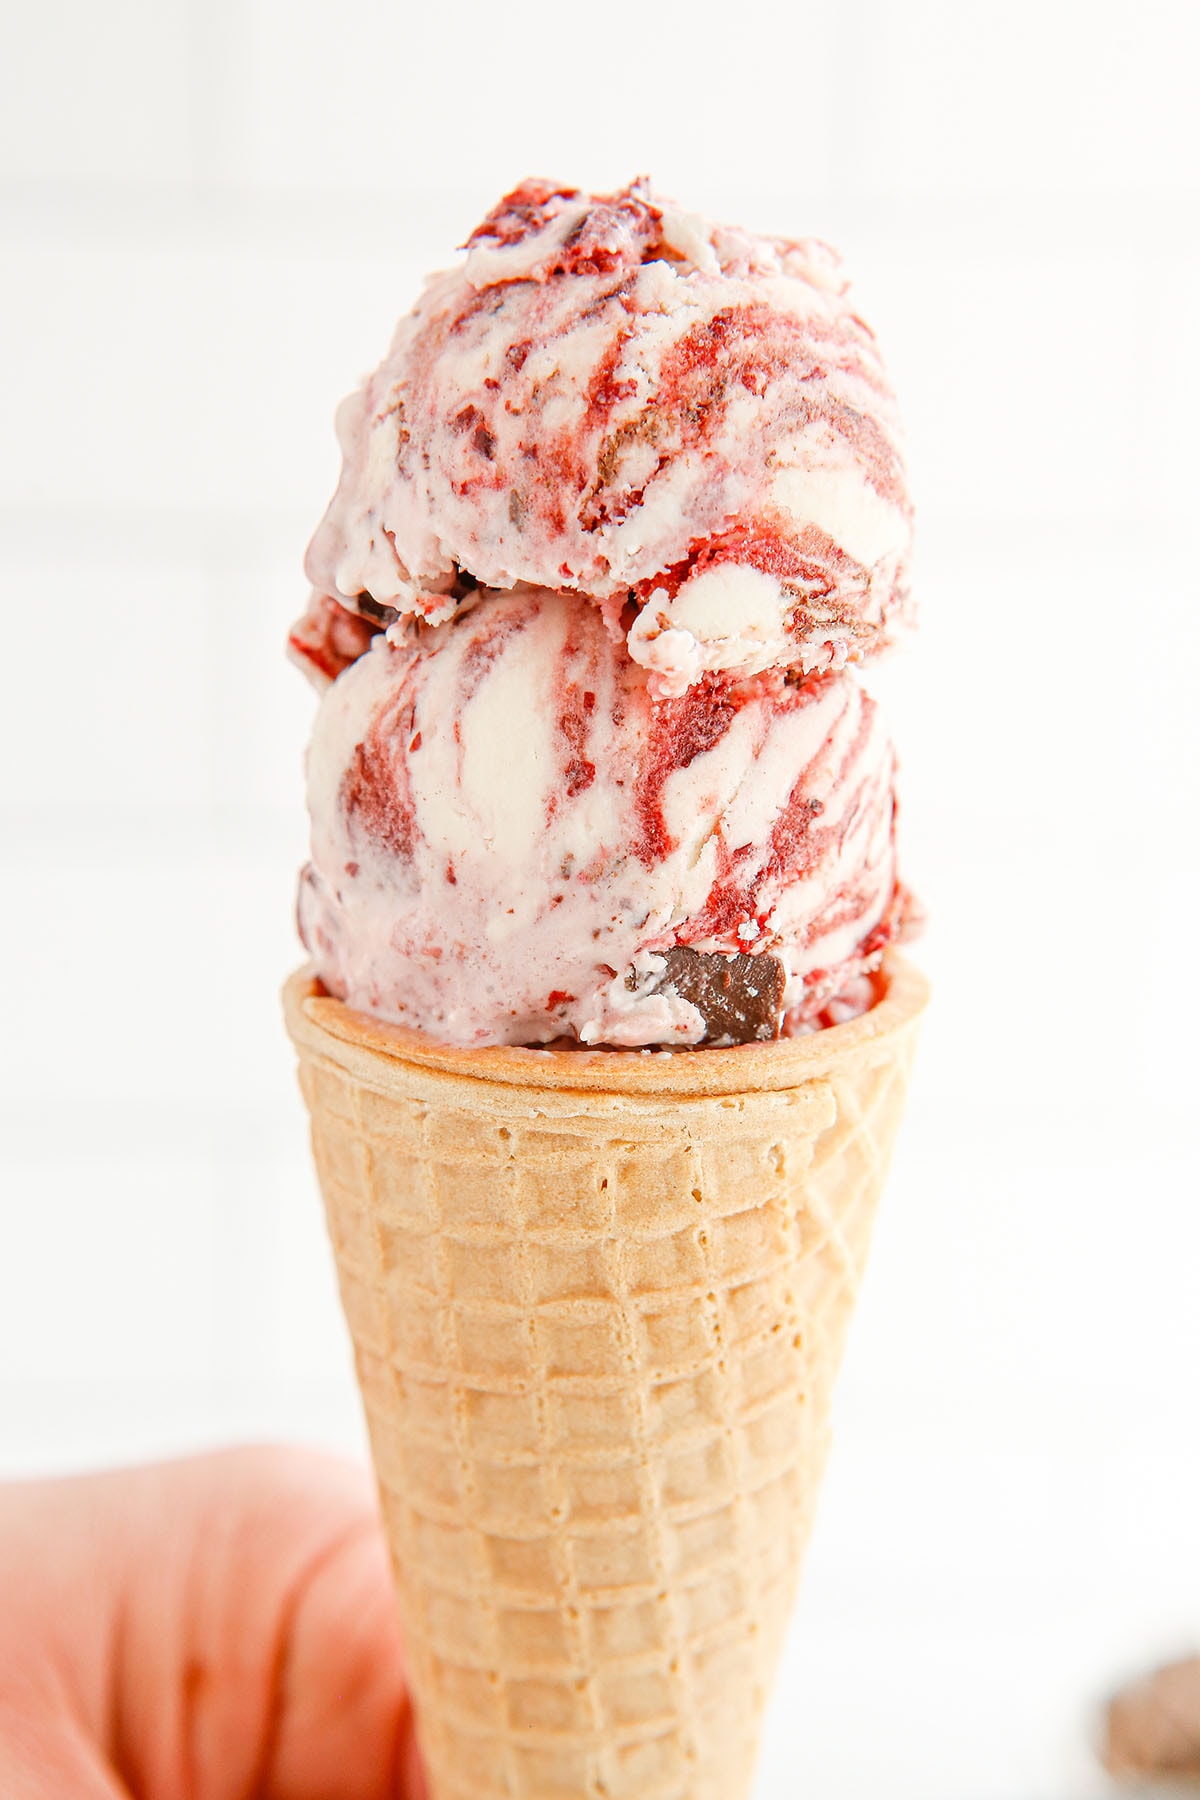
Scoop it into a cone or eat it straight from the spoon, cold treats are my kind of comfort food and the perfect way to beat the summer heat!
For more of my favorite no-churn ice cream recipes, try my Unicorn Ice Cream, Cotton Candy Ice Cream, and Caramel Pretzel Ice Cream.
Why We Love This Homemade Cherry Garcia Ice Cream Recipe
- Quick and easy to make in 15 minutes – No-churn ice cream recipes which means, no ice cream machine is needed.
- Only uses 6 simple ingredients to recreate the famous flavor.
- Naturally gluten-free.
- Silky smooth, creamy soft base studded with chopped cherries and chunks of chocolate.
- Tasty edible tribute to the famous rock legend.
- Delicious homemade frozen dessert that tastes like the original but costs less than the store-bought kind.
- Perfectly cold to beat the summer heat or for cooling off in any warm weather.
Ingredients
- Heavy cream
- Sweetened condensed milk
- Vanilla extract
- Fresh or frozen cherries
- Chocolate chunks
- Ice cream cones, for serving
SEE FULL PRINTABLE RECIPE CARD BELOW
Substitutions and Additions
- Choose Your Chocolate: feel free to use the chocolate of your choice. You can use chocolate chips or a chopped-up chocolate bar. I do recommend using dark chocolate whenever possible, as it pairs perfectly with the cherries!
- Tasty Toppings: While I love eating this ice cream on its own, I’d be lying if I said adding a drizzle of chocolate syrup or a dollop of whipped cream on top wouldn’t be delicious!
Recommended Tools
- Loaf pan
- Mixing bowl
- Measuring tools
- Electric mixer
- Ice cream scoop
How to Make No-Churn Cherry Garcia Ice Cream
Our homemade Cherry Garcia Ice Cream recipe is a quick and easy way to recreate the famous flavor at home. This creamy copycat tastes even better than Ben & Jerry’s and can be prepared in 15 minutes without using a machine.
- Form Stiff Peaks: Whip the heavy cream until it thickens and stiff peaks form (this takes several minutes).
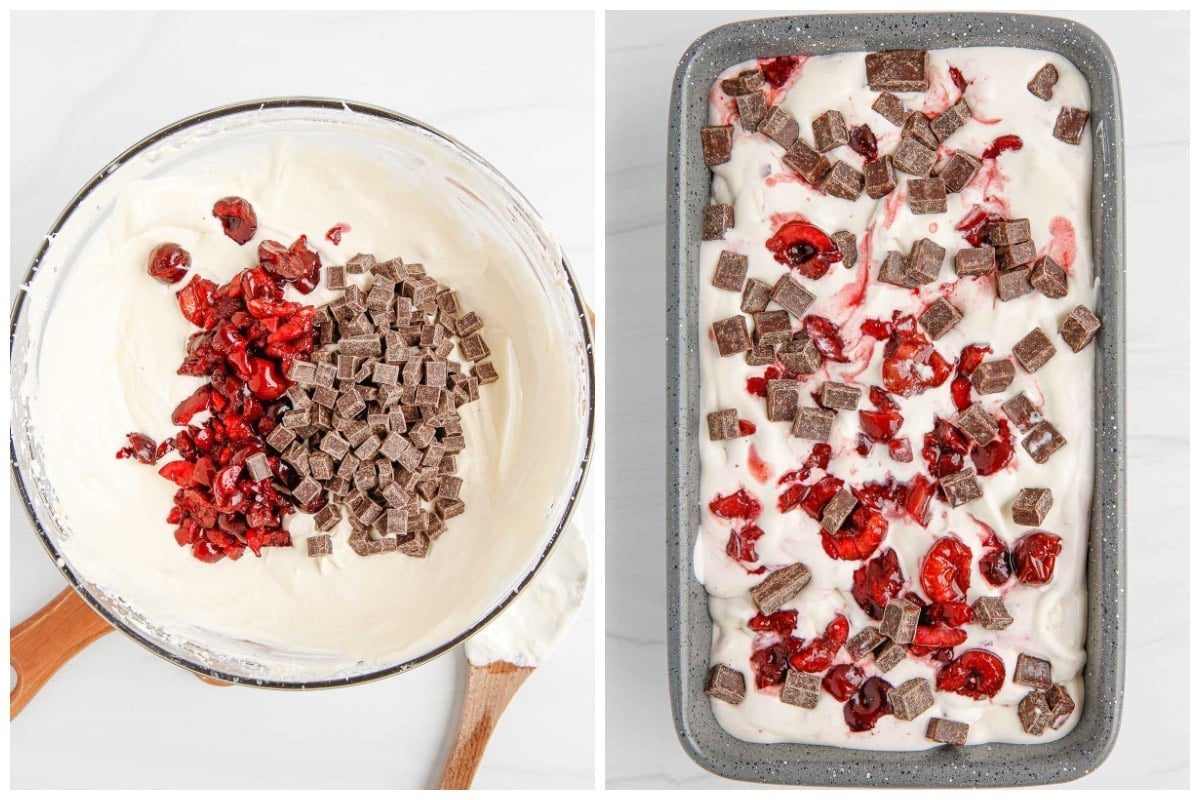
- Make The Mixture: Fold in the sweetened condensed milk and vanilla extract until just combined. Gently fold in the cherries and chocolate chunks.
Pro Tip: Feel free to reserve a handful of cherries or chocolate chunks to garnish the top of the ice cream. - Freeze: Add the ice cream mixture to the chilled loaf pan, garnish with any reserved cherry or chocolate chunks, and place it in the freezer for 6-8 hours until the ice cream is fully set.
- Serve: When ready to serve, scoop in bowls or scoop into an ice cream cone, enjoy!
Tips
- Place your loaf pan in the freezer to chill while preparing your ice cream for best results.
- Freezing the ice cream in a metal container will make it freeze faster.
- This homemade ice cream is very soft and melts quicker than store-bought ice cream. Don’t leave it out for too long!
Storage Tips
- To Store: Store leftover ice cream in an airtight container in the freezer for 3-4 weeks or store it in the loaf pan with plastic wrap for up to 1 week.
- I love these reusable ice cream containers. They are great and help prevent freezer burn.
Frequently Asked Questions
This recipe makes about 1 1/2 quarts which equal 6 servings or about 12 scoops.
No churn means no ice cream maker required — all you need is 10-15 minutes and an electric mixer. Unlike regular ice cream, no-churn ice cream does not contain eggs and uses sweetened condensed milk instead of granulated sugar.
This Cherry Garcia ice cream recipe is gluten-free as long as you make sure the chocolate you’re using is gluten-free. Most chocolate chunks, chips, or bars are naturally gluten-free, but it’s always good practice to check the label.
Other Easy Homemade Ice Cream Recipes
- Kool-Aid Ice Cream
- Harry Potter Butterbeer Ice Cream
- Cookie Monster Ice Cream
- Reese’s Peanut Butter Ice Cream
- Peanut Butter Dog Ice Cream
- Orange Sherbet
- Skrewball Whiskey Ice Cream
Cherry Garcia No Churn Ice Cream
Ingredients
- 2 cups heavy cream cold
- 14 oz can sweetened condensed milk
- 1 teaspoon vanilla extract
- 2 cups fresh or frozen cherries pitted and roughly chopped
- Chocolate chunks
- Ice cream cones for serving
Instructions
- Place a loaf pan in your freezer to chill while preparing your ice cream.
- In a large mixing bowl, use an electric mixer to whip the chilled heavy cream until it thickens and stiff peaks form (this takes several minutes).
- Fold the sweetened condensed milk with vanilla extract until just combined. Gently fold in the cherries and chocolate chunks. (Optional: reserve a handful of cherries or chocolate chunks to garnish the top of the ice cream).
- Remove the chilled loaf pan from the freezer and put the ice cream mixture into the loaf pan. Garnish with any reserved cherry or chocolate chunks.
- Place the loaf pan back into the freezer for 6-8 hours until the ice cream is fully set.
- When ready to serve, scoop in bowls or scoop into an ice cream cone, enjoy!
Jenn’s Notes
- Place your loaf pan in the freezer to chill while preparing your ice cream for best results.
- Freezing the ice cream in a metal container will make it freeze faster.
- This homemade ice cream is very soft and melts quicker than store-bought ice cream. Don’t leave it out for too long!


What kind of chocolate do you use in the cherry Garcia?
You can really use whatever kind you like. I prefer dark chocolate here, but milk chocolate will be delicious too!
The recipe calls for cream cheese, yet I don’t see it anywhere in the instructions. (?)
My apologies, there was a typo in my recipe, there is no cream cheese in the recipe. Please see the corrected recipe above.
How would you make this if wanting to use an ice cream freezer?
I was thinking I was missing something about the cream cheese! I read it 20 times to figure out that the cream cheese isn’t listed !
My apologies, there was a typo in my recipe, there is no cream cheese in the recipe. Please see the corrected recipe above.
On the ice cream recipe, you don’t say when to put in the cream cheese.
My apologies, there was a typo in my recipe, there is no cream cheese in the recipe. Please see the corrected recipe above.
When do you add the cream cheese?
My apologies, there was a typo in my recipe, there is no cream cheese in the recipe. Please see the corrected recipe above.