
This post may contain affiliate links. Please read our disclosure policy.
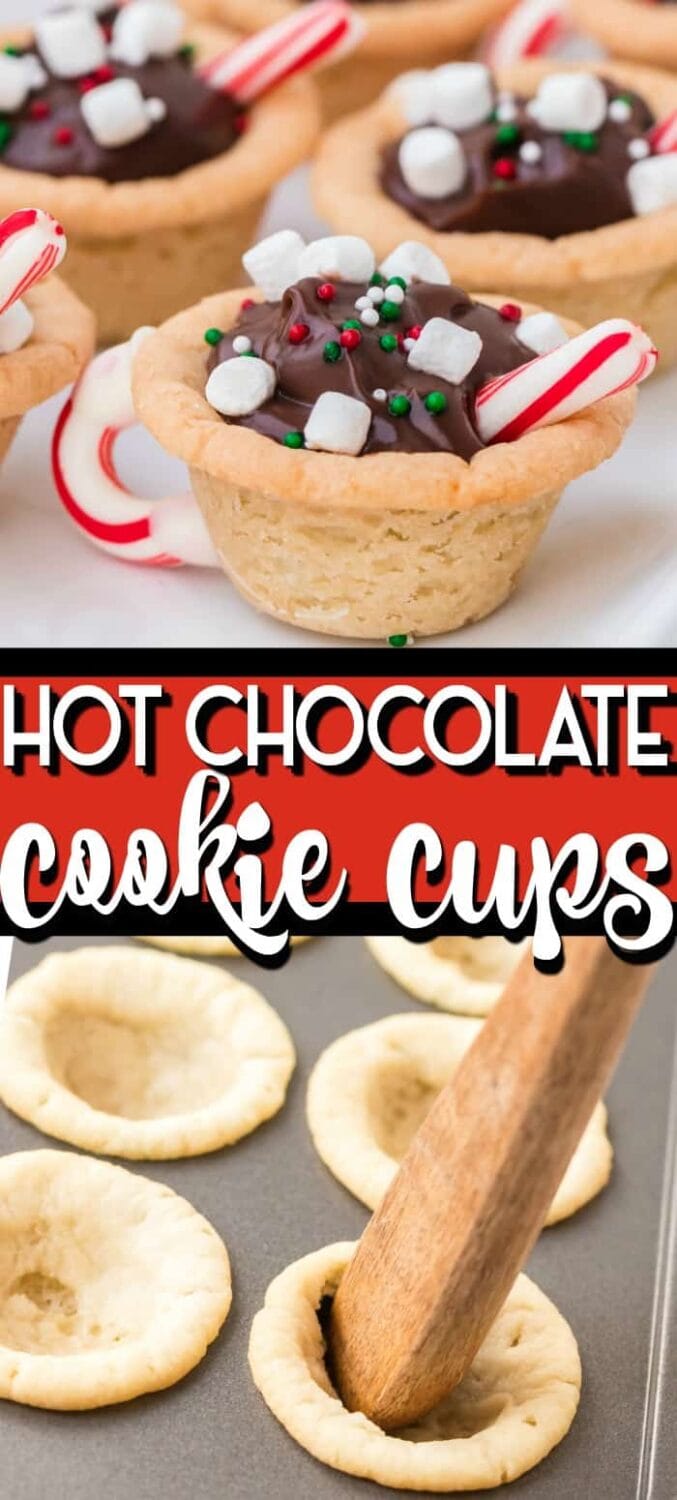
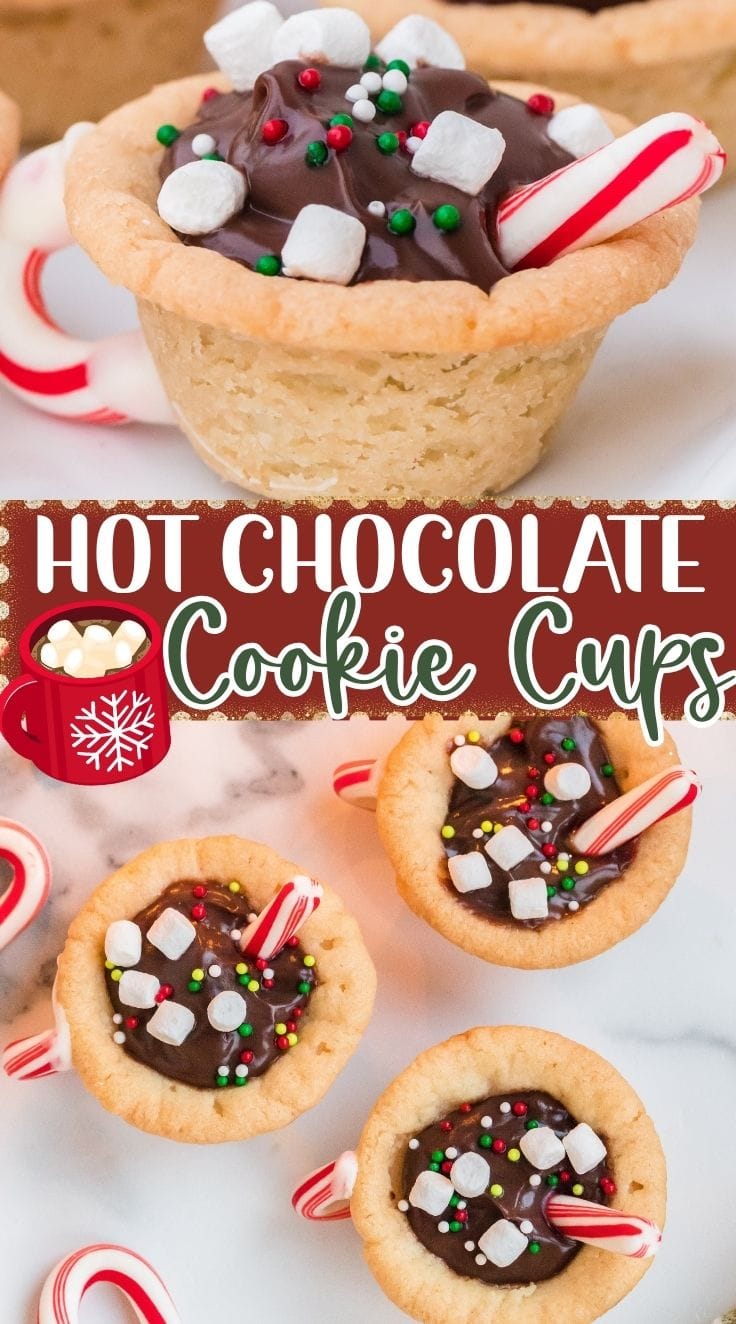
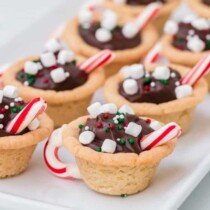
These Hot Chocolate Cookie Cups are made with ready to bake sugar cookie dough and pudding cups! So easy to make and they are a super fun holiday dessert and are perfect for Christmas parties, cookie exchanges or just to put a smile on someone’s face!

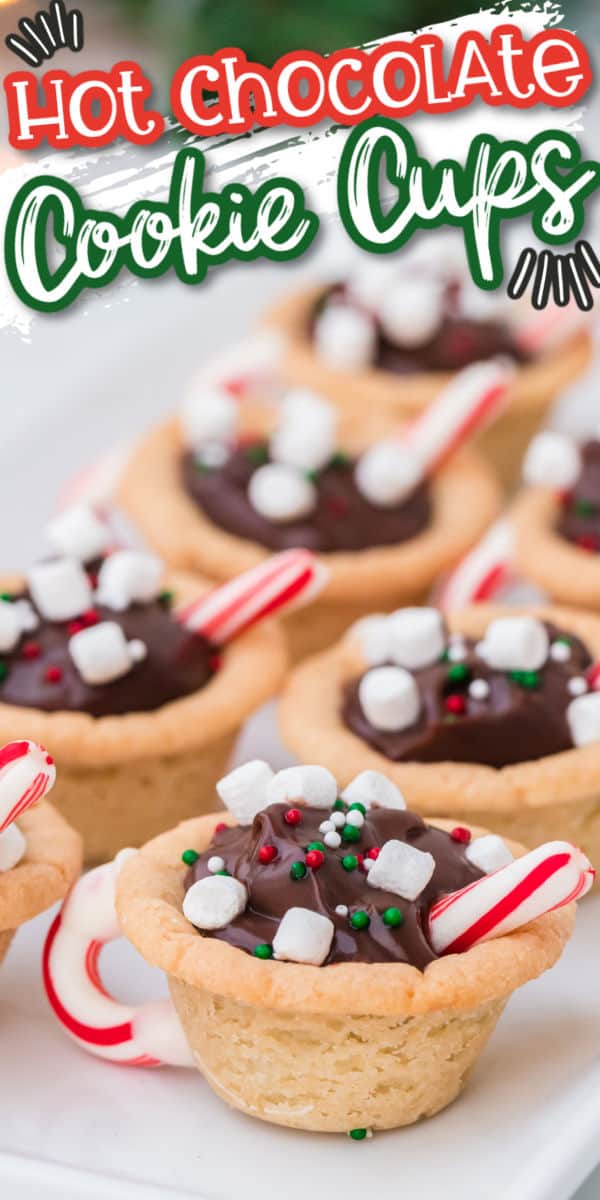

Hot Chocolate Cookie Cups
Winter can be a drag, but these Hot Chocolate Cookie Cups will brighten up even the gloomiest winter day!
Have you ever seen a recipe that you totally inspires you? Well, that is what happened with me with these adorable Hot Chocolate Cookie Cups! The Gunny Sack shared these a few years ago and I couldn’t get them off of my mind.
She made them a little different and used a different filling, but they totally inspired me to try my own version of these adorable cookies!
Do you just love holiday traditions? Me too!! What about the Elf on the Shelf? We love that one too, but we do the Mensch on the Bench (our Hanukkah twist on the Elf!!)
What I adore about these Cookie Cups is how easy they are to make! They use ready to bake sugar cookies, already sectioned off into the perfect size and ready-made pudding cups, so there is virtually no “cooking” involved…really just assembling!
Do you love making cute things for the holiday’s? Like I mentioned, I love to food craft! What is food crafting… my definition is making cute things out of food!
Want to see some of my favorite food crafts? Check out my DIY Peppermint Candy Bowl! These make great DIY gifts for Christmas!
Also, if you need some easy gifts to hand out to friends, co-workers and family. These DIY Candy Cane Sleighs are total winners! They are an easy DIY Christmas gift and really fun to make too!
If you know anything about Princess Pinky Girl, then you know that I think of myself as more of an assembler or food crafter rather than a cook. I love to make cute things with food and these Hot Chocolate Cookie Cups are all that and more!
To make these adorable Holiday Cookies, you only need about six ingredients. I would recommend making the cookie cups first and then topping them off with the pudding, marshmallow bits and sprinkles right when you are ready to serve them.
Don’t worry, though, topping them off only takes a few minutes! I am telling you that these Hot Chocolate Cookie Cups are perfect for a Christmas Party and will be the envy of any Christmas Cookie Exchange!
Ingredients
- Ready to Bake Sugar Cookies
- Ready to Eat Pudding Cups
- Mini Marshmallow Bits (NOTE, these are NOT mini marshmallows, but mini marshmallow BITS – they can usually be found by the hot chocolate in the grocery – see link to view product!)
- Mini Candy Canes
- White Chocolate
- Christmas Sprinkles
How to make Hot Chocolate Cookie Cups!
Step 1
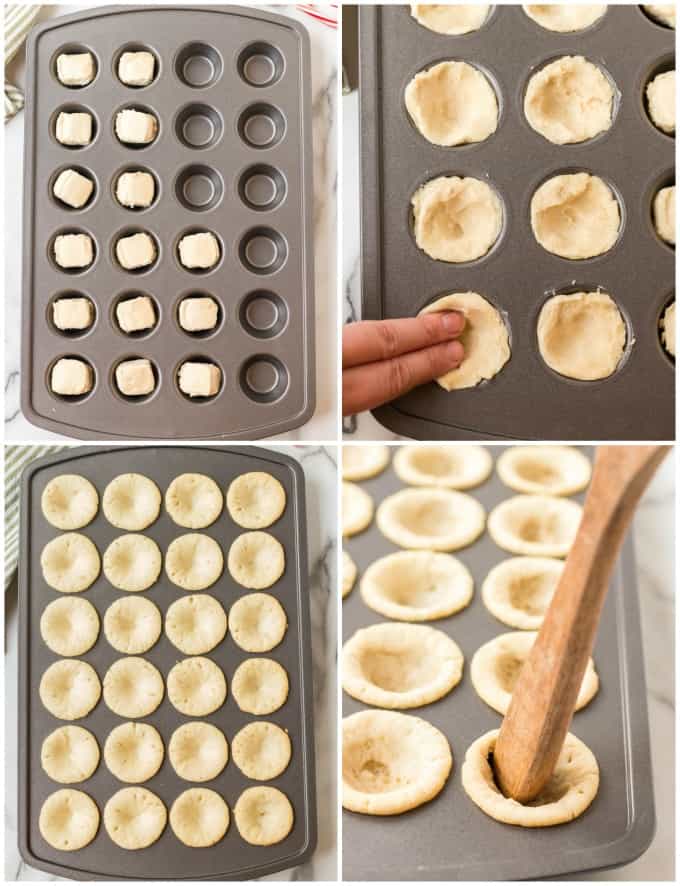
Preheat oven to 350. Place one piece of ready to bake cookie dough in the bottom of each mini-muffin baking cup. Use your fingers to press the dough up and along the sides of the pan to make a cup shape.
Step 2
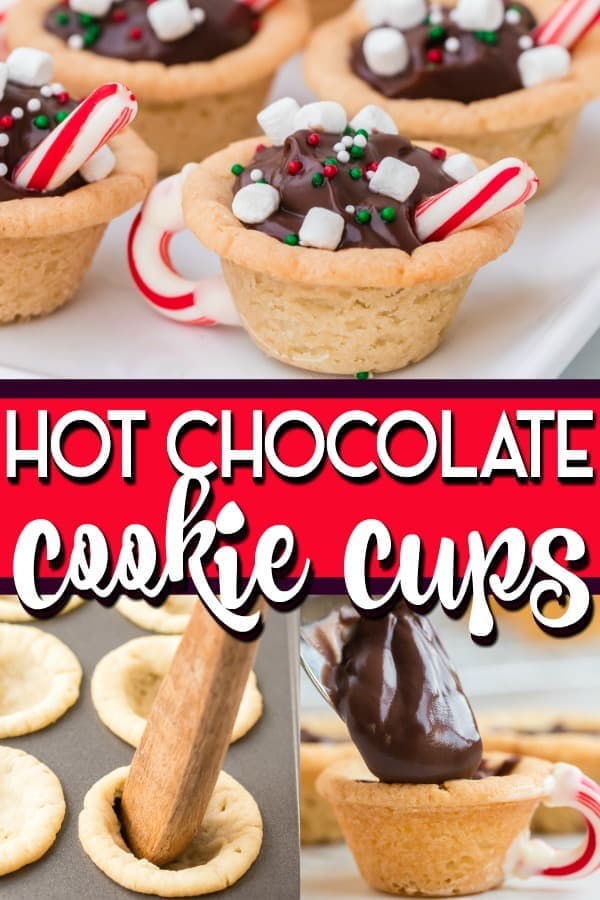
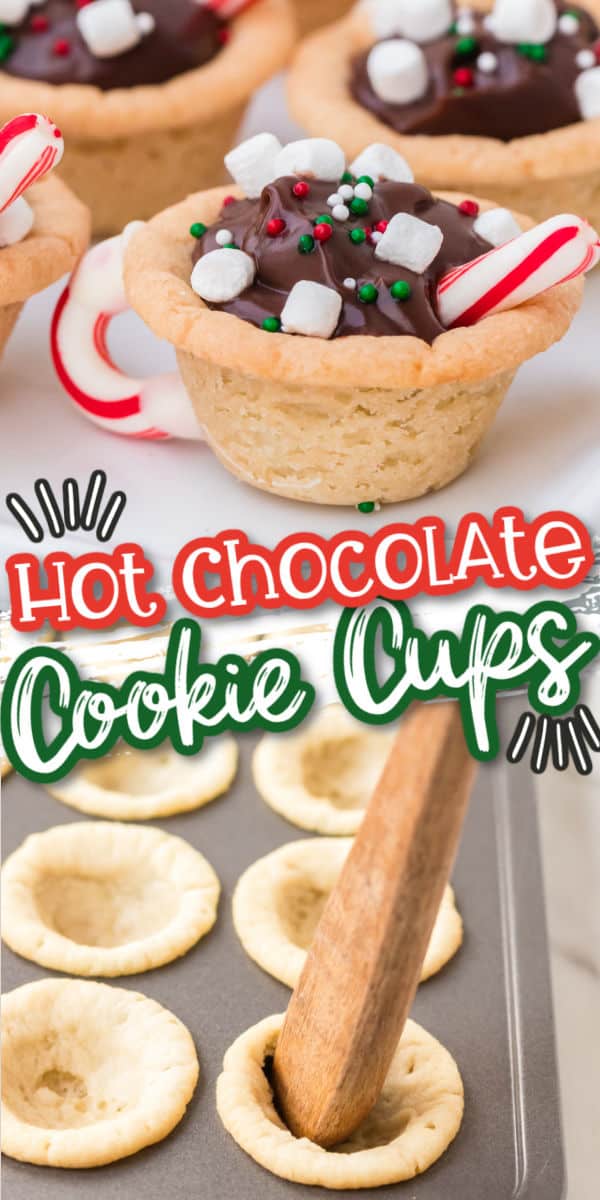
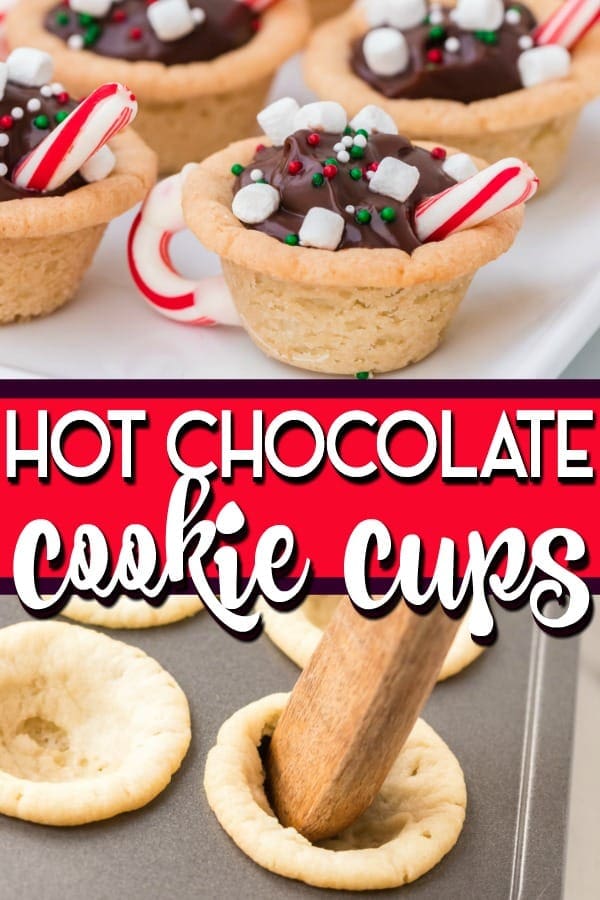
Bake for 10 minutes. Immediately after removing the cookies from the oven, take the end of a wooden spoon (or something similar) and gently re-form the “cup shape” by widening the center and flattening the bottom of cup. Place back in oven and bake for an additional 2 minutes.
Step 3
Remove from the oven and let the cookies cool completely. Once cooled, use the end of a knife to gently pop out the cookie cups (you may have to gently twist them, but the should easily pop out).
Step 4
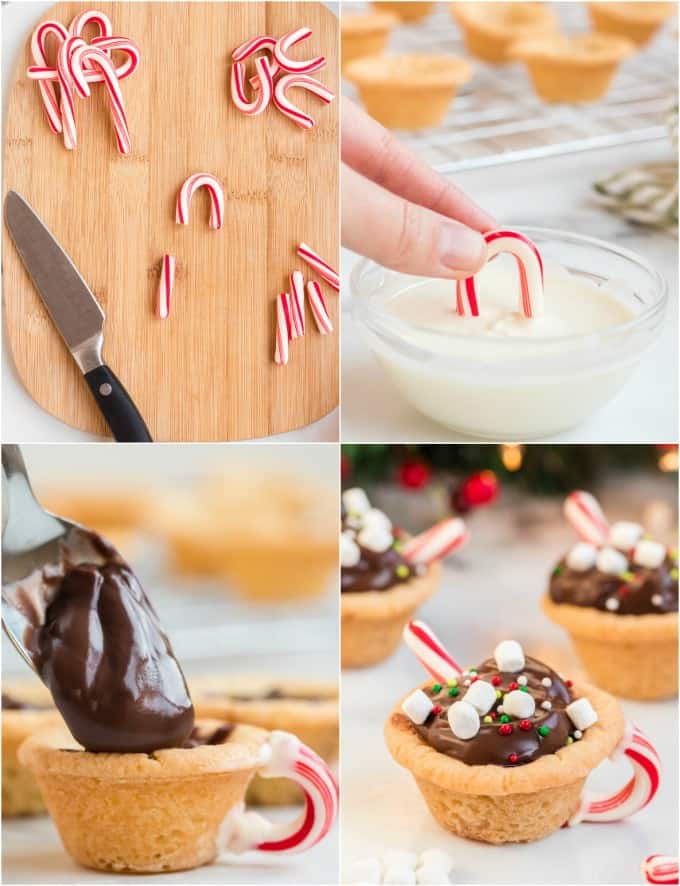
Using a sharp knife, carefully cut the mini candy canes and create a “cup handle” with the curved section and a “straw” with the remainder of the candy cane.
Step 5
Melt the white chocolate. Once melted, dip the end of the curved candy cane piece into the white chocolate and attach the candy cane handle to the cookie cup (see notes if you are having trouble keeping the candy cane handle sticking). Let the handle dry and set.
Step 6
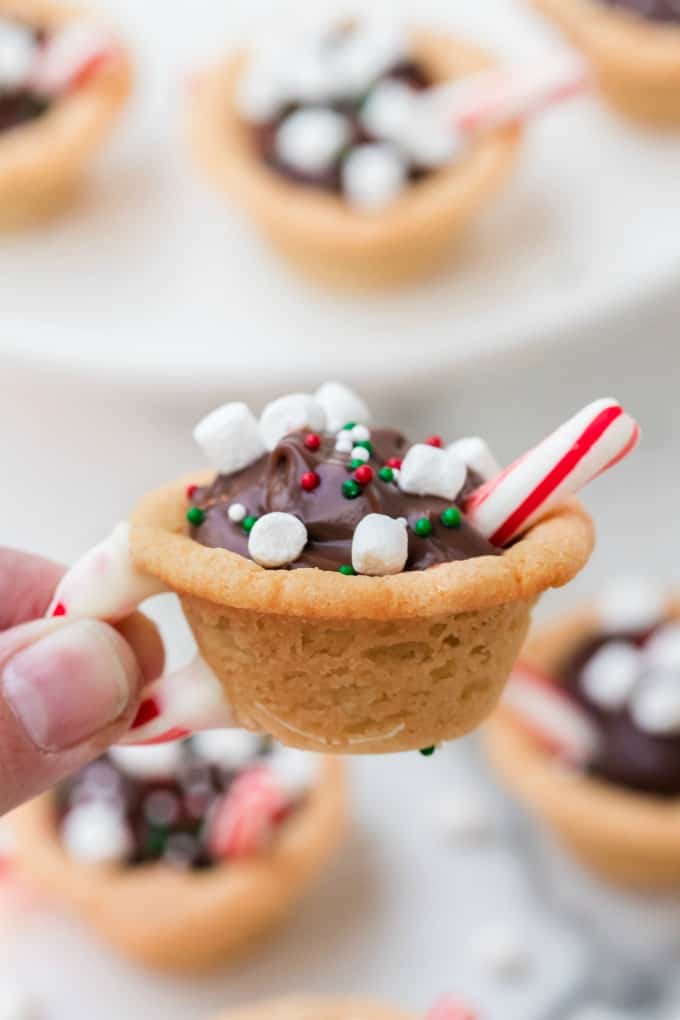
Just before serving, spoon chocolate pudding into the cup. Add mini marshmallow bits, sprinkles and candy cane “straw”.
Pro-Tips:
- If you are not serving the cups right away, wait to put the pudding and toppings in them. Fill them right before serving!
- NOTE, these are NOT mini marshmallows, but mini marshmallow BITS – they can usually be found by the hot chocolate in the grocery – see link to view product!
- Regarding the candy cane handle… if you have trouble getting the handle to “stick” to the cup. Follow this tip.
PRO-TIP: after dipping the candy cane in the white chocolate, hold the handle on to the cup and hold it in your freezer for about 30-60 seconds so the chocolate will set. Once it can stick without you holding it, place it in the freezer for another 1-2 minutes to help it quickly dry! - If you are having trouble with the handle, try a pretzel instead. It is lighter and will stick easier (but we think the candy cane is cuter!)
More Christmas Cookie Recipes & Cookie Exchange Recipe Ideas
- Chocolate Dipped Meringue Cookies {Meringue Kisses}
- Christmas Sugar Cookie Blossoms
- Melted Snowman Bark
- Rainbow Sprinkle Cookies
- Cinnamon Roll Cookies
- Hot Chocolate on a Stick (not a cookie, but still yummy!)
- Christmas Cake Mix Cookies
Hot Chocolate Cookie Cups
Ingredients
- 1 package Sugar Cookies – Ready to Bake
- 4 Cups Ready to Eat Pudding Cups
- Mini Marshmallow Bits
- Mini Candy Canes
- White Chocolate Candy
- Christmas Sprinkles
Instructions
- Preheat oven to 350.
- Place one piece of ready to bake cookie dough in the bottom of each mini-muffin baking cup. Using your fingers, gently press the dough up and along the side of the pan to make a cup shape.
- Bake for 10 minutes. Immediately after removing the cookies from the oven, take the end of a wooden spoon (or something similar) and gently re-form the “cup shape” by widening the center and flattening the bottom of cup.
- Bake for an additional 2 minutes.
- Remove from the oven and let the cookies cool completely. Once cooled, use the end of a knife to gently pop out the cookie cups (you may have to gently twist them, but the should easily pop out).
- Using a sharp knife, carefully cut the mini candy canes and create a “cup handle” with the curved section and a “straw” with the remainder of the candy cane.
- Melt the white chocolate. Once melted, dip the end of the curved candy cane piece into the white chocolate and attach the candy cane handle to the cookie cup (see notes if you are having trouble keeping the candy cane handle sticking). Let the handle dry and set.
- Just before serving, spoon chocolate pudding into the cup. Add mini marshmallow bits, sprinkles and candy cane “straw”
Jenn’s Notes
- If you are not serving the cups right away, wait to put the pudding and toppings in them. Fill them right before serving!
- NOTE, these are NOT mini marshmallows, but mini marshmallow BITS – they can usually be found by the hot chocolate in the grocery – see link to view product!
- Regarding the candy cane handle… if you have trouble getting the handle to “stick” to the cup. Follow this tip.
- TIP: after dipping the candy cane in the white chocolate, hold the handle on to the cup and hold it in your freezer for about 30-60 seconds so the chocolate will set. Once it can stick without you holding it, place it in the freezer for another 1-2 minutes to help it quickly dry!


Just wanted to add that they will DEFINITELY get soggy if made the night before. When I go to pick them up the pudding is seeping out of the cookie and the cookie is crumbling. The only thing you can do with these the night before is bake the cookie cup itself. Leave everything else to add literally right before serving.
I made these for a cookie exchange last night and it is important to note that candy canes ‘straw’ MUST be added right before serving. I woke up this morning and the candy cane piece dissolved in some of the cups and is in the process of dissolving at the moment. The candy cane portions inserted previously the night before are entirely dissolved in some and partially dissolved in others. The other thing I noticed is I bought marshmellows that said ‘mini’ but when placed in the cookie cup they are huge in comparison to the picture shown on this site. I don’t know if they were broken up from their mini state then added for the ones in the picture above but I used Jiff mini’s and I assure you they don’t look mini once added. Last, the people eating them definitely needto like peppermint. The ‘straw piece’ isn’t just for looks, the flavor of the candy cane actually works its way into the pudding in its entirety quickly so its no longer a chocolate tasting pudding fill but more of a chocolate-peppermint pudding taste. Overall they taste good, but it would have been helpful to know these things beforehand.
Hi Michelle! Thanks so much for your message! Regarding the marshmallows – if you look at the ingredients (and the link for the marshmallow bits – they actually say ‘mini marshmallow bits’ not mini marshmallows. These are teeny tiny bits of marshmallow and can be found using the link above or usually by the hot chocolate in the grocery. Sorry for the confusion. And regarding filling before serving, I do mention to add the pudding right before serving, but will make it more clear.
Suggestion …stick pretzel sticks in pudding
Do you need to grease the pan?
Hi Angela – I followed whatever the package said about greasing the pan… and cannot remember. Do whatever it says!
May i ask why you suggest to fill them just before serving and not the night before?
I think the cookie could start to get soggy if left with the pudding overnight. I think the pudding will also taste fresher if you fill them before you serve!
Besplatno https://turskeserije.cc/ Emanet Epizoda 295 online video. Ako ste zainteresovani da gledate turske drame i godišnja doba i najpopularnije serije na engleskom sa titlovima, pratite nas i uživajte u najboljim turskim serijama na mreži.
What are your thoughts of making one day and passing out a couple of days later. Will the pudding be hard?
I think you could make them before, store them in a airtight container and fill them with the pudding right before you are ready to serve!
We made these at Christmas and the turned out really cute but a couple of things I wanted to note. First, the handles were time consuming. We had to hold the handles on for a few minutes before we could get them to stay on enough to put in the freezer. Second, they do not last very long after you fill them…the pudding made the cookies soggy and third, the sticks that were put in the pudding made the pudding minty by the next day. They were very good and super cute but I am not sure we will make them again 🙂
Thanks for your feedback! One thing to note (and I write it in the “blurb”) you want to wait until you are ready to serve them before you put the pudding and peppermint stick in them. That is the beauty of using ready-made pudding – you can just plop it in there. Sorry they didn’t meet expectations <3
Could the cups be frozen then filled later?
They are just sugar cookies, so I don’t see why not!
They looks sooo yummy and cute ,my kids would love these Thanks for amazing idea
Thank you for the link back! Your version is SO cute- filling them with pudding is a great idea! 😉
These are so adorable! My kids would love to make them and give them as gifts!
These are SO adorable! Perfect for chilly evenings this holiday season 😀