

This post may contain affiliate links. Please read our disclosure policy.

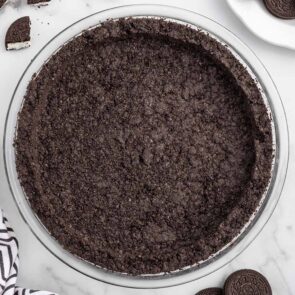
I make this Oreo pie crust anytime a dessert needs a chocolate cookie base instead of graham crackers. It bakes up thick and crunchy, with that deep chocolate-and-cream Oreo flavor in every bite, and it holds a filling without going soggy.


I started making my own when the premade Oreo crusts disappeared from my grocery store. I looked everywhere, could not find them, and figured out pretty fast that a homemade one is better anyway. It takes two ingredients and a few minutes, and it tastes like real Oreos instead of a thin packaged shell.
Here is the difference with mine. Most Oreo crusts go wrong one of two ways, either baking into a hard slab you cannot cut through or falling apart the second you lift a slice. Mine packs firm but still gives way to a fork, and I will show you exactly how I get it there.
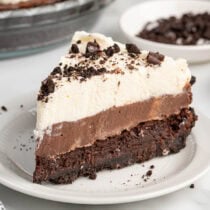
This is the base I reach for when I make my no bake Oreo cream pie and my no bake dirt pie, and it works for almost any pie filling you like.

Tested & Perfected
The Change That Finally Got Me a Crust That Slices Clean
The first time I made this I pressed the crumbs down as hard as I could, thinking harder meant sturdier. It baked into something close to cement and I could barely cut through it. The fix was to press firm but stop before compacting the crumbs into a solid mass. Now it holds every slice together but still gives way to a fork.


What You’ll Need
Oreo cookies: Use regular Oreos, not Double Stuf or Thins. The regular cookie has the cookie-to-cream ratio that sets up into a firm crust. Double Stuf has too much cream and bakes up wet and greasy, and Thins do not give you enough crumb. Keep the cream filling in, it helps bind everything together.
Butter: Melted butter is what holds the crumbs into a crust you can slice. I use unsalted, but salted works too and adds a little contrast to the sweet cookies.

How to Make an Oreo Pie Crust
Step 1: Prep the Pan and Oven Preheat the oven to 350°F and spray a 9-inch pie plate with nonstick spray. If you are making a no-bake crust and plan to chill it, you can skip the oven.
Step 2: Crush the Cookies Pulse 25 regular Oreos in a food processor until they are fine crumbs, about 2 cups. No processor? Seal them in a zip-top bag and crush with a rolling pin until fine.
Step 3: Coat the Crumbs in Butter Stir the melted butter into the crumbs until every crumb is coated and the mixture looks like wet sand. That even coating is what keeps the crust from crumbling later.
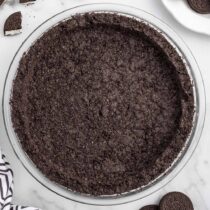
Step 4: Press It Into the Pan Pour the crumbs into the pie plate. Use the flat bottom of a measuring cup to press them firmly and evenly up the sides and across the bottom. Press until they hold, but do not compact them into a solid mass.
Step 5: Bake and Cool Bake for 10 minutes, then let the crust cool completely before adding any filling. For a no-bake filling, chill the unbaked crust until firm instead of baking.

Bake It or Chill It
Whether you bake the crust depends on the filling.
Bake it for baked or warm fillings, and for most no-bake fillings too. Ten minutes at 350°F sets the crust so it stays crisp and does not go soggy once the filling goes in.
Chill it instead when a no-bake recipe calls for an unbaked crust. Press it into the pan and refrigerate until firm, about 30 minutes, so the butter sets before you add the filling.

How to Store and Freeze an Oreo Pie Crust
Fridge: Cover a baked and cooled crust with plastic wrap and keep it in the refrigerator for up to 7 days before filling.
Freezer: Wrap the crust in plastic wrap and then foil and freeze for up to 3 months. Thaw in the fridge before you fill it.

More Pie Recipes to Try
Oreo Pie Crust
Ingredients
- 25 regular Oreo cookies with filling
- 5 tablespoons unsalted butter melted
Instructions
- Preheat the oven to 350°F. Generously spray a 9 inch pie plate with nonstick cooking spray.
- Using a food processor makes it faster, but a gallon size ziploc and a rolling pin work just as well. Pulse the cookies 5 or 6 times before crushing on the shred speed for a couple of minutes or until the cookies are fine crumbs. Same goes for the ziploc bag and rolling pin, crush until the cookies are fine crumbs. 25 cookies should give you about 2 cups of cookie crumbs.25 regular Oreo cookies
- Add the cookie crumbs to a medium size mixing bowl. Stir in the melted butter until the crumbs are completely coated and well incorporated.5 tablespoons unsalted butter
- Pour the coated crumbs into the prepared pie plate. Use the bottom of a mixing cup to evenly press the coated crumbs up the sides and on the bottom of the pie plate.
- Bake for 10 minutes and then allow the crust to completely cool before filling.
Jenn’s Notes
- Press the crumbs firm and even, not compacted. Pressing too hard bakes the crust into a hard slab that is difficult to cut.
- Crush the cookies into fine crumbs and stir until every crumb is coated in butter, that is what keeps the crust from falling apart when you slice it.
- Let the crust cool completely before filling so the butter sets.








I often use a 9×13 pan for desserts. Can an Oreo crust be used for a no-bake? Recommendations?
Yes, it sure can!