This post may contain affiliate links. Please read our disclosure policy.

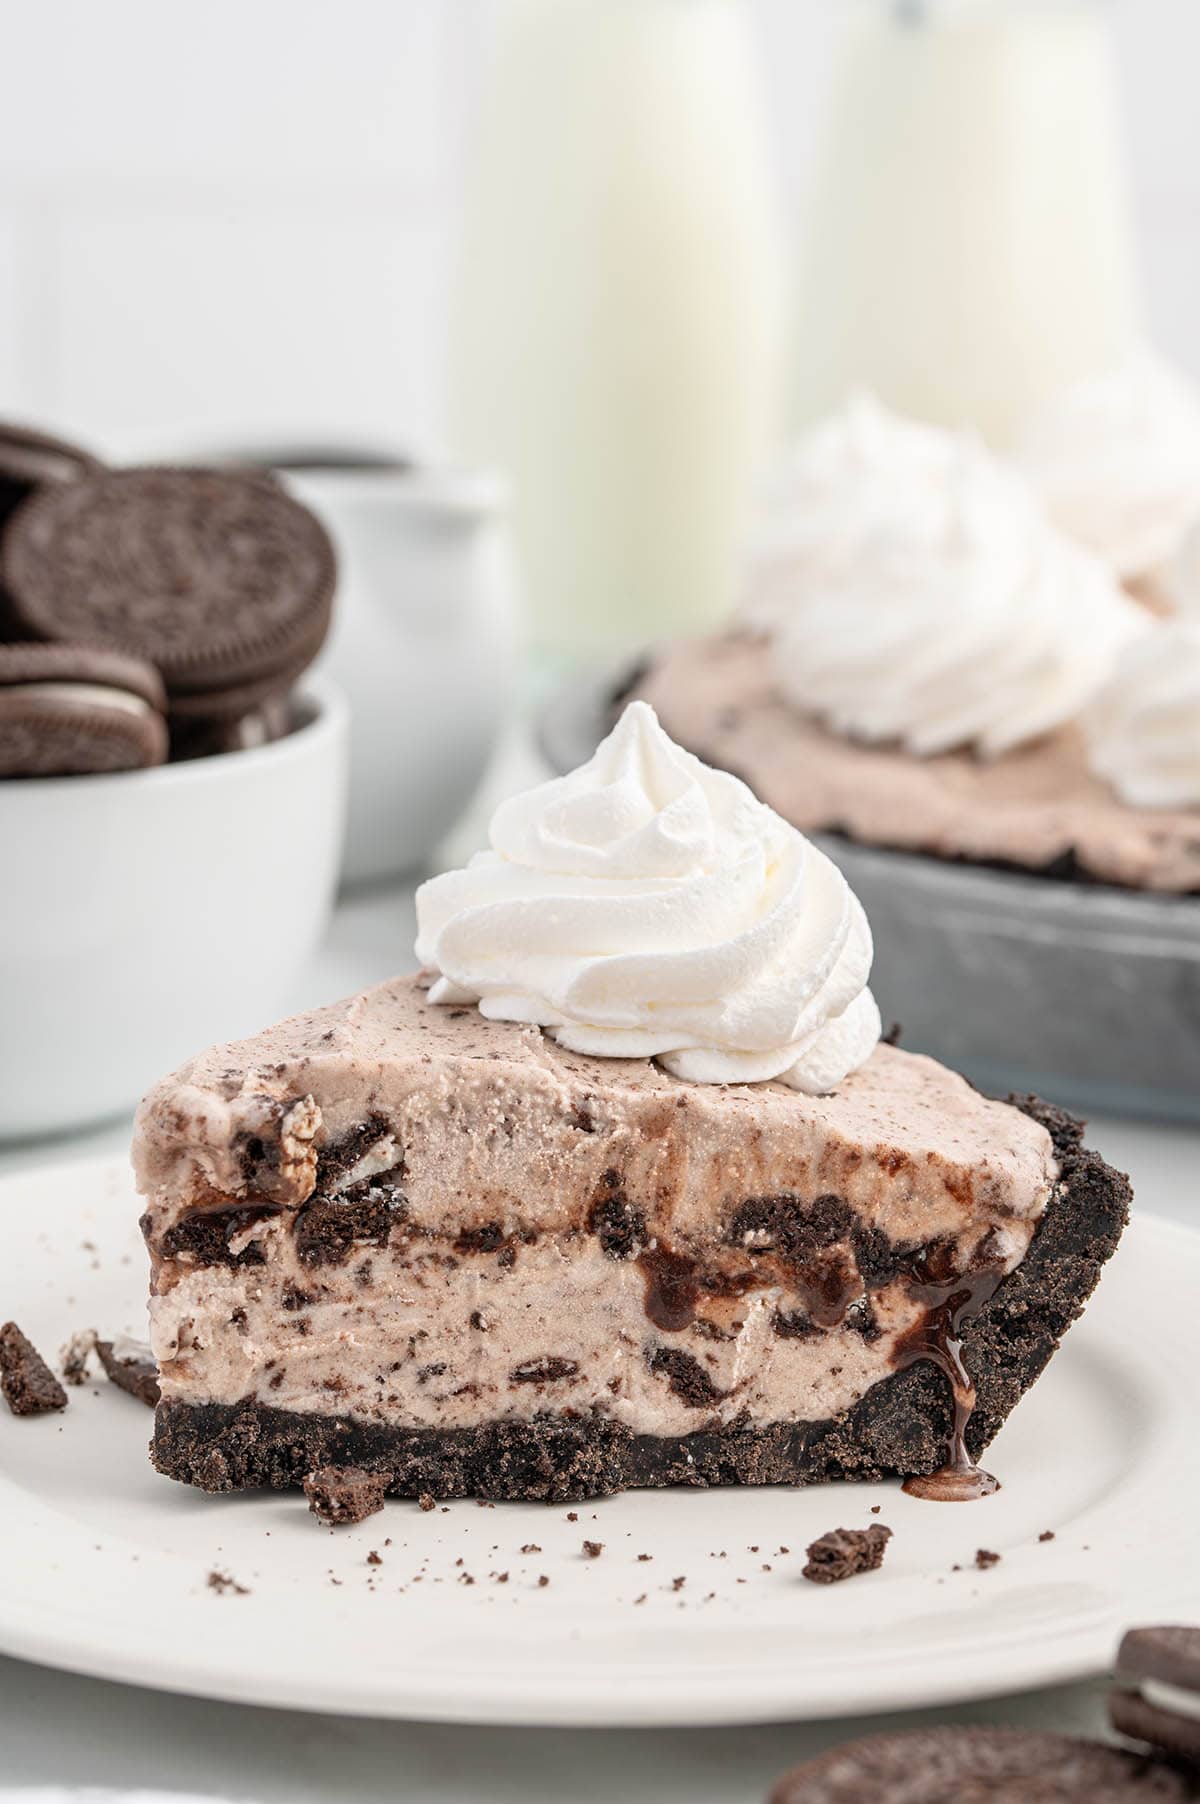
If you’ve ever made an ice cream pie for a party and watched people assume it took hours, you know exactly why I keep making this one. It’s an Oreo cookie crust, layers of cookies and cream ice cream, a hidden chocolate ribbon in the middle, and whipped topping around the edge. The whole thing takes 20 minutes of actual work.

This one has been my go-to for summer pool parties for years. When my kids were little, it was the end-of-year pool party dessert, the one they always asked for by name. Now they’re grown and it still makes an appearance every summer when we have families over. It disappears every single time.
Make it the night before, pull it out right before guests arrive. Done.
If you love no-bake frozen desserts, my No Bake Oreo Pie is another crowd-pleaser with that same cookies-and-cream flavor. And if you want something to keep in the freezer for the whole summer, my S’mores Ice Cream is always a hit with kids.
What You Need
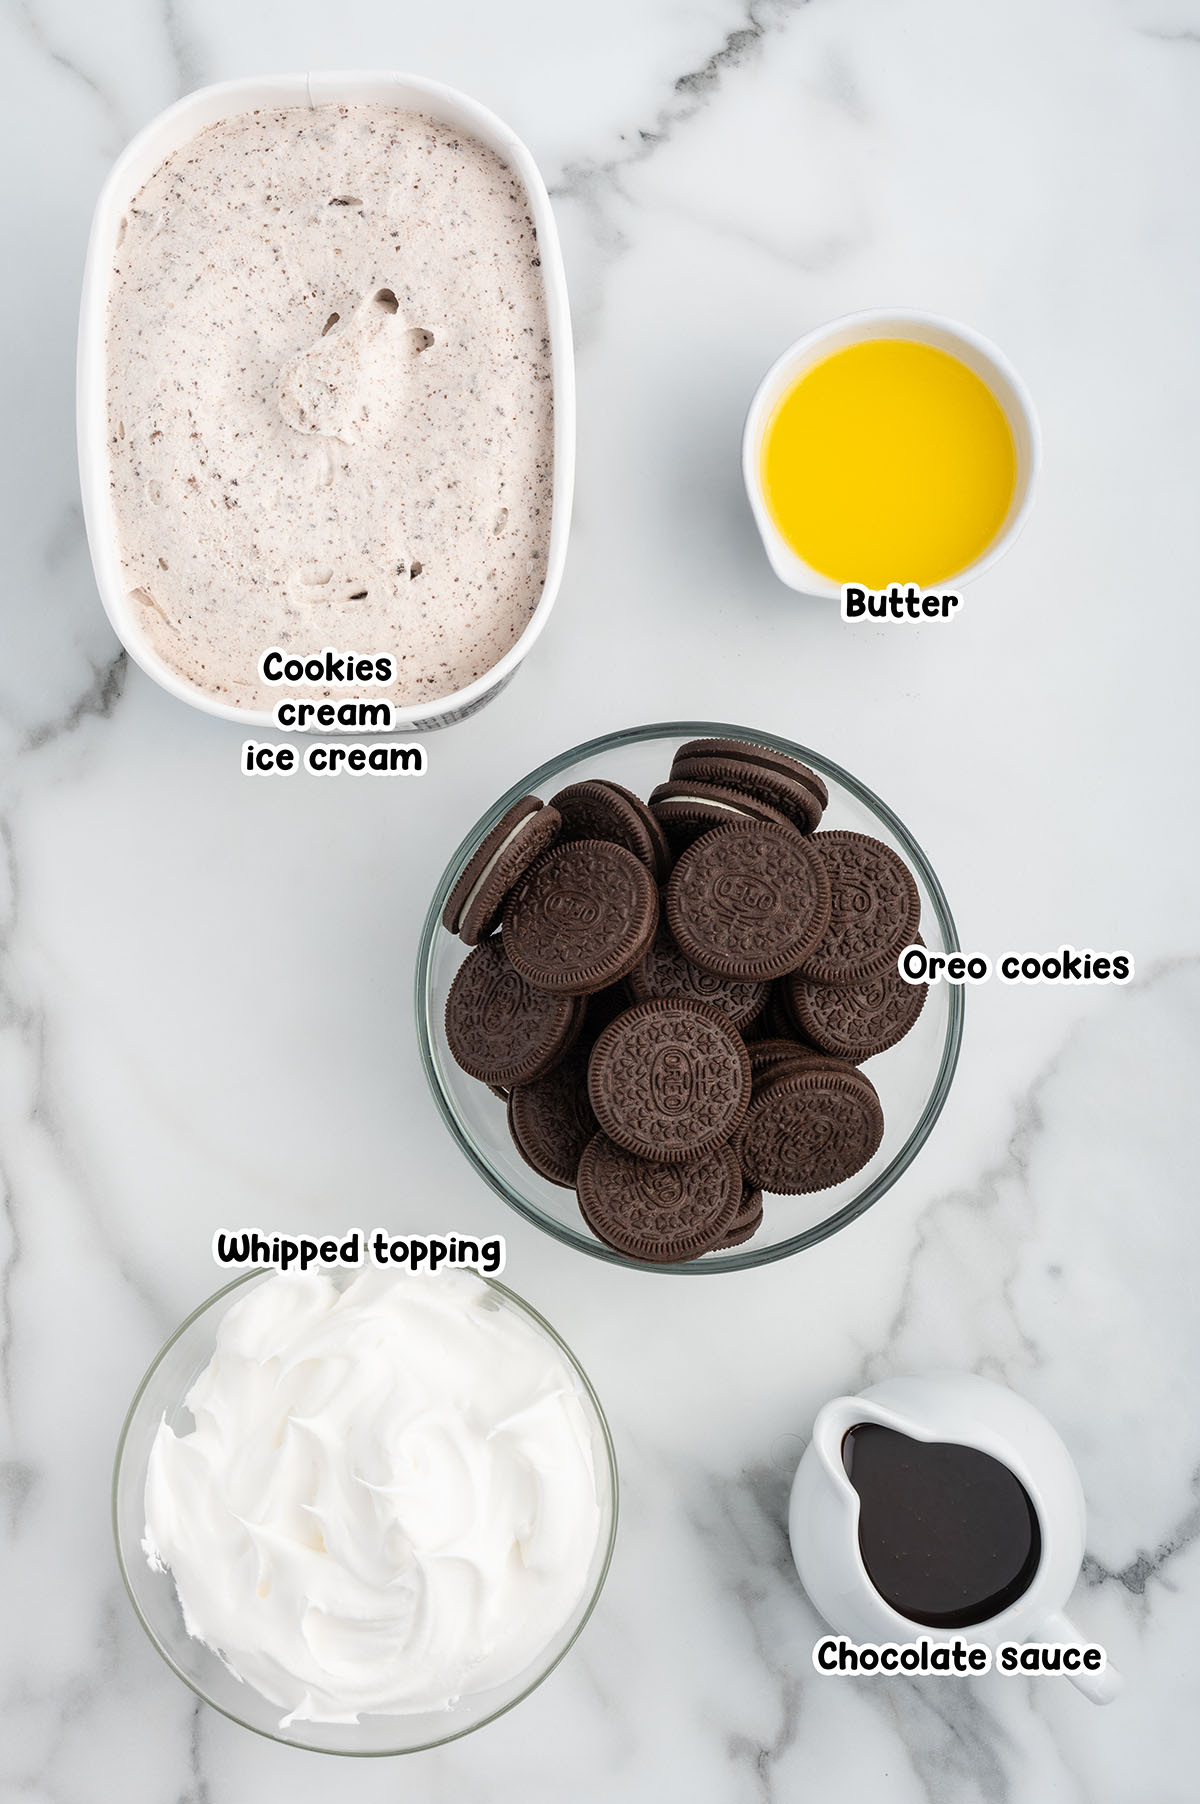
- Oreo cookies: Use the whole cookie, filling and all. The cream center is what helps the crust bind together and hold its shape. Twenty-four get crushed fine for the crust base, and the remaining ten get roughly chopped for the middle layer.
- Salted butter: The salt balances the sweetness from the Oreos and keeps the crust from tasting flat. Melt it first and let it cool slightly before mixing so it doesn’t start softening your crust before it goes in the freezer.
- Cookies and cream ice cream: One 48-ounce container. The Oreo pieces in this ice cream stay crunchy when frozen, which adds texture throughout the filling. It pairs naturally with the Oreo crust, but any flavor you love works here.
- Chocolate sauce: Half a cup goes inside the pie as a middle layer and freezes into a fudge-like ribbon. This is what makes the pie. Keep a little extra on the side for drizzling over each slice when you serve.
How to Make Easy No-Bake Ice Cream Pie
Step 1: Crush the Oreos for the Crust Measure out 24 Oreos and crush them into fine crumbs. A food processor gives you the most even texture, but a zip-top bag and a rolling pin work just as well. The crumbs should be uniform with no large chunks, so the crust presses together evenly.
Step 2: Mix, Press, and Freeze the Crust Pour the melted, cooled butter over the crumbs and mix until everything is combined and looks like wet sand. Press the mixture firmly into the bottom and up the sides of a 9-inch pie plate, using the bottom of a measuring cup to pack it in tight. Freeze while you prep the filling.
Step 3: Soften the Ice Cream and Chop the Oreos Take the ice cream out of the freezer and let it sit at room temperature for about 10 minutes. You want it soft enough to spread but not melted. It should look like soft serve. While you wait, roughly chop the remaining 10 Oreos into chunks.
Step 4: Spread the First Ice Cream Layer Pull the crust out of the freezer and spread 3 cups of the softened ice cream over it in an even layer. An offset spatula makes this easier and gives you a smooth surface. Work fairly quickly so the crust stays cold while you work.
Step 5: Add the Chocolate Sauce and Chopped Cookies Drizzle the chocolate sauce evenly over the ice cream layer. Scatter the chopped Oreos over the top. This is the middle layer that makes every slice interesting. The chocolate freezes into a ribbon and the cookie pieces add crunch between the layers.
Step 6: Add the Final Ice Cream Layer Spread the remaining softened ice cream over the chopped cookie layer. Smooth the top with a spatula. Cover the pie plate tightly with plastic wrap and put it in the freezer for at least 4 hours.
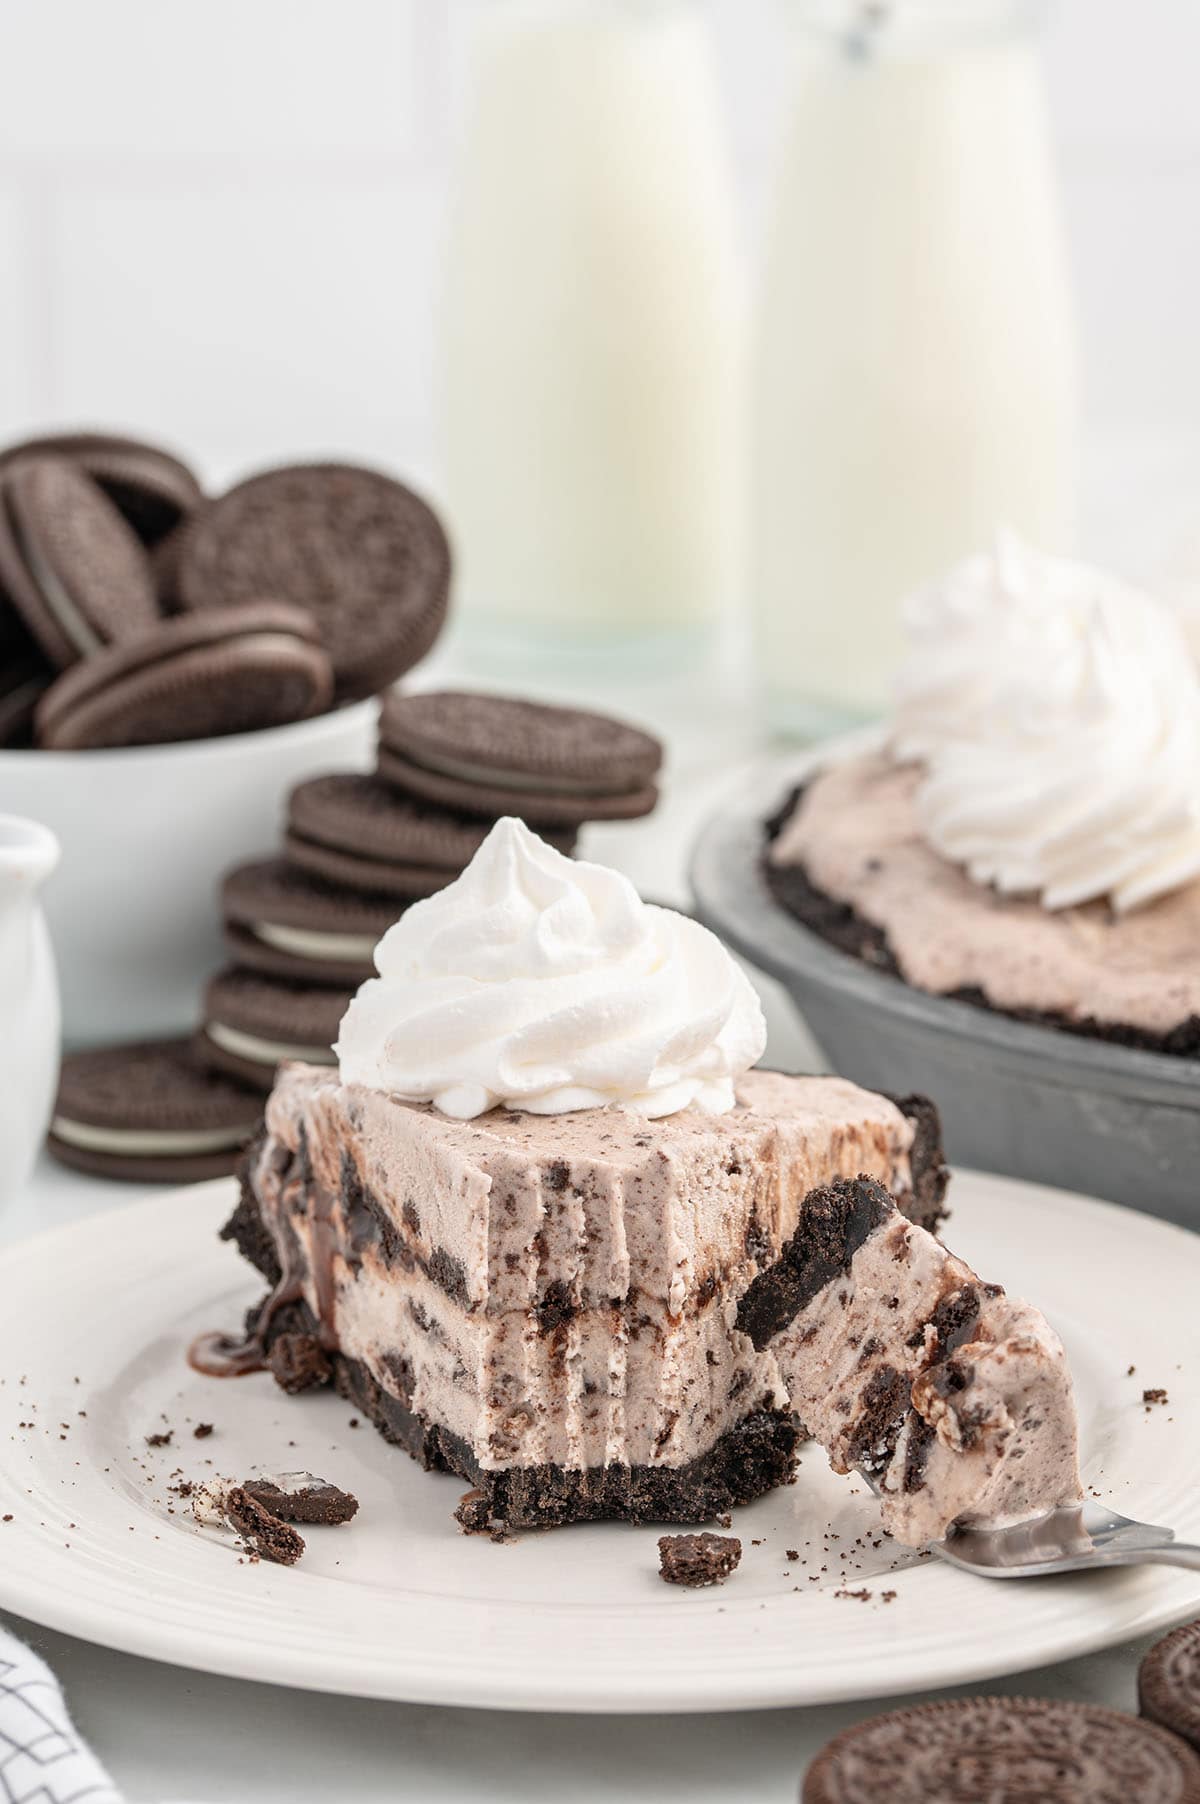
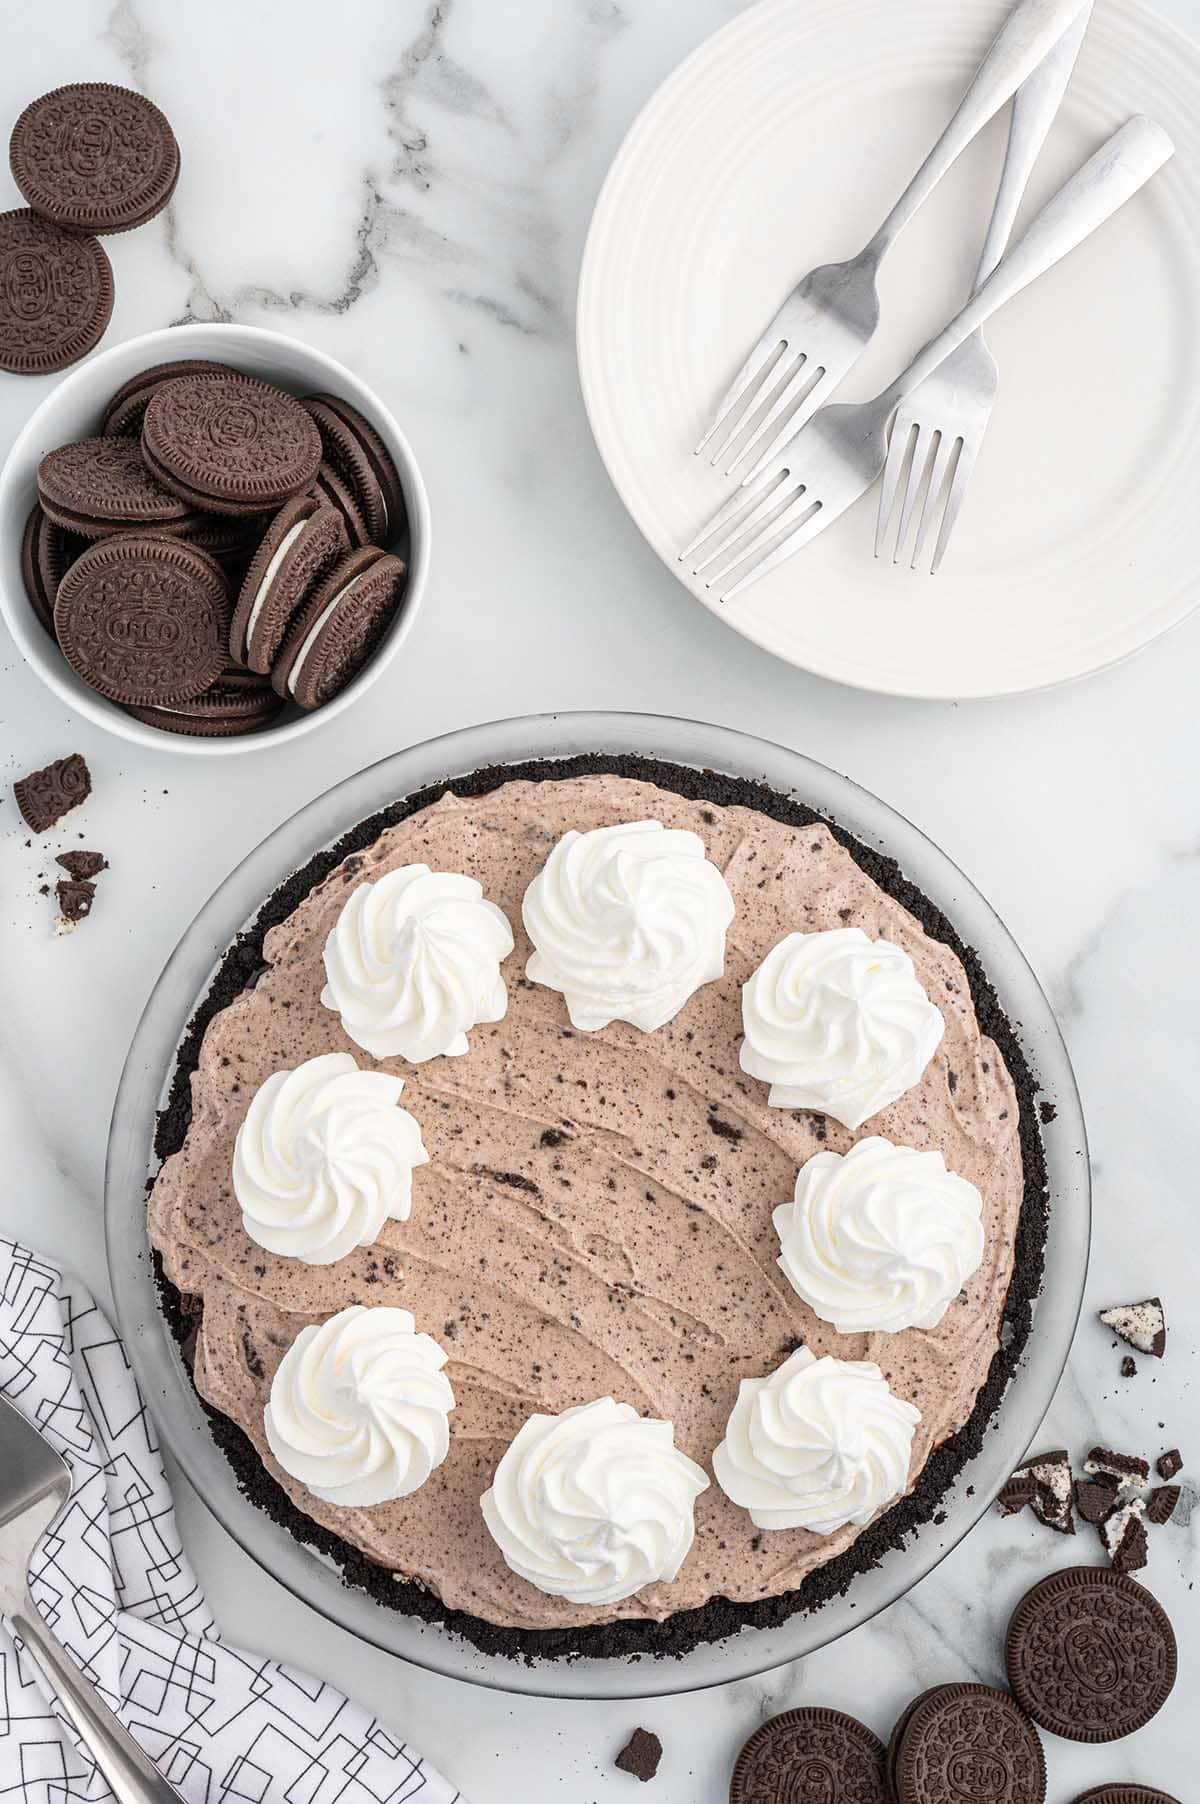
Step 7: Garnish and Serve Let the pie sit at room temperature a few minutes before you cut into it. This keeps the crust from cracking. Pipe or spoon whipped topping around the outer edge, drizzle with extra chocolate sauce if you like, and slice with a sharp knife. Serve right away.
Tips for the Best Results
- Freeze the crust before you fill it. I know 20 minutes feels like a step to skip, but don’t. A cold crust holds its shape when you press the ice cream in. A room-temperature crust will shift and crumble.
- Soft ice cream, not melted ice cream. You want it spreadable, not liquid. If it melts fully, it changes the texture of the pie once it refreezes. Ten minutes on the counter is usually the right amount of time.
- Pack the crust firmly. Press it hard into the pie plate, especially up the sides. Use the bottom of a measuring cup and really push it in. A firmly packed crust won’t crumble when you cut a slice.
- Cover tightly before freezing. Press plastic wrap directly onto the surface of the pie before it goes in the freezer. This prevents ice crystals from forming and keeps the top from getting icy.
- Give it enough time to freeze solid. Four hours is the minimum. If you’re making this for a party, overnight is the move. Slicing too early means the filling hasn’t set all the way through and you’ll end up with a soft, messy slice.
Make-Ahead and Storage
- This ice cream pie is built for making ahead, which is half the reason I love it for summer parties. I almost always make it the night before so it has all night to freeze solid and I don’t have to think about it the day of.
- Wrap the finished pie tightly in plastic wrap and it keeps well in the freezer.
- When you’re ready to serve, set it on the counter for 5 minutes before slicing. Use a sharp knife and serve immediately. This isn’t a dessert that holds up sitting out.
Frequently Asked Questions
Yes. A store-bought Oreo cookie crust or chocolate cookie crust works fine here. The homemade version gives you a thicker crust that holds up a little better when frozen, but store-bought is a completely solid shortcut and saves you a step.
Two things fix this: make sure you pack the crust firmly before freezing it, and always let the pie sit at room temperature for 5 minutes before you slice. Going straight from the freezer to the knife is what causes cracks and crumbles. A brief rest makes a big difference.
More No-Bake Pie Recipes

Easy No-Bake Ice Cream Pie
Ingredients
- 34 Oreo cookies with filling or generic version (divided into 24 and 10 cookies)
- ⅓ cup salted butter, melted and cooled
- 48 ounces (or 1.4 liters) cookies and cream ice cream your favorite brand
- ½ cup chocolate sauce + more for optional drizzle
- whipped topping optional garnish
Instructions
- Crush 24 Oreo cookies into fine crumbs. You can do this in a food processor or by placing the cookies in a zip-top bag and crushing them with a rolling pin or the smooth side of a meat mallet.24 Oreo cookies with filling
- Mix the crushed cookies with melted butter until well combined.⅓ cup salted butter, melted and cooled
- Firmly press the buttered crumbs into the bottom and up the sides of a 9-inch pie plate to form the crust. Place the crust in the freezer to set while you prepare the other layers.
- Roughly chop the remaining 10 cookies into smaller pieces.10 Oreo cookies with filling
- Soften the ice cream by letting it sit at room temperature for about 10 minutes.48 ounces (or 1.4 liters) cookies and cream ice cream
- Remove the pie plate from the freezer and spread 3 cups of the softened ice cream over the crust. Smooth it out with a spatula or an offset spatula.
- Drizzle the chocolate sauce over the layer of ice cream and sprinkle the remaining chopped cookies over the chocolate sauce.½ cup chocolate sauce
- Add the remaining softened ice cream over the cookie layer. Smooth the top with a spatula.
- Cover the pie plate with plastic wrap and place it in the freezer for at least 4 hours or until the ice cream is completely frozen.
- Before serving, let the pie sit at room temperature for a few minutes to make it easier to slice.
- Garnish the outer edge of the pie with the whipped topping (I used a piping bag and decorator's tip for my whipped topping garnish). Slice and drizzle with extra chocolate sauce if desired. Serve immediately.whipped topping
Jenn’s Notes
One of my favorite things about this ice cream pie is how well it lends itself to making ahead, it’s practically built for it. I usually throw it together the night before a party so it has plenty of time to freeze through completely, and I can cross dessert off my mental list before the day even starts. Once it’s done, wrap it up tight in plastic wrap and it’ll keep happily in the freezer until you need it. When it’s time to eat, just pull it out and let it sit on the counter for about five minutes before you cut into it. Sharp knife, quick serve. This is not a dessert that likes to linger. Tips:
- Don’t skip freezing the crust before you fill it. Twenty minutes feels like an unnecessary wait, but it makes a real difference. A chilled crust stays put when you’re pressing the ice cream in, while one that’s still at room temperature will slide around and fall apart.
- Make sure your ice cream is soft, not soupy. You’re going for spreadable, not liquid. If it’s fully melted by the time you use it, the texture of the finished pie suffers once it refreezes. About ten minutes on the counter is usually all it needs.
- When you pack the crust, really mean it. Push it firmly into the pie plate, especially along the sides, using the flat bottom of a measuring cup to get it as compact as possible. A well-packed crust holds together cleanly when you go to slice it.
- Before the pie goes into the freezer, press plastic wrap directly against the surface, not just over the top of the plate. That direct contact is what keeps ice crystals from forming and the top from going icy.
- And give it enough time to actually freeze through. Four hours is the bare minimum, but if this is for a party, overnight is the smarter call. Cut into it too soon and the filling won’t be fully set, which means messy, soft slices instead of clean ones.