


This post may contain affiliate links. Please read our disclosure policy.

Cut out sugar cookies made with my recipe come out of the oven looking like the cutter, not like mystery Christmas blobs. They’re soft, buttery and vanilla-forward, with a little almond in the background. Pull out every cookie cutter you own.


Christmas is sugar cookie season for me, especially the kind we can cut into shapes and decorate. My mom used to bake sugar cookies with my kids when they were growing up, and they’d cut out letters, spell out their names and then cover them in icing. They loved baking with her, and I love that they’ll always have that memory together.
Getting the dough ready for all that cutting is easier than you’d think, because I roll it out before it ever goes in the fridge. It’s so much easier to work with while it’s still soft, and once it’s rolled out between parchment, chilling gives me a flat, firm sheet that’s ready to cut. I don’t have to wrestle a cold disk of dough with a rolling pin.
Once the cookie cutters are out, my cranberry orange shortbread cookies are another cookie I bake for the Christmas tray.

CHRISTMAS FAVORITE
Why I Trust These Cookies With Little Decorators
These cookies hold up really well, whether they’re going on a Christmas cookie tray, into a gift tin or into the hands of a few little decorators. They bake with a nice, sturdy shape and don’t get crumbly when they’re handled. As long as you let them cool completely before decorating, they’ll stand up to plenty of kid-level enthusiasm.

What Goes Into the Dough and Why

- Salted butter: Salted butter gives these their rich, buttery flavor, and the extra salt in the recipe is on purpose too. If you only keep unsalted butter, use it and add a little more salt. Let it soften to room temperature first so it beats up creamy with the sugar.
- All-purpose flour: Spoon the flour into the measuring cup and level it off instead of scooping it straight from the bag. Scooping packs extra flour into the cup, and too much flour makes the dough dry and crumbly. The weight is on the recipe card if you’d rather use a kitchen scale.
- Vanilla extract: Vanilla is the flavor that leads in these cookies, and that’s why the recipe calls for a full tablespoon of it.
- Almond extract: There’s only a tiny bit next to all that vanilla, so the cookies don’t taste like almond. It adds a little extra bakery-style flavor, and I love the richness it brings, but I’d call it optional if you don’t like almond.

How to Make Cut Out Sugar Cookies
Step 1: Make the Dough Beat the softened butter and sugar until creamy, about 1 to 2 minutes, then mix in the egg, vanilla, and almond extract. In a separate bowl, combine the flour, baking powder, and salt, then add the dry ingredients to the wet ingredients a little at a time until a soft dough comes together.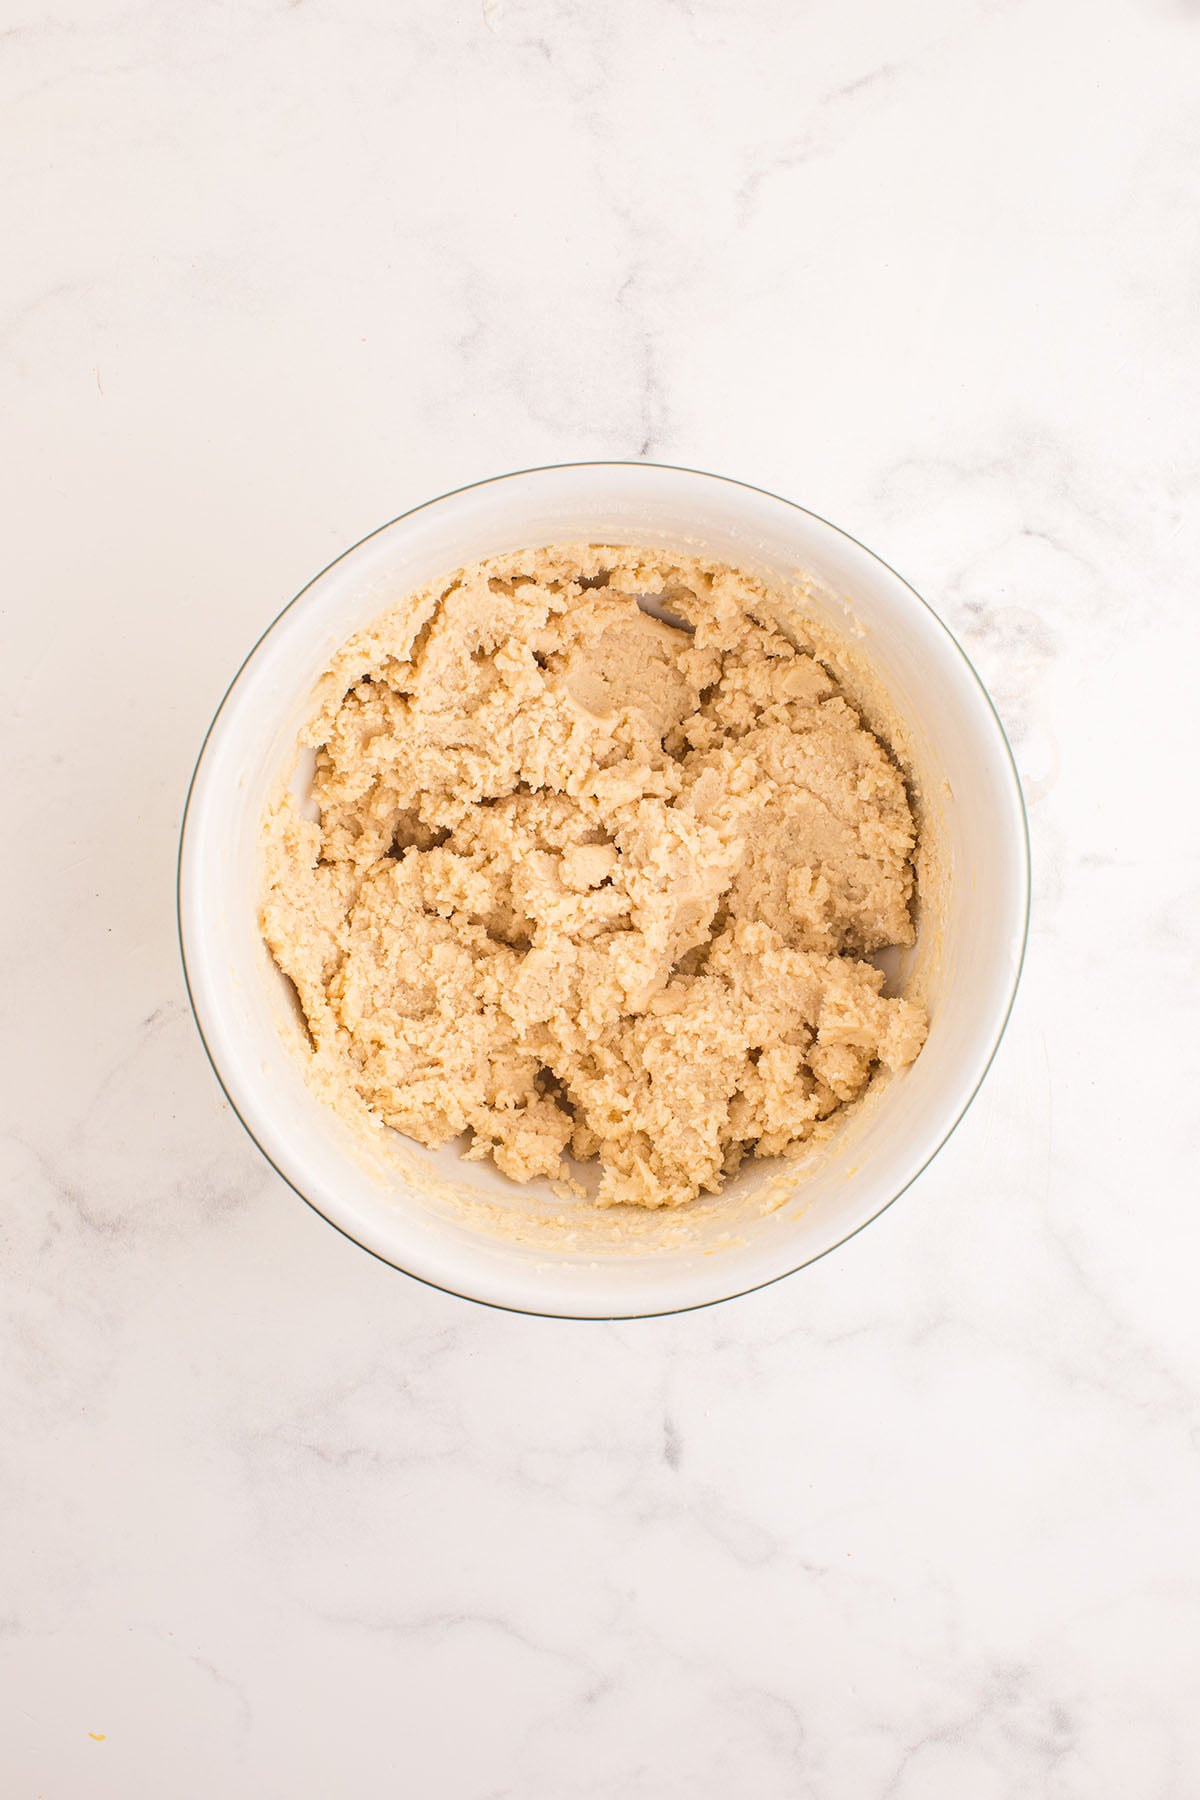
Step 2: Roll It Out, Then Chill It Divide the dough in half and roll each half between two sheets of parchment paper to ¼ inch thick, the thickness I’ve found works best for this dough. Slide the sheets into the fridge for 1 to 2 hours, or overnight, until the dough is firm.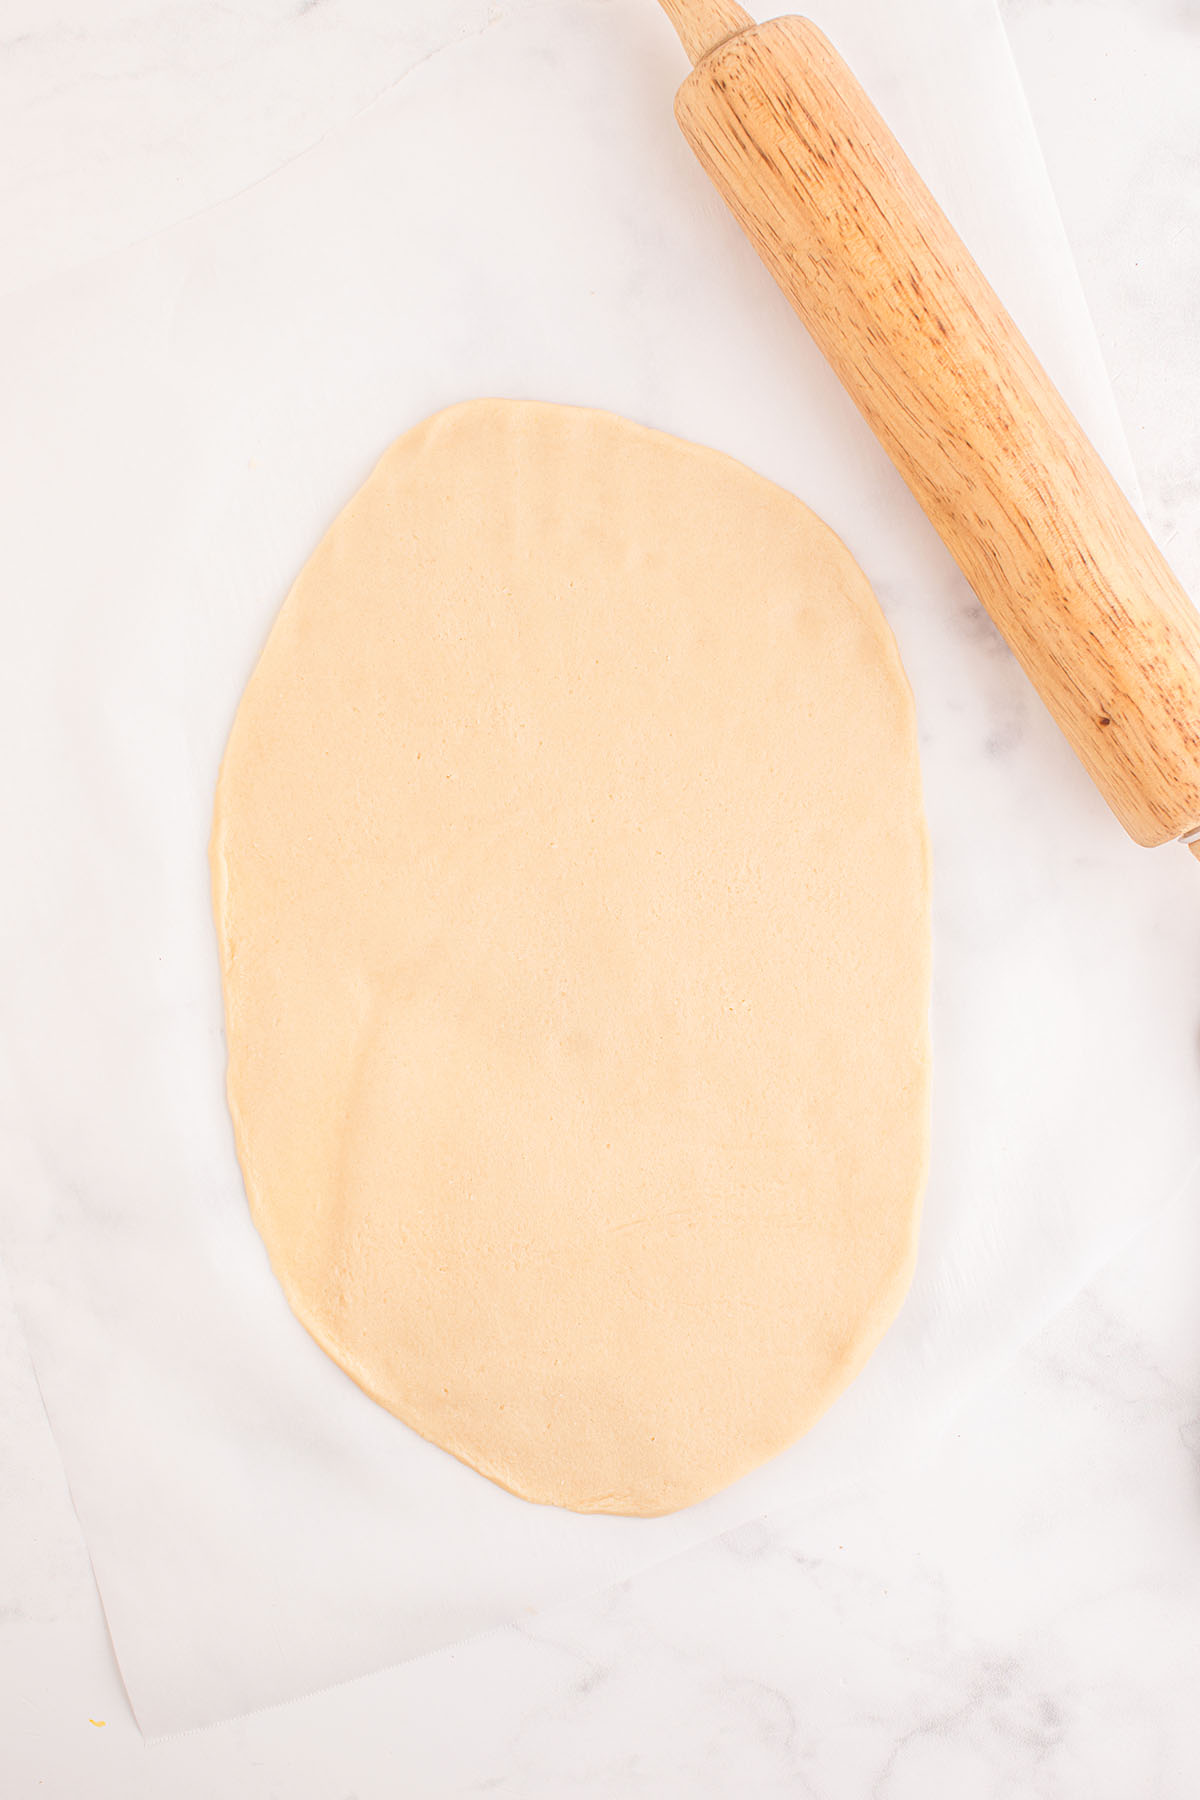
Step 3: Cut and Chill Again Peel off the top sheet of parchment, cut out your shapes and set them on a sheet pan. Put the whole pan back in the fridge for 10 to 15 minutes, until the cookies are cold to the touch.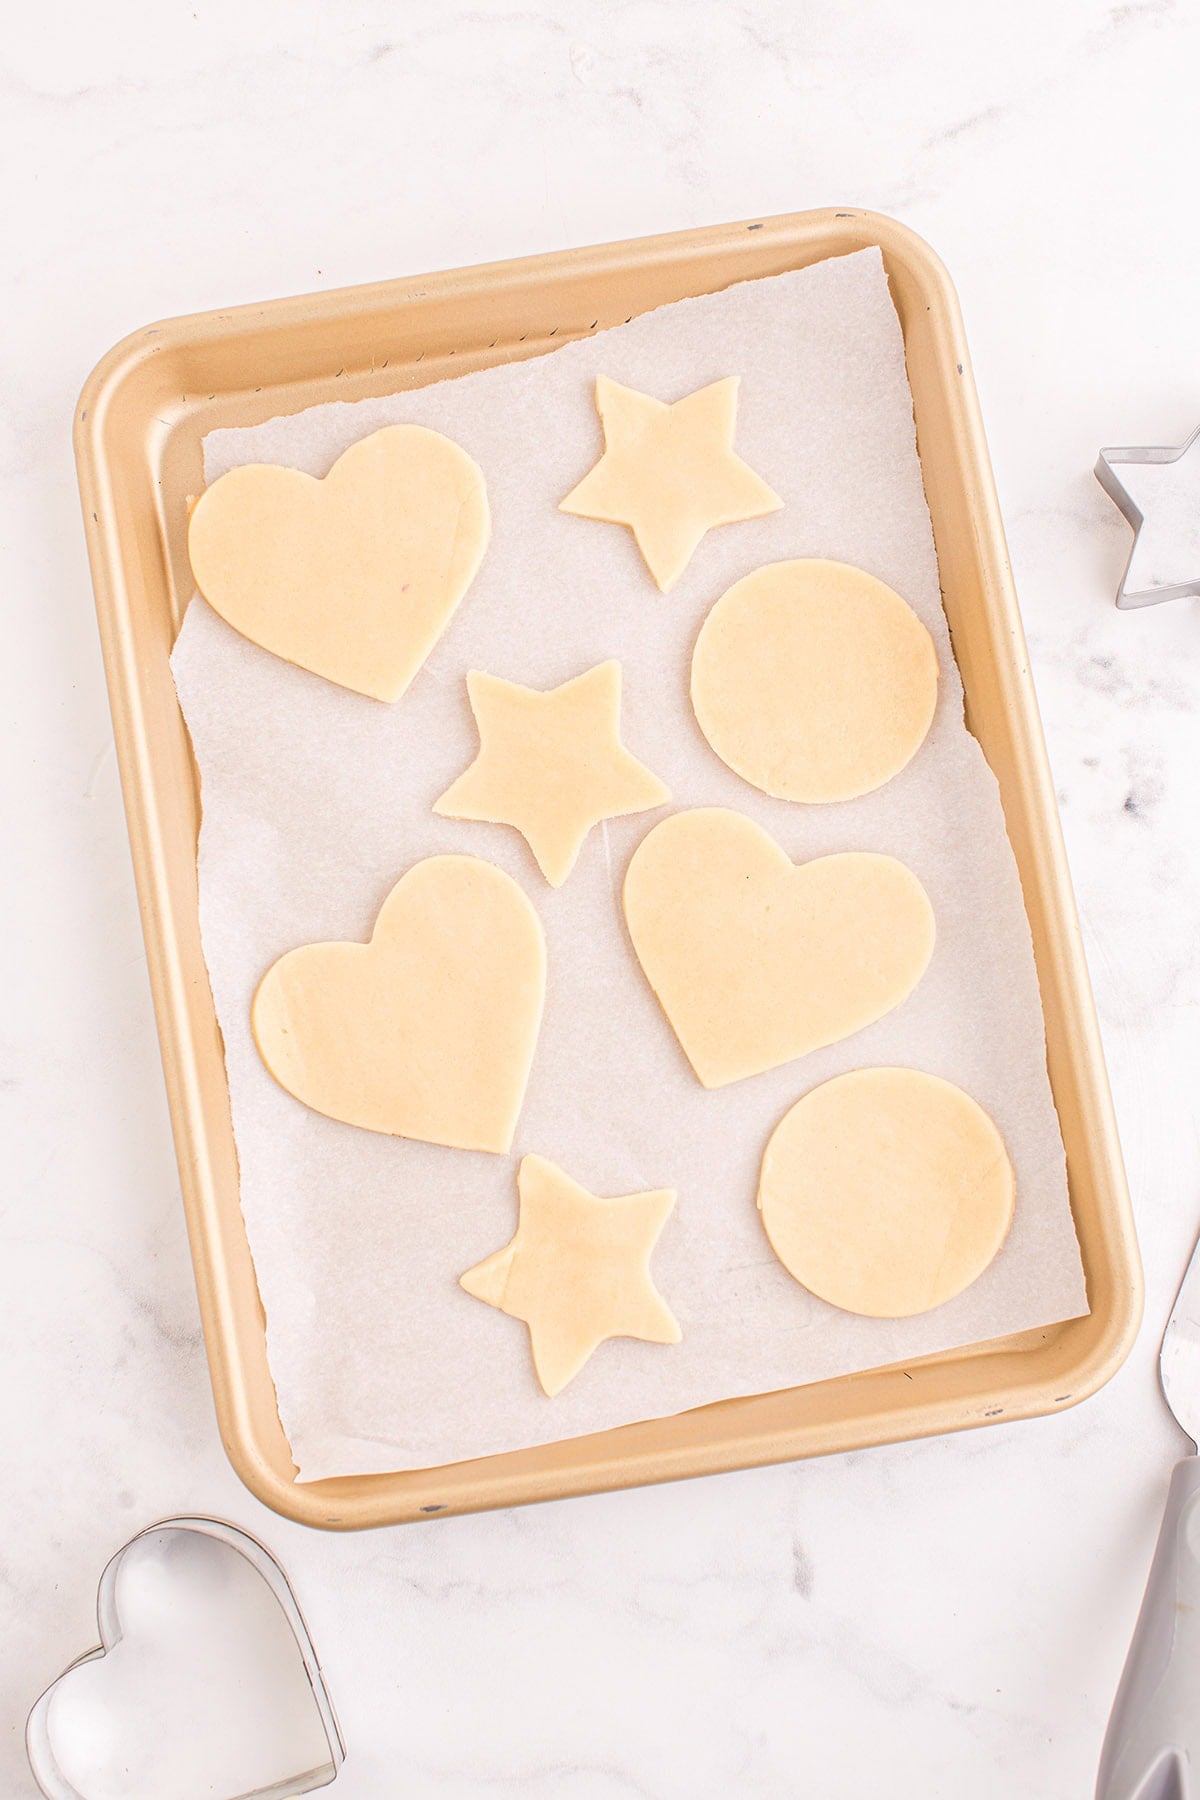
Step 4: Bake Until the Bottoms Barely Brown Preheat the oven to 375°F. Bake on a parchment-lined baking sheet for 6 to 8 minutes until the bottoms are set and barely starting to brown. Do not overcook. Move them to a cooling rack to finish cooling.

This is by far the easiest and best sugar cookie recipe I have ever tried! This will be my go to!

How I Decorate Them
Once the cookies have cooled completely, the fun is really in the decorating. These are the kind of cookie people want to pick up and look at before they eat, especially with a mix of shapes and decorations on the tray.
I’ve tinted the dough itself different colors, and I switch up the frosting, the decorations and the cookie cutters depending on the holiday. Hearts for Valentine’s Day, letters for names, and pretty much anything you have a cutter for, which is what makes these so fun. For a decorating party, set out bowls of colored icing, sprinkles and other edible decorations and let everyone make their own.

Packing Them Up as Gifts
A box or tin of these makes an easy gift for teachers, friends and coworkers, and a little care in packing keeps the decorations looking the way you left them. Before anything touches the cookies, make sure the icing has set all the way.
- Bag them one at a time. Clear treat bags tied with ribbon, or closed with a heat sealer, keep each cookie protected and look pretty doing it.
- Layer with parchment. In a tin or a box, lay the cookies flat and slip a sheet of parchment between each layer so the icing doesn’t scuff.
- Pack them snug. Pick a container that fits, so the cookies can’t slide around, and fill any gaps with crinkle paper or tissue.
- Mix up the tin. They look great next to a few other cookies from my Christmas cookie recipes list.
Storage, Freezing and Make-Ahead
On the counter: Keep the baked cookies in an airtight container at room temperature for up to 1 week.
Make the dough ahead: The dough keeps in the fridge for 1 to 2 days, so you can make it ahead and bake when you’re ready. That’s another thing I love about this cut out sugar cookie recipe.
Freezing baked cookies: Freeze undecorated cookies in a freezer-safe container for up to 3 months, and decorated cookies for up to 1 month.
Freezing the cut shapes: I haven’t tested baking these from frozen. Other bakers freeze unbaked cut outs in a single layer, then bake them straight from the freezer and add a couple of minutes to the bake time.

More Cookies for the Christmas Tray
- Soft Frosted Sugar Cookies
- Classic Christmas Cookies
- Peanut Butter Blossom Cookies
- Thumbprint Cookies With Icing
- Italian Cookies

Cut Out Sugar Cookies
Ingredients
- 1 cup salted butter softened
- 1 cup granulated white sugar
- 1 large egg
- 1 tablespoon vanilla extract
- ¼ teaspoon almond extract
- 2½ cups (300 grams) all-purpose flour spooned and leveled
- ½ teaspoon baking powder
- ½ teaspoon salt
Instructions
- Beat salted butter and granulated sugar together until creamy, about 1-2 minutes.1 cup salted butter, 1 cup granulated white sugar
- Add egg, vanilla extract, and almond extract and mix until combined. Set aside for now.1 large egg, 1 tablespoon vanilla extract, ¼ teaspoon almond extract
- In a separate bowl, combine all-purpose flour, baking powder, and salt.2½ cups (300 grams) all-purpose flour, ½ teaspoon baking powder, ½ teaspoon salt
- Gradually add the dry ingredients to the wet ingredients and mix until a dough forms.
- Divide the dough in half, place each half between two sheets of parchment paper, and roll out to ¼ inch in thickness.
- Chill the dough in the refrigerator for 1-2 hours or overnight.
- Once chilled, use cookie cutters to cut out shapes from the dough.
- Place cookies on a large sheet pan and place cookies and pan into the refrigerator for an additional 10-15 minutes or until cold to the touch.
- Preheat the oven to 375 degrees Fahrenheit.
- Bake on a parchment-lined baking sheet for 6-8 minutes or until the bottoms are set and barely starting to brown. Do not overcook.
- Transfer cookies to a cookie rack to finish cooling before frosting.
Jenn’s Notes
- I chill the cut shapes on the sheet pan for another 10 to 15 minutes before baking. The dough warms up while you cut, and cold dough is what keeps the cookies from spreading.
- I pull them when the bottoms are set and barely starting to brown, without waiting for golden edges, so they stay soft.
- I let them cool completely before decorating.
- If you only have unsalted butter, use it and add a little more salt.





Would the cookies be sturdy enough for a cookie decorating party? Kids will be decorating the cookies. Just wondering if the cookies can withstand the manhandling of little hands : )
Yes, these cookies hold up really well for decorating. They bake with a nice, sturdy shape and don’t get crumbly when handled, so they’re great for little hands. As long as you let them cool completely before decorating, they’ll stand up to plenty of kid-level enthusiasm.
These turned out perfect! This is now my go to recipe ❤️
This is by far the easiest and best sugar cookie recipe I have ever tried! This will be my go to!
10 stars the recipe was GREAT 😃