This post may contain affiliate links. Please read our disclosure policy.
Discouraged that Chili’s Awesome Blossom was discontinued? Don’t be, because now you can recreate this deep-fried onion copycat recipe right in your own kitchen!
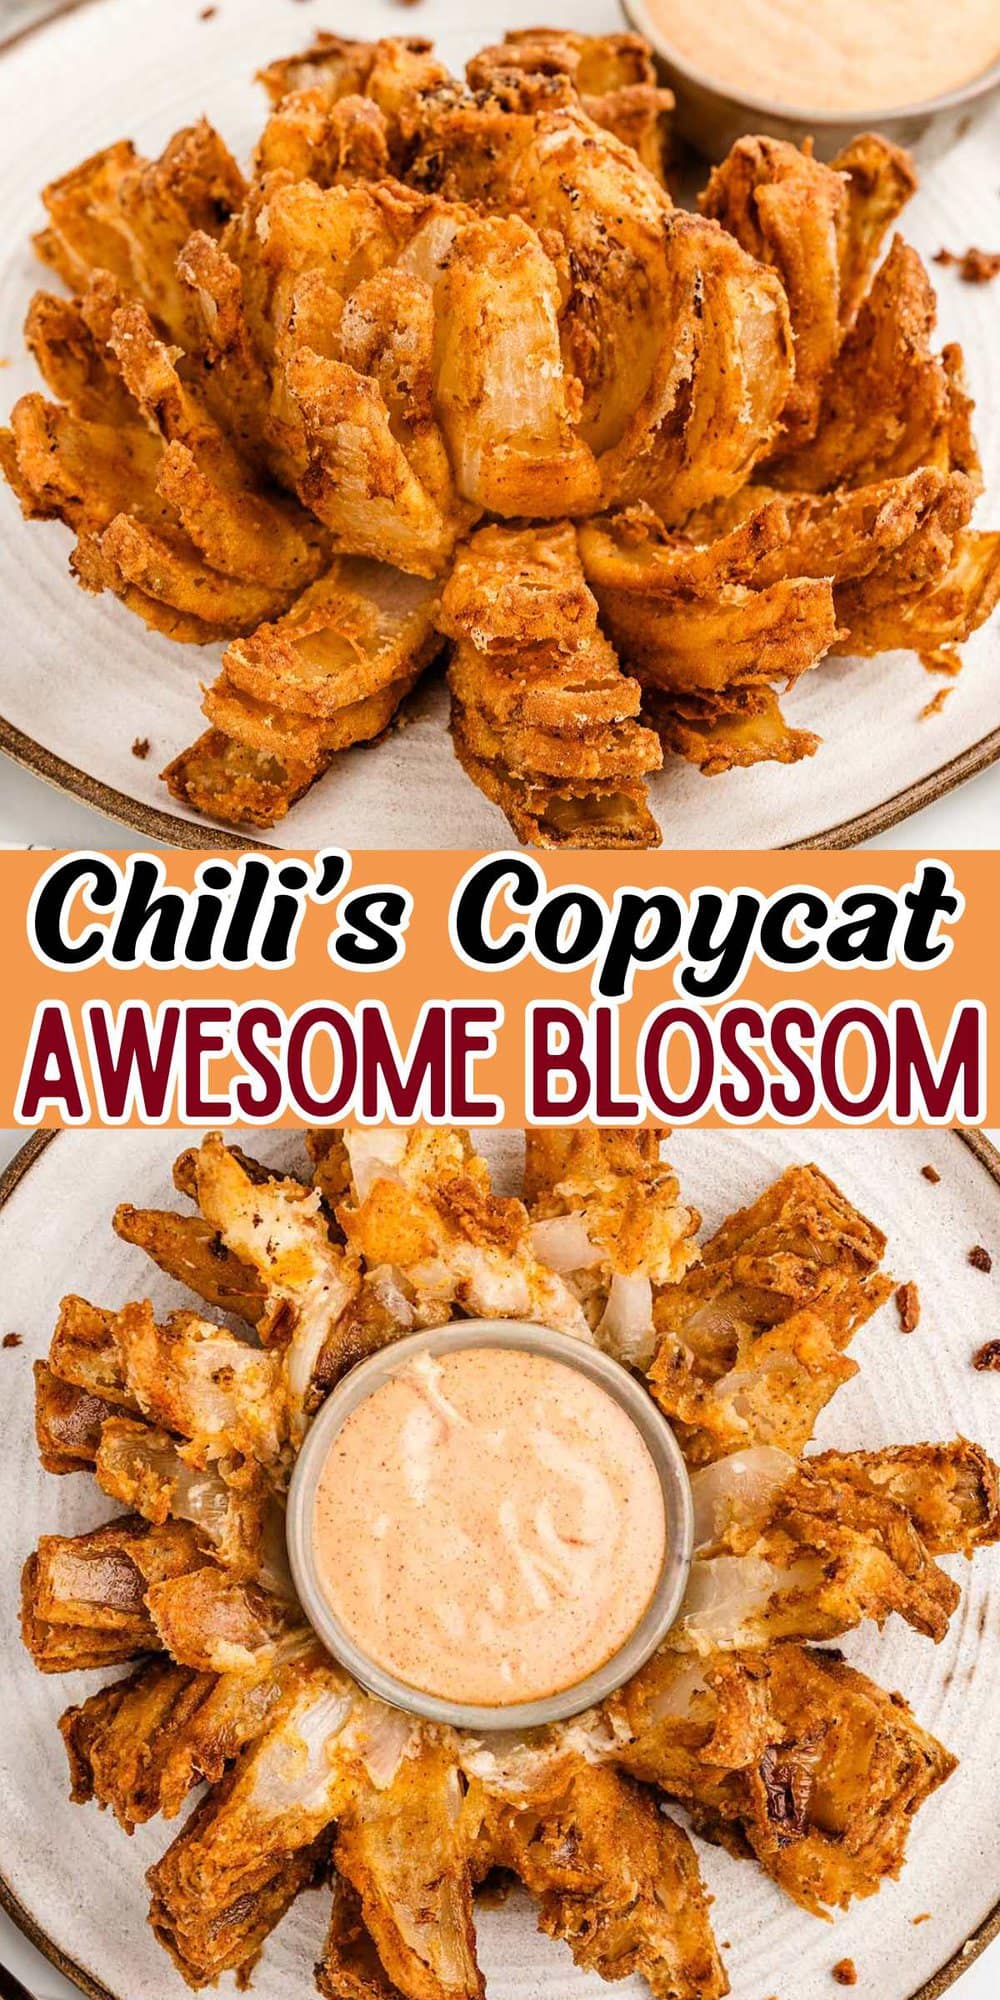
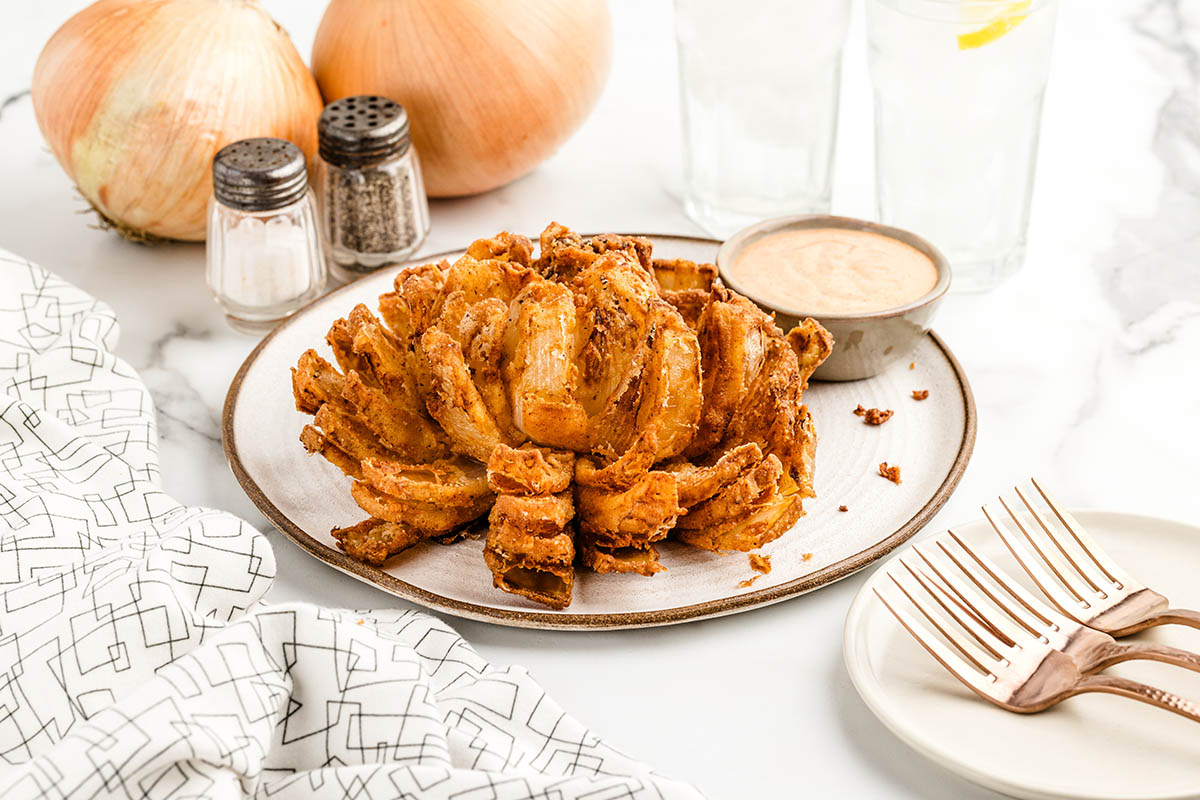
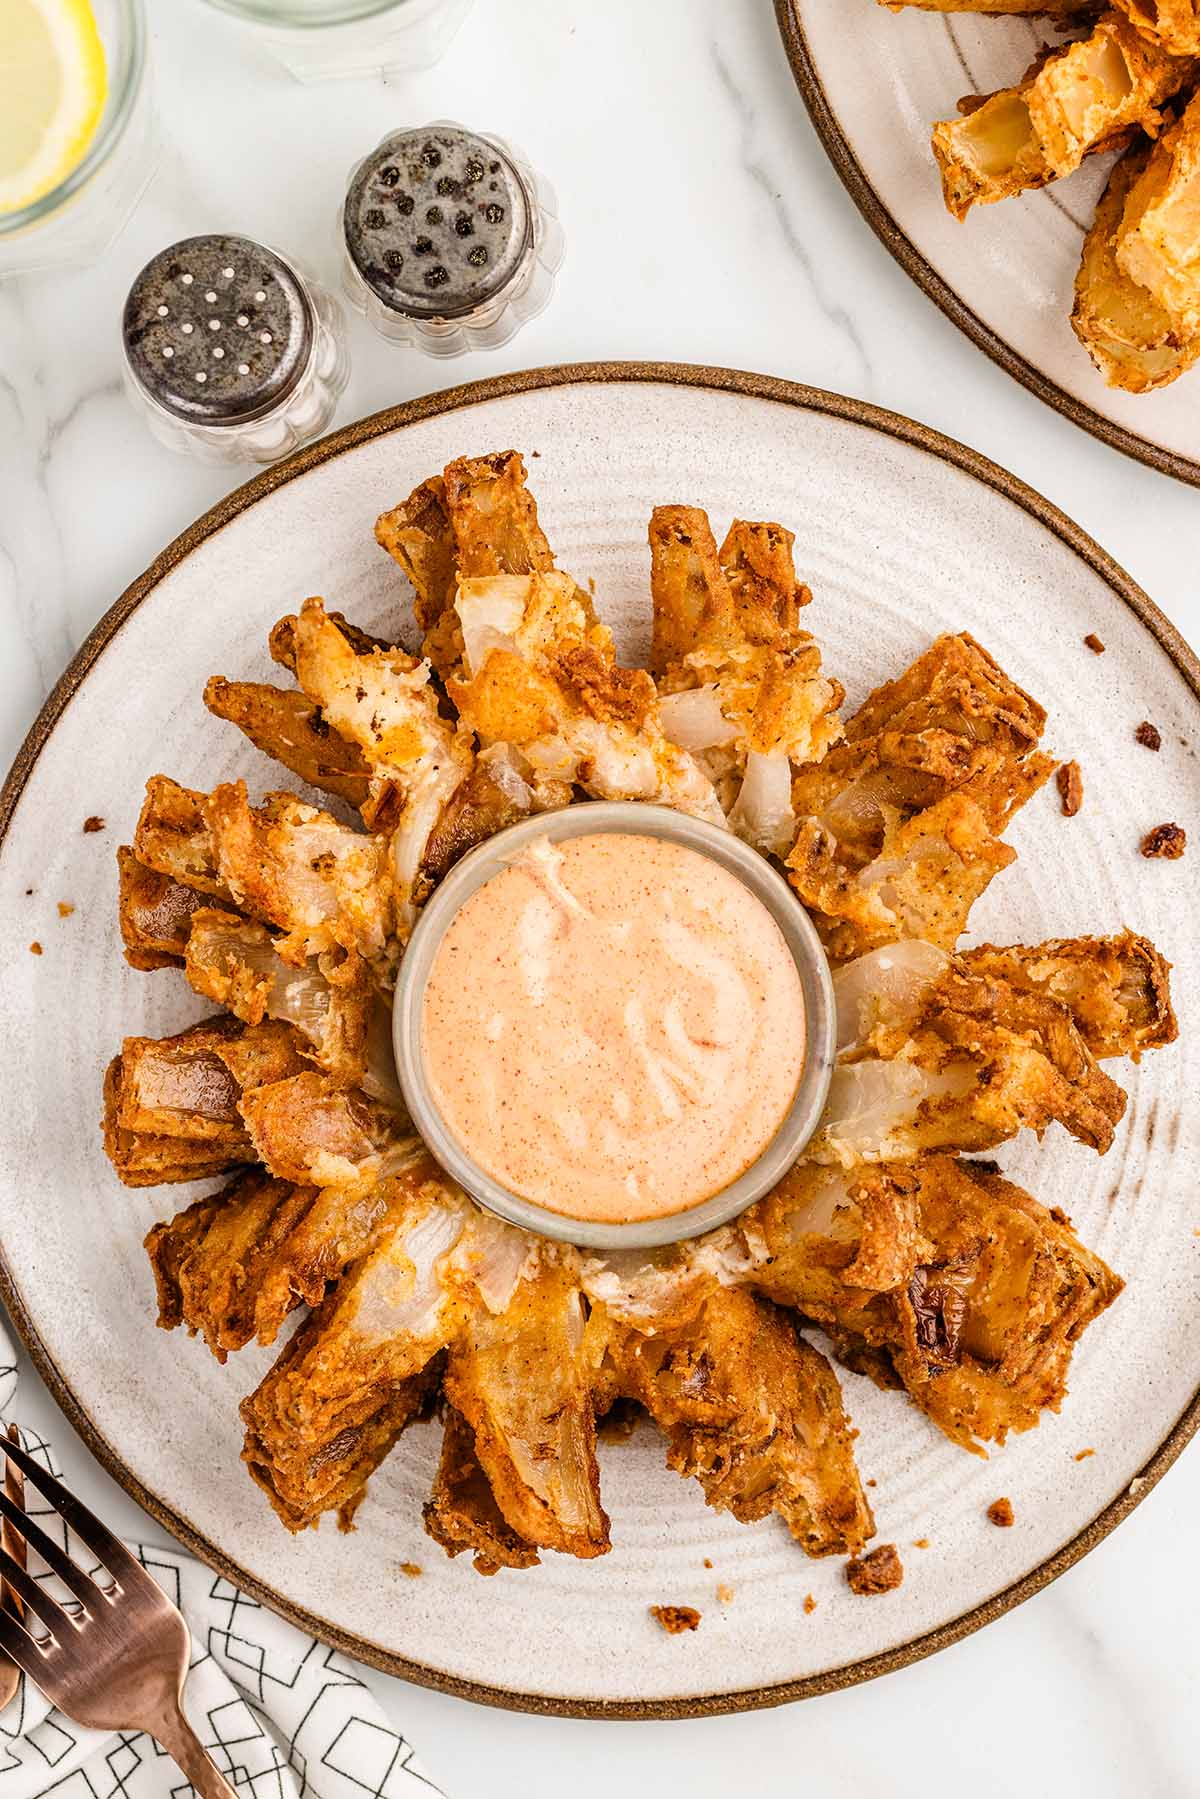
Chilis Awesome Blossom Copycat Recipe
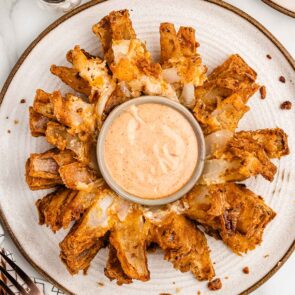
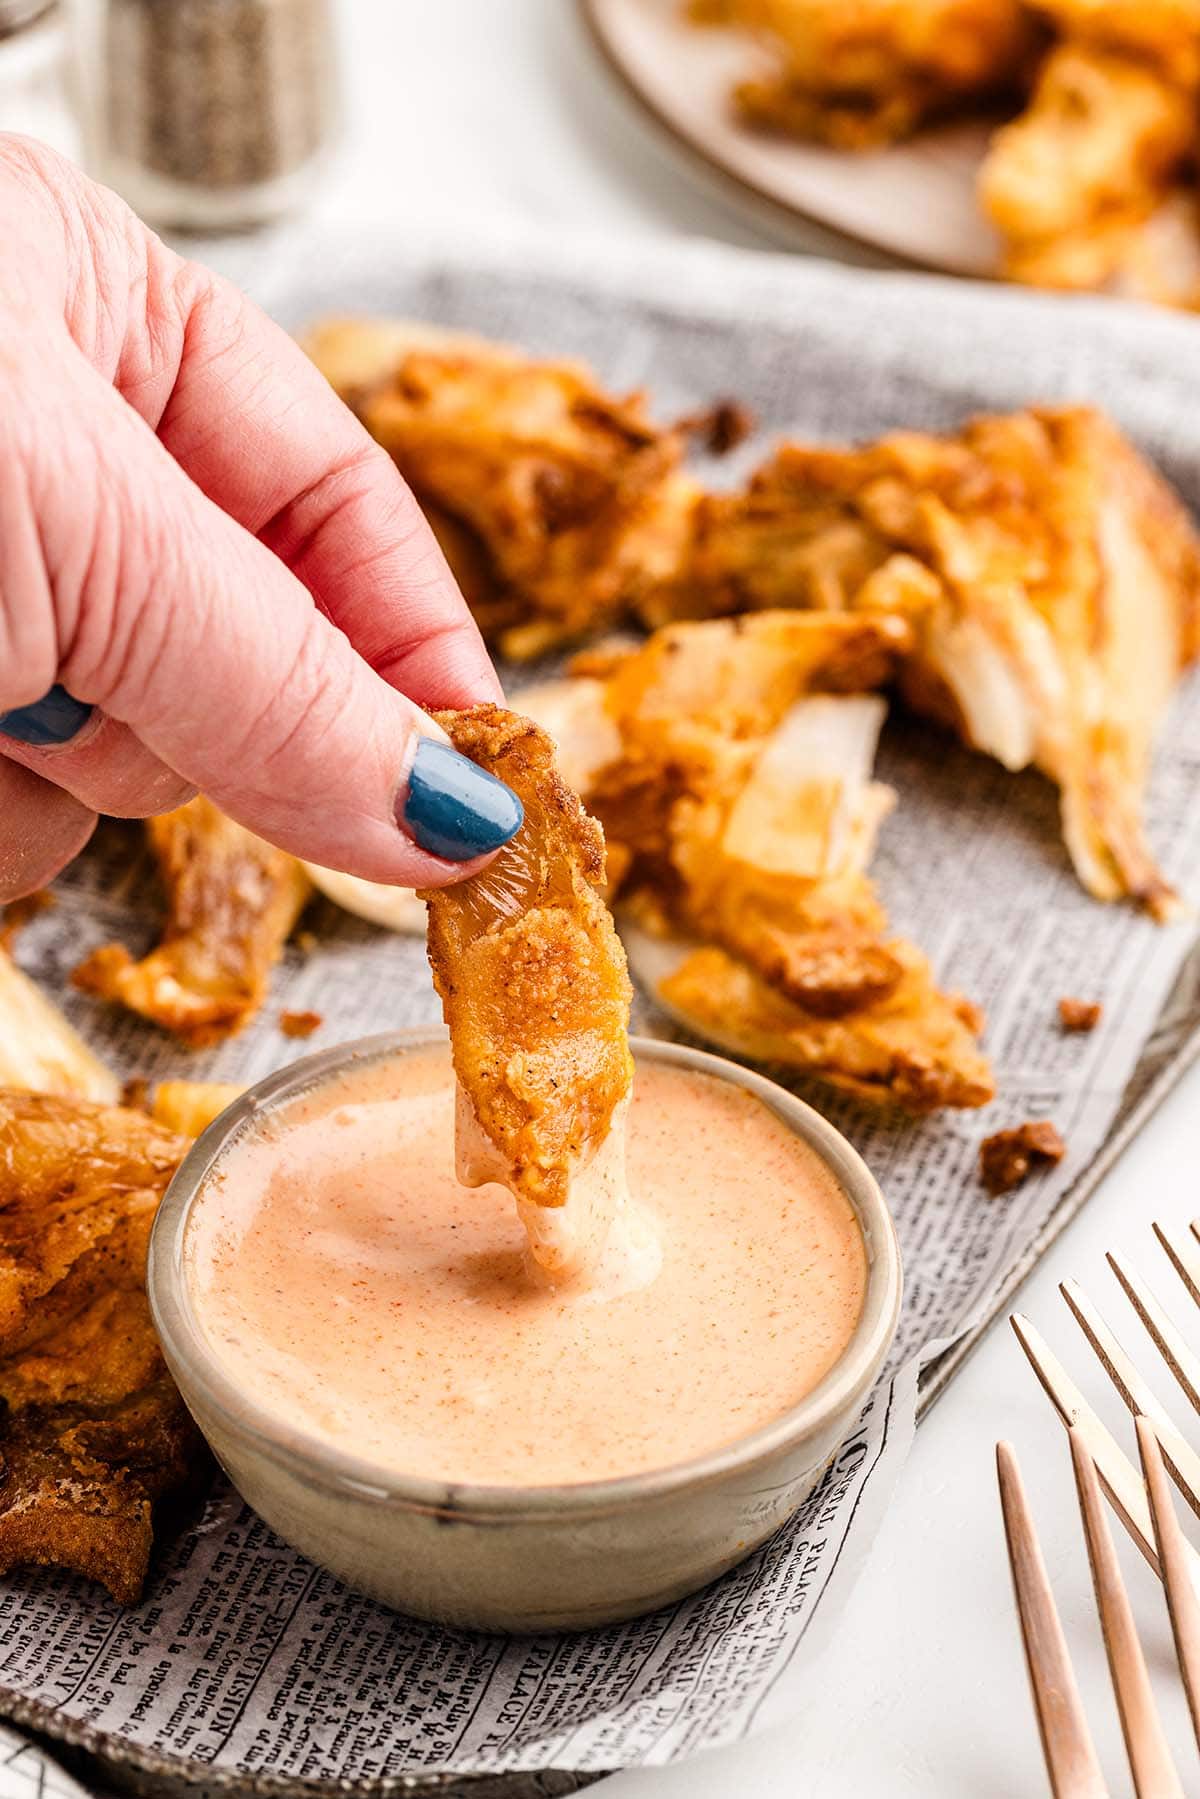
Our easy Awesome Blossom recipe features a big sweet onion that’s been battered and fried until crispy golden brown. Once plated, pick apart the “flower petals” and have fun dipping each slice in a homemade spicy sauce.
If Outback Steakhouse started it and Chili’s couldn’t continue it, then this Texas Roadhouse copycat will rival any Bloomin Onion, Blooming Onion, or Onion Blossom recipe! I dare you to disagree! (And don’t forget the blossom dipping sauce to serve on the side.)
This appetizer is probably not the prettiest plate of petals that’s ever been bloomed. Still, it’s the tastiest, double-coated, dipped, and deep-fried onion flower finger food that’s perfect for game day gatherings or serving with the main meal.
Why We Love Chili’s Awesome Blossom Copycat Recipes
- Quick and easy to make.
- Uses simple ingredients and spices.
- The sauce tastes tangy with a creamy texture and has a delicious balance of spice and sweetness.
- Looks just like the real deal from the restaurant, but better!
- Perfect appetizer for game day, Super Bowl parties, or special occasions.
Awesome Blossom Ingredients
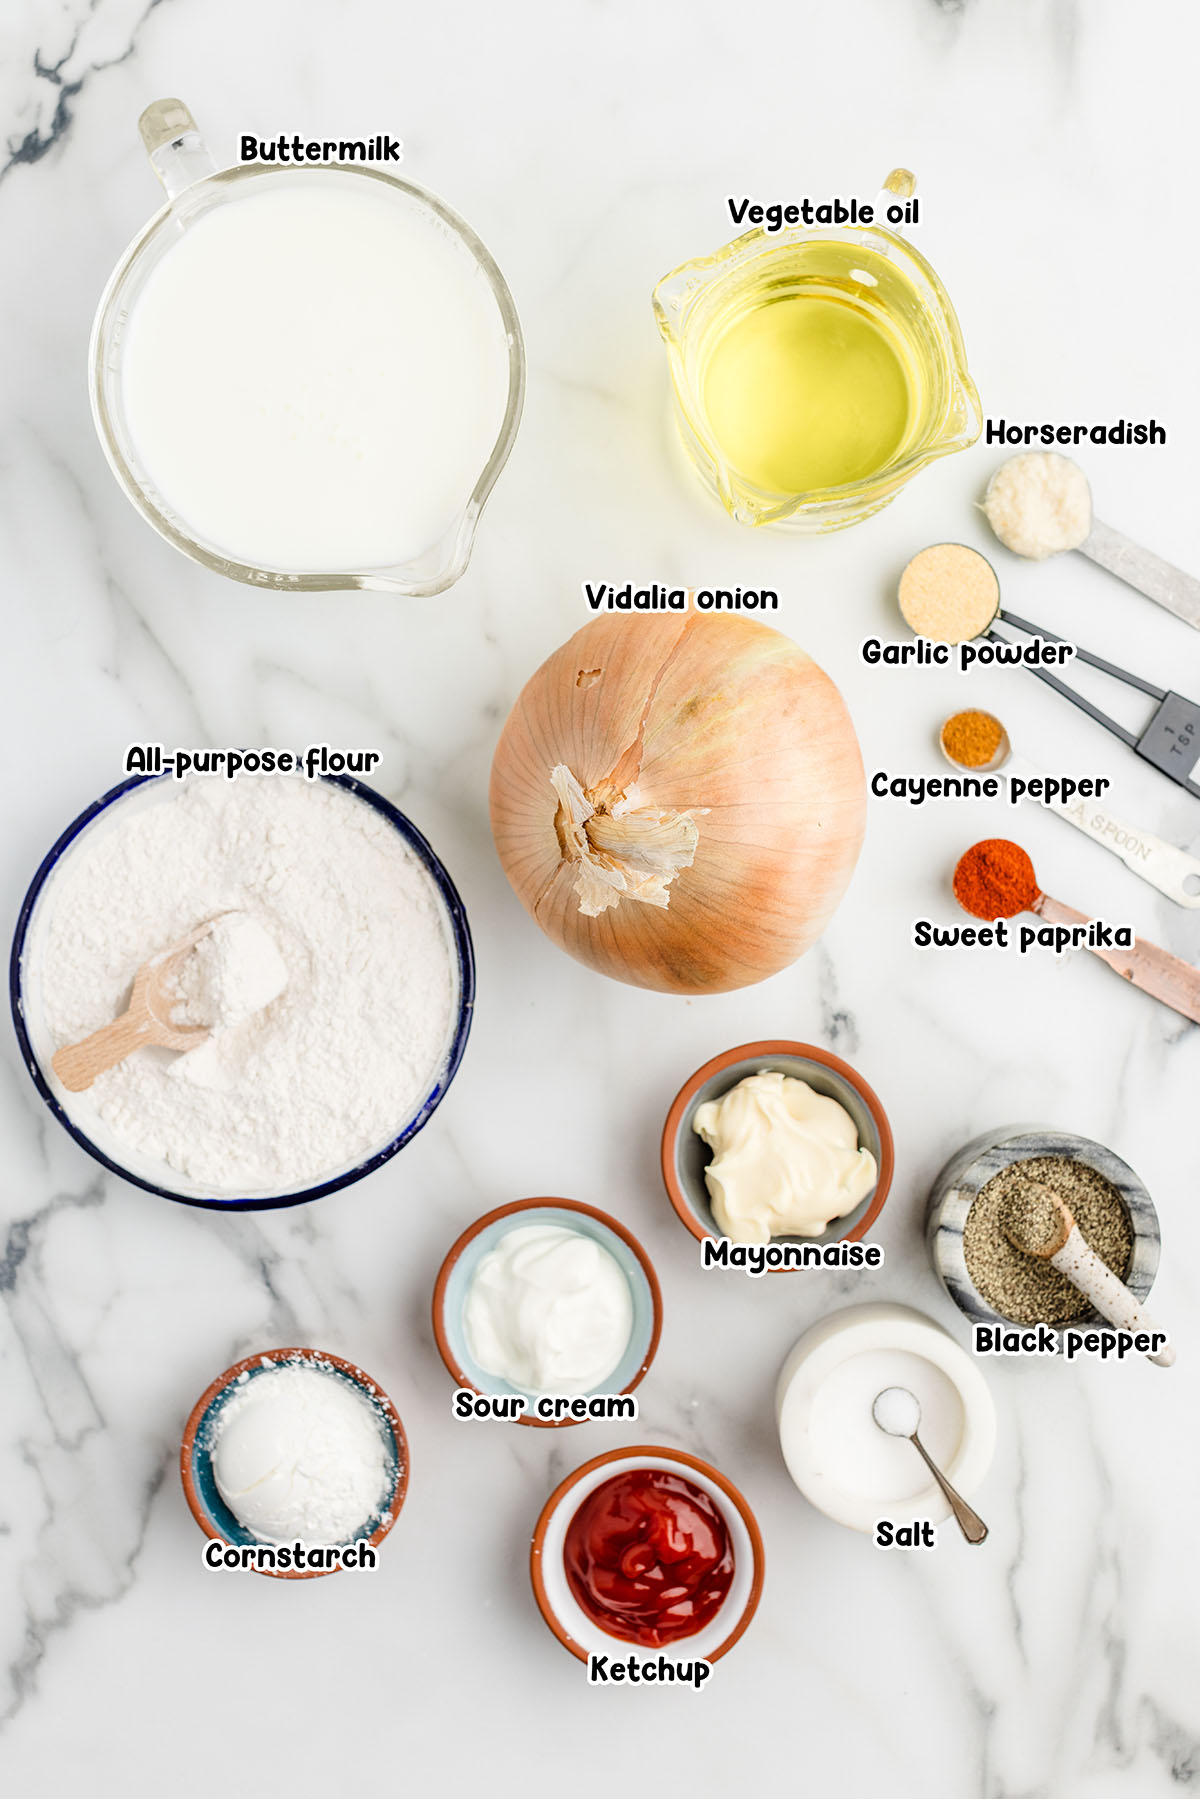
- Mayonnaise
- Sour cream
- Ketchup
- Horseradish
- Sweet paprika
- Salt
- Black pepper
- Cayenne pepper
- Vegetable oil
- Vidalia onion
- All-purpose flour
- Cornstarch
- Garlic powder
- Buttermilk
See the recipe card for full information on ingredients and quantities.
Substitutions and Additions
- Other Oil Options: Peanut or canola oil can both be used as a good substitute for vegetable oil when frying.
- Swap The Sauce: While I love the sweet and tangy flavor of this Awesome Blossom dipping sauce, feel free to serve this dish with my Buffalo Dipping Sauce, BBQ Sauce, Carolina Mustard BBQ Sauce, or even ketchup on the side.
How to Make Awesome Blossom
- Make The Dipping Sauce: Stir together the mayonnaise, sour cream, ketchup, horseradish, paprika, salt, black pepper, and cayenne pepper. Cover with plastic wrap until ready to serve.
- Heat The Oil: Heat the oil to 375 degrees Fahrenheit.
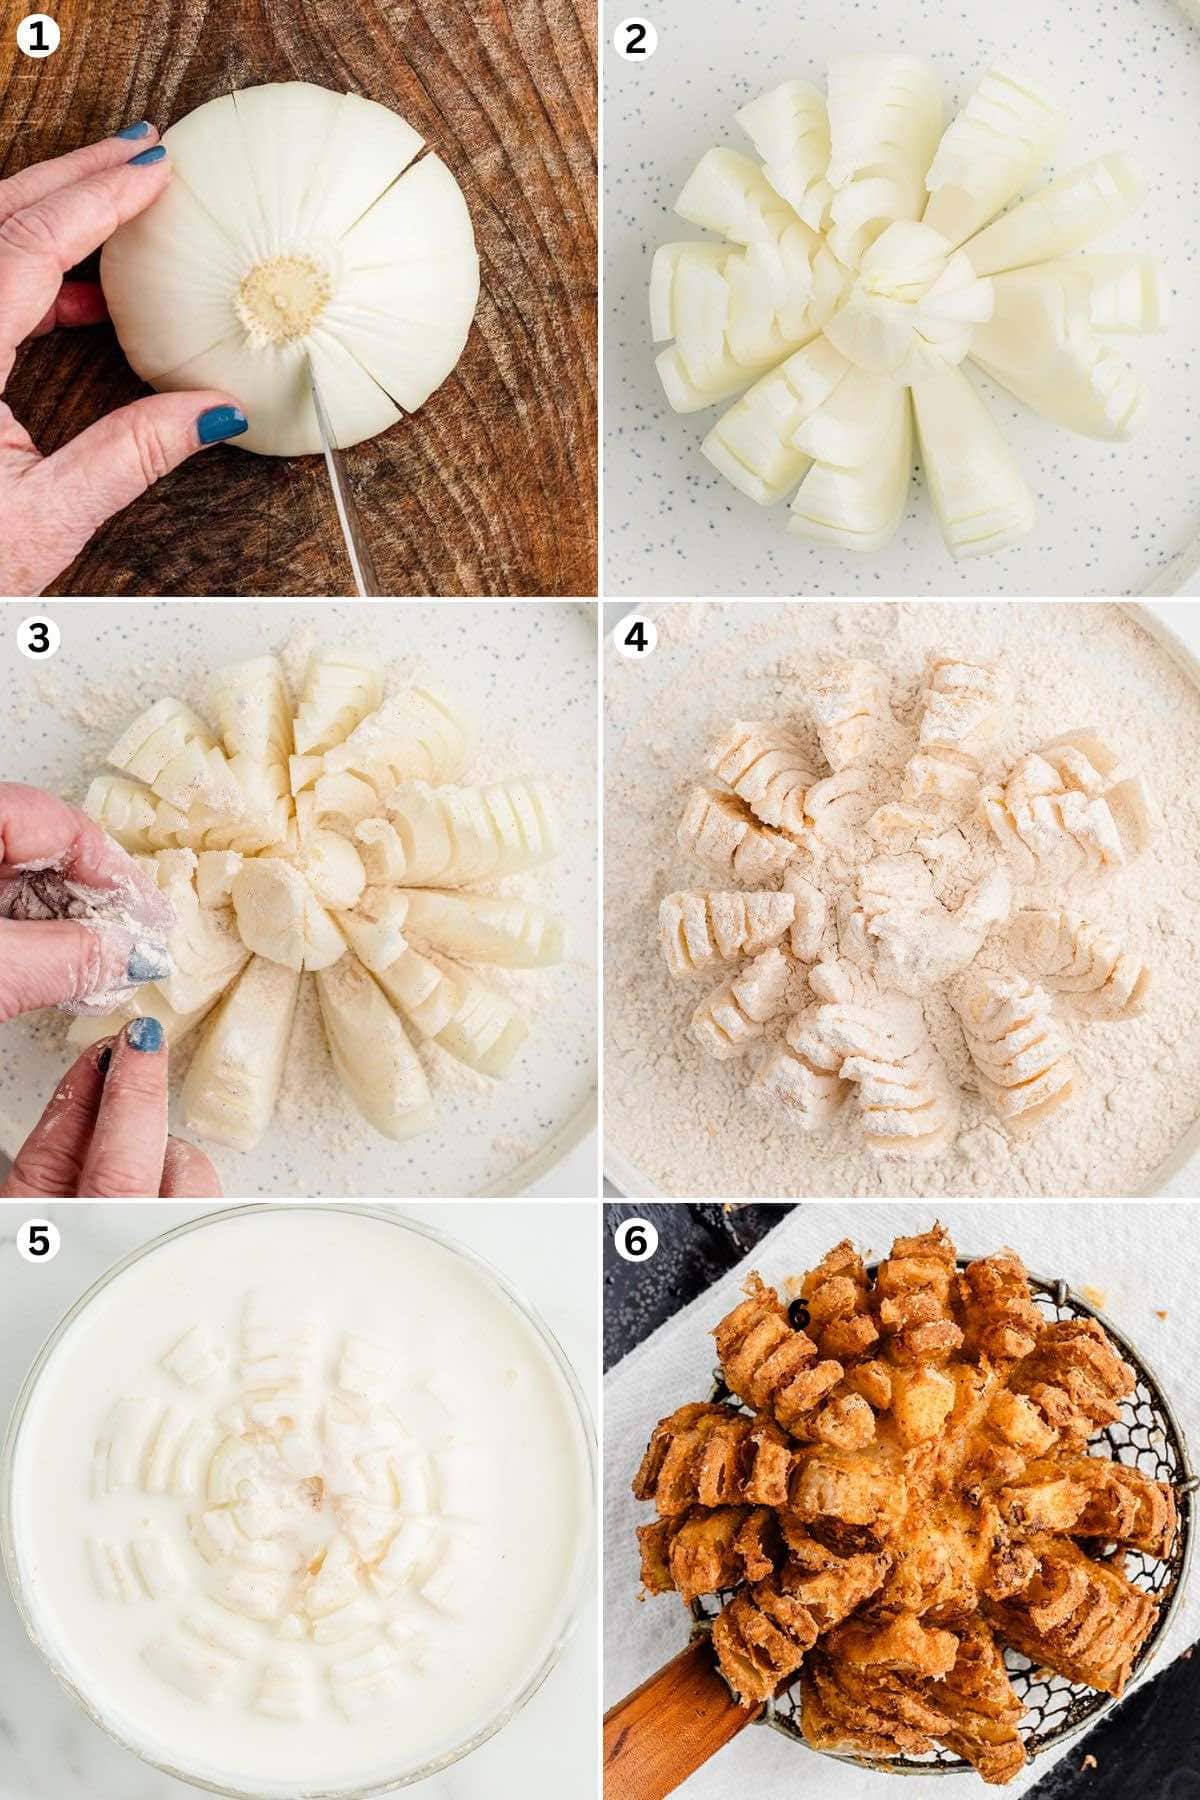
Pro Tip: The oil should be deep enough so that the onion is fully submerged while frying. - Create The Cuts: Cut the onion according to the steps below. Then use your fingers to open the sections so that it resembles a flower that has “blossomed” or opened up all its petals. (Image 1 and 2)
- Make The Seasoning Mixture: Mix together the flour, cornstarch, sweet paprika, garlic powder, salt, and black pepper.
- Sprinkle And Submerge: Sprinkle the seasoned flour over the entire surface of the onion (Image 3 and 4). Dip the entire onion into a bowl of buttermilk, root side up. (Image 5)
Pro Tip: Make sure to separate the slices so that both the flour mixture and buttermilk get in between the individual “petals”. - Batter The Blossom: Lift the onion out of the buttermilk, and allow any excess liquid to drip back into the bowl. Sprinkle as much of the remaining flour mixture over the top, sides, and between each of the onion “petals”.
Pro Tip: You want to get as much of the flour mixture as possible into all the openings so that as the onion fries, the “petals” will all be coated in the batter. - Fry: Fry the battered onion in the hot oil for 4-6 minutes or until golden and crispy (Image 6). Once fried, place it onto a paper towel-lined plate to absorb any excess oil.
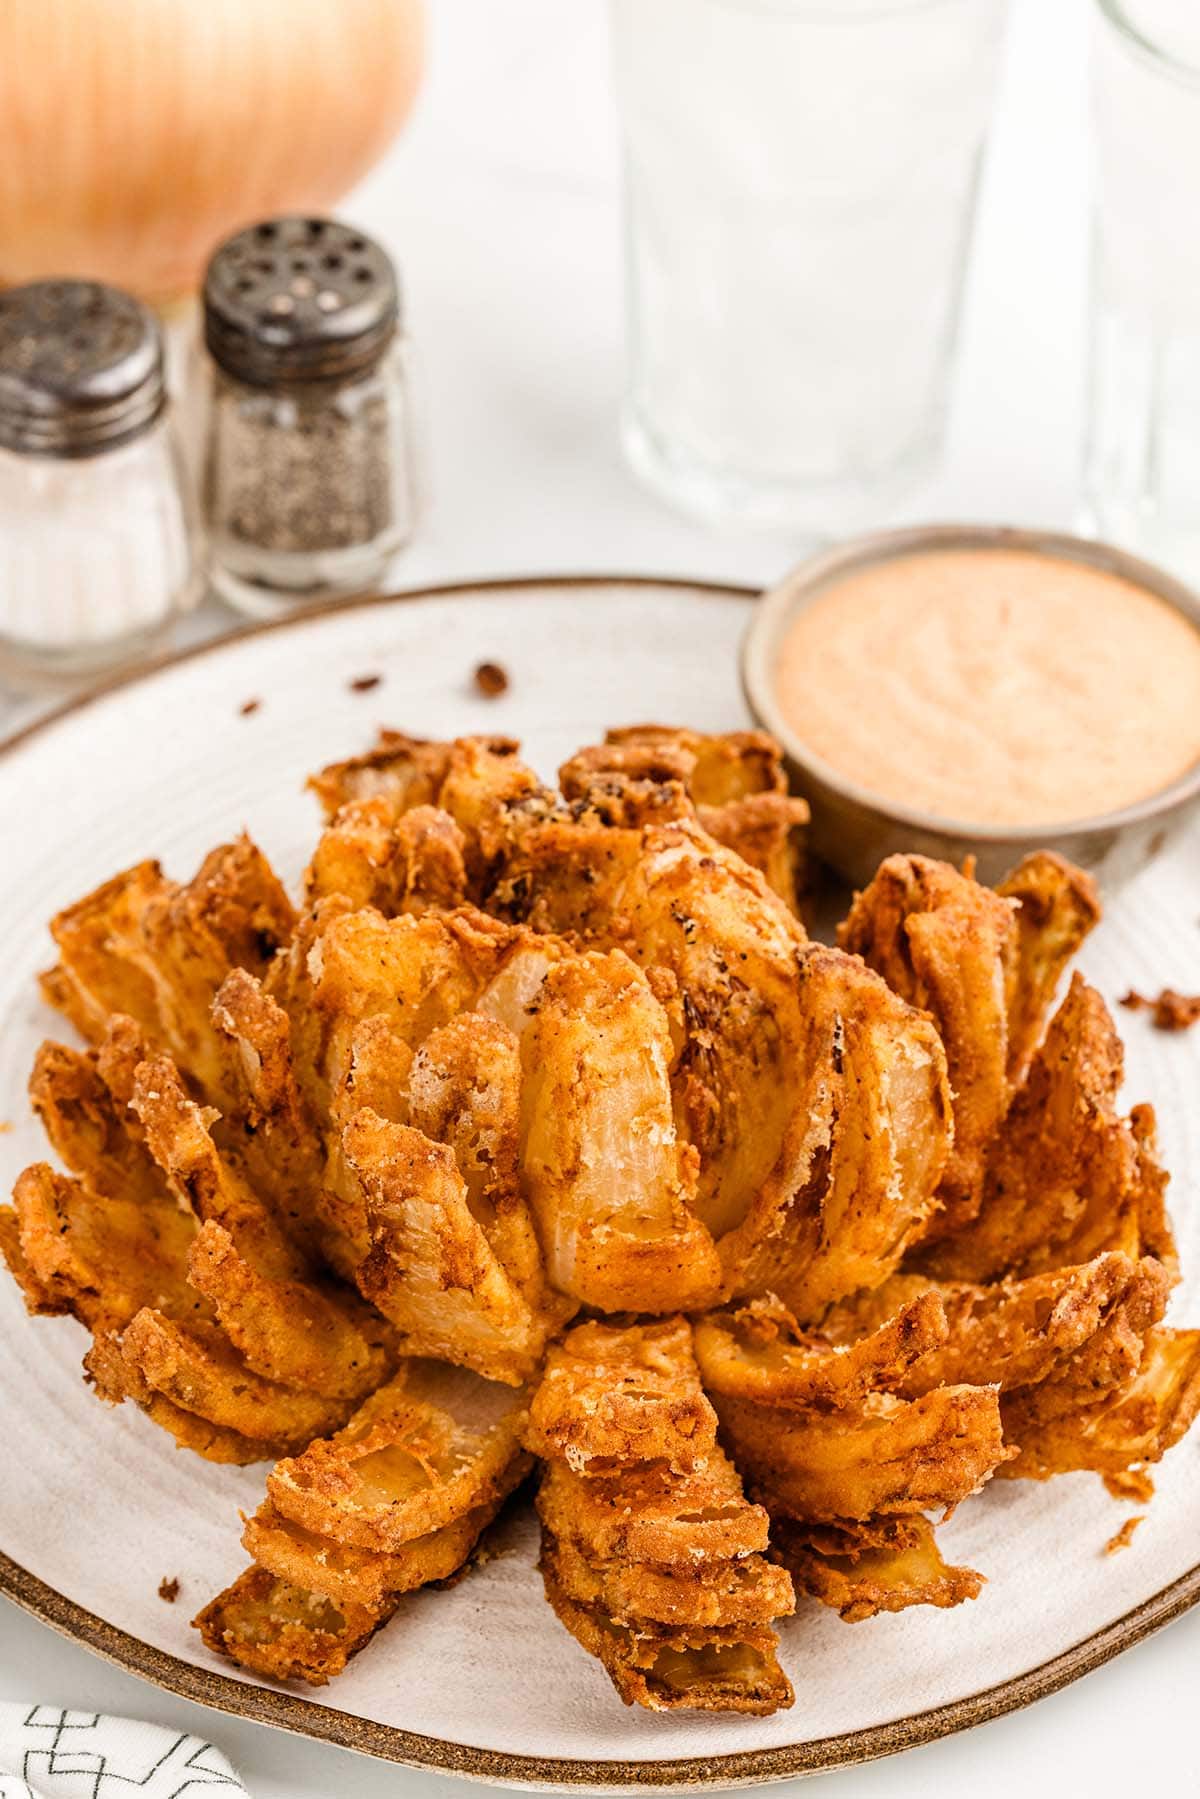
- Serve: Serve warm with dipping sauce on the side. Enjoy!
How To Cut The Onion
- Trim about ½ inch from the top of the onion straight across so that you have a flat, even top. Flip the onion over to the root side and just barely trim off the roots from the onion. Be sure that you leave the root intact. Peel the outer skin from the onion and discard.
- Place the onion cut side down (root side up) on a stable cutting surface. Starting about ½ from the root, make a downward cut all the way through the onion until you hit the cutting board. Repeat to create 4 equally spaced cuts around the onion. The onion will be quartered but still held together at the root.
- Next, make the same type of cuts in each of the quarter sections to divide the quarter section into halves or thirds. Remember that you do not want to get too close to the root. Repeat until you have made all the additional cuts in the remaining 3 quarters of the onion.
Best Way To Deep Fry Awesome Blossom
Place the prepared onion on a spider and slowly, (I mean SUPER slow) lower it into the hot grease. If it starts popping and splattering too much, raise it back up and then slowly start to lower again. The grease pops and splatters because of the flour and the buttermilk coating, so you must go slow. If you try toplace it in the grease all at once, the pot will boil up and over and also splatter your arms.
I find it helpful to deep fry on the spider utensil, occasionally raising it and lowering it in the grease slightly, so it wouldn’t stick to the spider.
When it is slightly brown or your desired color (about 4 minutes) then you can lift the spider out with the onion on it. Then, use a fork to gently loosen any parts of the onion petals that are sticking to the wire before transferring to the plate with the paper towel.
How To Air Fry Awesome Blossom
Simply preheat the air fryer to 400 degrees Fahrenheit and follow the same instructions as written, but instead of deep frying, spray the battered onion with cooking spray and place it root side down in the air fryer basket. Cook it in the air fryer for about 10 minutes or until crispy and golden brown.
Cooking times vary according to different models, so watch closely after about 5 minutes.
Tips For Making The Best Awesome Blossom
- If using a large pot to heat the oil, the best way to ensure your oil is at the correct temperature is to use a candy thermometer placed into the pot (according to directions for your brand thermometer). This way, you can make sure that you can adjust the heat to your burner, as needed, to keep the heat of the oil at 375°F during the entire time the onion is frying.
- I suggest when placing the onion in the buttermilk, to first place it root up, then gently and slowly turn it over and carefully move it around in the buttermilk to allow the liquid to get in between the petals.
- If using a deep fryer make sure it’s big enough to cover the blossom.
- If you prefer a little spicier dipping sauce, you can increase the amount of cayenne pepper according to your taste.
- Depending on your personally preference, if you’re not a fan of the tangy taste of horseradish, it can be left out of the dipping sauce.
- You can use a small sharp knife to cut the petals around the base of the fried onion just before serving to make them easier to pull off and dip into the dipping sauce. Do not do this until after your fried onion has been plated onto the serving platter you intend to use.
How to Store Awesome Blossom
- To Store: I do not recommend refrigerating or freezing this appetizer.
More Easy Copycat Recipes


Craving more drive-through favorites at home? See all of my copycat fast food recipes.
Other Easy Appetizers
- Baked Salami Appetizer
- Crack Chicken Sliders
- Blooming Quesadilla Ring
- Chicken Teriyaki Meatballs
- Bacon Wrapped Pickles
If you tried this Awesome Blossom Recipe or any other recipe on my website, please leave a 🌟 star rating and let me know how it went in the 📝 comments below. Thanks for visiting!!!

Awesome Blossom
Ingredients
Dipping Sauce
- 2 tablespoons mayonnaise
- 2 tablespoons sour cream
- 1½ tablespoons ketchup
- 1½ teaspoons prepared horseradish
- ½ teaspoon sweet paprika
- ¼ teaspoon salt
- ⅛ teaspoon black pepper
- ⅛ teaspoon cayenne pepper
Fried Onion
- Vegetable oil for frying amount will vary depending on the size of your pot or electric fryer
- 1 large Vidalia onion approximately 1 pound in weight
- 1½ cups all-purpose flour
- 2 tablespoons cornstarch
- 1½ teaspoons sweet paprika
- 1½ teaspoons garlic powder
- 1½ teaspoons salt
- ½ teaspoon black pepper
- 1½-2 cups buttermilk
Instructions
- To make the dipping sauce, add the mayonnaise, sour cream, ketchup, prepared horseradish, sweet paprika, salt, black pepper, and cayenne pepper to a small mixing bowl. Stir to fully combine all ingredients. Transfer the dipping sauce to a small serving bowl and cover with plastic wrap until ready to serve.2 tablespoons mayonnaise, 2 tablespoons sour cream, 1½ tablespoons ketchup, 1½ teaspoons prepared horseradish, ½ teaspoon sweet paprika, ¼ teaspoon salt, ⅛ teaspoon black pepper, ⅛ teaspoon cayenne pepper
- Add the vegetable oil to an electric fryer or large 6 to 8-quart pot, and heat the oil to 375°F. The oil should be deep enough in your electric fryer or large pot that the onion is fully submerged while frying. While the oil is heating, you will prepare the onion for frying.Vegetable oil for frying
- Trim about ½ inch from the top of the onion straight across so that you have a flat, even top. Flip the onion over to the root side and just barely trim off the roots from the onion. Be sure that you leave the root intact. Peel the outer skin from the onion and discard.1 large Vidalia onion
- Place the onion cut side down (root side up) on a stable cutting surface. Starting about ½ from the root, make a downward cut all the way through the onion until you hit the cutting board. Repeat to create 4 equally spaced cuts around the onion. The onion will be quartered but still held together at the root.
- Next, make the same type of cuts in each of the quarter sections to divide the quarter section into halves or thirds. Remember that you do not want to get too close to the root. Repeat until you have made all the additional cuts in the remaining 3 quarters of the onion.
- Very carefully flip the onion over, place it onto a large plate, and use your fingers to gently open the sections, creating the “bloomed” onion. The onion should resemble a flower that has “blossomed” or opened up all its petals.
- In a medium mixing bowl, combine the all-purpose flour, cornstarch, sweet paprika, garlic powder, salt, and black pepper. Be sure that all the spices are evenly distributed into the flour.1½ cups all-purpose flour, 2 tablespoons cornstarch, 1½ teaspoons sweet paprika, 1½ teaspoons garlic powder, 1½ teaspoons salt, ½ teaspoon black pepper
- In a separate bowl (big enough that your onion will fit but not too big), add the buttermilk. The amount of buttermilk you will need will depend on the size of the bowl, as the cut onion will need to be dipped or submerged into the buttermilk.1½-2 cups buttermilk
- Using your hands, sprinkle up to ¼ cup of the flour over the entire surface of the onion, being sure to separate the onion slices so that the flour gets in between the individual “petals” of the onion.
- Carefully pick up the sliced onion, being sure to keep it intact, and dip it into the bowl of buttermilk root side up. You want your onion to be fully submerged in the buttermilk so that the buttermilk can get in between all the individual slices of onion “petals”.
- Using a large slotted spoon, lift the onion out of the buttermilk and allow any excess buttermilk to drip back into the bowl. Place the buttermilk-coated onion back onto the plate that you used to add the first batch of flour to the onion. Using your hands, separate the pieces of onion and sprinkle as much of the remaining flour mixture all over the top, sides, and between each of the onion “petals”. You want to get as much of the flour mixture as possible into all the openings so that as the onion fries, the “petals” will all be coated in the batter.
- Very carefully, place the battered onion into the basket of an electric fryer or onto a spider. Gently lower the onion into the hot oil and fry for 4-6 minutes or until golden and crispy.
- Once the awesome blossom is fully fried, carefully remove it from the hot oil, allowing as much of the excess oil to drip back into the hot pot or electric fryer, then place it onto a paper towel-lined plate to absorb the remaining excess oil.
- Place the oil drained fried awesome blossom onto a serving plate along with the small bowl of dipping sauce for serving.
Jenn’s Notes
- To Store: I do not recommend refrigerating or freezing this appetizer.
- If using an electric fryer, you may need to use a large metal spoon to gently lift and slide the fried onion out of the fryer basket so that you do not have to flip it upside down to remove it.
- If using a large pot to fry, a spider works great to both lower and lift out the fried onion from the pot of hot oil.
- If using a large pot to heat the oil, the best way to ensure your oil is at the correct temperature is to use a candy thermometer placed into the pot (according to directions for your brand thermometer). This way, you can make sure that you can adjust the heat to your burner, as needed, to keep the heat of the oil at 375°F during the entire time the onion is frying.
- Peanut or canola oil can both be used as a good substitute for vegetable oil when frying.
- If you prefer a little spicier dipping sauce, you can increase the amount of cayenne pepper according to your taste.
- Vidalia onions are sweet onions and work really well for this recipe. If you can not find a large one (approximately 1 pound or the size of a softball), then 2 smaller onions can be used, but you will need to fry them in batches and watch the fry time (checking them at 3-4 minutes) as they may not take as long as the larger onion to fry to a golden brown.
- You can use a small sharp knife to cut the petals around the base of the fried onion just before serving to make them easier to pull off and dip into the dipping sauce. Do not do this until after your fried onion has been plated onto the serving platter you intend to use.