
This post may contain affiliate links. Please read our disclosure policy.
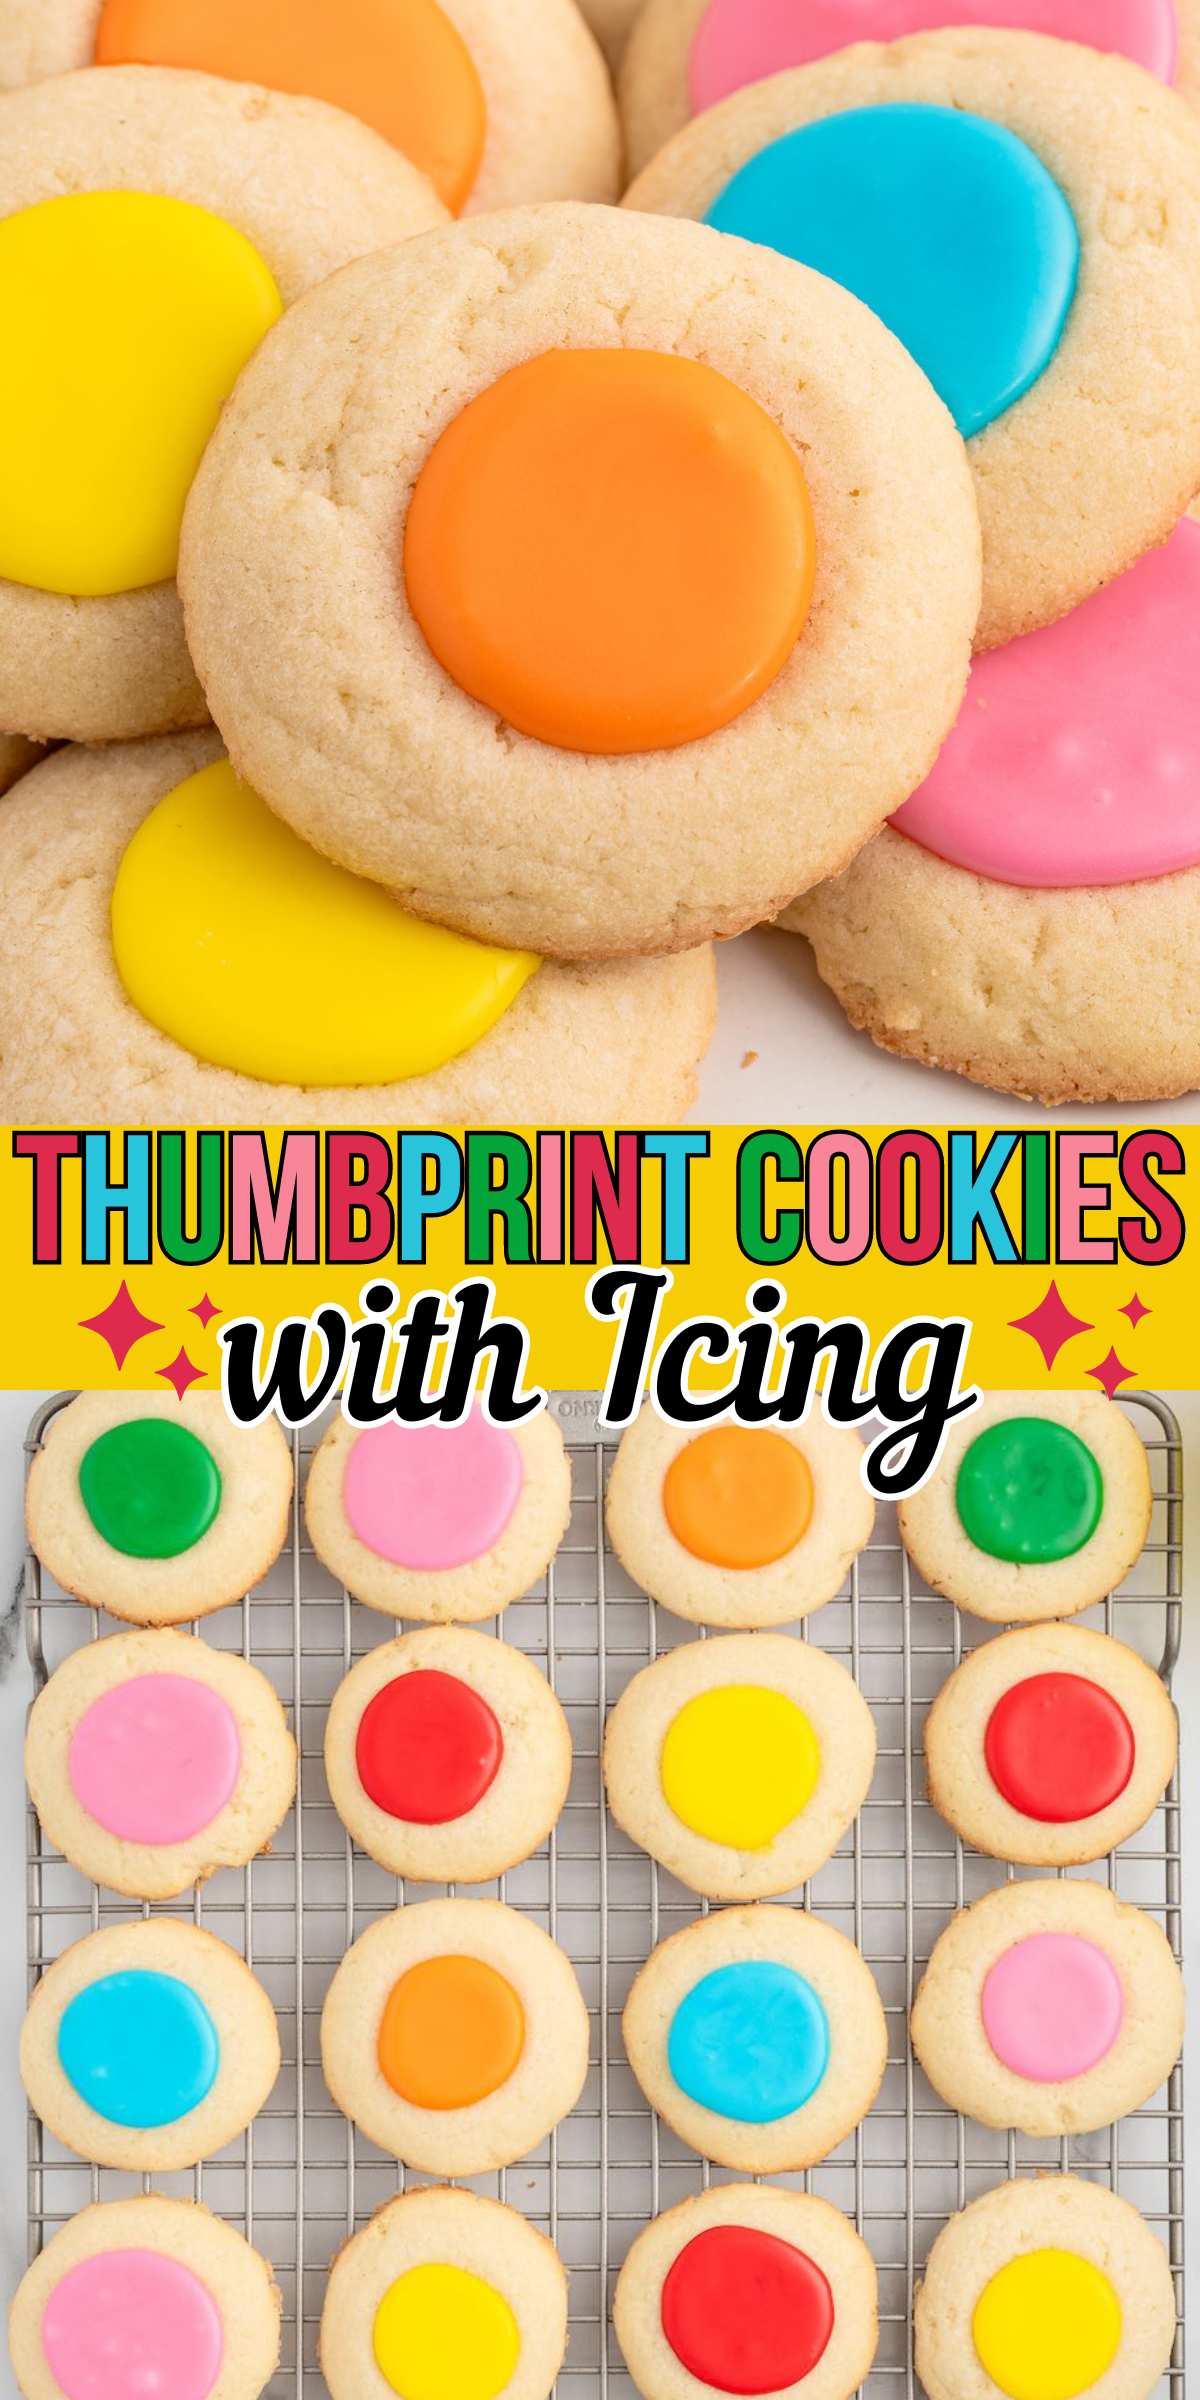
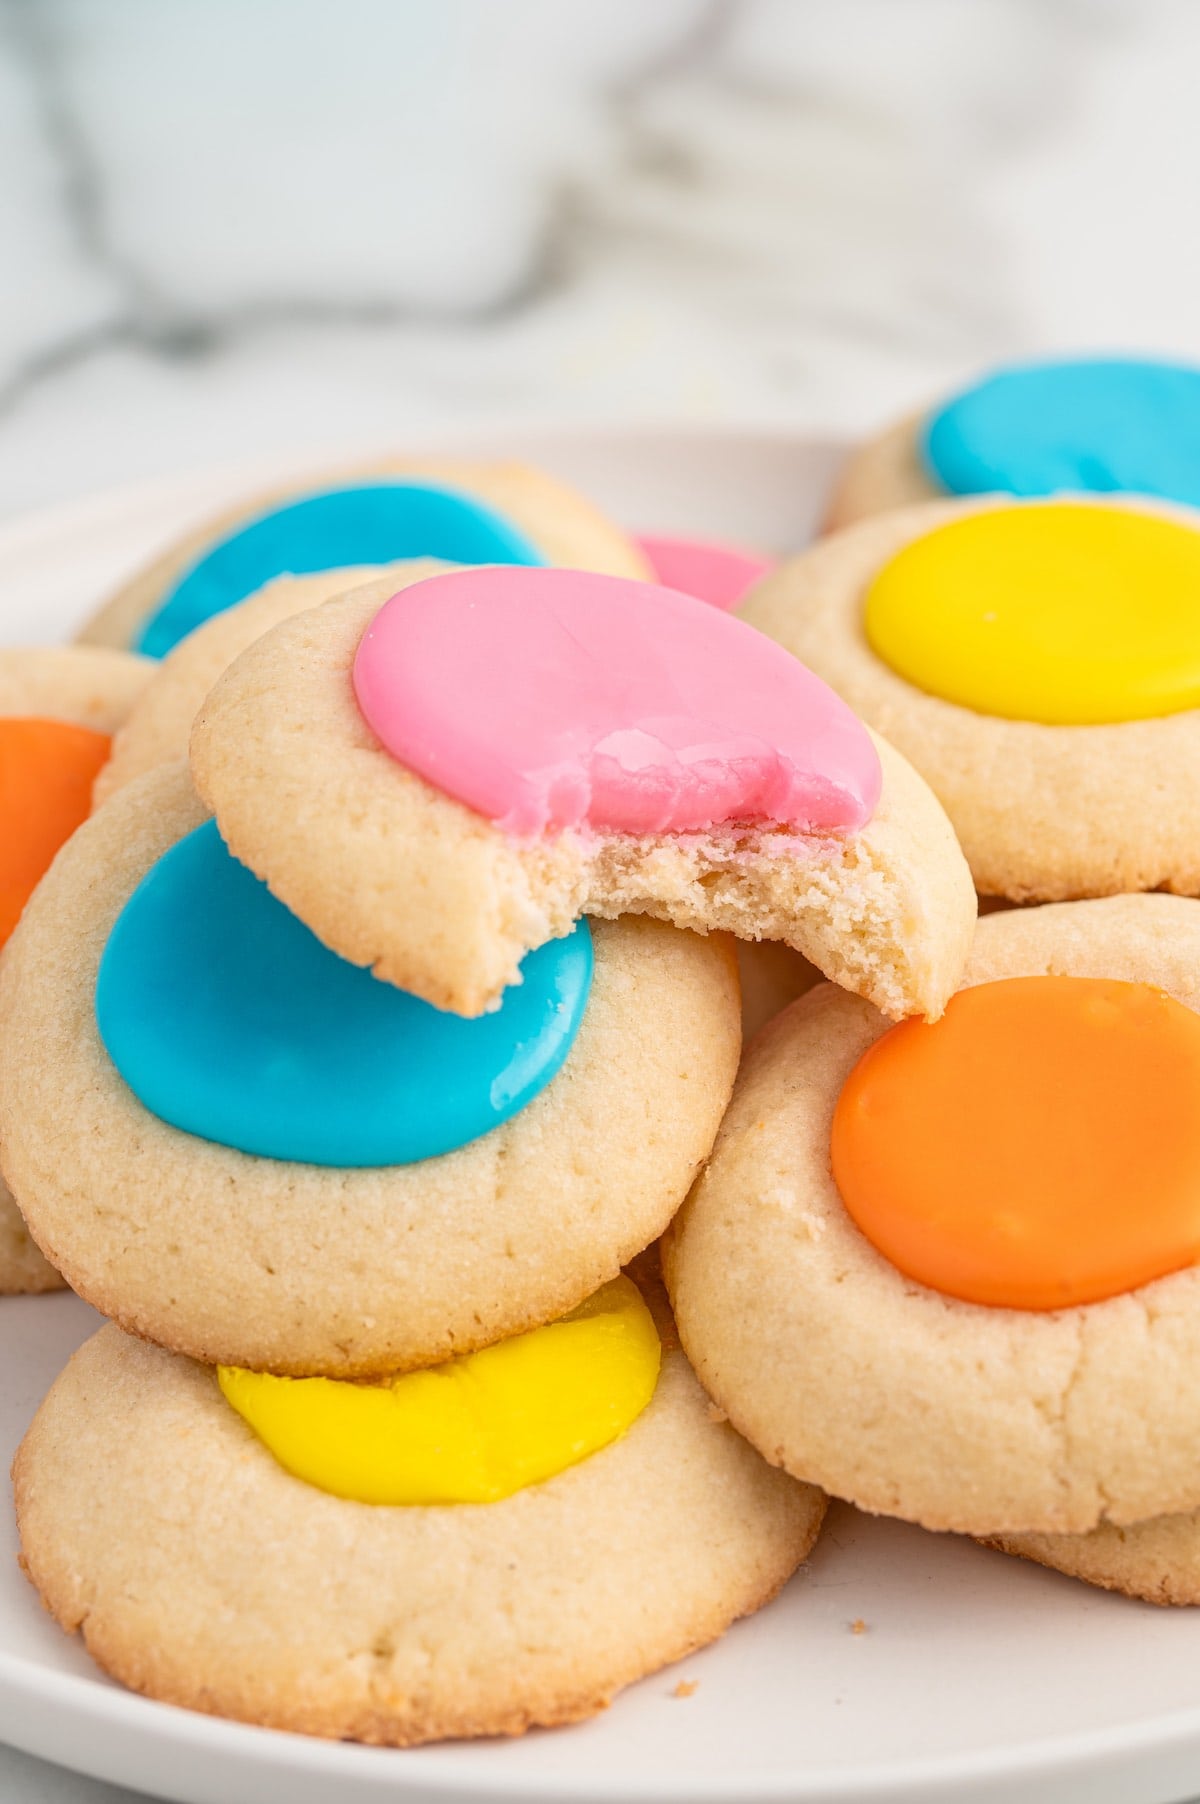
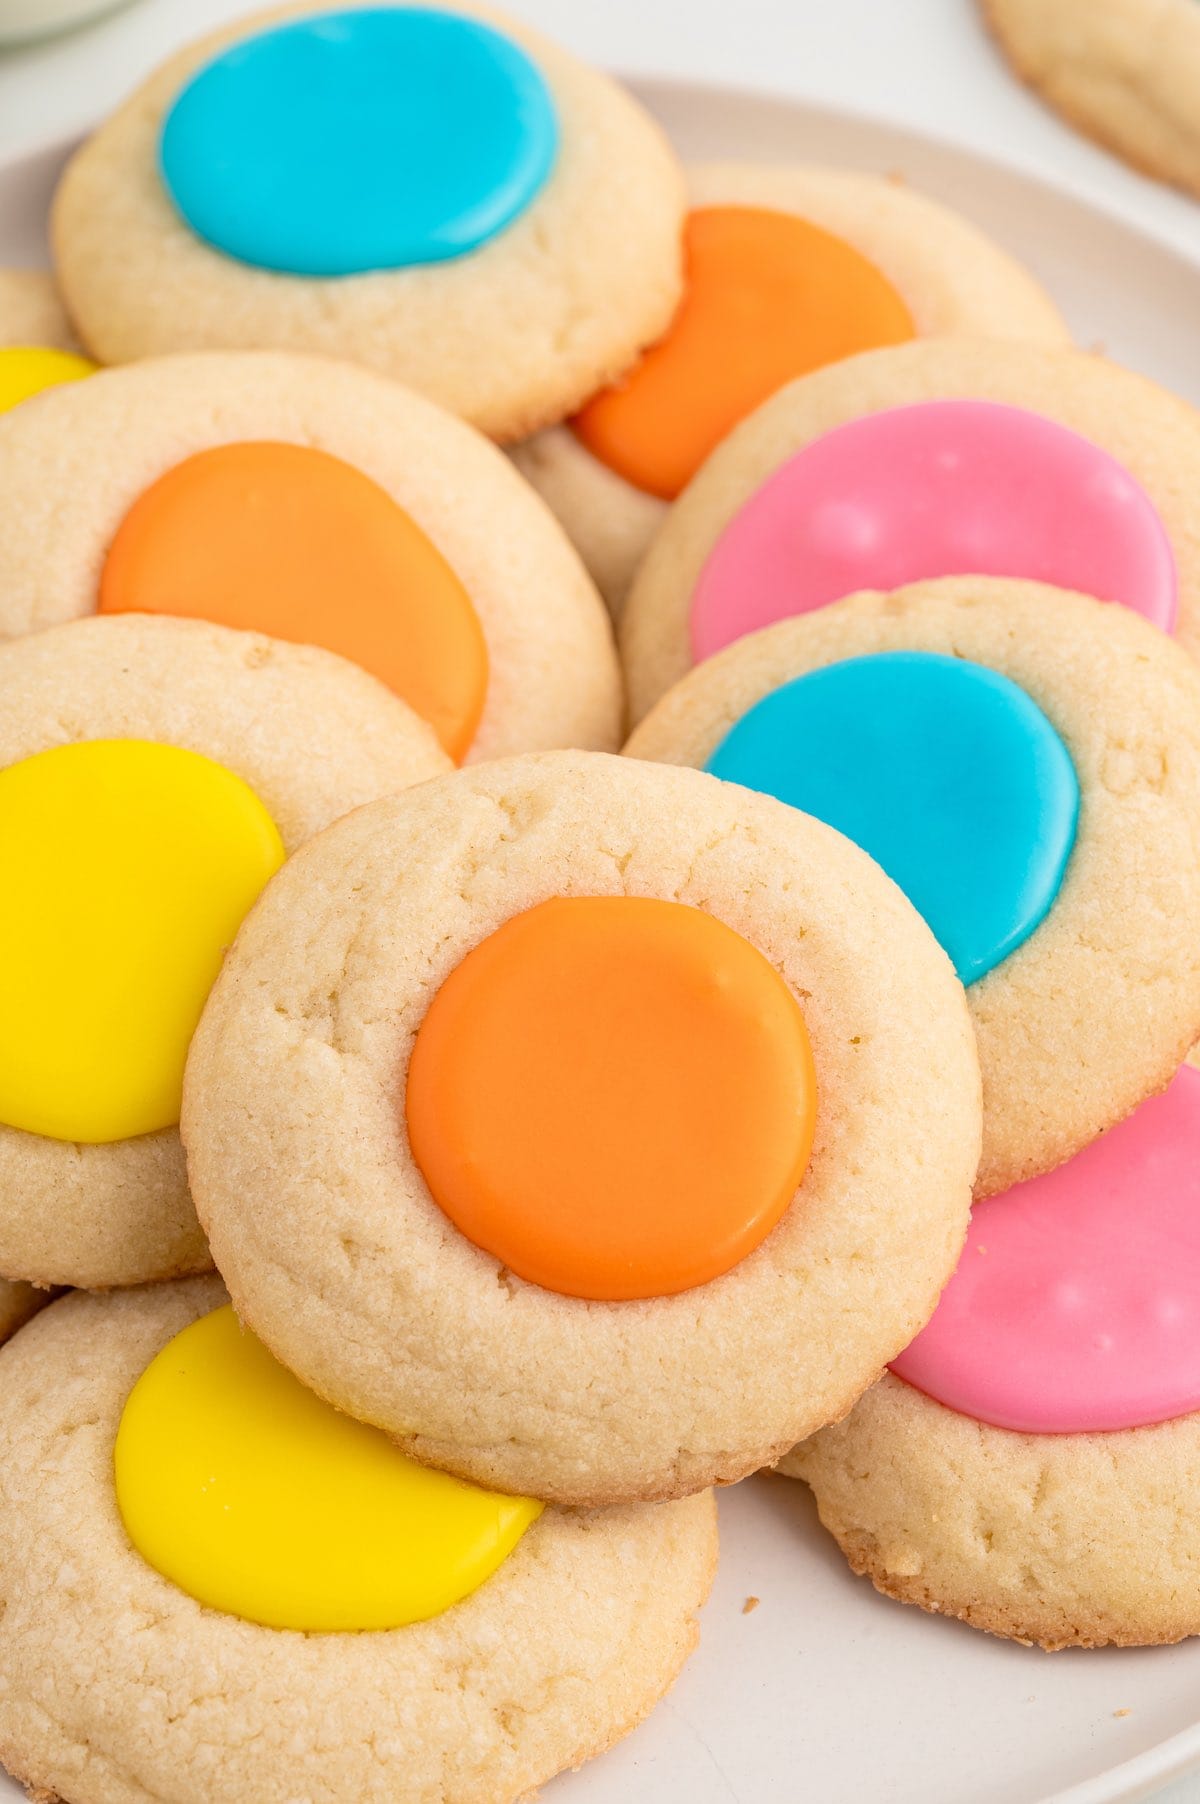
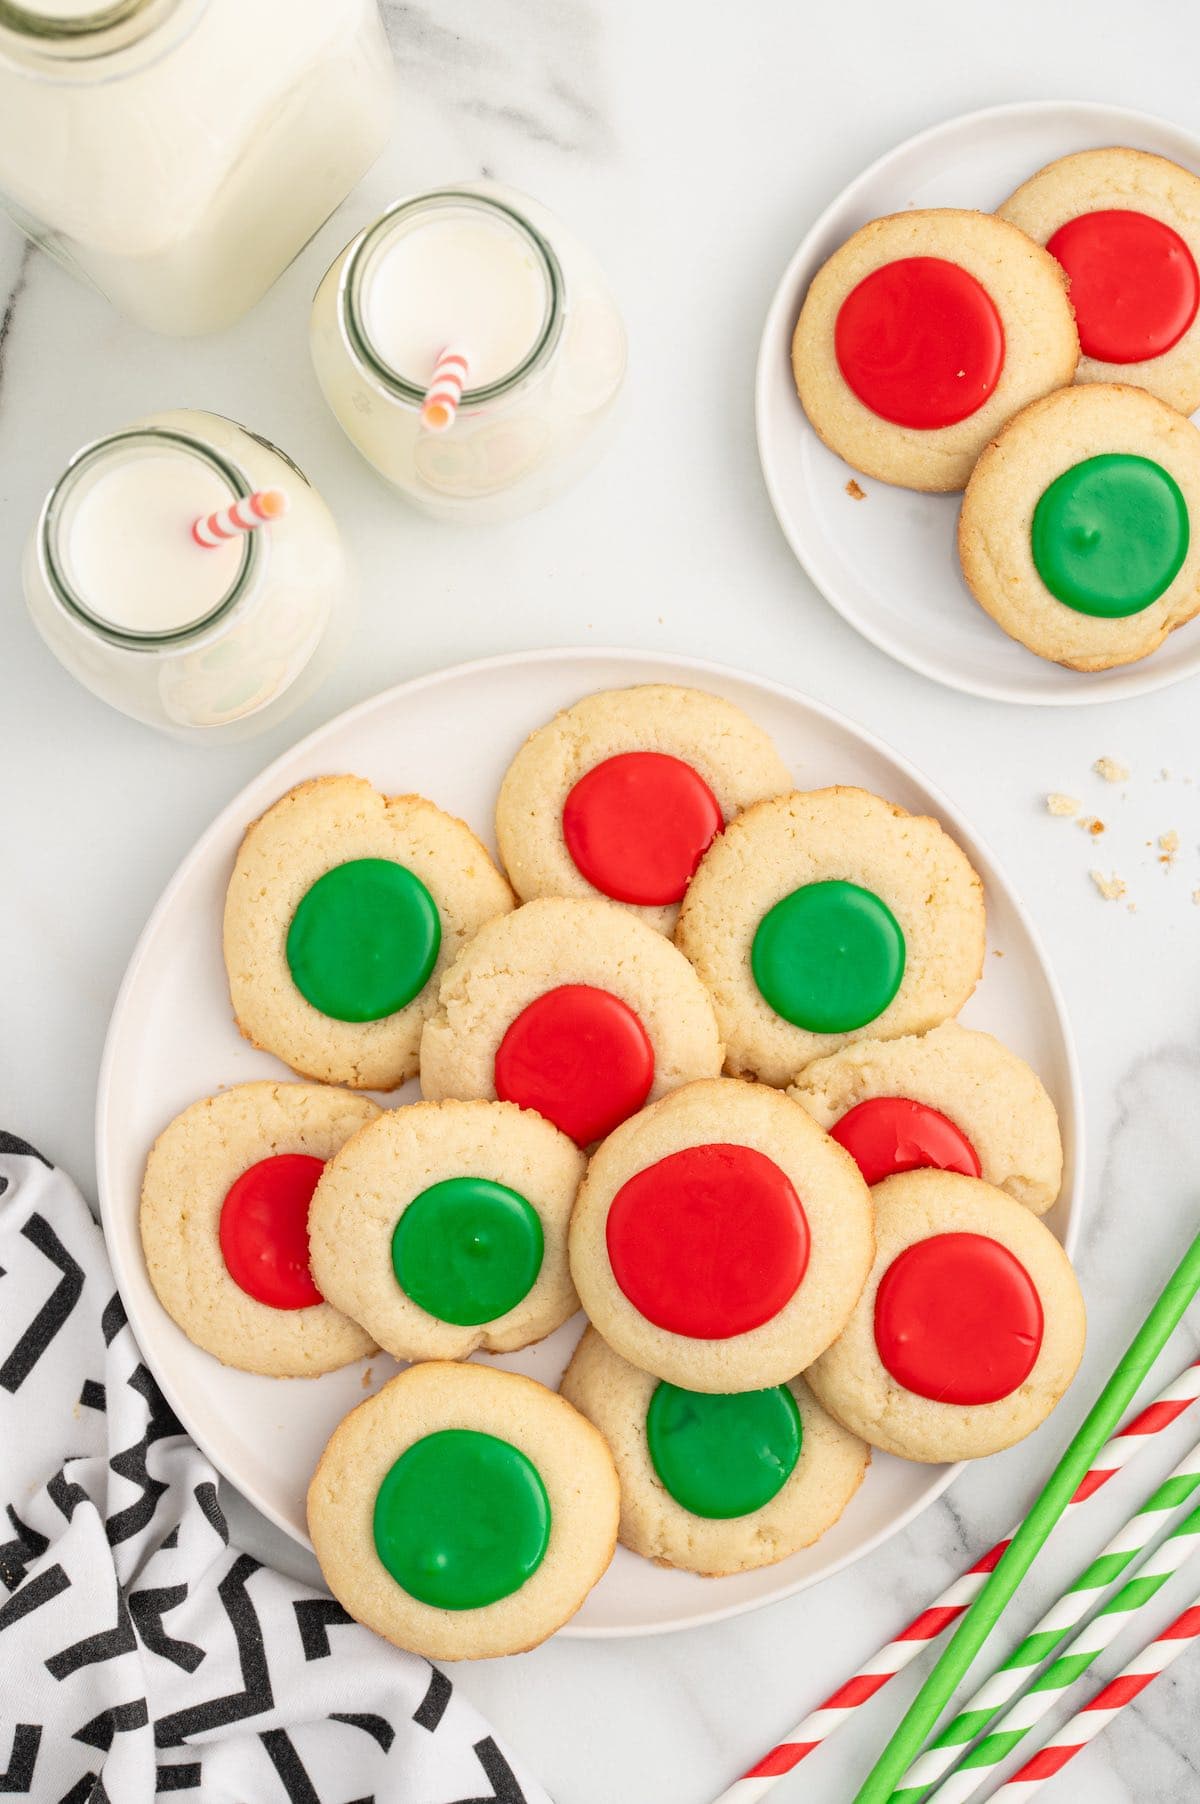
Thumbprint Cookies with Icing recipe turns a classic fruity, jam-filled Christmas cookie into a multi-occasion treat. Easy to make from scratch, the shortbread-style cookie dough base and colored icing in the middle come together in 15 minutes.
Easy Iced Thumbprint Cookies
These old-fashioned thumbprint cookies have the perfect soft and tender buttery base to house the homemade icing in the middle. But if you prefer to go back to the basics, you can bake my Peanut Butter Thumbprint Cookies, go classic and add strawberry jam to the center (I’ve got the best thumbprint cookies.)
Get creative with your thumbprint cookies recipe because the cookie dough can cradle all sorts of candy, puddles of jelly, and pools of chocolate and hold it in place as it sets!
Thumbprint Cookies with Icing Ingredients
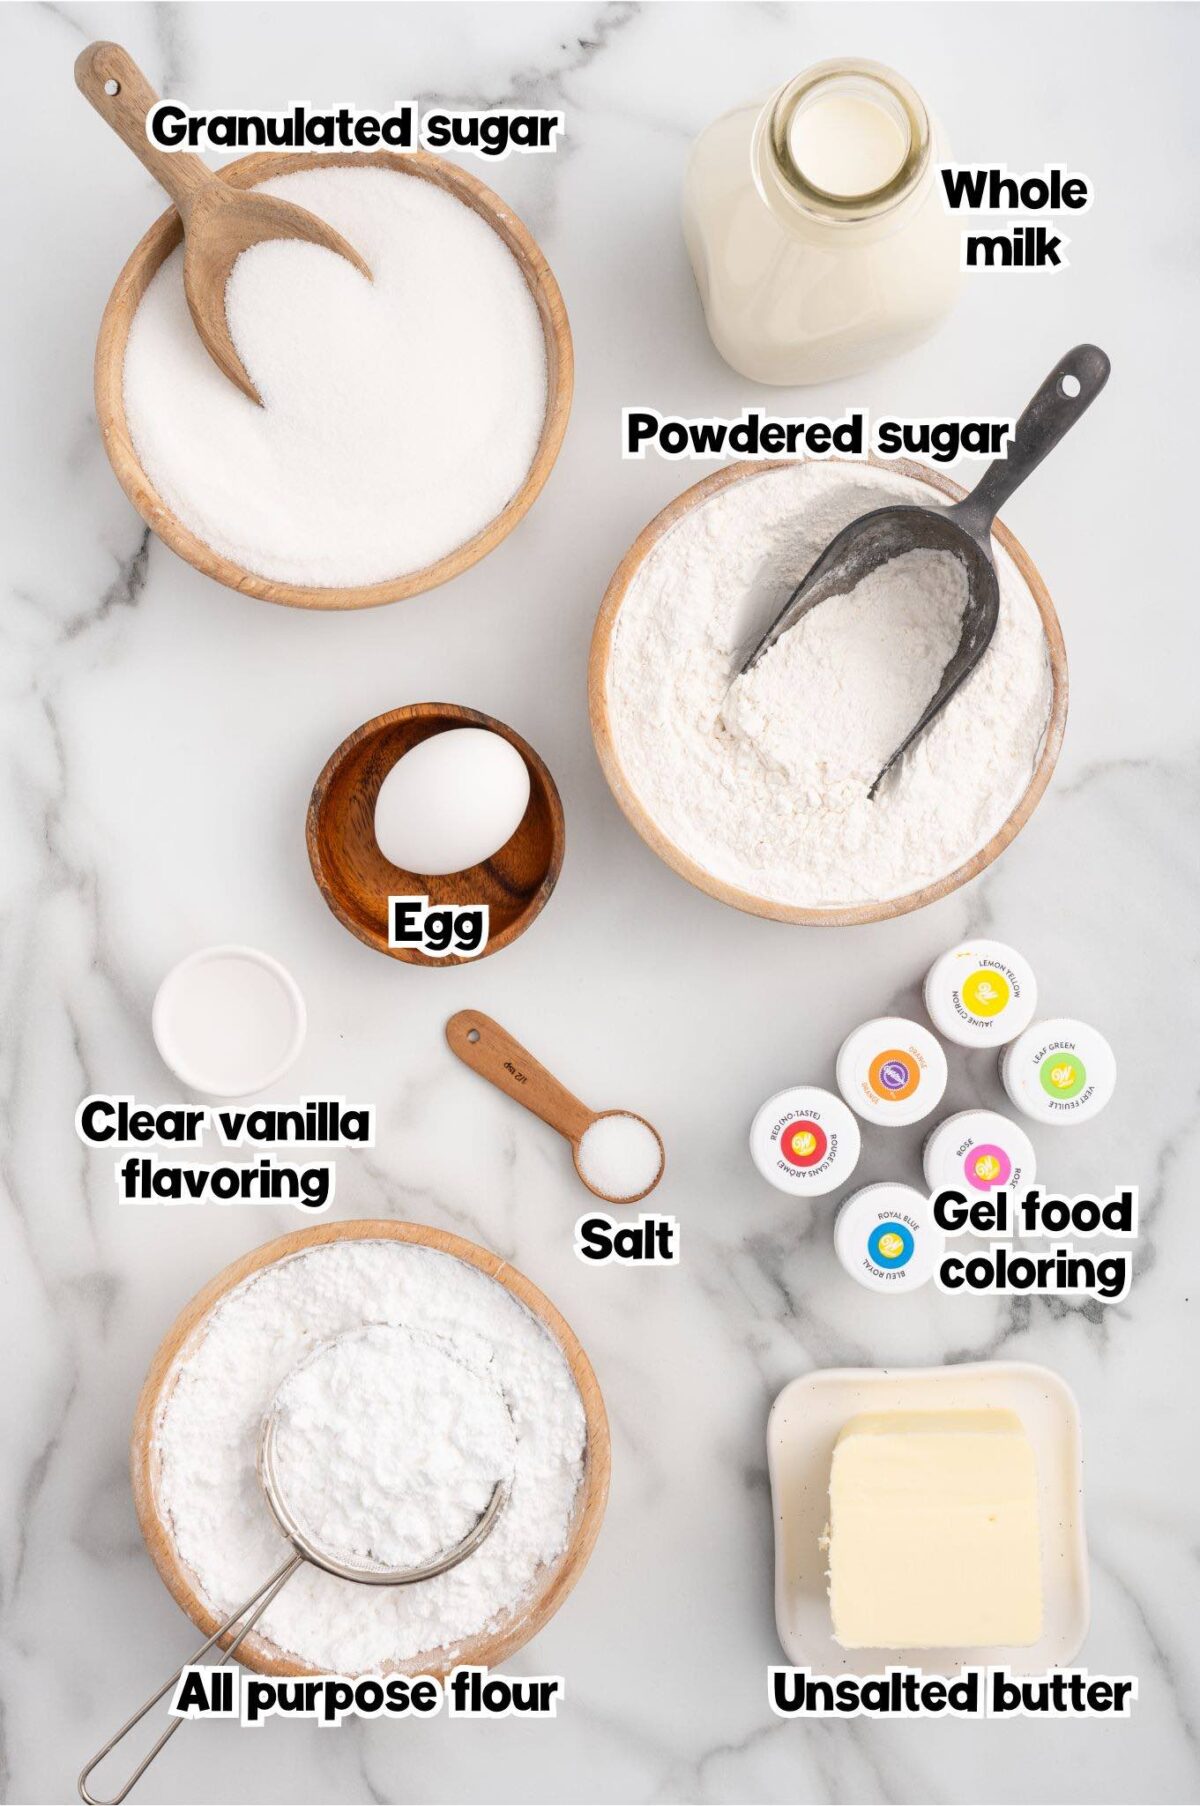
- All purpose flour
- Salt
- Unsalted butter: Make sure your butter is softened to room temperature.
- Granulated sugar
- Egg: Make sure to bring your egg to room temperature.
- Clear vanilla flavoring: You can replace the clear vanilla flavoring with vanilla extract or almond extract in a pinch.
- Powdered sugar
- Whole milk
- Gel food coloring
See the recipe card for full information on ingredients and quantities.
How to Make Thumbprint Cookies with Icing
- Make The Dry Mixture: Combine the flour and salt. Set aside.
- Make The Wet Mixture: Cream together the butter and sugar until smooth. Add the egg and vanilla flavoring and beat again until fully incorporated.
- Create The Cookie Dough: Add the dry mixture to the wet mixture and beat until it forms a thick, and smooth, dough. Cover and refrigerate for 30- 60 minutes.
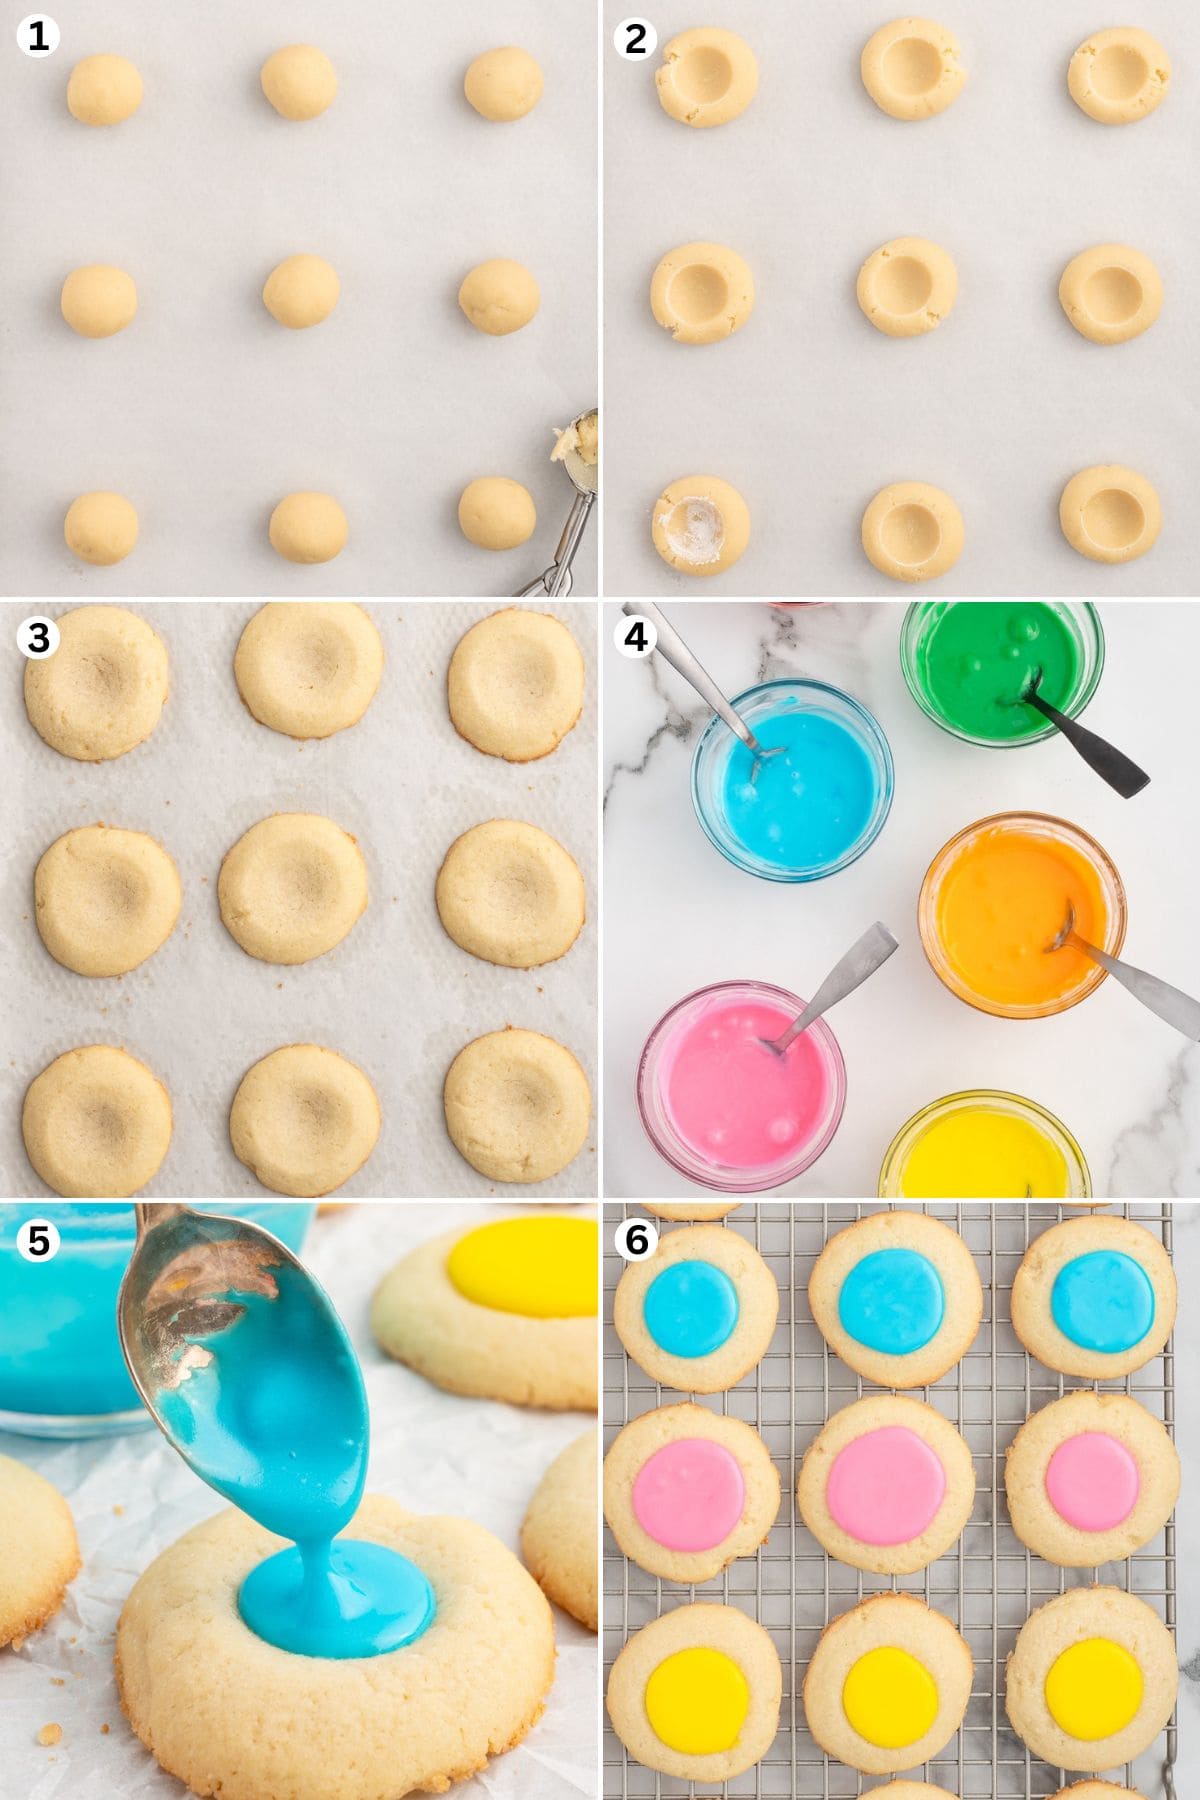
- Bake Dough Balls: Scoop out tablespoons of chilled dough and roll them into smooth balls (Image 1). Press an indent into the center of each ball, about ¾ – 1 inch wide (Image 2). Bake at 350 degrees Fahrenheit for 10-12 minutes or until lightly golden around the bottom edges. (Image 3)
- Make The Icing: Whisk together the powdered sugar, milk, and vanilla flavoring until smooth. Stir in the gel food coloring, starting with 2-3 drops, until you reach your desired color. (Image 4)
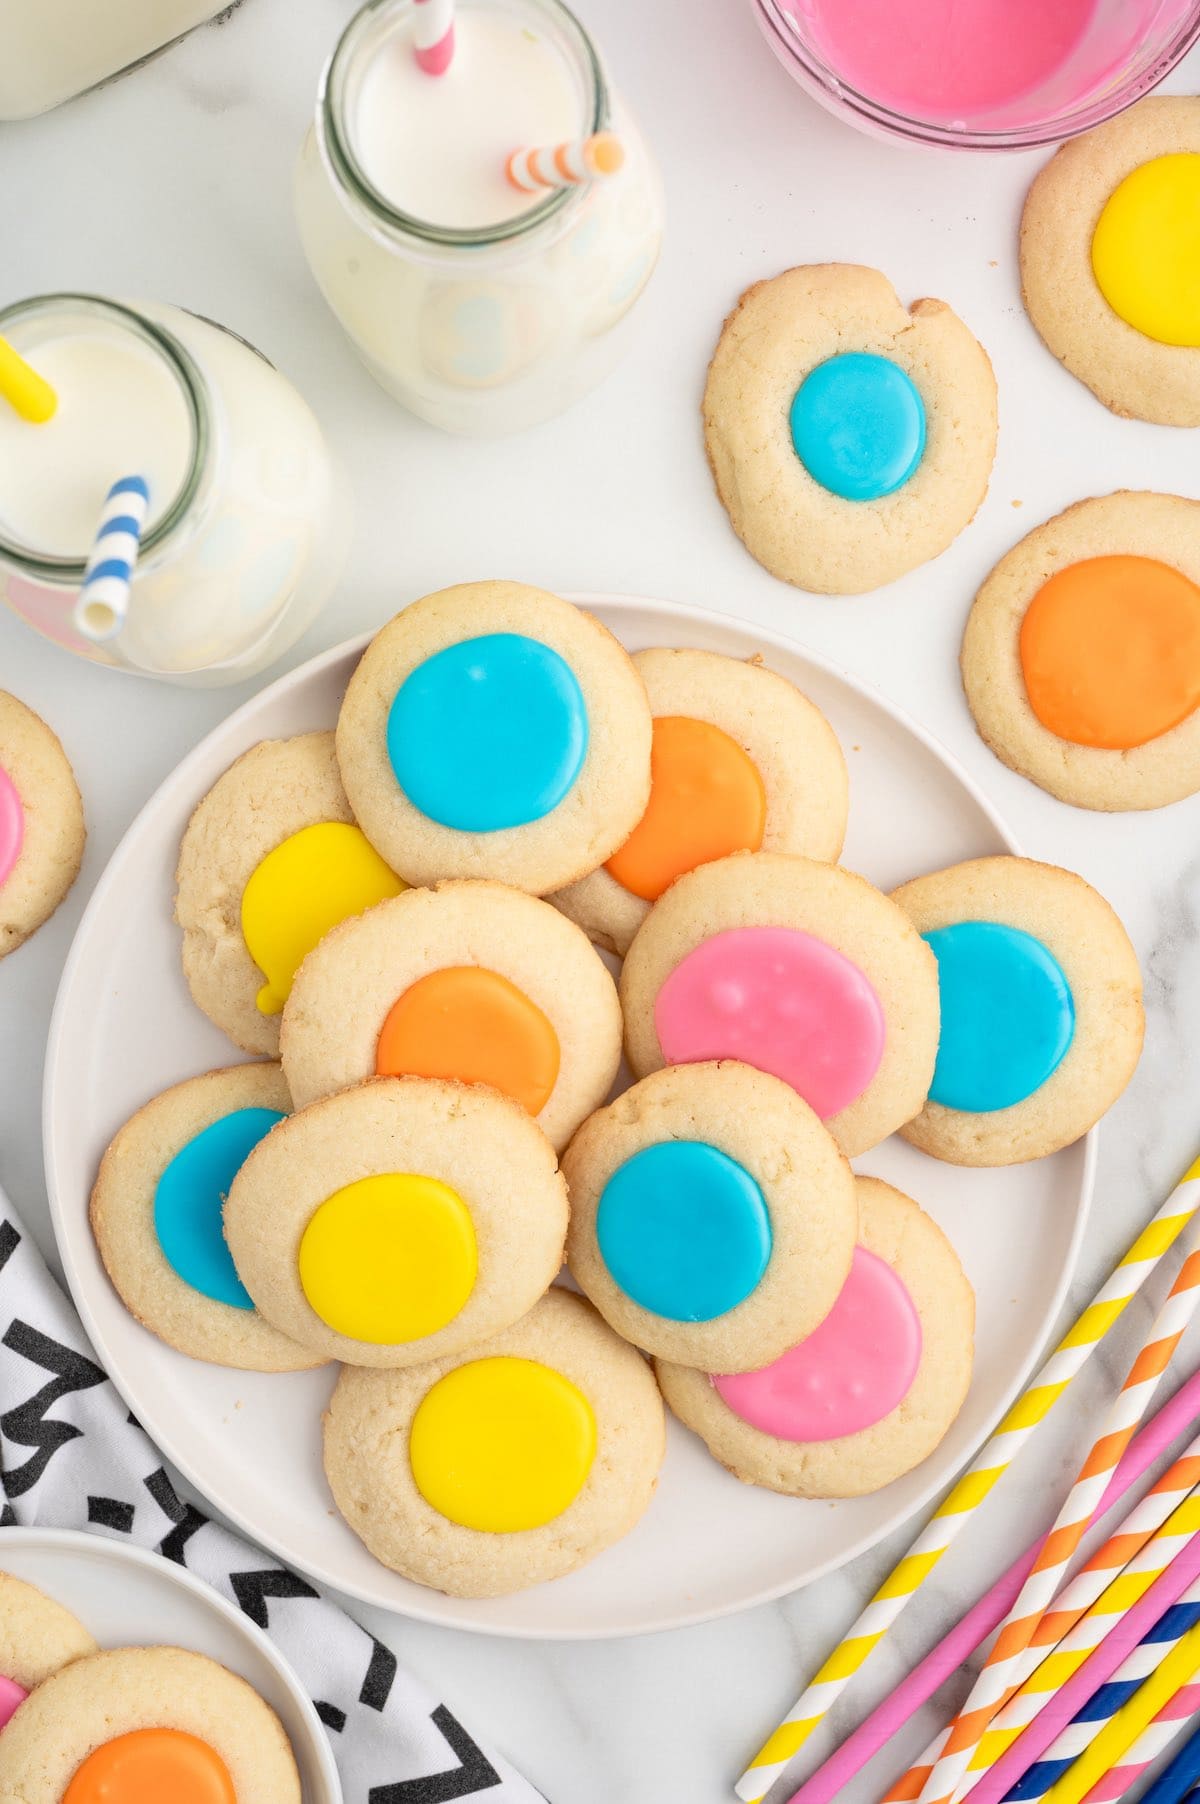
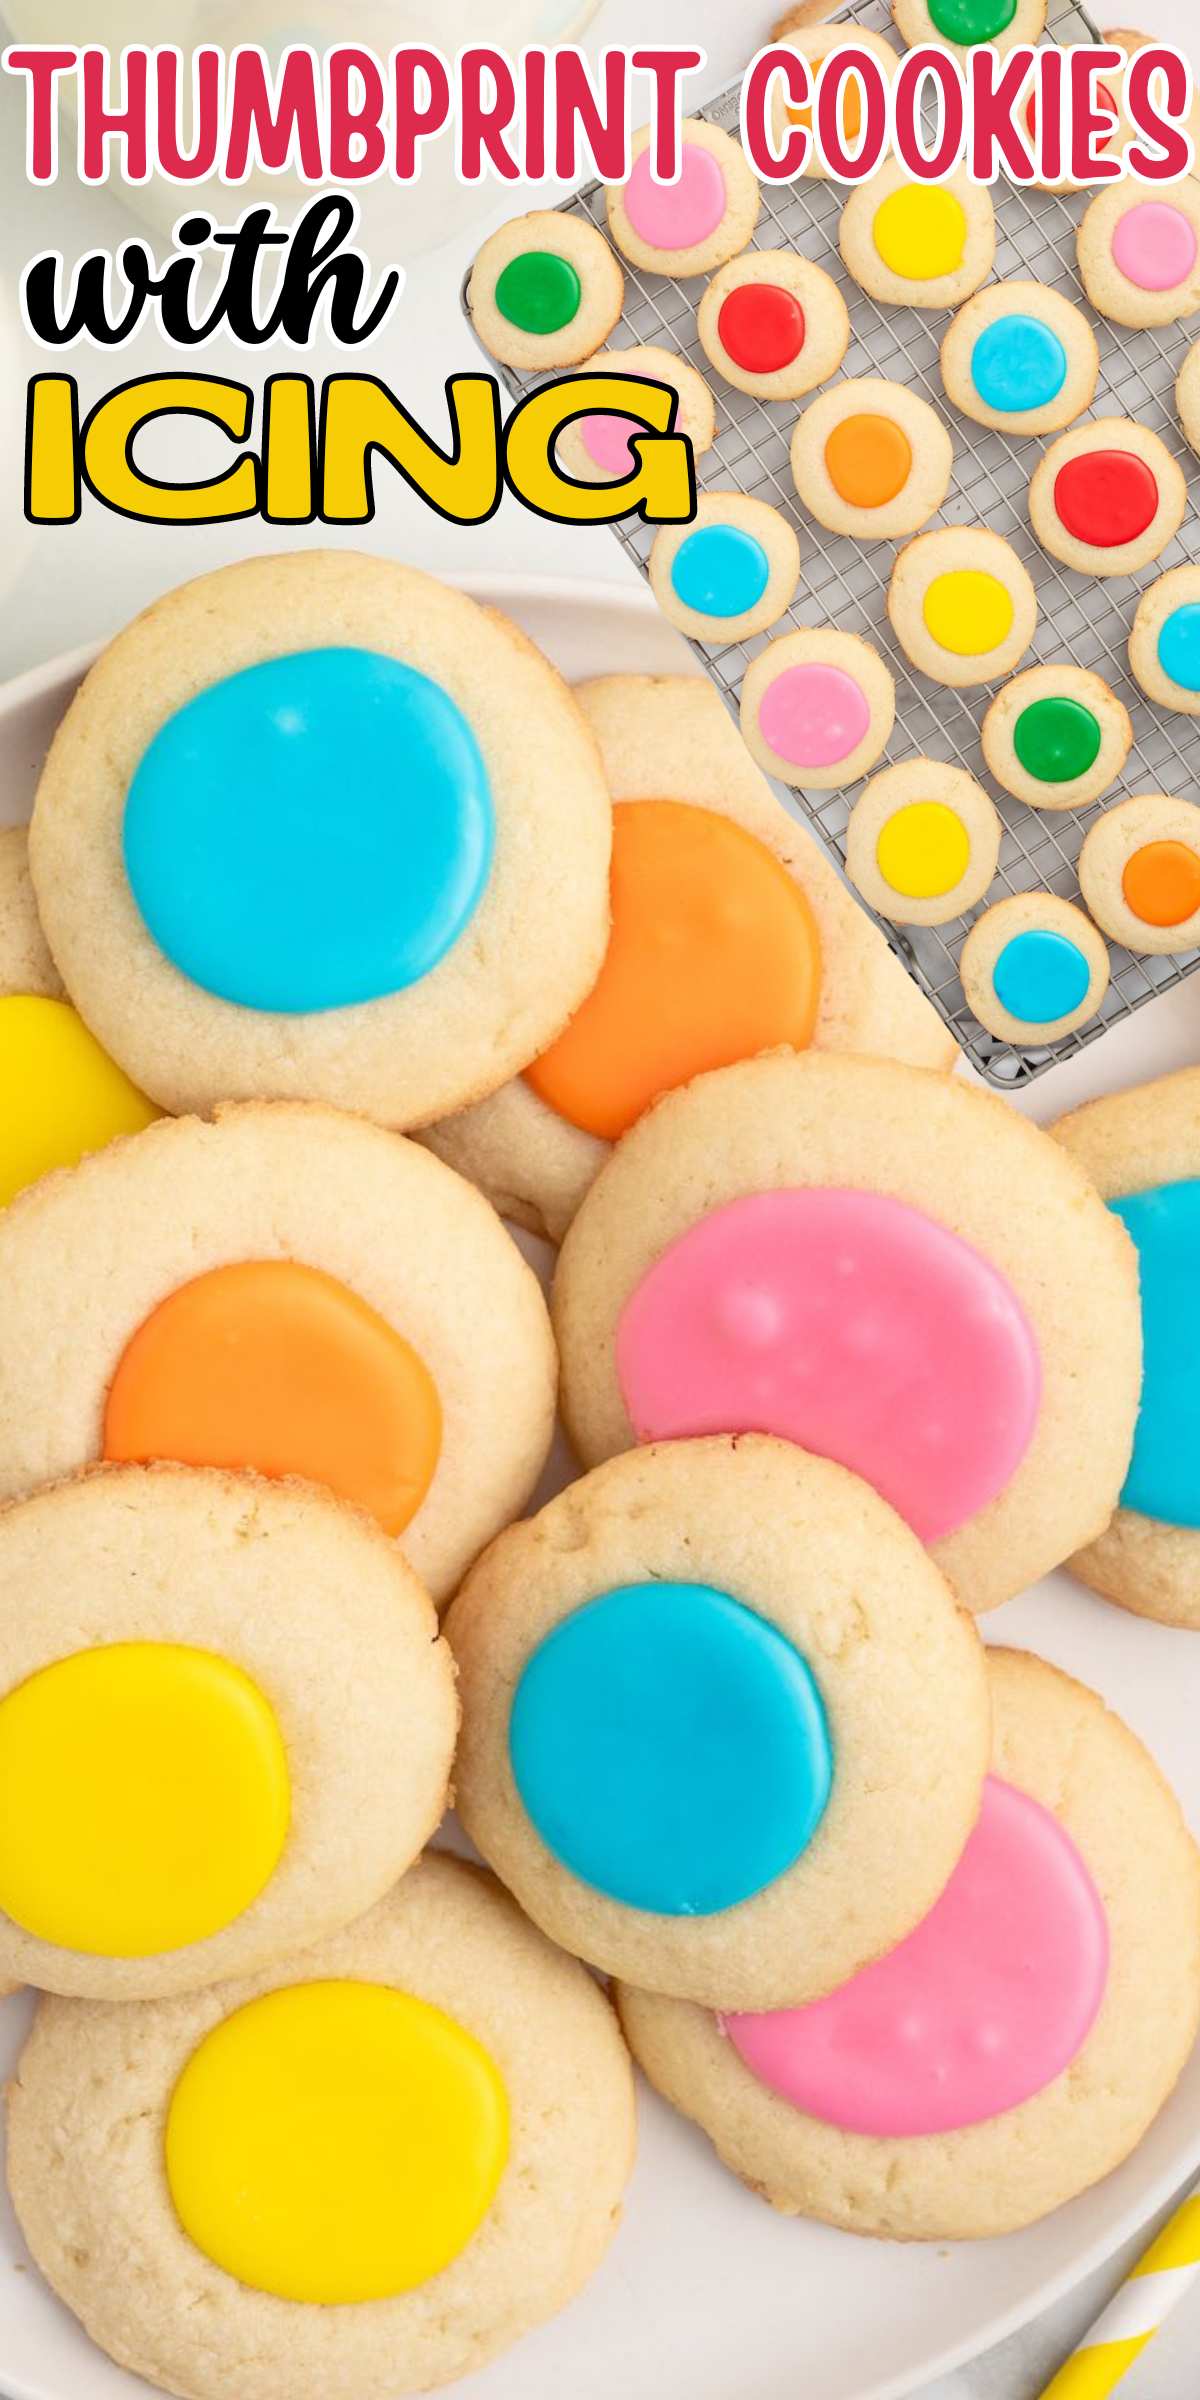
- Fill And Firm: Fill each cavity of the cooled cookies with icing (Image 5) and allow it to firm up before serving or storing (Image 6). Enjoy!
Tips & Variations
- You can make your thumbprint cookies with buttercream icing, chocolate frosting, or vanilla frosting.
- Feel free to fill your cookie base with your favorite fillings like hazelnut spread, jam, dulce de leche, caramel sauce, or chocolate ganache.
- You don’t have to use your thumb to make perfect thumbprints! Instead, I find a rounded teaspoon is perfect for making indentations.
- When your cookies come out of the oven and are still warm, you can gently press down in the center of your indentation if it has risen too much while baking. This is not necessary but will give you a little more defined indentation to fill with the colored icing once the cookies are cooled.
- Be sure to allow plenty of time for the icing to firm up before trying to stack these cookies. The icing will never get truly hard like a royal icing used for decorated sugar cookies but will firm up. I allowed mine to sit overnight on the counter at a cool room temperature before plating and serving.
How To Make Multiple Colors Of Icing
If making multiple colors of icing for your thumbprint cookies, you will want to get your white icing to the proper consistency, then divide the icing equally (depending on the amount of colors) before adding the gel food coloring.
Please note that since you have divided this icing, you will want to start with a smaller amount of gel food coloring per batch. If using Wilton brand food coloring (that comes in the little pots) you can use a toothpick to just dip into the gel food coloring and then swirl it into the smaller amounts of icing. If using a brand such as Americolor, start with a very small drop as I find that their colors are more intense than other popular brands.
Proper STorage
- To Store: Store these iced thumbprint cookies at room temperature, in a single layer, in an airtight container for 4-5 days.
- To Freeze: You can freeze the thumbprint cookie dough balls or the baked cookies (without the icing) for up to 2 months in an airtight container. Be sure to thaw the dough in the refrigerator before making the indents and baking.
Frequently Asked Questions
Your icing should be thicker, not pourable. Start with 2 tablespoons of whole milk, then add 1 teaspoon at a time (up to 1 tablespoon) to achieve your desired consistency.
You can place a little bowl of flour next to the baking trays. Lightly dip your thumb, or rounded measuring spoon, into the flour before pressing into the cookie dough ball to make the indentation. This will help to keep the dough from sticking.
Other Easy Cookie Recipes
- Raspberry Crumble Cookies
- Sour Cream Cookies
- Snow Ball Cookies
- White Chocolate Cranberry Cookies
- Twix Thumbprint Cookies
If you tried this Thumbprint Cookies With Icing Recipe or any other recipe on my website, please leave a 🌟 star rating and let me know how it went in the 📝 comments below. Thanks for visiting!!!

Thumbprint Cookies with Icing
Ingredients
Cookies
- 2 cups all-purpose flour
- ½ teaspoon salt
- 1 cup unsalted butter softened to room temperature
- ⅔ cup granulated sugar
- 1 large egg room temperature
- 1 teaspoon clear vanilla flavoring
Colored Icing
- 2 cups powdered sugar sifted
- 2-3 tablespoons whole milk
- ½ teaspoon clear vanilla flavoring
- 2-3 drops gel food coloring see tips
Instructions
Cookies
- In a medium bowl add the all-purpose flour and salt. Set aside.
- In a large mixing bowl, add the softened unsalted butter and granulated sugar. Using a hand mixer, on medium speed, cream together the butter and sugar for 2-3 minutes or until smooth.
- To the butter mixture add the egg and clear vanilla flavoring. Beat again for 1-2 minutes or until fully incorporated.
- Add the dry ingredients to the bowl of wet ingredients and beat on low speed until it comes together to form a thick, and smooth, dough. Scrape the sides and bottom of the bowl with a rubber spatula to ensure that all the dry ingredients are fully incorporated and the dough is well combined.
- Cover the bowl of cookie dough with plastic wrap and refrigerate for 30- 60 minutes.
- Preheat the oven to 350* F. Line two large baking sheets with parchment paper and set aside.
- Using a 1 tablespoon cookie scoop, scoop out a level amount of chilled dough and roll it in the palm of your hand to create a smooth ball. Place the rolled ball onto a baking sheet and repeat until all the dough has been rolled and placed onto the two prepared baking sheets. Be sure to leave about 2 inches of space between each dough ball.
- Using a small rounded measuring spoon, or your thumb, press an indent into the center of each dough ball that is about ¾ – 1 inch wide. This should flatten your dough ball slightly and the indentation should not go all the way to the bottom of the dough ball. Repeat until all the cookie dough balls are indented.
- Bake the cookies for 10-12 minutes or just until lightly golden around the bottom edges.
- Remove the thumbprint cookies from the oven and allow them to cool on the pan for 5 minutes before transferring them to a wire rack to cool completely before icing them.
Colored Icing
- To a large mixing bowl add the sifted powdered sugar, 2 tablespoons whole milk and clear vanilla flavoring. Whisk until smooth. You want a thicker consistency, not a pourable one. Start with the 2 tablespoons of whole milk then add 1 teaspoon at a time (up to 1 tablespoon) to get desired consistency.
- If you are making a single icing color, you will add the gel food coloring of your choice, starting with 2-3 drops, until you reach your desired color. If making multiple colors see tips below. Stir the gel food coloring into the icing until no streaks remain and the color is uniform.
- Using a small spoon, or transferring the colored icing to a small piping bag with the end cut off, fill each of the indentations of the cooled thumbprint cookies. Be careful not to overfill the indentations with the icing.
- Allow the iced thumbprint cookies to sit at room temperature to allow the icing to firm up before placing onto a serving plate or adding to a container for storage.
Jenn’s Notes
- To Store: Store these iced thumbprint cookies at room temperature, in a single layer, in an airtight container for 4-5 days.
- To Freeze: You can freeze the thumbprint cookie dough balls or the baked cookies (without the icing) for up to 2 months in an airtight container. Be sure to thaw the dough in the refrigerator before making the indents and baking.
- You can place a little bowl of flour next to the baking trays to lightly dip your thumb, or rounded measuring spoon, into before pressing into the cookie dough ball to make an indentation. This will help to keep the dough from sticking.
- When your cookies come out of the oven, and are still warm, you can gently press down in the center of your indentation if it has risen too much while baking. This is not necessary but will give you a little more defined indentation to fill with the colored icing once the cookies are cooled.
- If making multiple colors of icing for your thumbprint cookies, you will want to get your white icing to the proper consistency, then divide the icing equally (depending on the amount of colors) before adding the gel food coloring. Please note that since you have divided this icing, you will want to start with a smaller amount of gel food coloring per batch. If using Wilton brand food coloring (that comes in the little pots) you can use a toothpick to just dip into the gel food coloring and then swirl it into the smaller amounts of icing. If using a brand such as Americolor, start with a very small drop as I find that their colors are more intense than other popular brands.
- Be sure to allow plenty of time for the icing to firm up before trying to stack these cookies. The icing will never get truly hard like a royal icing used for decorated sugar cookies but will firm up. I allowed mine to sit overnight on the counter, at a cool room temperature, before plating and serving.


what a mess. dont try this. I don’t think it needs eggs. it melted into a huge blob. thank goodness I had put down parchment paper. so clean up was not too bad
I’m sorry it turned into a mess. That’s frustrating, especially with a cookie that should be simple.
The eggs are actually important in this recipe. They help bind the dough and keep the cookies from spreading too much. When the dough melts into one big blob, it’s usually caused by one of these things:
• Butter that was too soft or partially melted
• Dough not chilled long enough
• Too much spreading from a warm pan or warm kitchen
What helps next time:
• Use butter that is softened but still cool
• Chill the dough for at least 30 minutes
• Bake on a fully cooled baking sheet
I appreciate you sharing what happened. Parchment paper definitely saved the day there.