This post may contain affiliate links. Please read our disclosure policy.

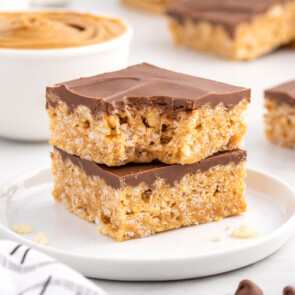
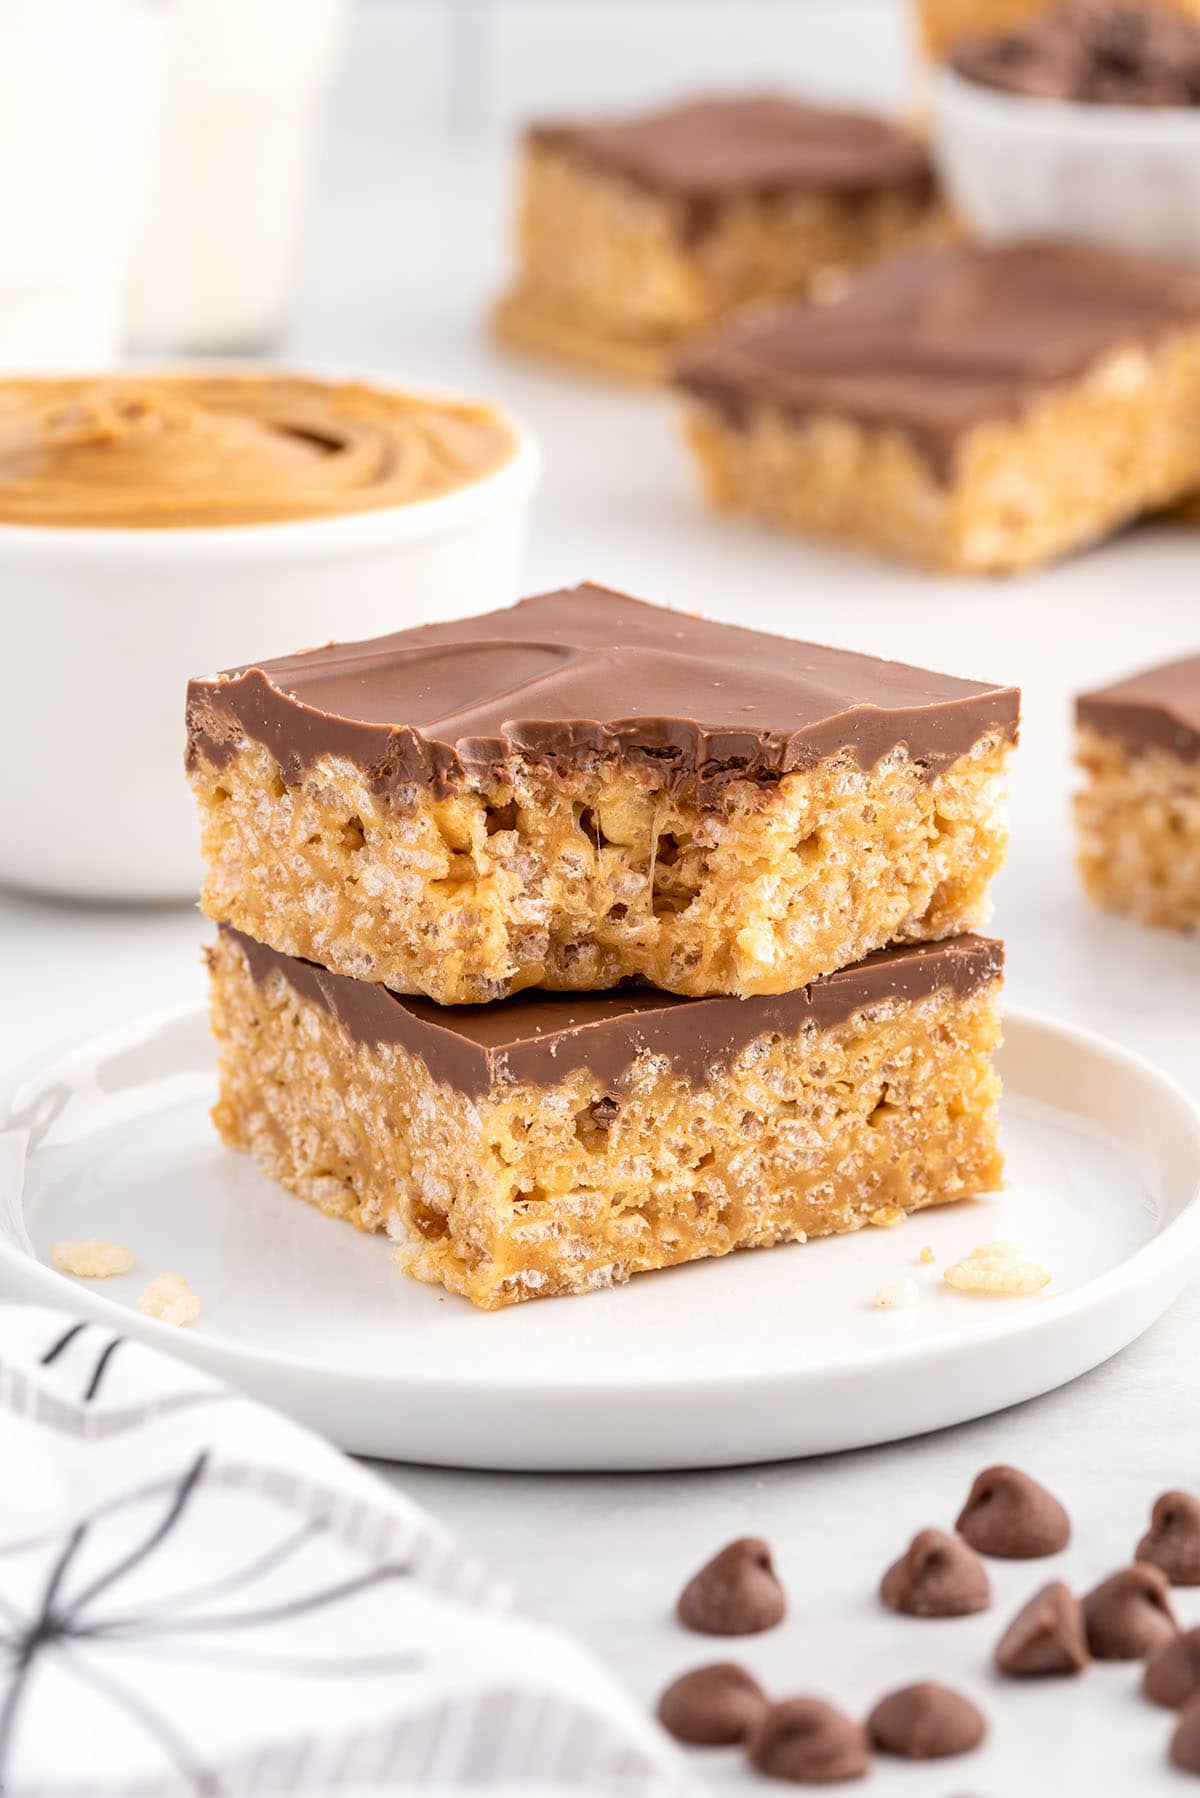
Peanut Butter Rice Krispies Treats are the perfect way to combine two of your favorite treats into one irresistible snack. They are a delicious sweet and salty twist on the traditional Rice Krispies dessert.
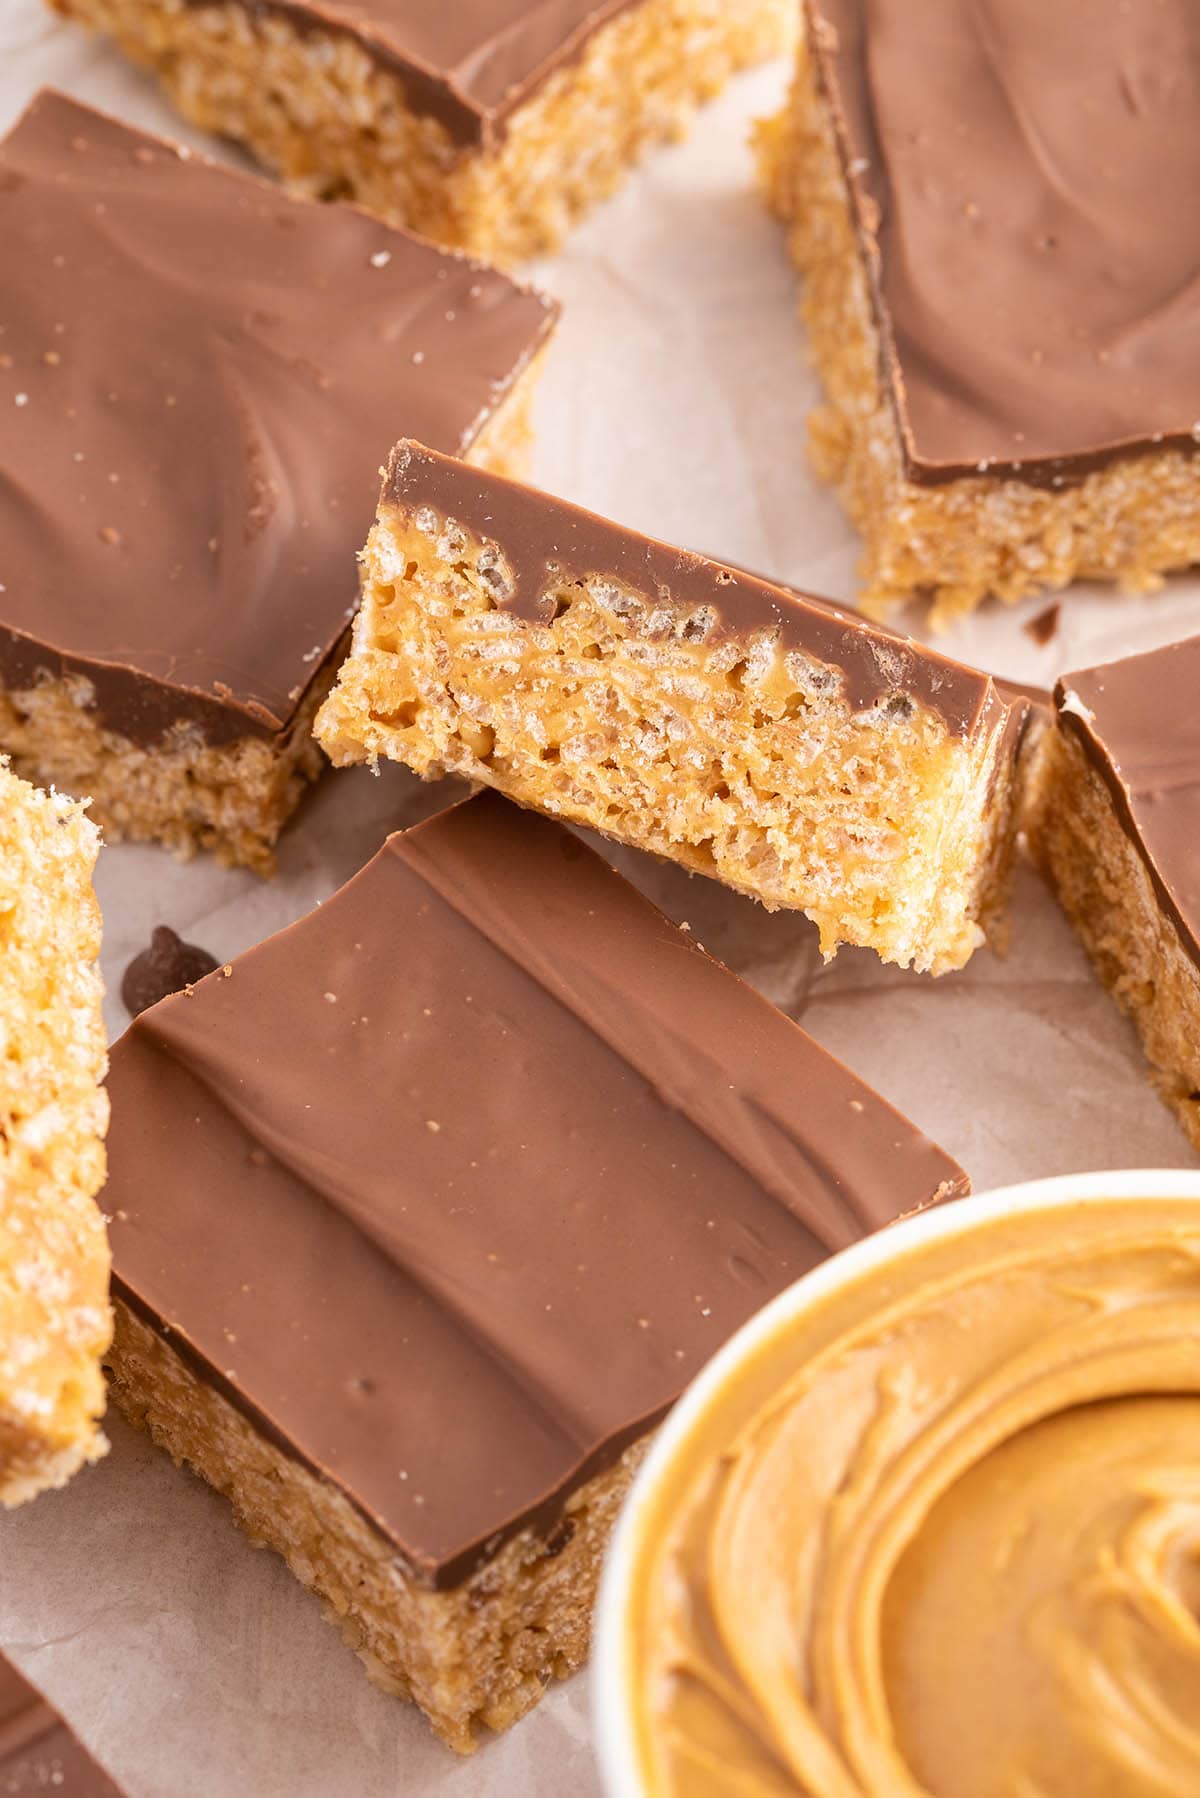
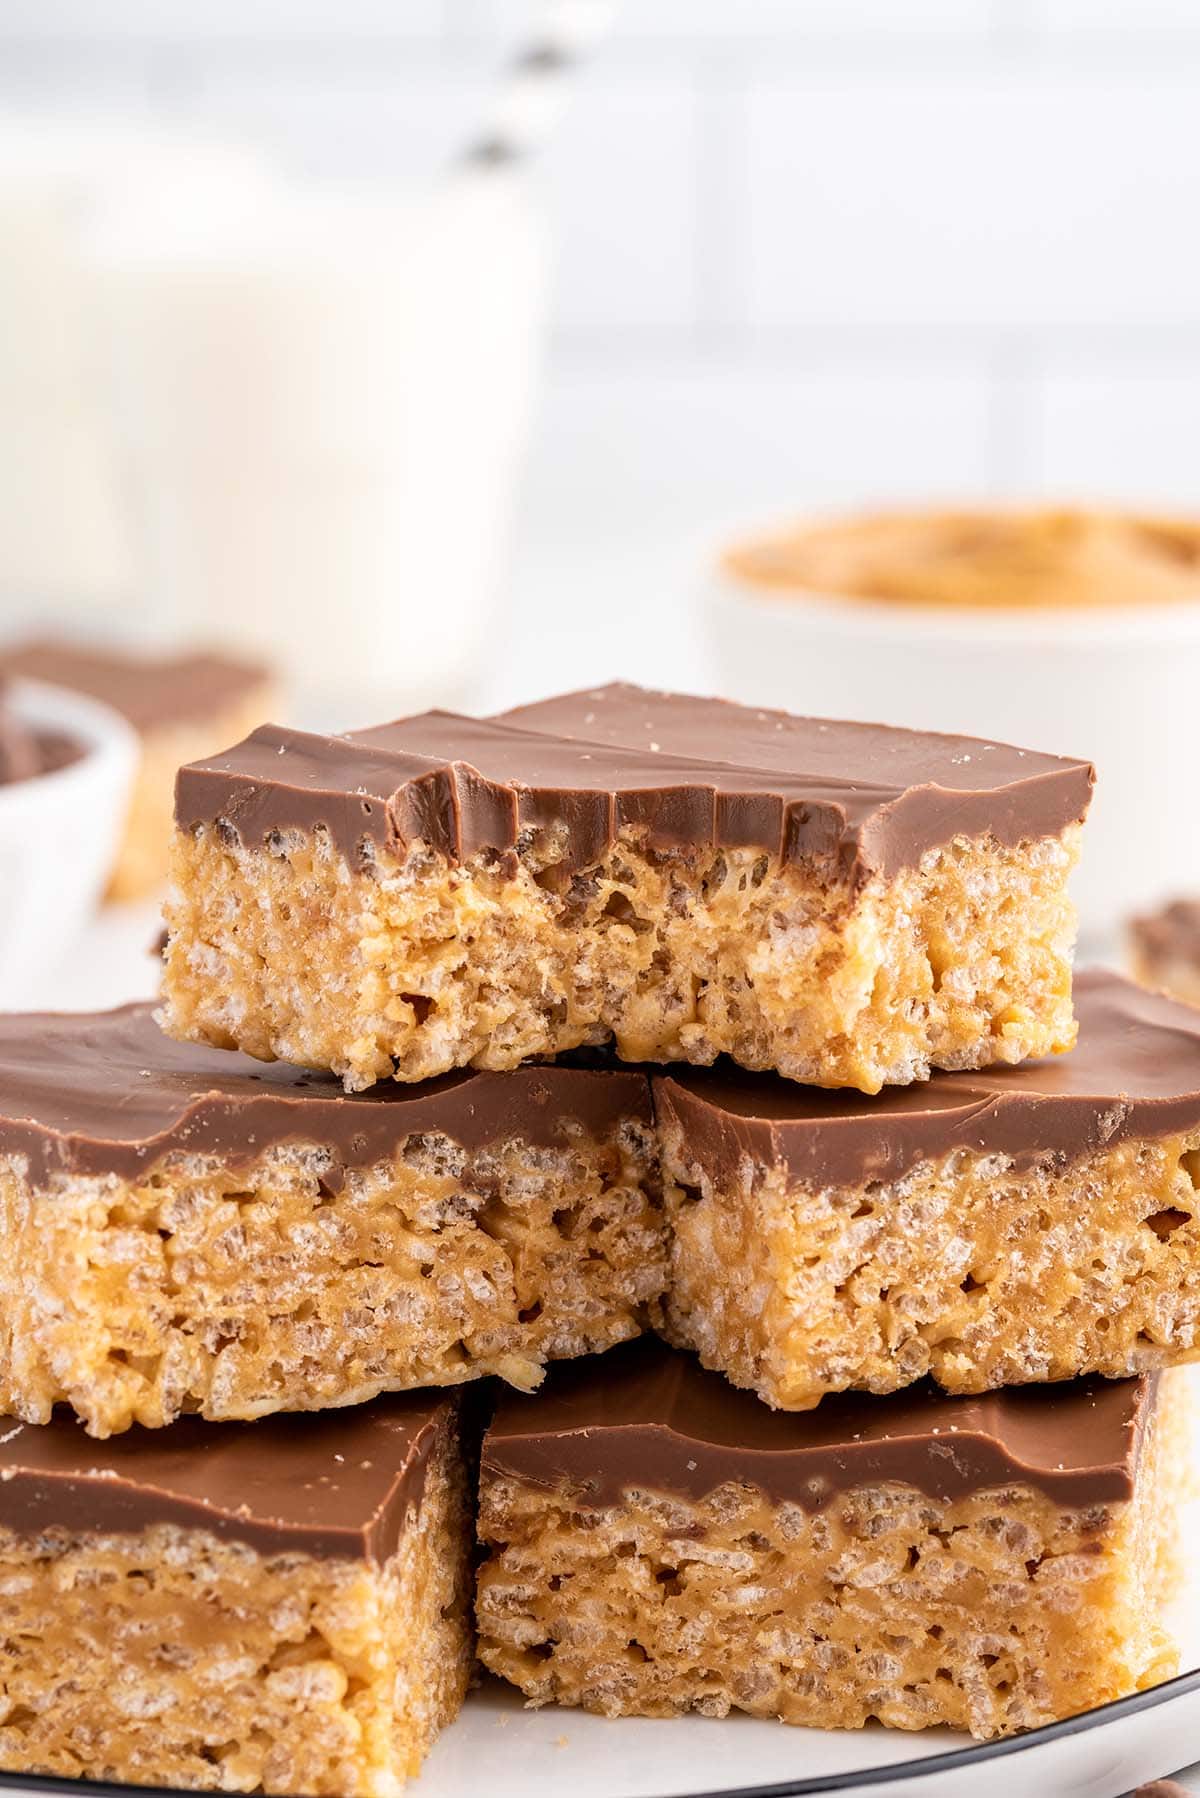
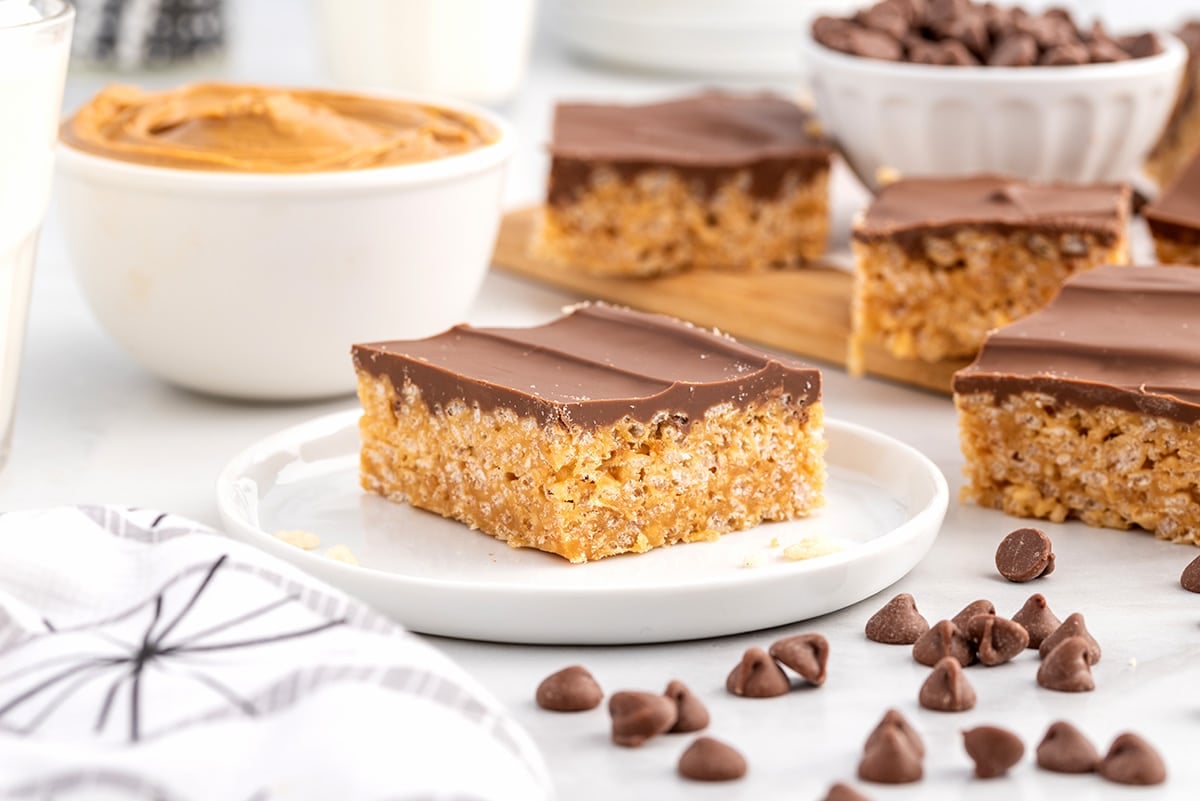
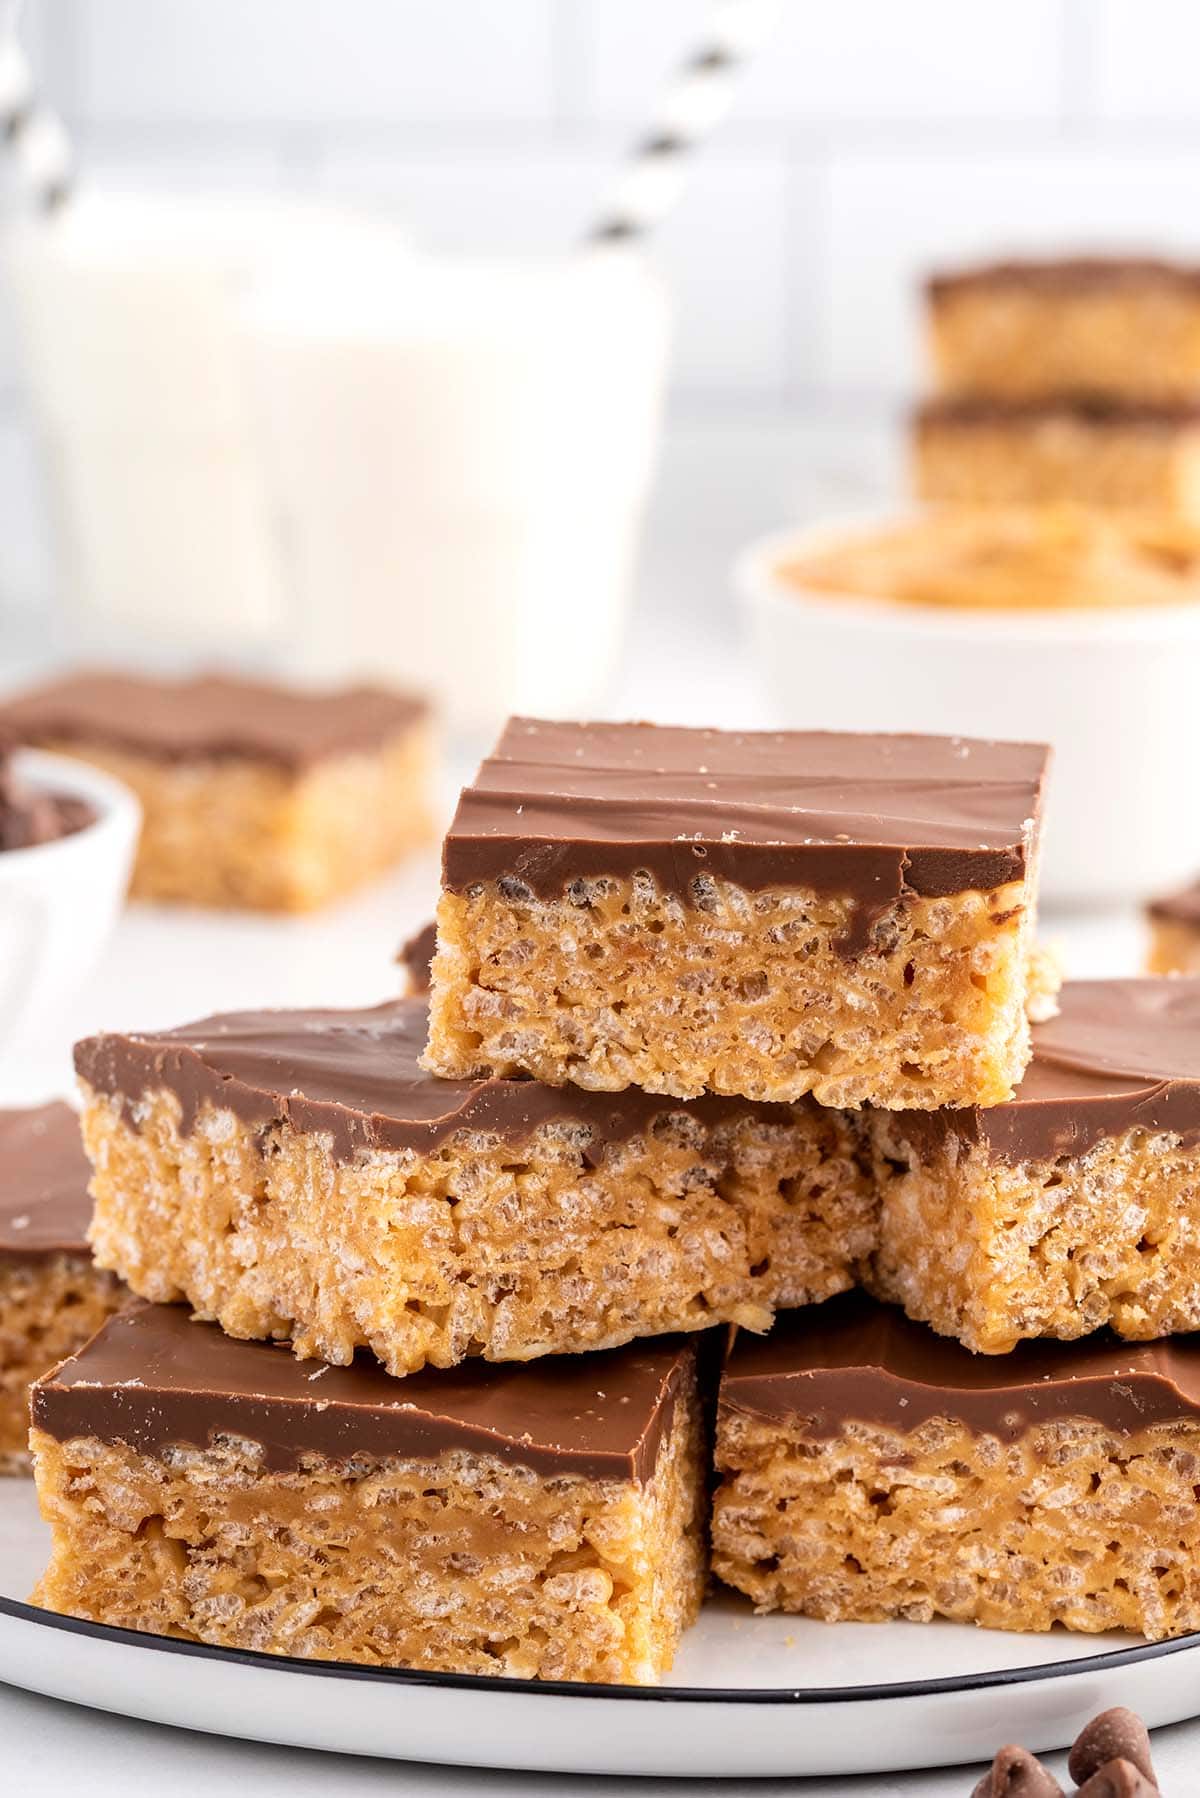
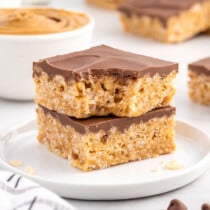
Easy to make in 15 minutes, these no-bake peanut butter rice Krispie bars have the perfect chewy, gooey, crunchy marshmallows, peanut butter, cereal base plus a layer of melted chocolate spread on top.
Peanut Butter Rice Krispie Treats
Our Peanut Butter Rice Krispies Treats recipe takes the classic flavor combination of my Reese’s Peanut Butter Cup Pie, Peanut Butter Balls with Rice Krispies with the crunch of a traditional Rice Krispie Treat and merges them all together into one perfect peanut buttery bite-size package.
Easy to make in minutes with 6 simple ingredients, there’s no better way to get a peanut butter fix than biting into a square that’s not too sticky, yet is full of flavor with a satisfying sweet crunch.
Perfect for peanut butter lovers (or even if you don’t love peanut butter but only like it!), this rice krispy recipe is so simple because once you melt butter, marshmallows, and peanut butter, stir in the rice cereal, spread it in a baking dish, you’re basically done!
Top your treats with a layer of chocolate and you’ve elevated the basic bar into the best peanut butter chocolate treat!
Why We Love Peanut Butter Rice Krispie Treats
- Quick and easy to make in 15 minutes.
- Only uses 6 ingredients.
- Light and chewy texture with a sweet and salty taste in every square.
- Taste like a Buckeye with a crispy crunch.
- Delicious twist on a childhood treat.
- Perfect for after school snacks, packing in lunchboxes, potlucks, and dessert platters.
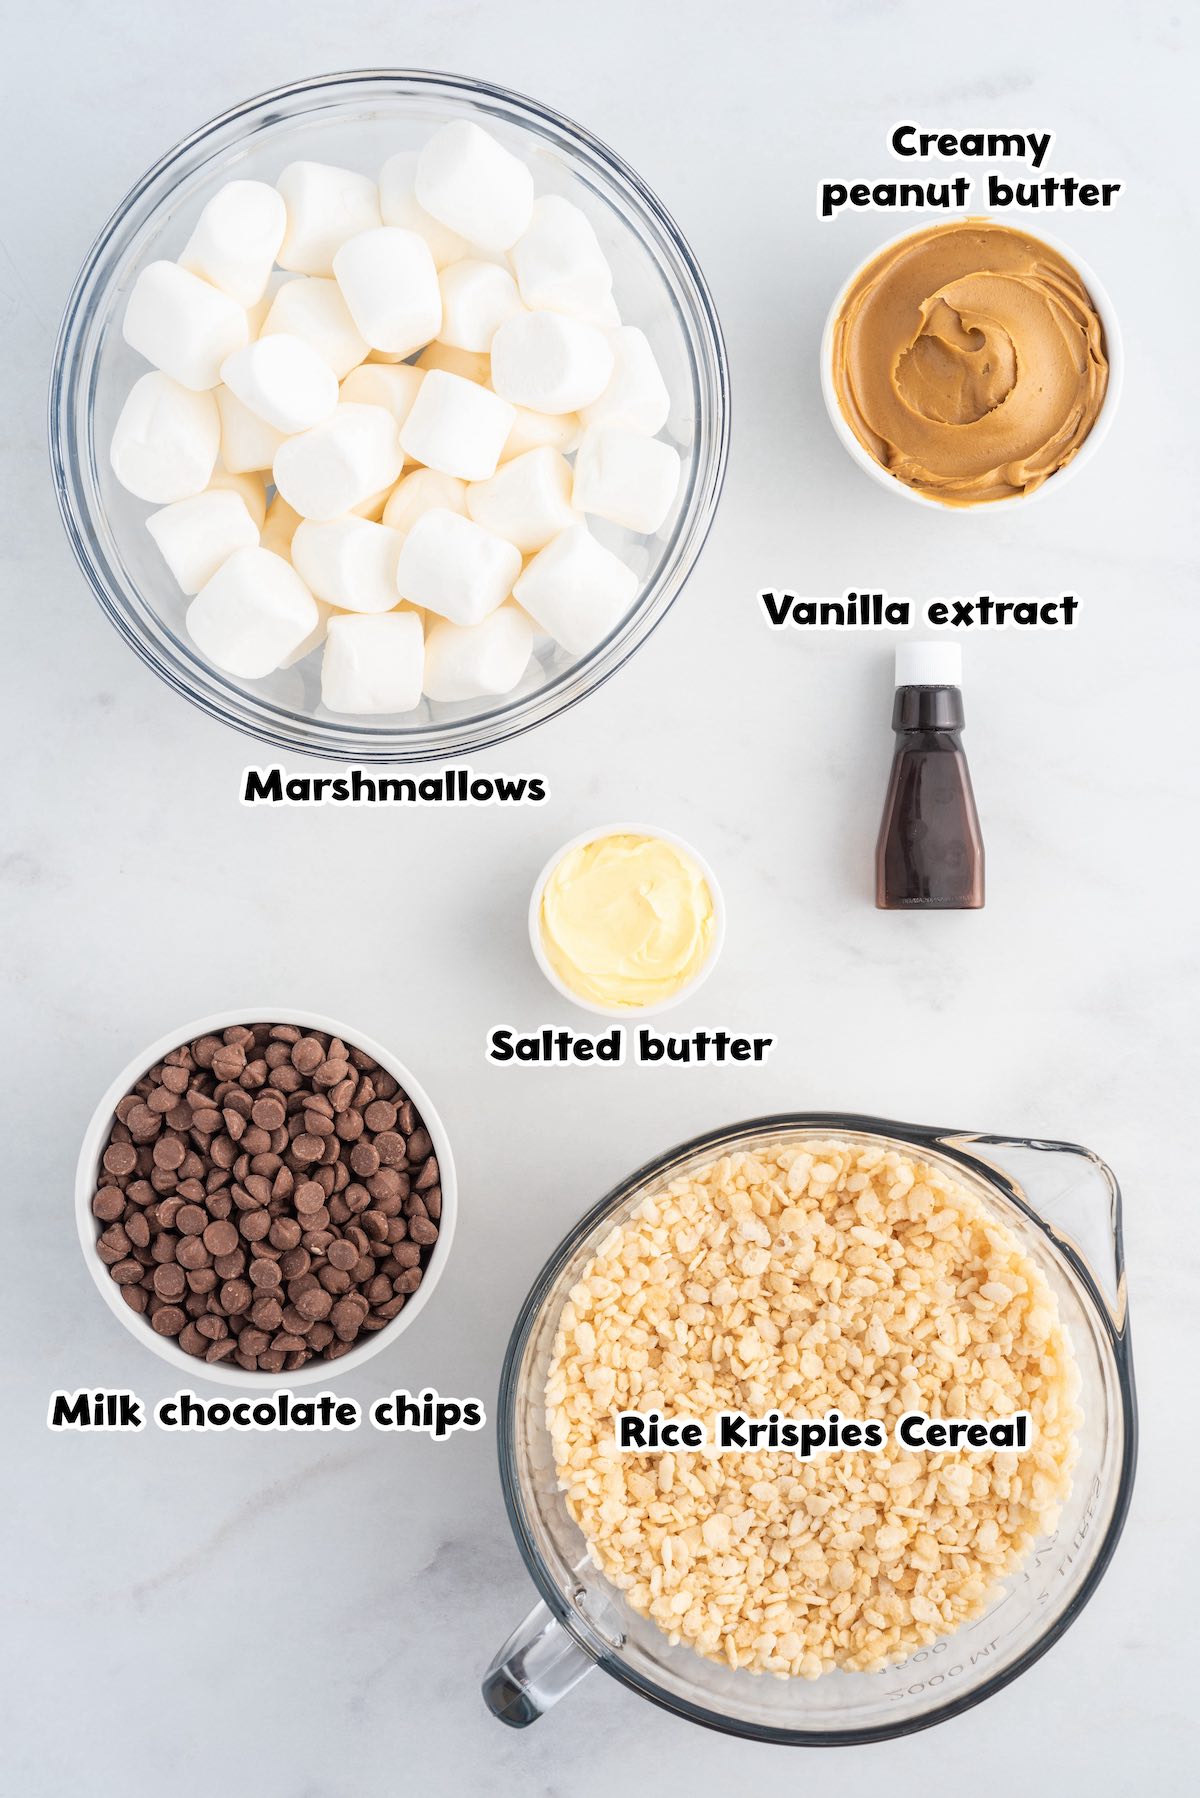
Ingredients
- Salted butter: You can also use unsalted butter, but add a ½ teaspoon of salt to the melted marshmallow mixture. The salt helps to balance the sweetness of the marshmallows.
- Creamy peanut butter: I used Peter Pan brand but feel free to use your favorite. You can even use chunky peanut butter for a fun, extra crunchy texture.
- Marshmallows: You can use either regular marshmallows or mini marshmallows.
- Vanilla extract
- Rice Krispies Cereal
- Milk chocolate chips
Substitutions and Additions
- Choose Your Chip: I like the combination of milk chocolate and peanut butter, but you can certainly substitute semi-sweet or dark chocolate chips instead if that is your preference.
- Make Without Marshmallows: If you want to make these treats without marshmallows, you can melt almond butter and maple syrup together to create a sticky mixture that acts as a substitute.
Recommended Tools
- 9×13 baking dish
- Large sauce pot
- Microwave-safe bowl
How to Make Rice Krispie Treats
- Melt The Marshmallow Mixture: Melt the butter, peanut butter, and marshmallows on the stovetop, stirring often to avoid burning.
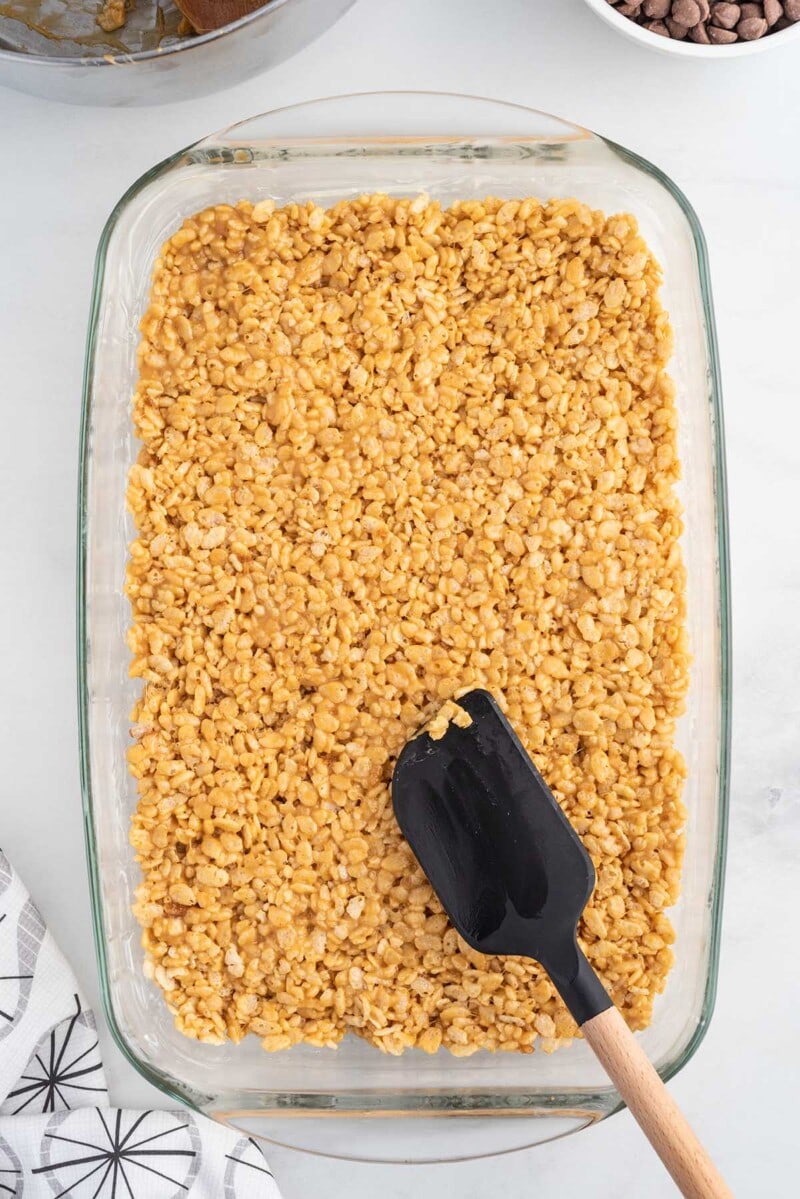
Pro Tip: This will take 3-5 minutes if using standard marshmallows or 2-3 minutes if using the mini marshmallows. - Make The Cereal Mixture: Remove the pot from the heat and stir the vanilla extract and cereal into the melted marshmallow mixture.
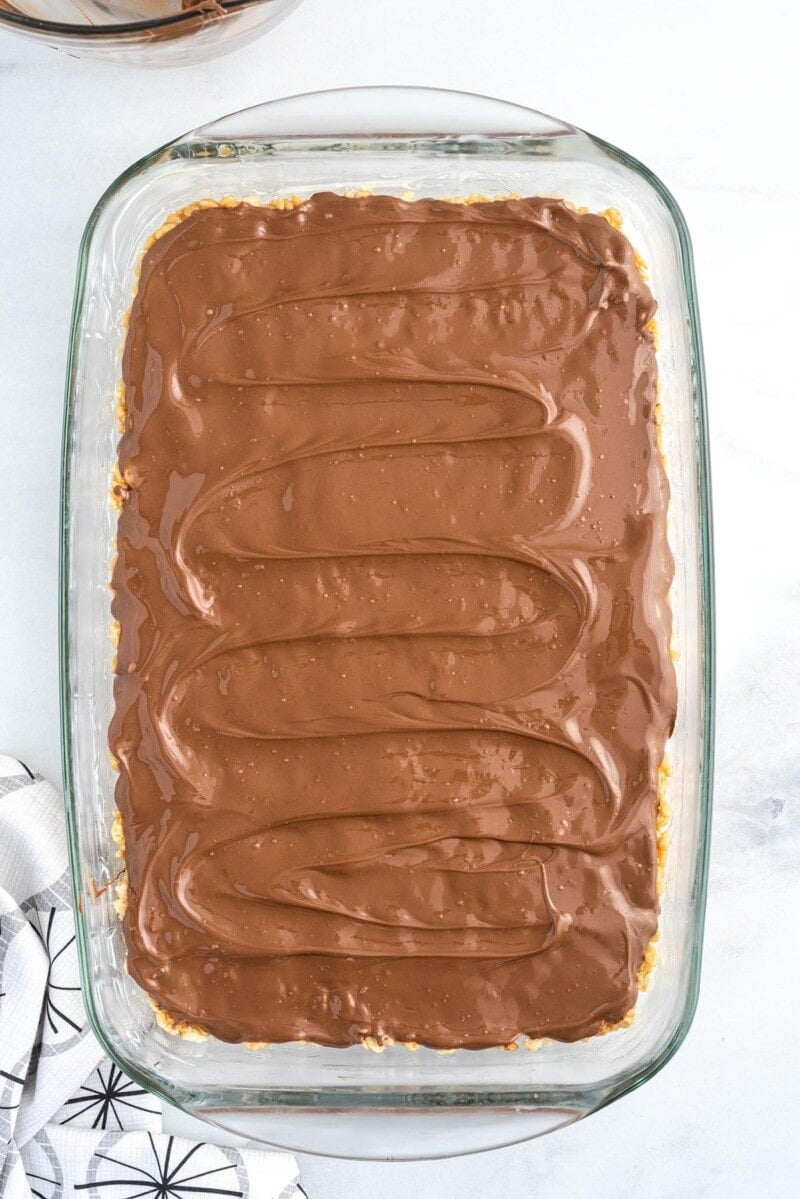
- Pour In The Pan: Spread the mixture into the pan and gently press it into an even layer. Cover with a layer of melted chocolate. Chill for 30 minutes or up to an hour before slicing.
Pro Tip: Do not pack the mixture into the dish too tightly. This will ensure that your rice Krispie treats are light and chewy. - Serve: Slice, serve, and enjoy!
How To Make Rice Krispie Treats In The Microwave
I usually make these treats on the stovetop, however you can easily use your microwave to melt together the butter, peanut butter and marshmallows. Simply microwave the butter and marshmallows in 1 minute intervals until melted, stir in the peanut butter, mix in the Rice Krispies and vanilla, and then press the mixture into your pan. Then you can add the layer of melted chocolate and chill before slicing and serving.
How To Melt Chocolate In The Microwave
Melt the milk chocolate chips for 1 minute at 50% power, stir and heat in additional 30-second increments until completely melted. Stir the melted chocolate until completely smooth. Be sure not to overheat the milk chocolate chips, or they will seize up and be unusable.
Tip From Our Recipe Developer
- I do not suggest using fresh or natural peanut butter for this recipe as they tend to have a lot of excess peanut oil in them. This extra oil will alter the texture of your rice Krispie treats.
- Make sure you completely melt your marshmallows, otherwise it can cause the Rice Krispies to lose all of the classic crunch.
- Make sure you use fresh marshmallows. Stale, dry, or sticky marshmallows will make your treats too hard and crunchy.
- When pressing the Rice Krispie mixture into the pan, spray a piece of parchment paper with nonstick cooking spray and press down with the parchment paper. This prevents the mixture from sticking to your hands or a spatula.
- These peanut butter rice Krispie treats are best served at room temperature once you have allowed the chocolate layer to firm up.
- If you are storing your peanut butter rice Krispie treats in the refrigerator, then I would allow them to come to room temperature before serving so that their texture is chewy and not hard.
More Easy Rice Krispie Treat Recipes


How to Store Rice Krispie treats
- To Store: Store these treats, in a covered container, in the refrigerator for up to one week, or on the counter for up to 4 days.
- To Freeze: I do not recommend freezing these treats, but you can certainly reduce this recipe by half and make them in an 8×8 pan if this recipe makes too many.
Other Easy Peanut Butter Recipes
- No Bake Peanut Butter Oatmeal Bars
- Peanut Butter Pretzel Bites
- Reese’s Pieces Peanut Butter Ball
- Peanut Butter Thumbprint Cookies
Peanut Butter Rice Krispie Treats
Ingredients
- 5 tablespoons salted butter room temperature, divided
- ⅔ cup creamy peanut butter I used Peter Pan brand
- 10 ounce bag marshmallows
- 2 teaspoons vanilla extract
- 6 cups Rice Krispies Cereal
- 2 cups milk chocolate chips approximately 1½ 11.5-ounce bags
Instructions
- Butter a 9×13 baking dish with 1 tablespoon of the salted butter. Set aside.
- In a large sauce pot on medium-low heat, melt the remaining 4 tablespoons of salted butter, peanut butter, and marshmallows. Stir often to avoid burning the melted marshmallows. This will take 3-5 minutes if using standard marshmallows or 2-3 minutes if using the mini marshmallows.
- Remove the large pot from the heat and stir the vanilla extract and rice Krispie cereal into the melted marshmallow mixture.
- Stir to incorporate all the ingredients evenly.
- Spread the peanut butter rice Krispie mixture into the prepared dish and gently press it into an even layer. Do not pack the mixture into the dish too tightly. This will ensure that your rice Krispie treats are light and chewy.
- In a microwave-safe bowl, melt the milk chocolate chips for 1 minute at 50% power, stir and heat in additional 30-second increments until completely melted. Stir the melted chocolate until completely smooth. Be sure not to overheat the milk chocolate chips, or they will seize up and be unusable.
- Spread the melted chocolate evenly over the dish of peanut butter rice Krispies.
- Allow the peanut butter rice Krispie treats to chill for 30 minutes, or up to an hour, to allow the chocolate to firm up before slicing and serving.
Jenn’s Notes
- To Store: Store these treats, in a covered container, in the refrigerator for up to one week, or on the counter for up to 4 days.
- To Freeze: I do not recommend freezing these treats, but you can certainly reduce this recipe by half and make them in an 8×8 pan if this recipe makes too many.
- Once the chocolate layer has firmed up, you can slice your peanut butter rice Krispies into single servings and store them in a lidded rectangular container. I would suggest you place a piece of parchment paper between the layers of rice Krispie treats to avoid them from sticking to each other.
- If you do not keep salted butter on hand in your kitchen, then you can add a ½ teaspoon of salt to the melted marshmallow mixture. The salt helps to balance the sweetness of the marshmallows.
- I do not suggest using fresh or natural peanut butter for this recipe as they tend to have a lot of excess peanut oil in them. This extra oil will alter the texture of your rice Krispie treats. I used the Peter Pan brand, but your favorite standard brand will work well, also. You can even use chunky peanut butter for a fun texture if you desire.
- I like the combination of milk chocolate and peanut butter, but you can certainly substitute semi-sweet or dark chocolate chips instead if that is your preference.
- When melting your chocolate chips, be very careful not to overheat them in the microwave. If your microwave has a “melt” preset, then you can use that according to your microwave’s manual. You can also melt them on the stovetop in a small saucepan on medium-low heat or in a double boiler. Use the method that works best for you.
- I do not recommend freezing these treats, but you can certainly reduce this recipe by half and make them in an 8×8 pan if this recipe makes too many. That is never the issue in my house, so I often will double the recipe. These keep great in the refrigerator and, when packed in your child’s lunch, will be perfectly chewy and delicious by the time they get to eat them.