This post may contain affiliate links. Please read our disclosure policy.
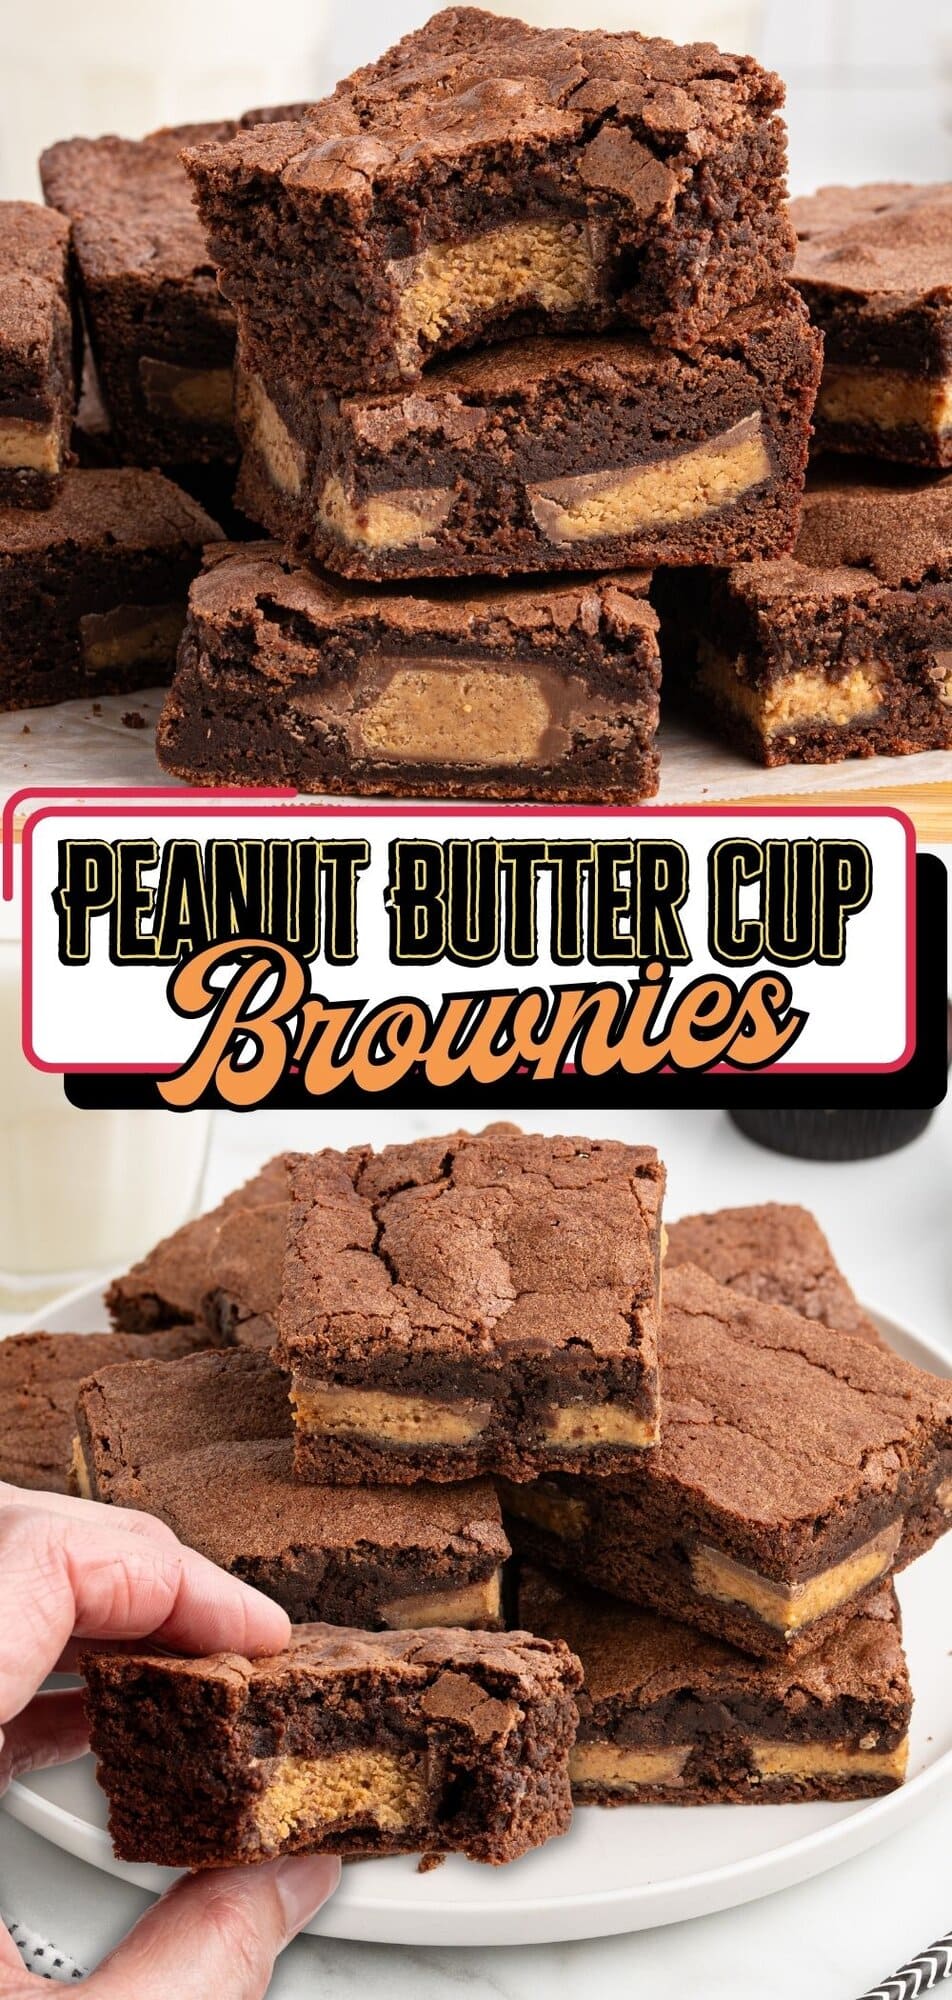
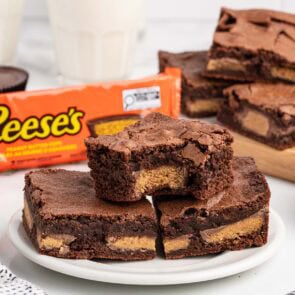
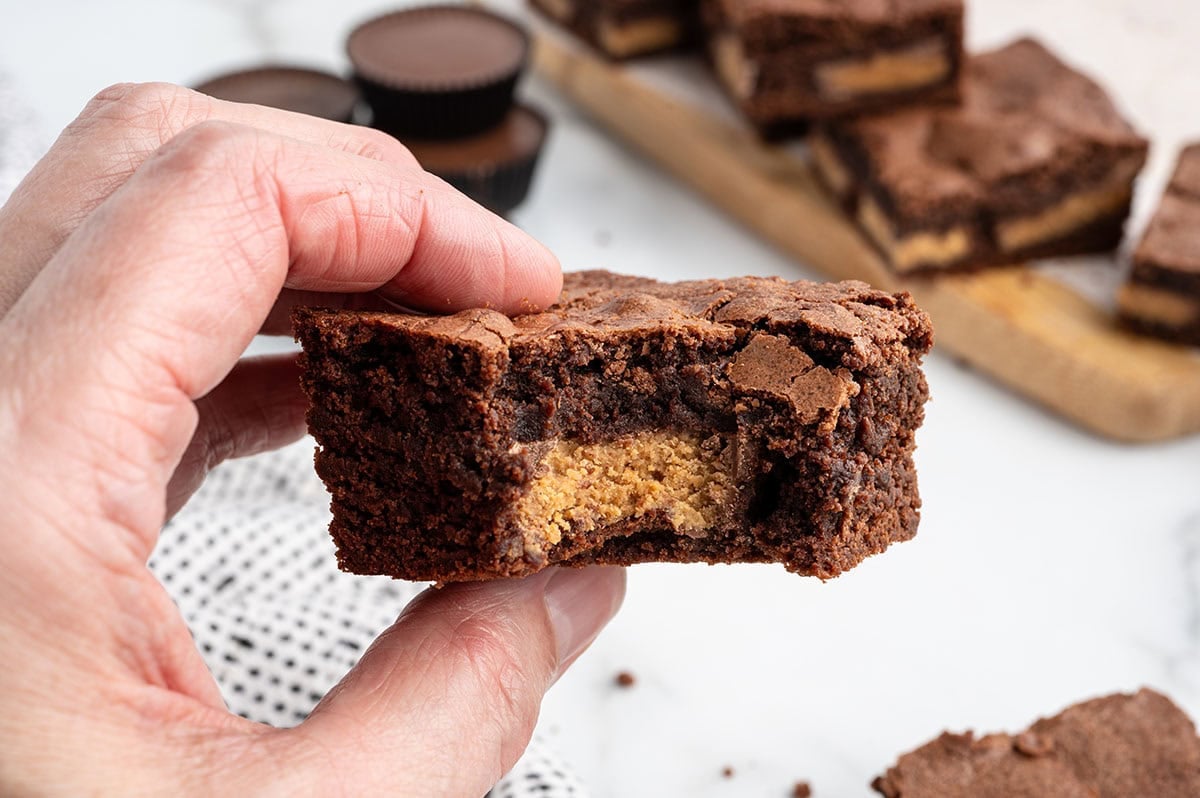
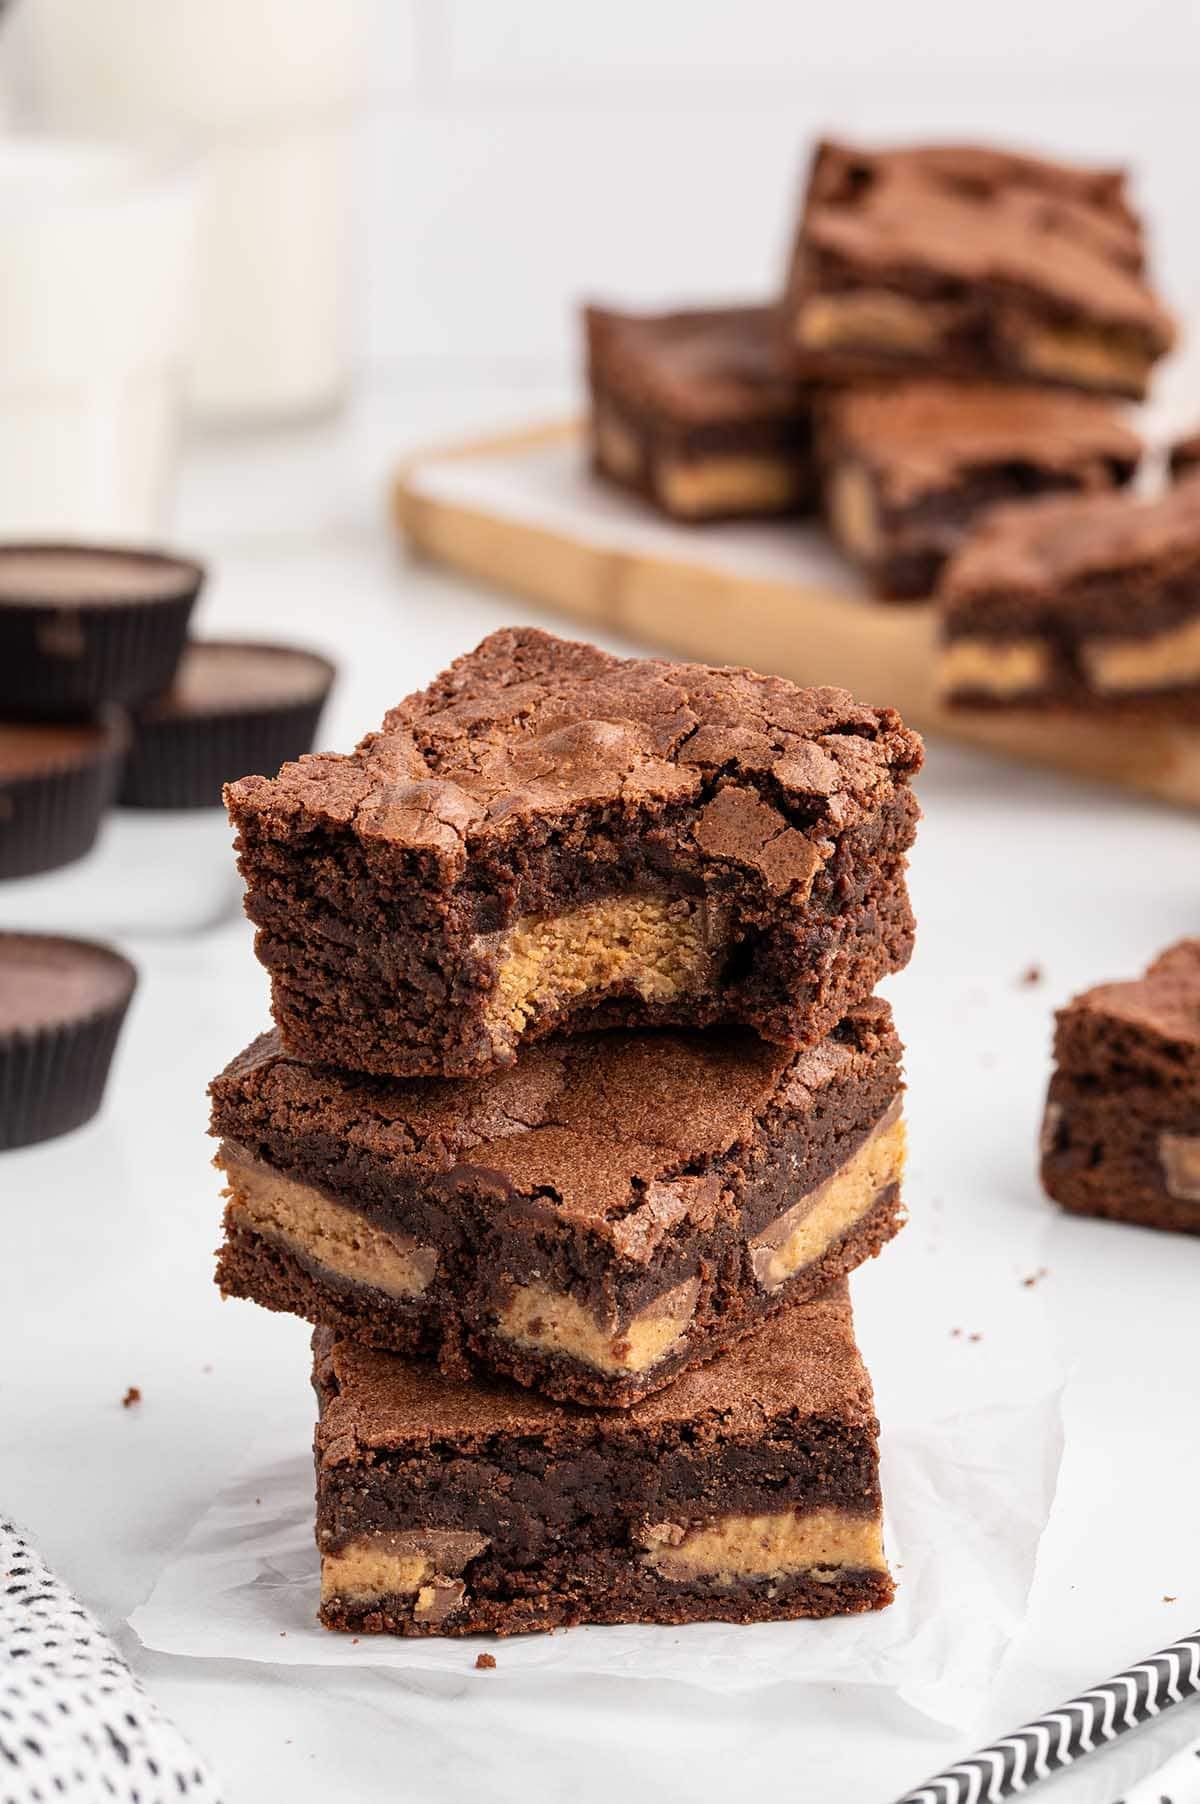
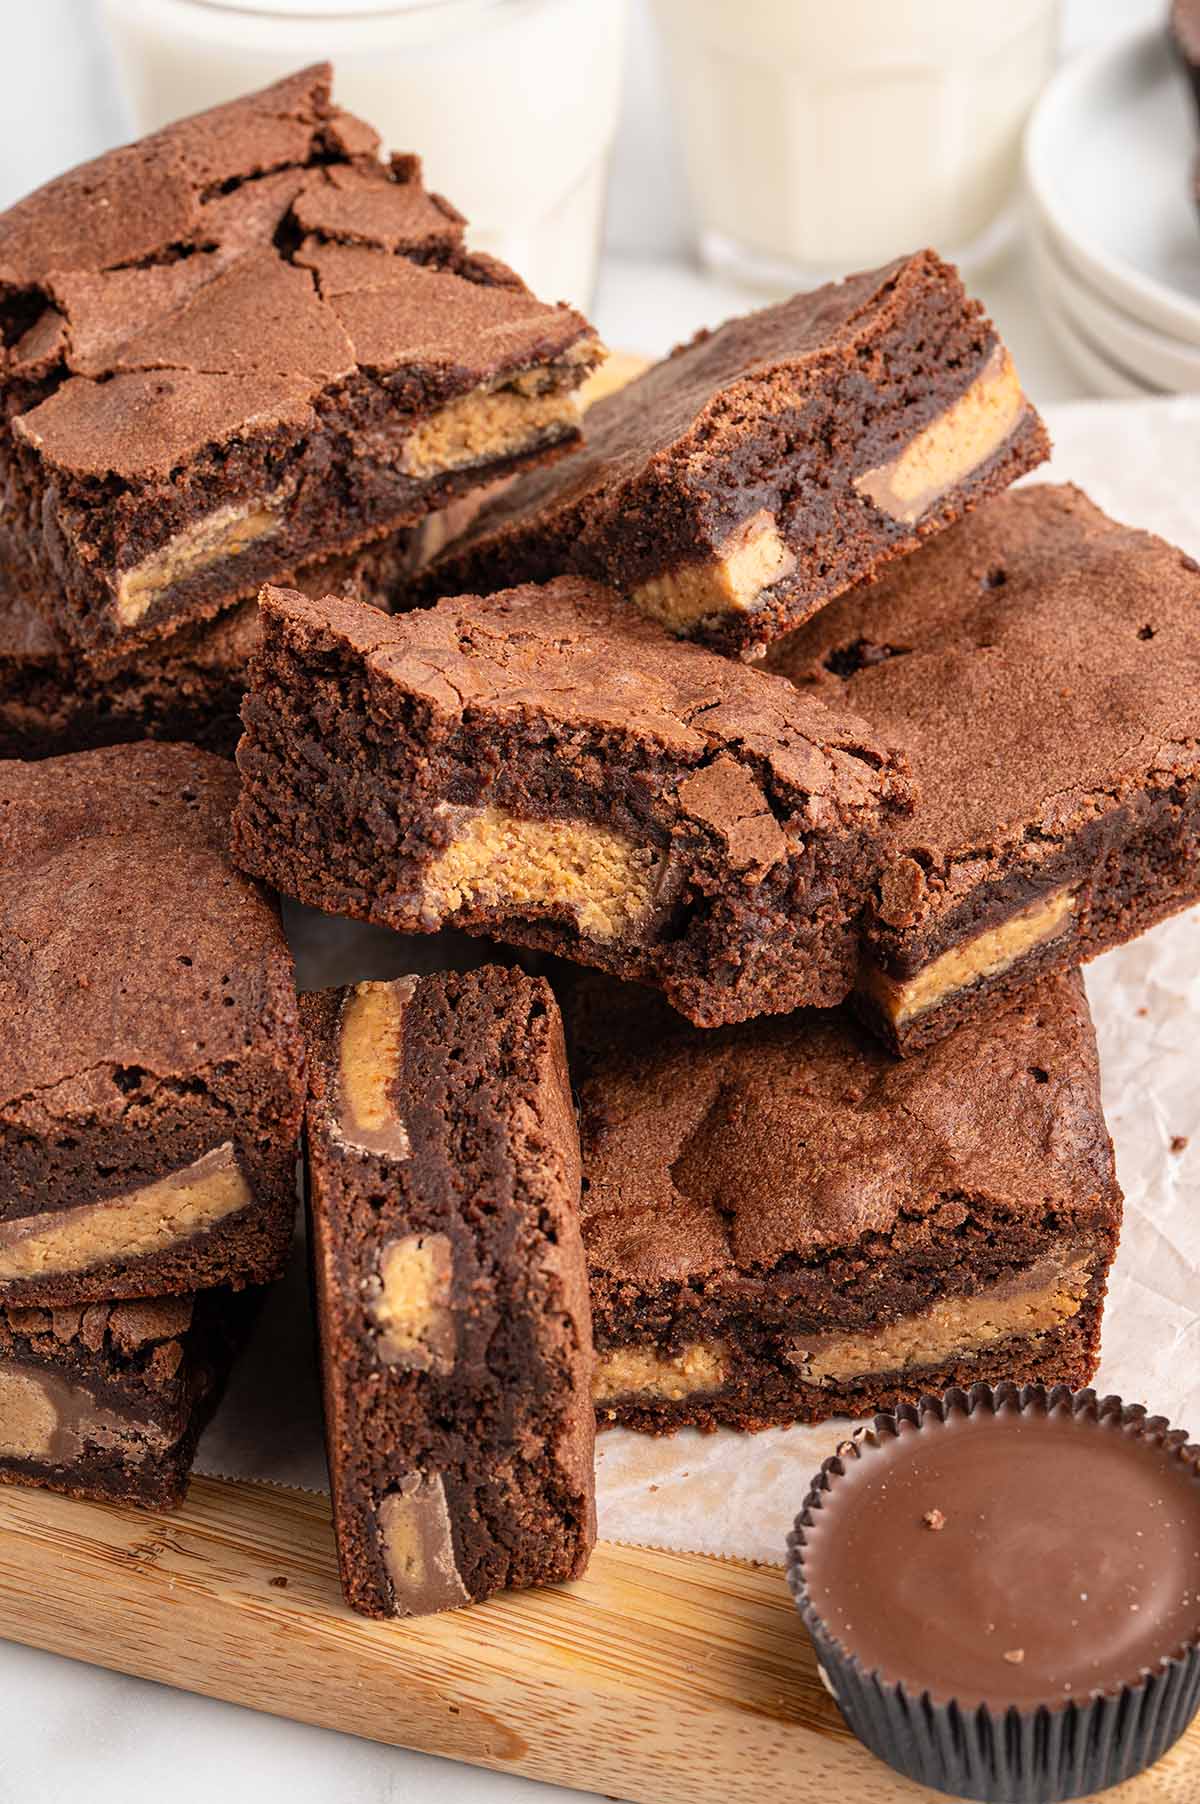
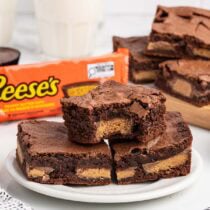
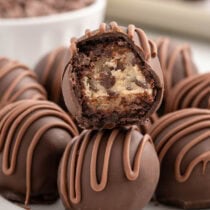
If chocolate and peanut butter is your weakness, these peanut butter cup brownies are going to be your new go-to. They’re fudgy and rich, made completely from scratch, and packed with full-size Reese’s cups baked right into the center of every single slice.
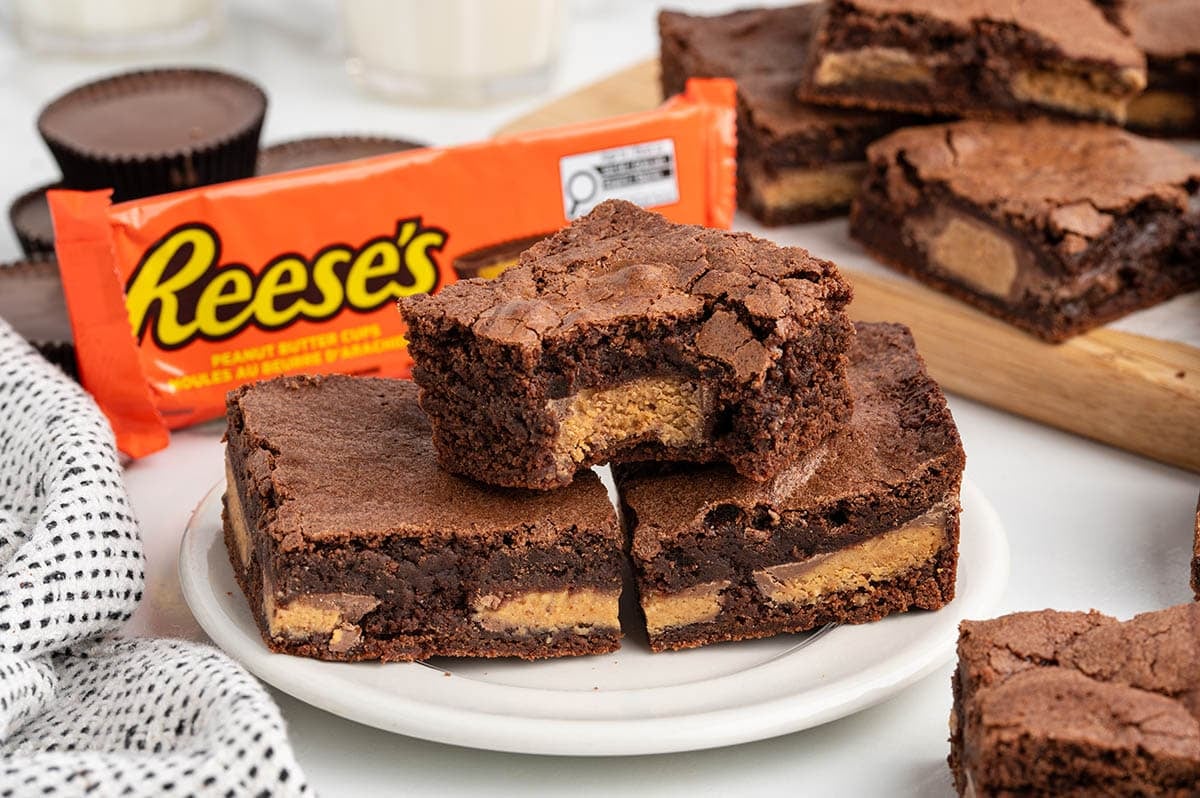
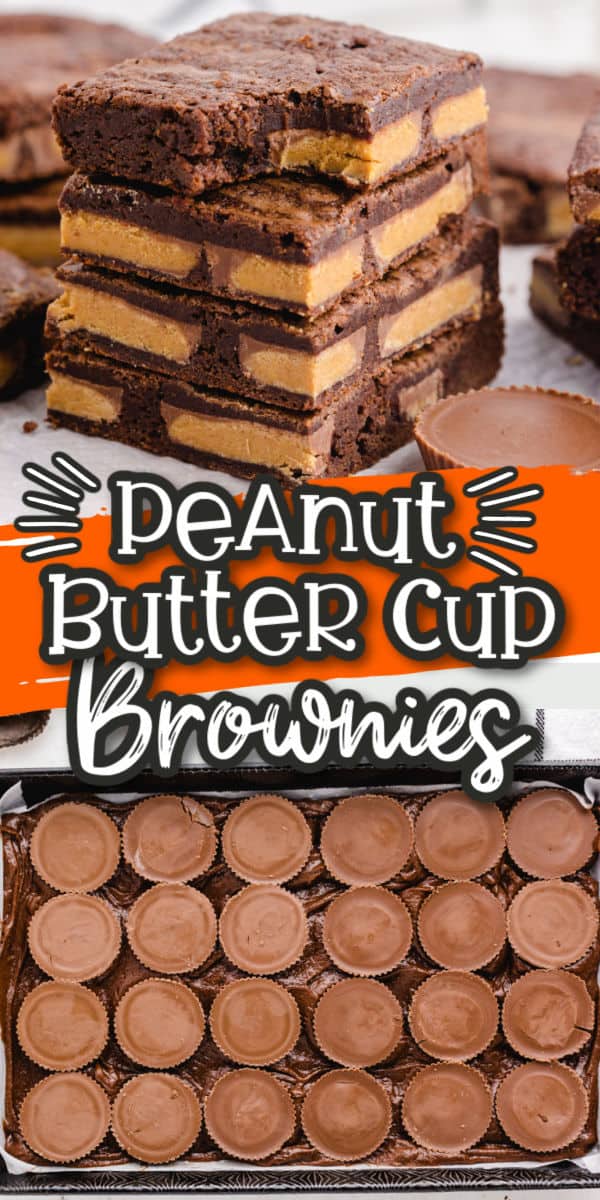
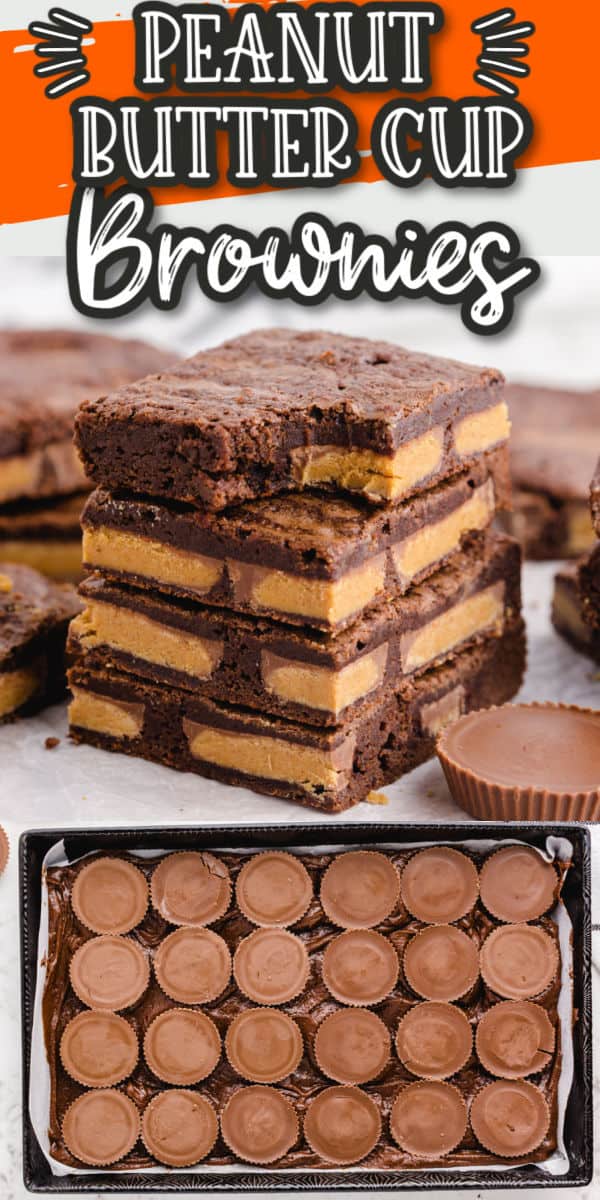
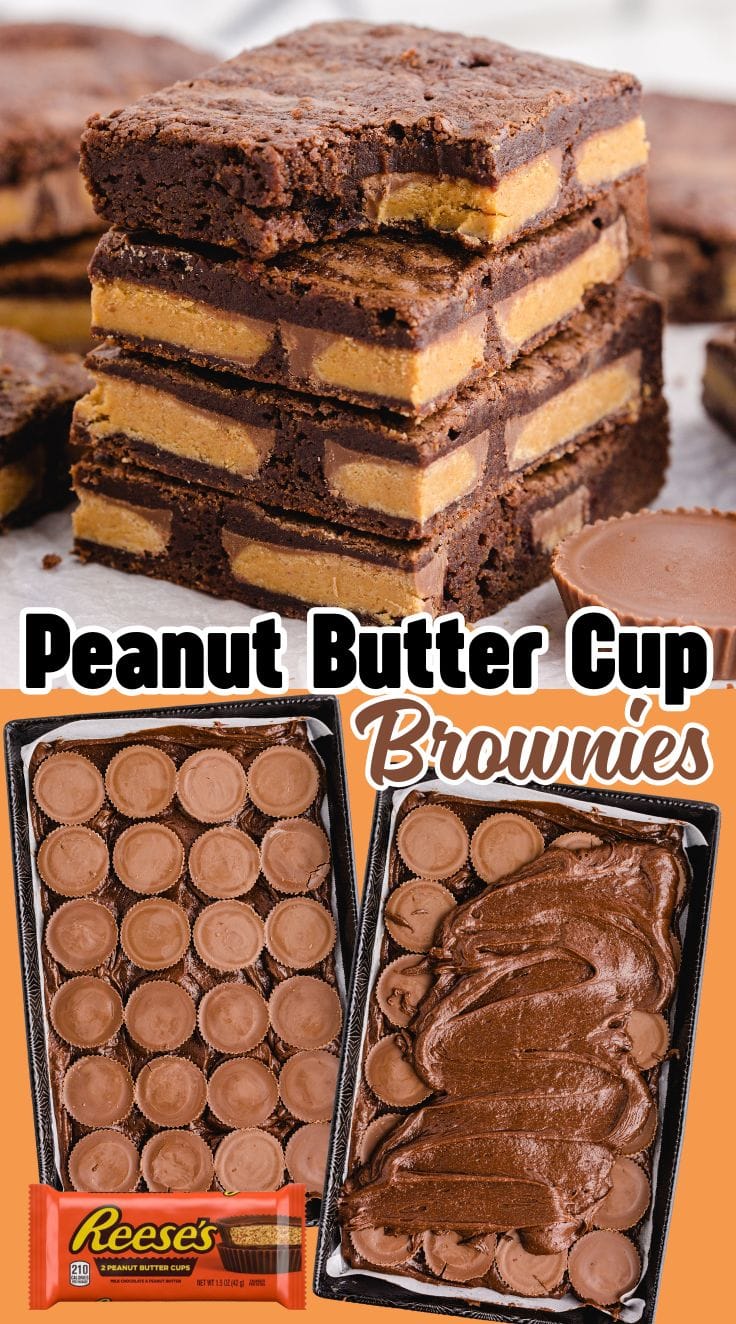
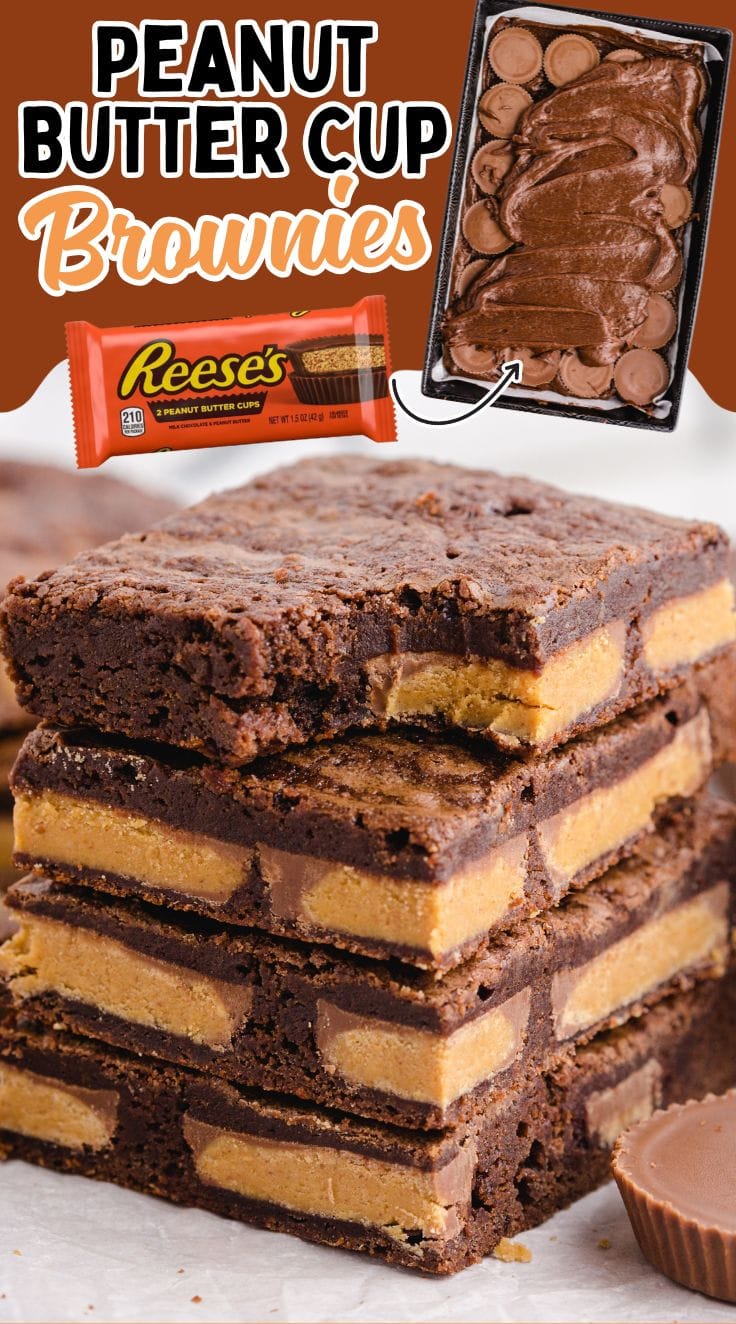
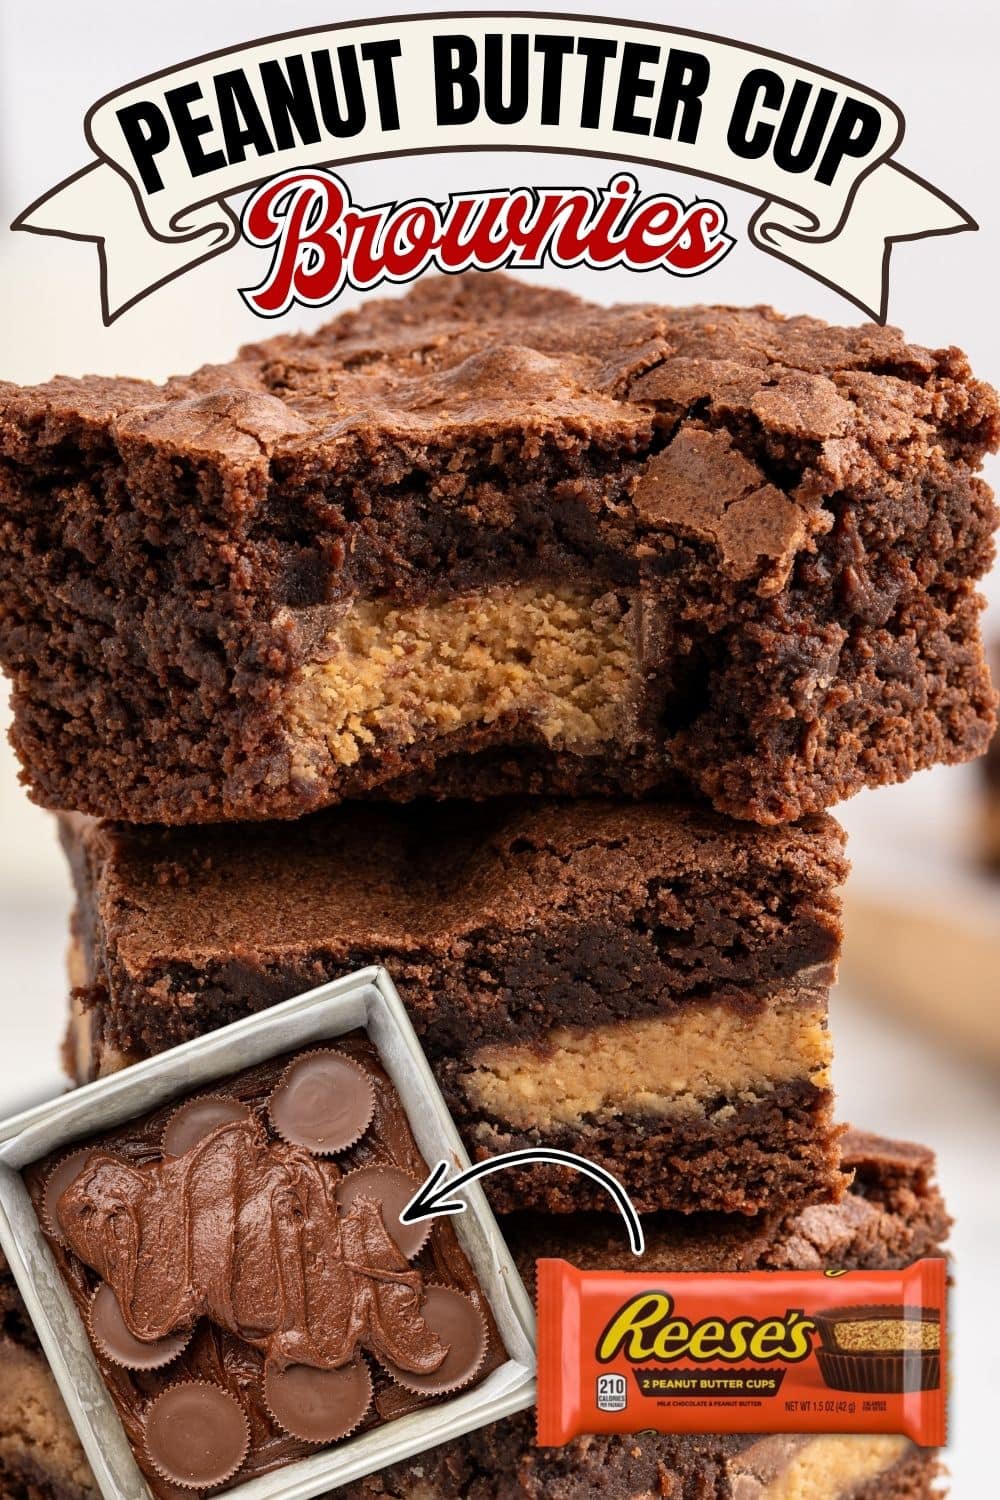
I tested and perfected this recipe over multiple rounds, and the biggest thing I learned? Pan size matters. My first batch was baked in a 9×13 pan, and while the flavor was great, the brownies came out too thin and were way too easy to overbake. Since brownies keep baking in the hot pan after you pull them from the oven, that extra carryover heat turned them from fudgy to overdone fast. When I switched to an 8×8 pan, it was a game changer. The thicker brownies were firm on the outside, ooey and gooey in the middle, and just a better brownie all around. With 9 full-size peanut butter cups arranged in neat rows, every single slice gets a peanut butter cup right in the center.
Speaking of chocolate and peanut butter, my Buckeye Brownies and Reese’s Cheesecake are two more crowd-pleasers you won’t want to miss.
Key Ingredients
Here’s what you need to make these Reese’s peanut butter cup brownies from scratch. Just a handful of ingredients and you’re ready to go.
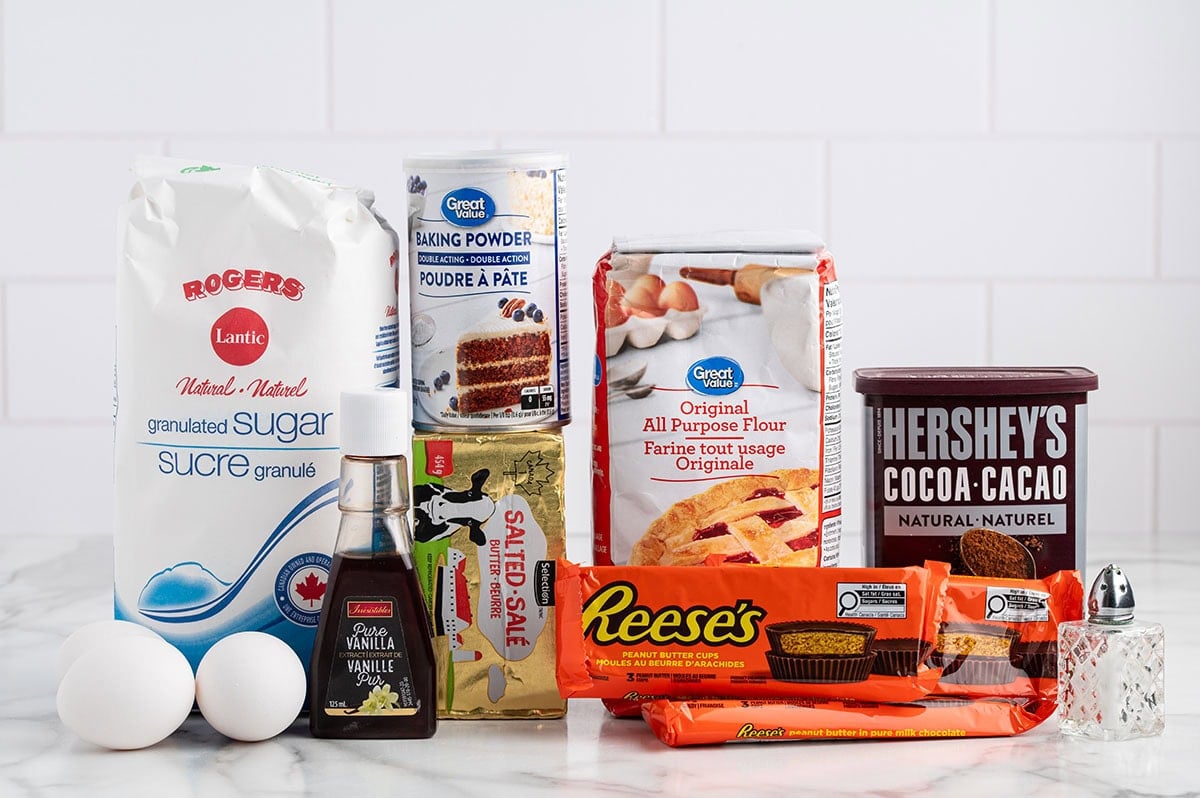
- Salted butter – brings rich flavor and keeps things fudgy. Make sure it’s melted and slightly cooled before mixing.
- Granulated sugar – sweetens the brownies and that classic crinkly, shiny top.
- Eggs – three large eggs, added one at a time. This is what builds the fudgy, chewy texture you are looking for.
- Vanilla extract – two teaspoons for warmth and depth of flavor.
- Unsweetened cocoa powder – the base of all that deep chocolate flavor. Use a good quality cocoa here.
- All-purpose flour, salt, and baking powder – these three work together to hold the batter without making the brownies cakey or dry.
- Full-size Reese’s peanut butter cups (9) – full-size cups are the move here. Arrange them in a 3×3 grid and every slice gets one right in the center. Mini cups work in a pinch, but they scatter more randomly and the payoff is not the same.
How to Make Peanut Butter Cup Brownies
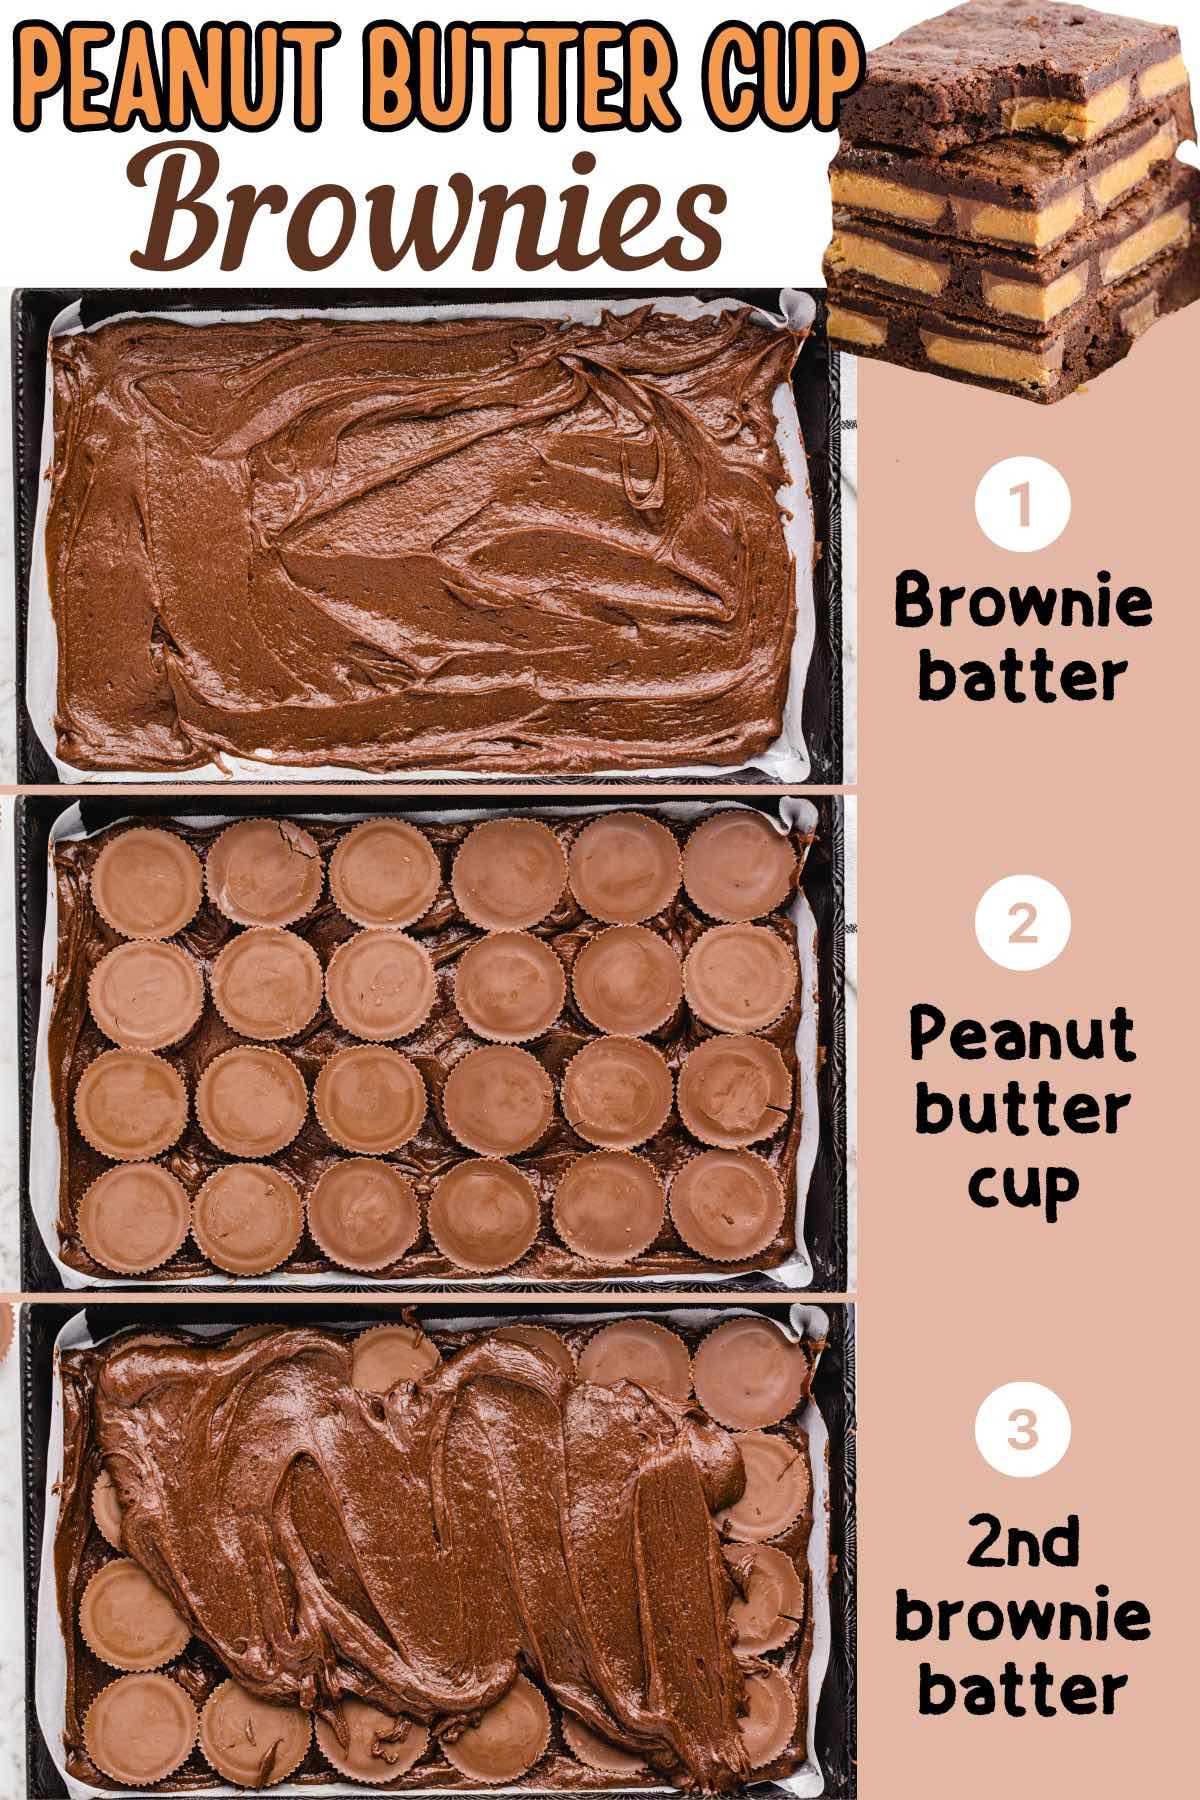
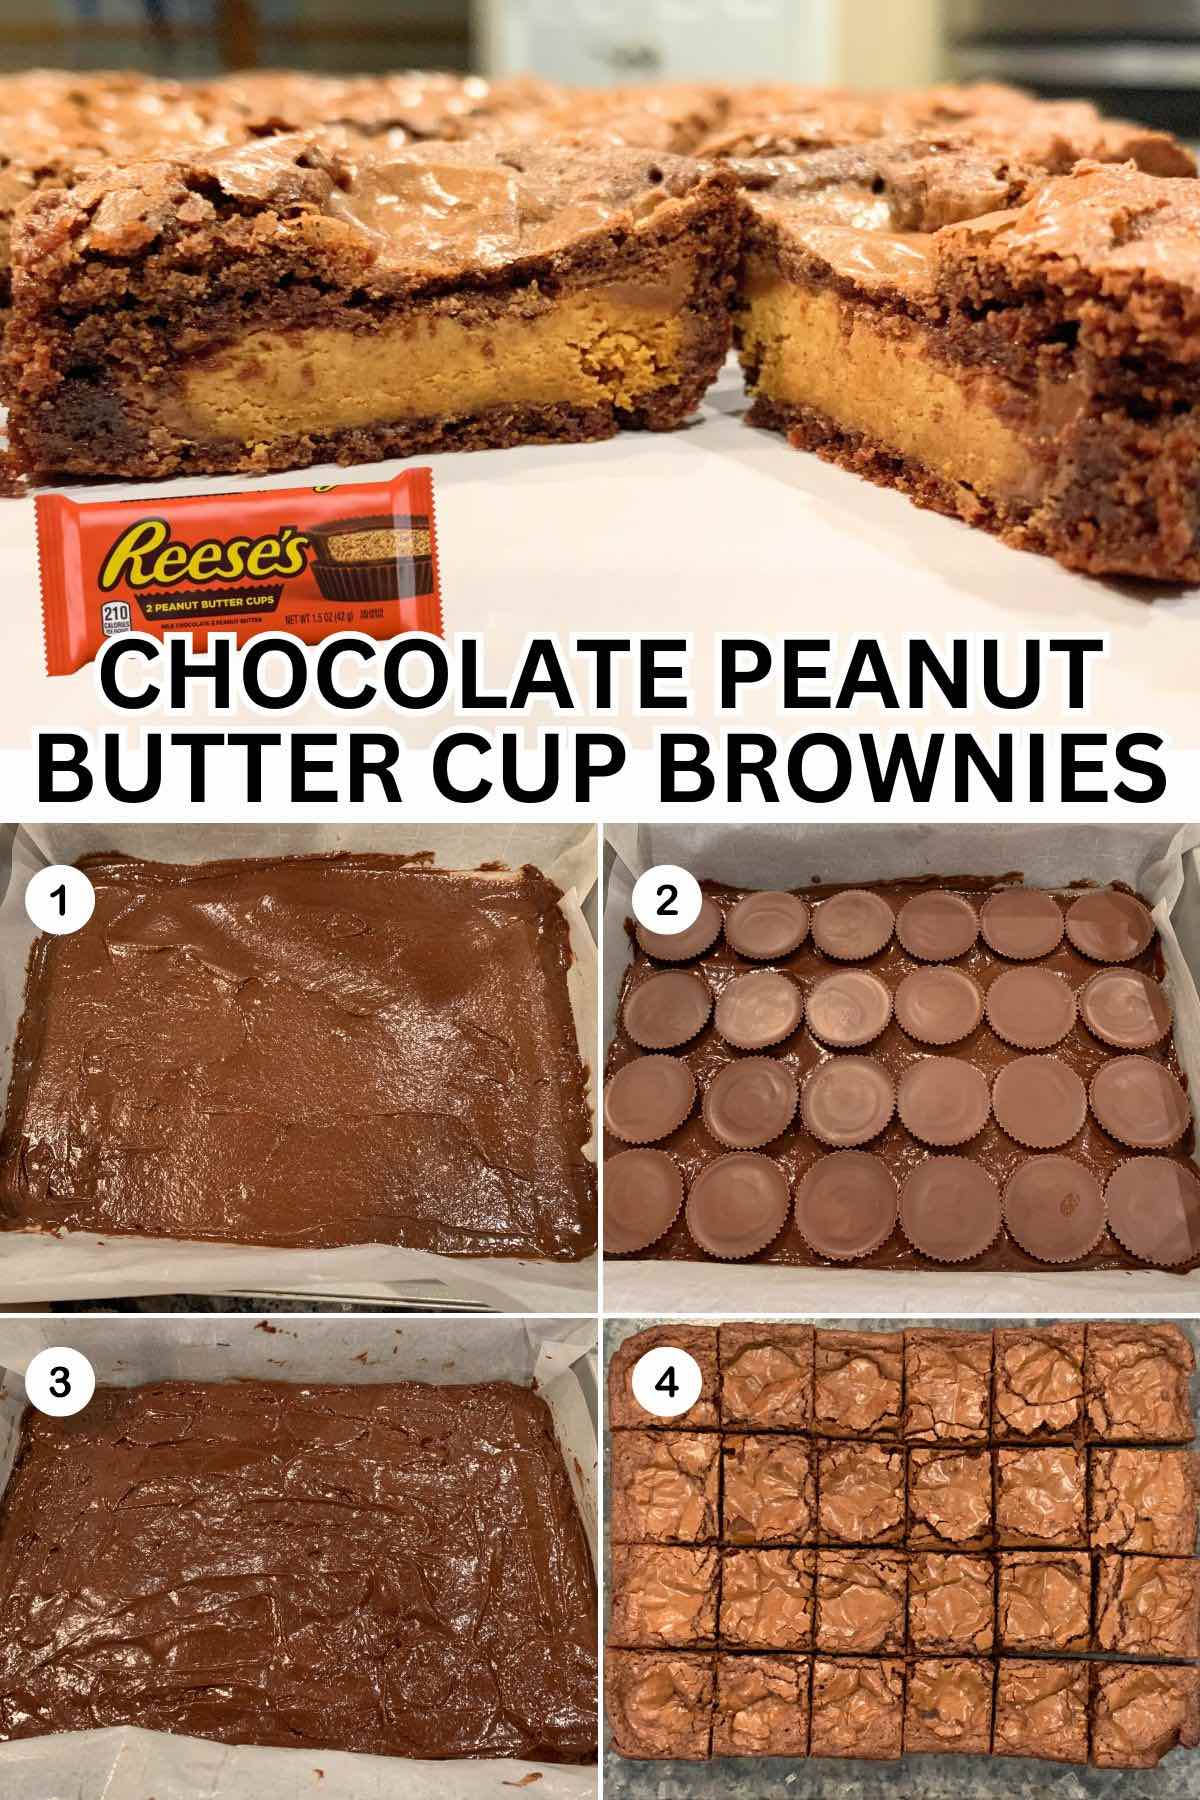
Step 1: Prep your pan. Preheat your oven to 350°F. Spray an 8×8 inch baking pan with nonstick spray, lay down your parchment paper, then spray again on top. That first spray before the parchment keeps it from sliding around while you spread the thick batter – a small thing that makes a real difference.
Step 2: Beat the butter and sugar. Using a hand mixer or stand mixer, beat together the melted, cooled butter and granulated sugar until combined.
Step 3: Add the vanilla and eggs. Add the vanilla extract, then the eggs, one at a time, beating well between each addition.
Step 4: Mix in the dry ingredients. Sift together the flour, cocoa powder, salt, and baking powder. Add to the butter and sugar mixture and beat until fully combined. The batter will be quite thick.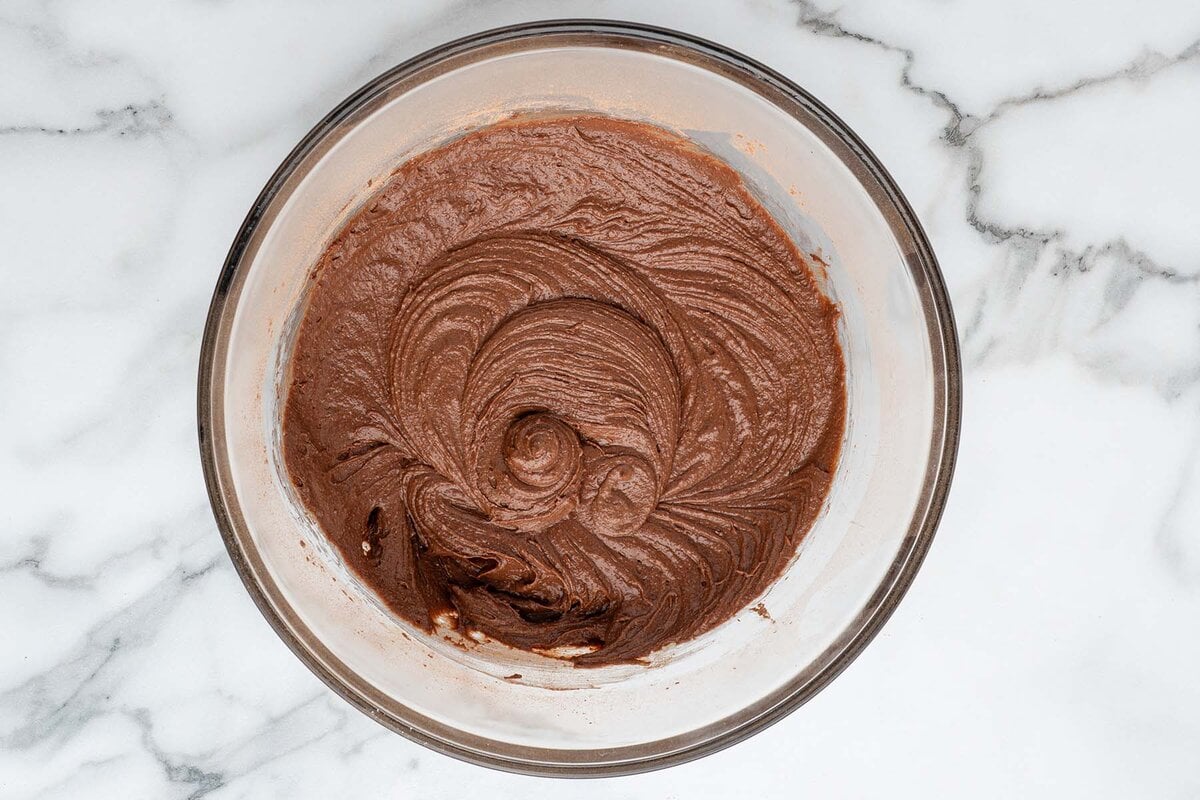
Step 5: Spread half the batter. Scoop half of the batter into the prepared pan and spread it carefully to cover the entire bottom. Work slowly here, the thick batter takes a bit of patience to spread edge to edge.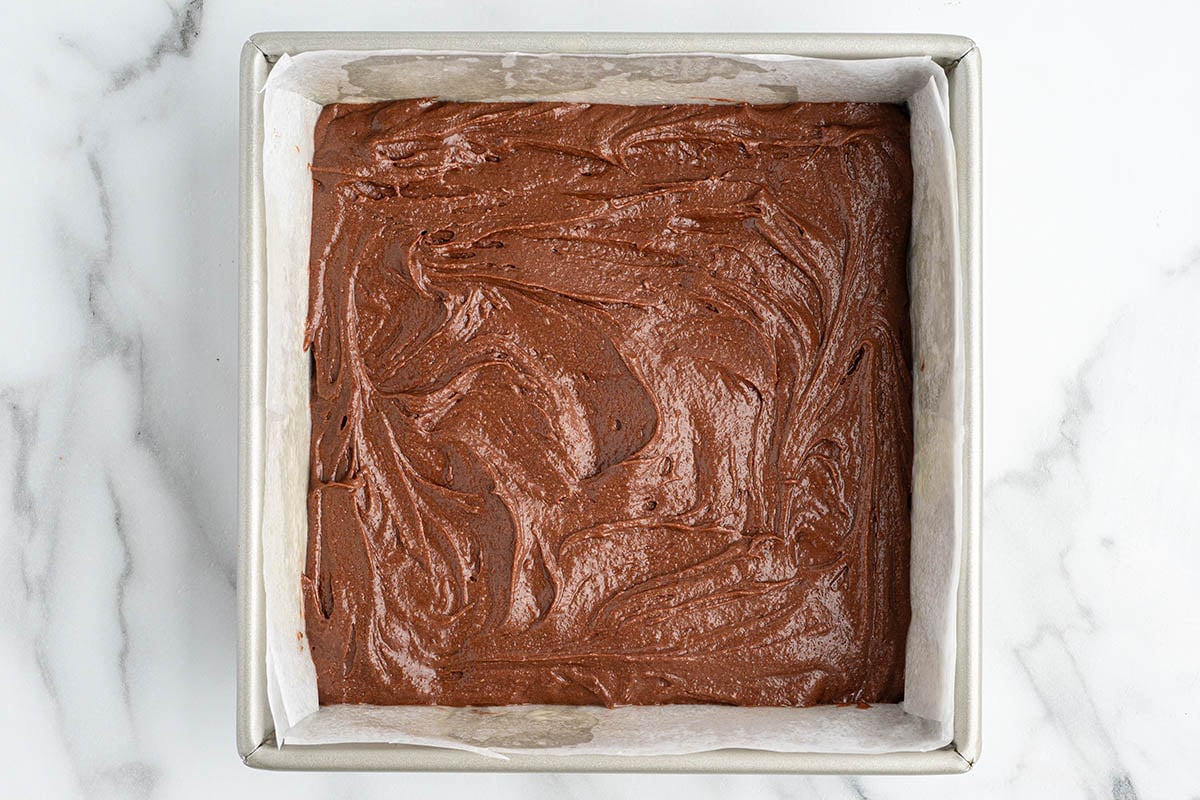
Step 6: Place the peanut butter cups. Nestle all 9 full-size Reese’s cups into the batter in three neat rows of three. Press them in gently so they sit flat.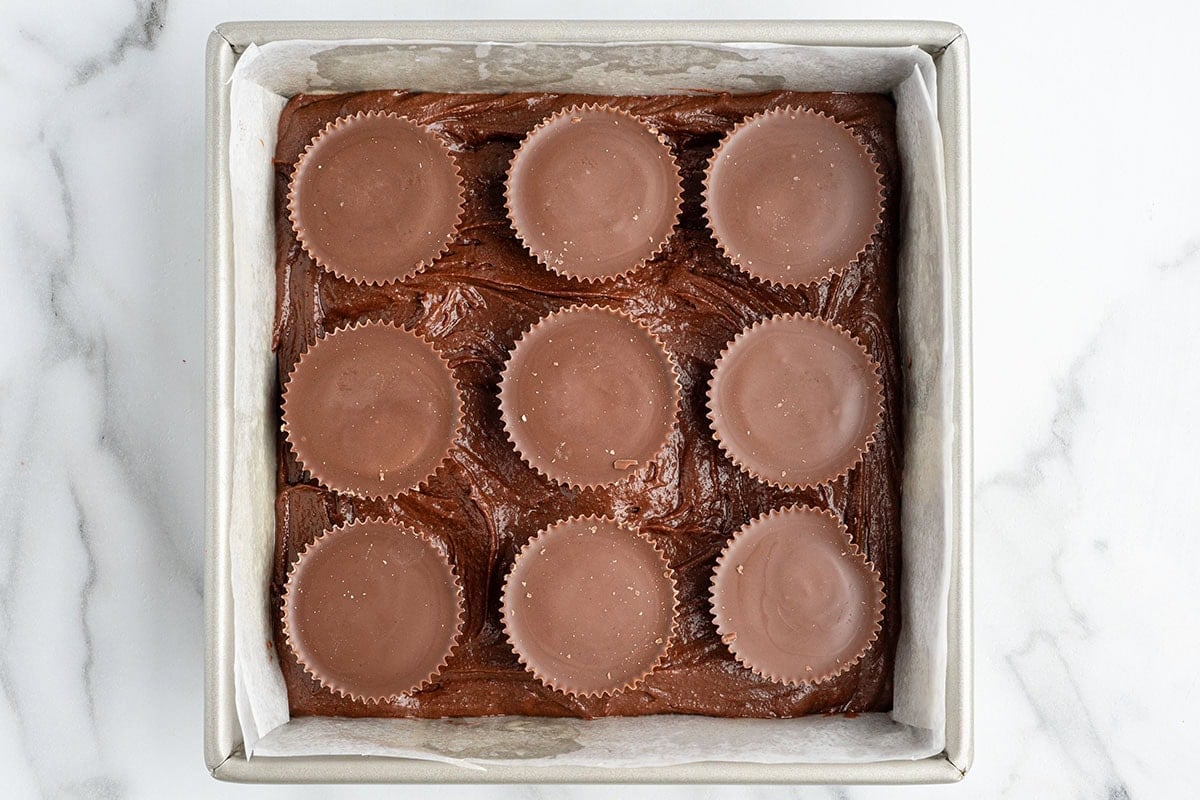
Step 7: Cover with remaining batter. Spread the rest of the batter over the peanut butter cups and smooth it out as evenly as you can to cover them completely.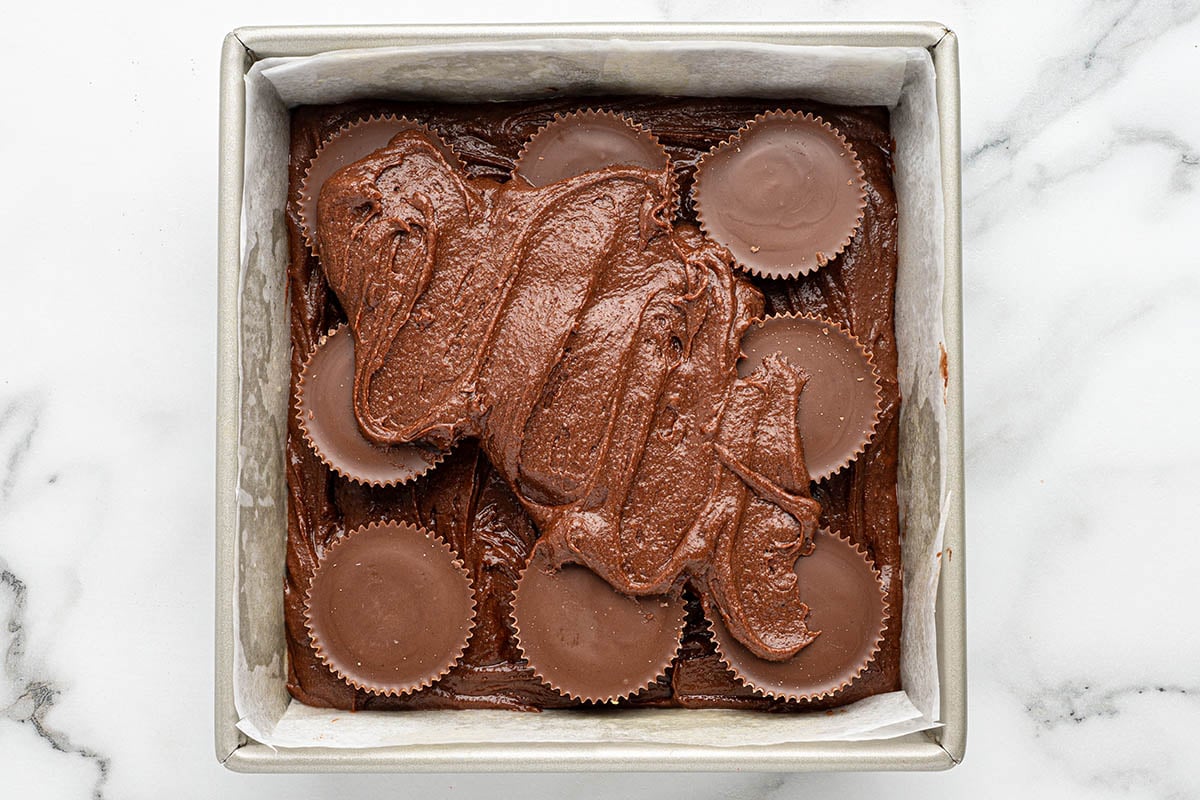
Step 8: Bake. Bake for 30 to 35 minutes, until the center is set and a toothpick inserted in the middle comes out with just a few moist crumbs. Start checking at the 30-minute mark. Pull them as soon as that toothpick looks right, the brownies will continue baking in the hot pan after you take them out.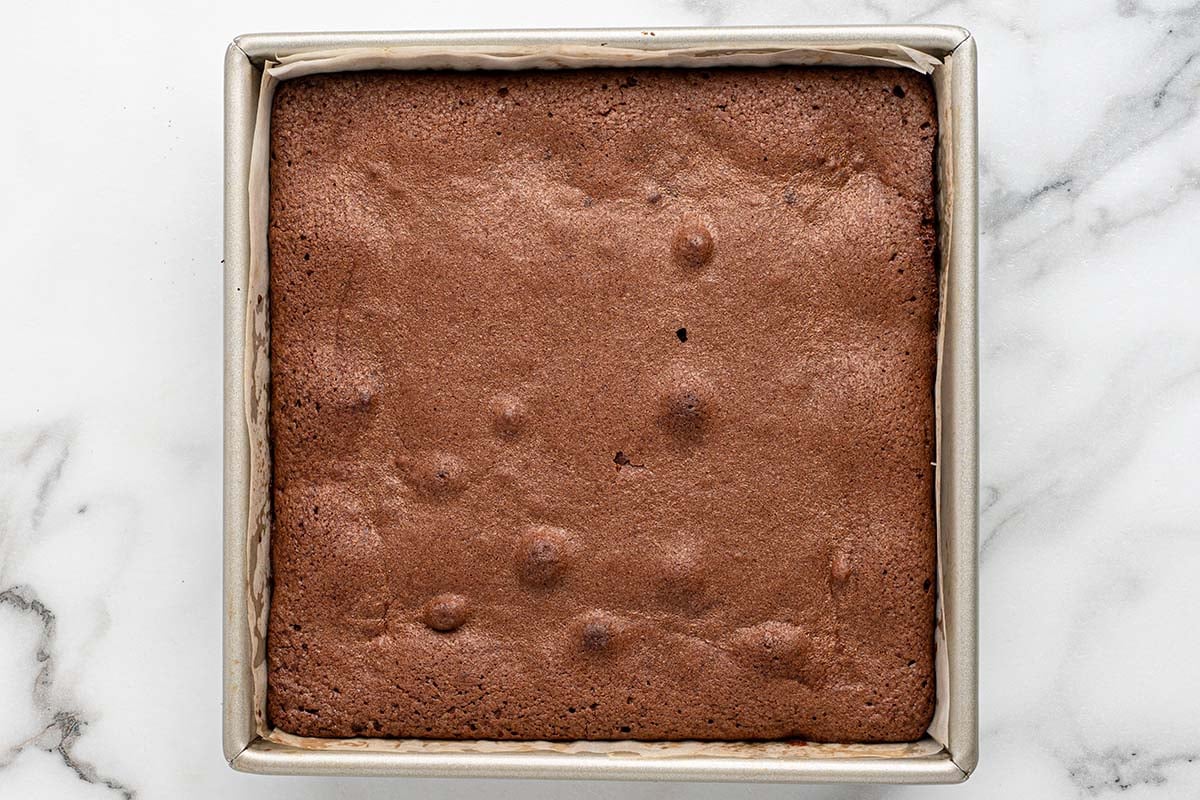
Step 9: Cool and cut. Let the brownies cool completely in the pan, this takes about 2 to 3 hours and it is worth the wait. Once fully cooled, lift them out by the parchment edges, cut into 12 squares, and serve.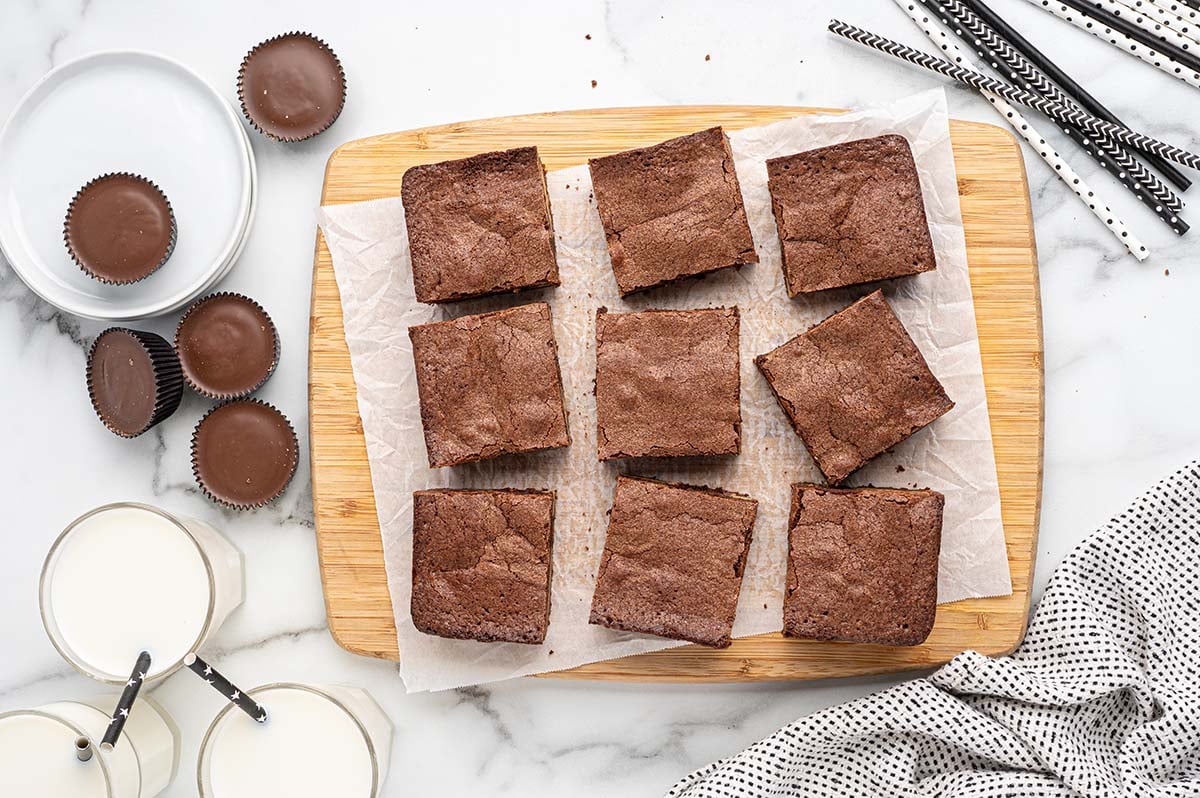
How to Store Peanut Butter Cup Brownies
Keep leftover brownies in an airtight container on the countertop for up to 5 days. They actually taste even better the next day once the flavors have had time to settle.
For longer storage, wrap individual brownies in plastic wrap and place them in a freezer-safe bag. They’ll keep in the freezer for up to 3 months. Let them thaw at room temperature before serving.
Frequently Asked Questions
Yes! Use your favorite box mix, prepare according to the package directions, and follow the same layering method with the peanut butter cups in the center. The pan size and layering method stay the same. My homemade version gives you a richer, fudgier result, but a box mix works in a pinch.
Yes. Mini cups work, but space them out across the batter layer as evenly as possible. The full-size cups are ideal because they guarantee a peanut butter center in each slice.
The most common reason is overbaking. Brownies continue to bake in the pan after they come out of the oven, so pulling them a little early is always the safer call. A toothpick with a few moist crumbs is your signal.
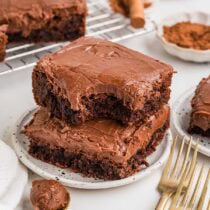
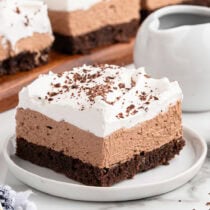
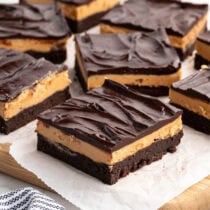
More Brownie Recipes to Try
Peanut Butter Cup Brownies
Ingredients
- ½ cup salted butter melted and cooled
- 1½ cups granulated sugar
- 2 teaspoons vanilla extract
- 3 large eggs
- ¾ cup all-purpose flour
- ½ cup unsweetened cocoa powder
- ½ teaspoon salt
- ½ teaspoon baking powder
- 9 full-size chocolate peanut butter cups
Instructions
- Preheat oven to 350°F.
- Spray a 8×8 inch rectangular baking pan with nonstick spray, and then line it with parchment paper and spray with nonstick cooking spray.
- Beat together melted butter and sugar with a hand mixer or standing mixer.½ cup salted butter, 1½ cups granulated sugar
- Add vanilla extract and eggs, adding one egg at a time and beating well between each addition.2 teaspoons vanilla extract, 3 large eggs
- Sift together flour, cocoa powder, salt and baking powder and add to the butter/sugar mixture.¾ cup all-purpose flour, ½ cup unsweetened cocoa powder, ½ teaspoon salt, ½ teaspoon baking powder
- Beat until fully combined.
- Spread half of the batter across the bottom of the prepared baking pan. The batter will be thick in texture and will need to be spread carefully to cover the entire pan.
- Nestle chocolate peanut butter cups into the brownie batter, forming neat rows.9 full-size chocolate peanut butter cups
- Spread remaining batter over the peanut butter cups and smooth evenly.
- Bake for 30-35 minutes until batter is set in the middle and a toothpick inserted in the center comes out with a few moist crumbs. (Do not over bake. The Brownies will continue to bake in the pan after removing from the oven.)
- Remove from oven and allow brownies to cool completely in the pan.
- Brownies will lift easily from the pan by lifting on the edges of the parchment paper lining. Cut into pieces and serve!
Jenn’s Notes
- Stick with the 8×8 pan. This one really matters. After testing both, the 8×8 is the clear winner, it gives you thicker, fudgier brownies that hold their shape beautifully. The 9×13 spread everything too thin and overbaked before you even had a chance.
- Spray the pan before the parchment and after. That first layer of spray isn’t just habit, it keeps the parchment from sliding all over the place when you’re trying to spread a thick, stubborn batter. Don’t skip it.
- Start peeking at 30 minutes. Ovens have their own opinions, so don’t rely on the timer alone. What you’re looking for is a toothpick with a few moist crumbs clinging to it, not a clean one. When in doubt, pull them early.
- Let them cool all the way before you cut in. Patience pays off here, fully cooled brownies slice cleanly and hold together so much better. That said, if you absolutely cannot wait, warm and gooey straight from the pan is honestly not a bad consolation prize.


Made these the other day with brownie mix in a copper 10 x 7 copper pan. Family favorite and very easy. You will love making these for the smiles and hugs from grandkids!
That’s how I made, hubby want tomorrow for birthday.
I make about once a month great recipe
So you can use boxed brownie mix , correct
Yes, absolutely!! A boxed brownie mix works perfectly and makes it even easier! just prep the mix according to the box instructions! Hope you love them!!