This post may contain affiliate links. Please read our disclosure policy.

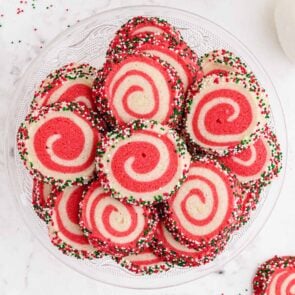
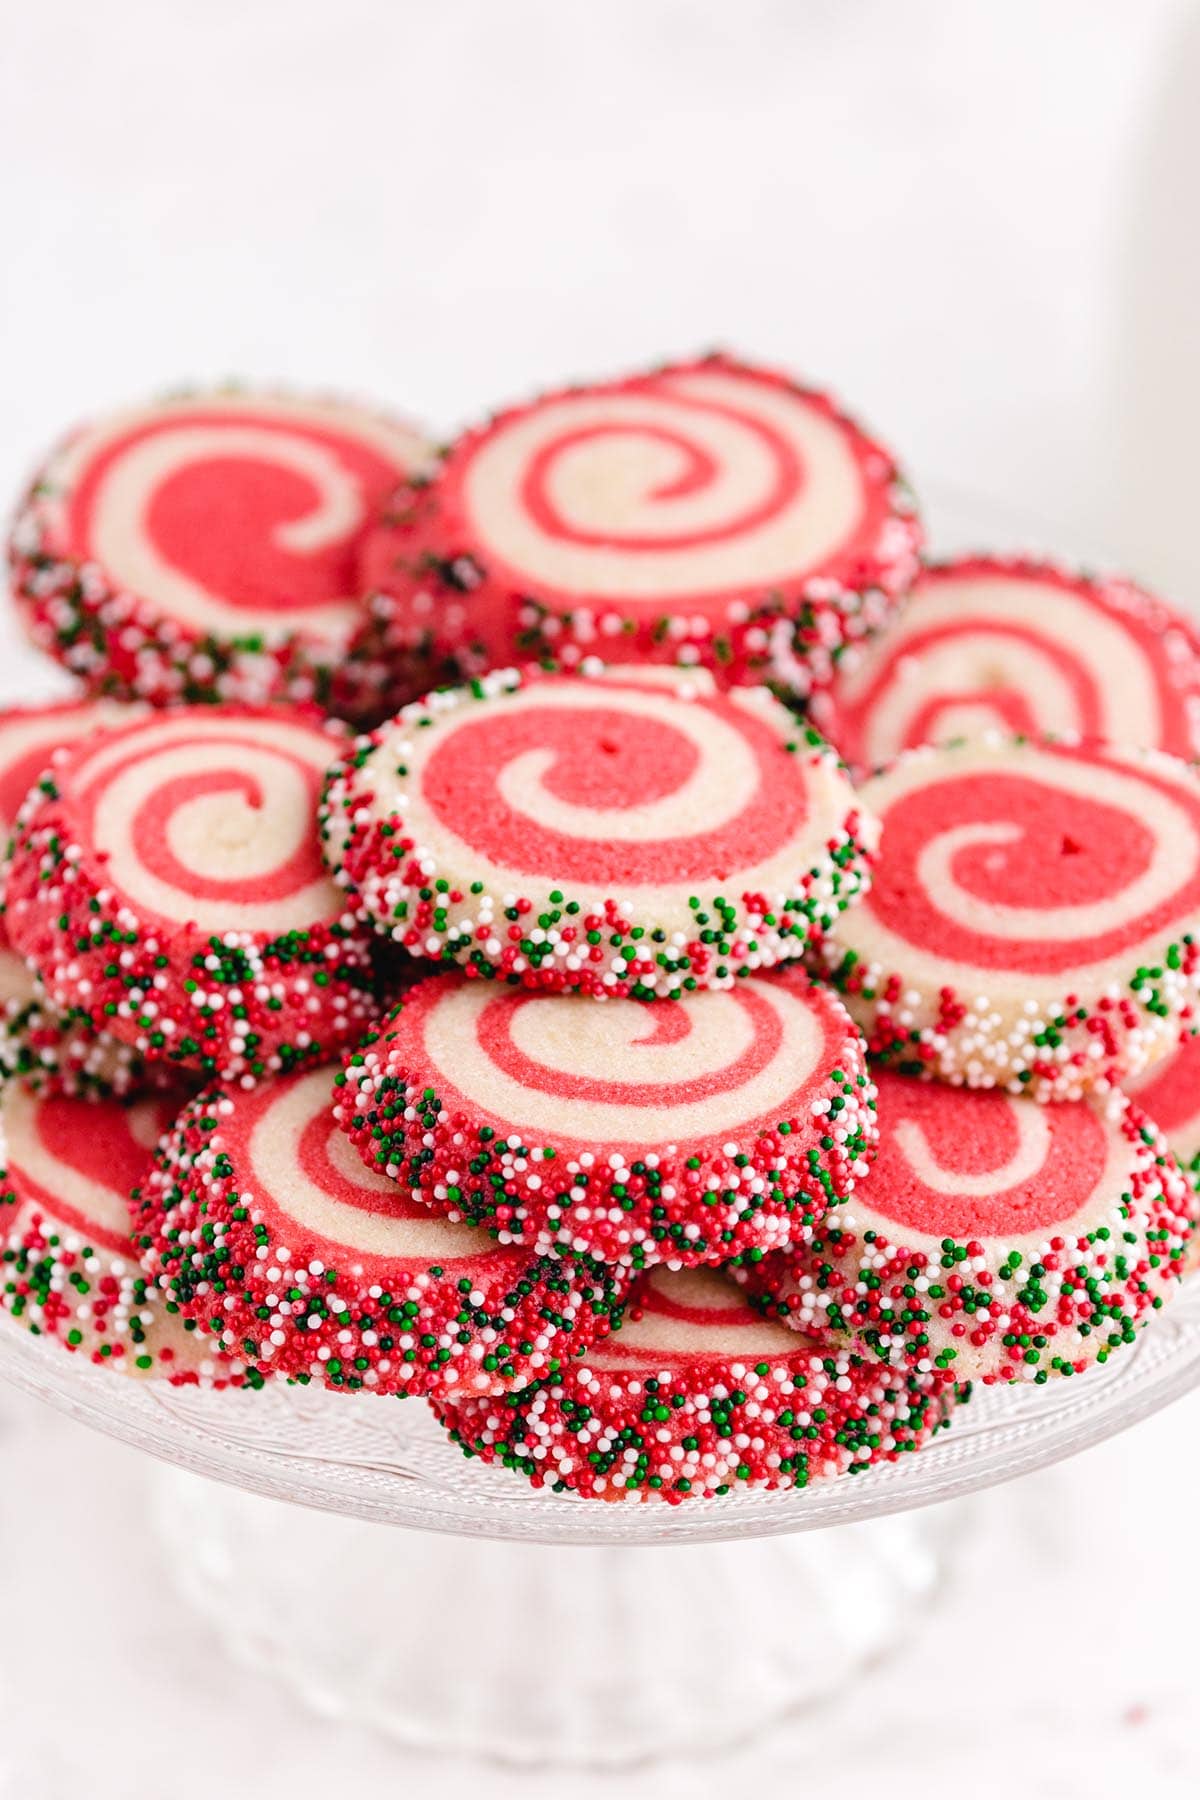
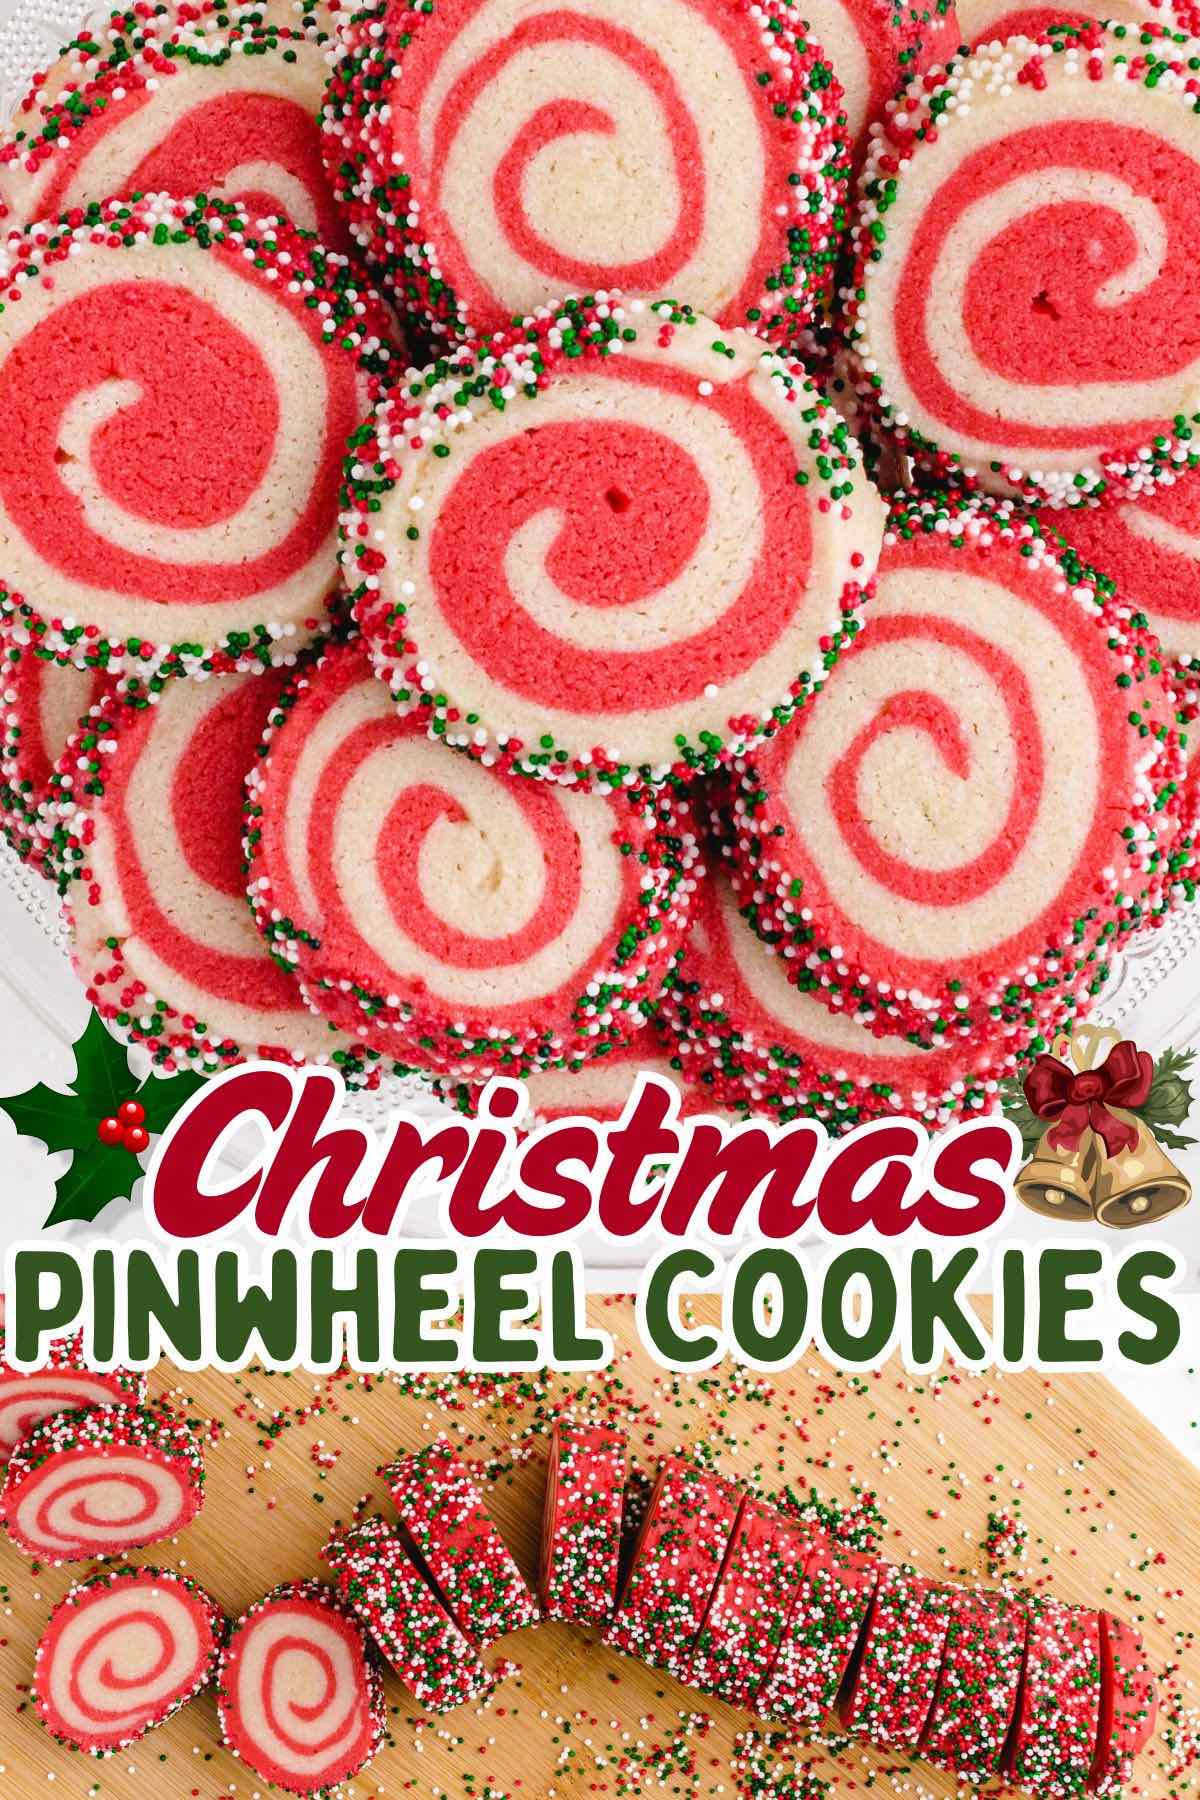
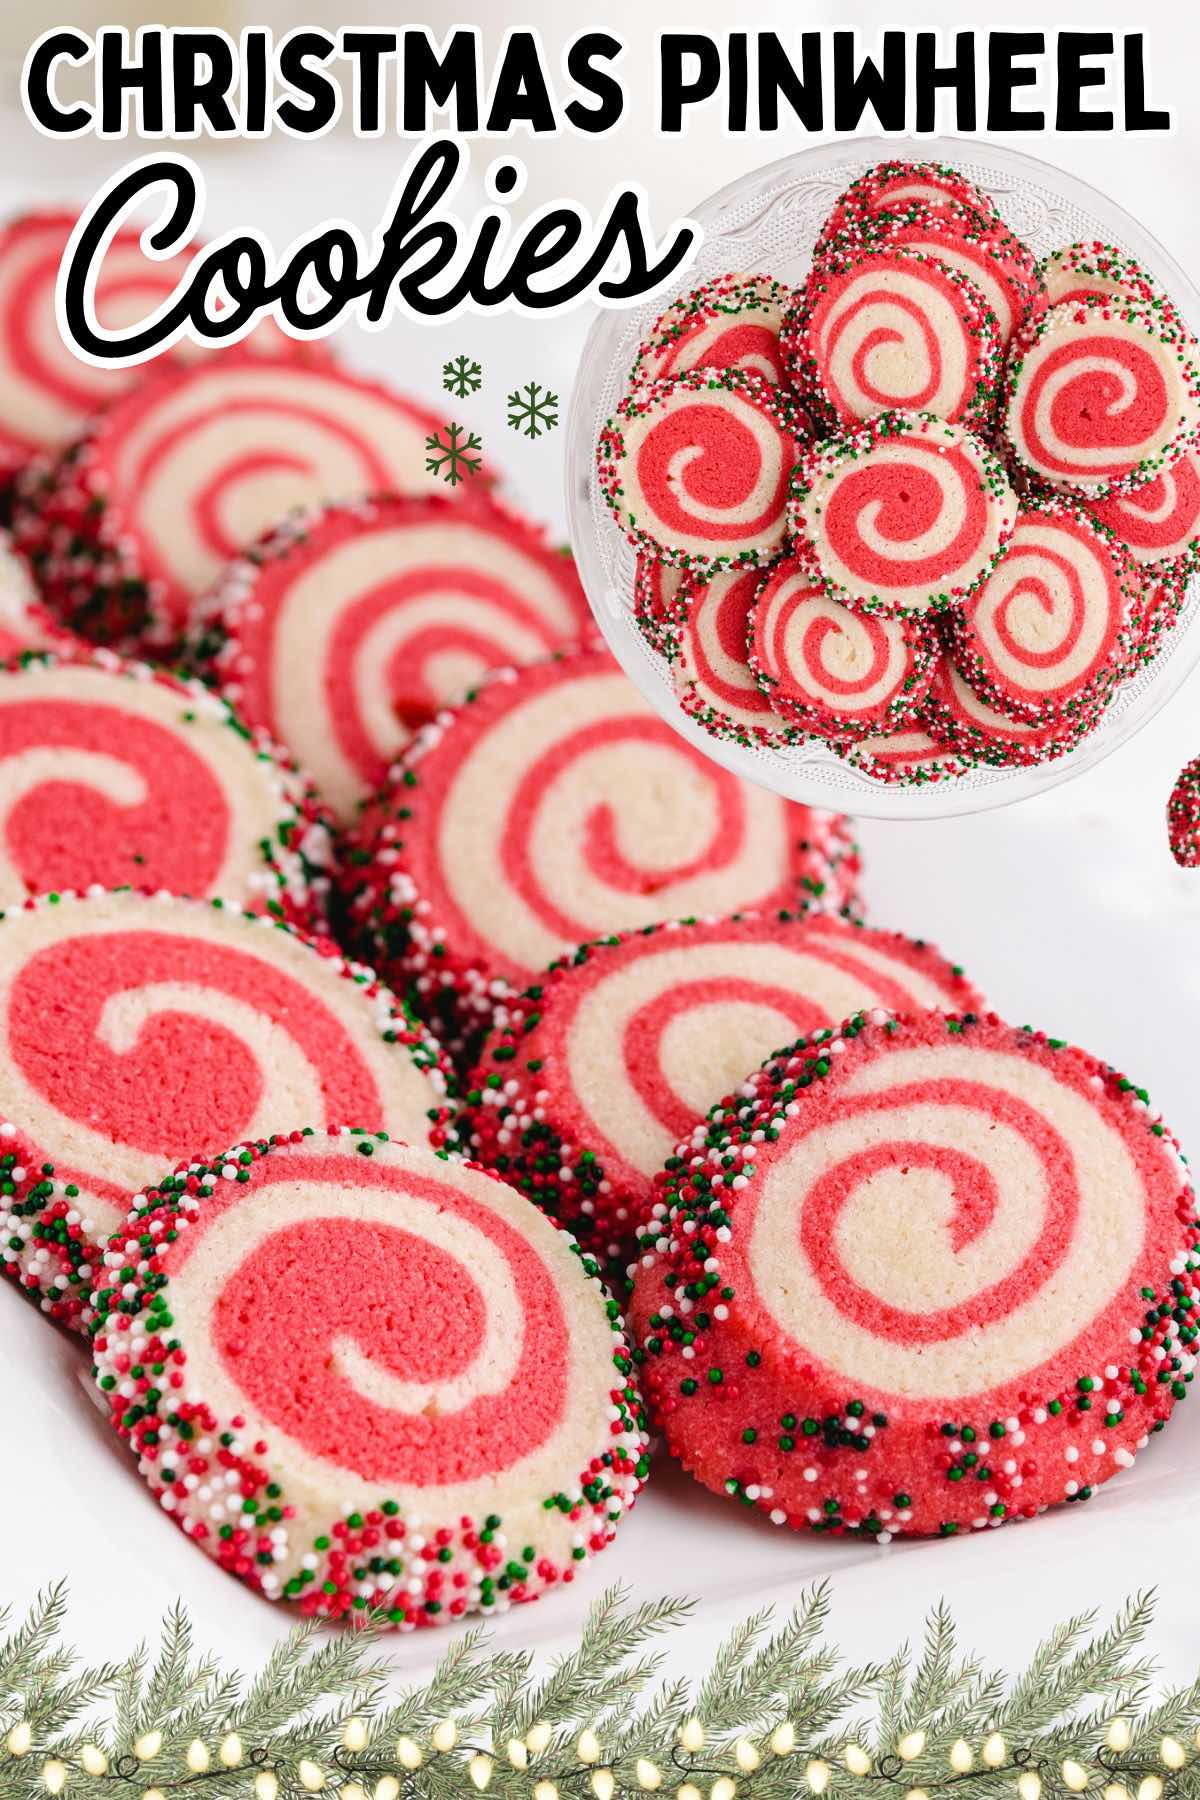
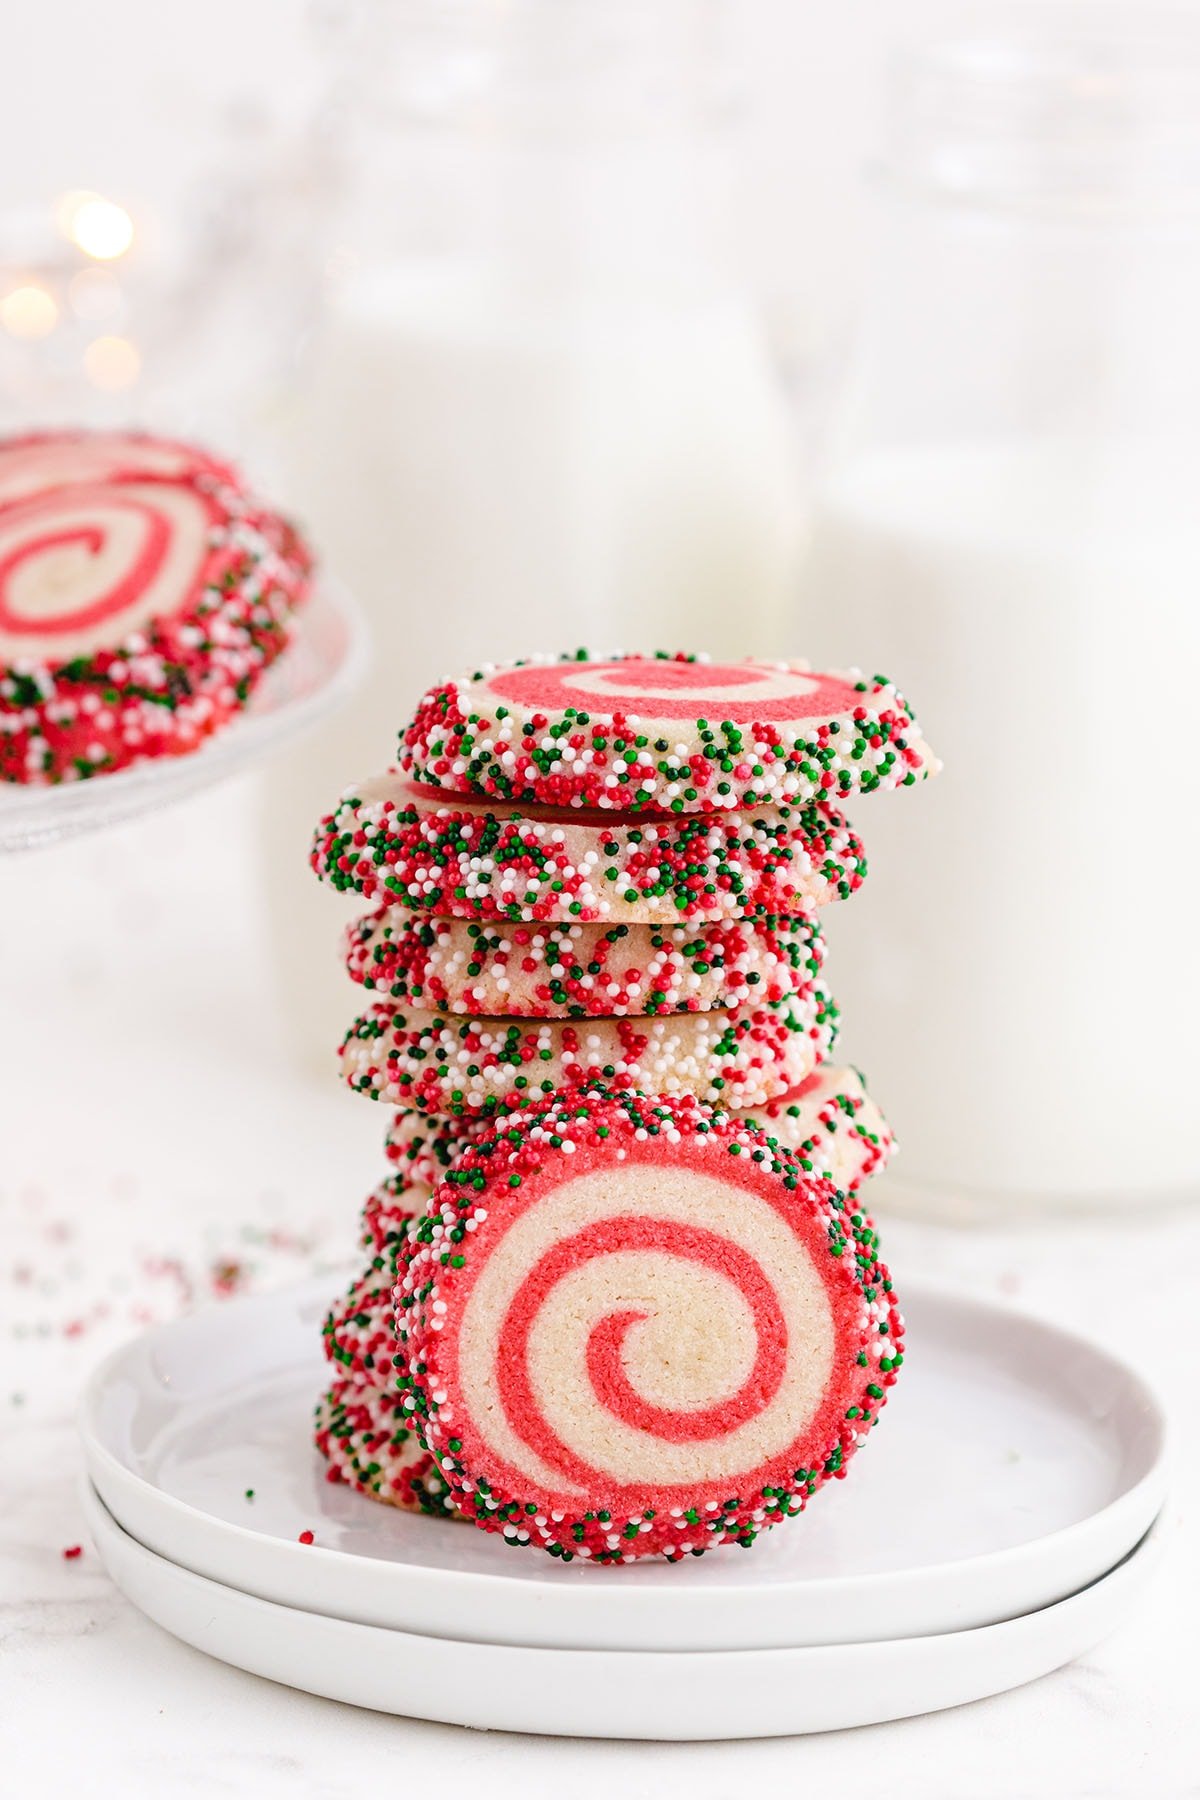
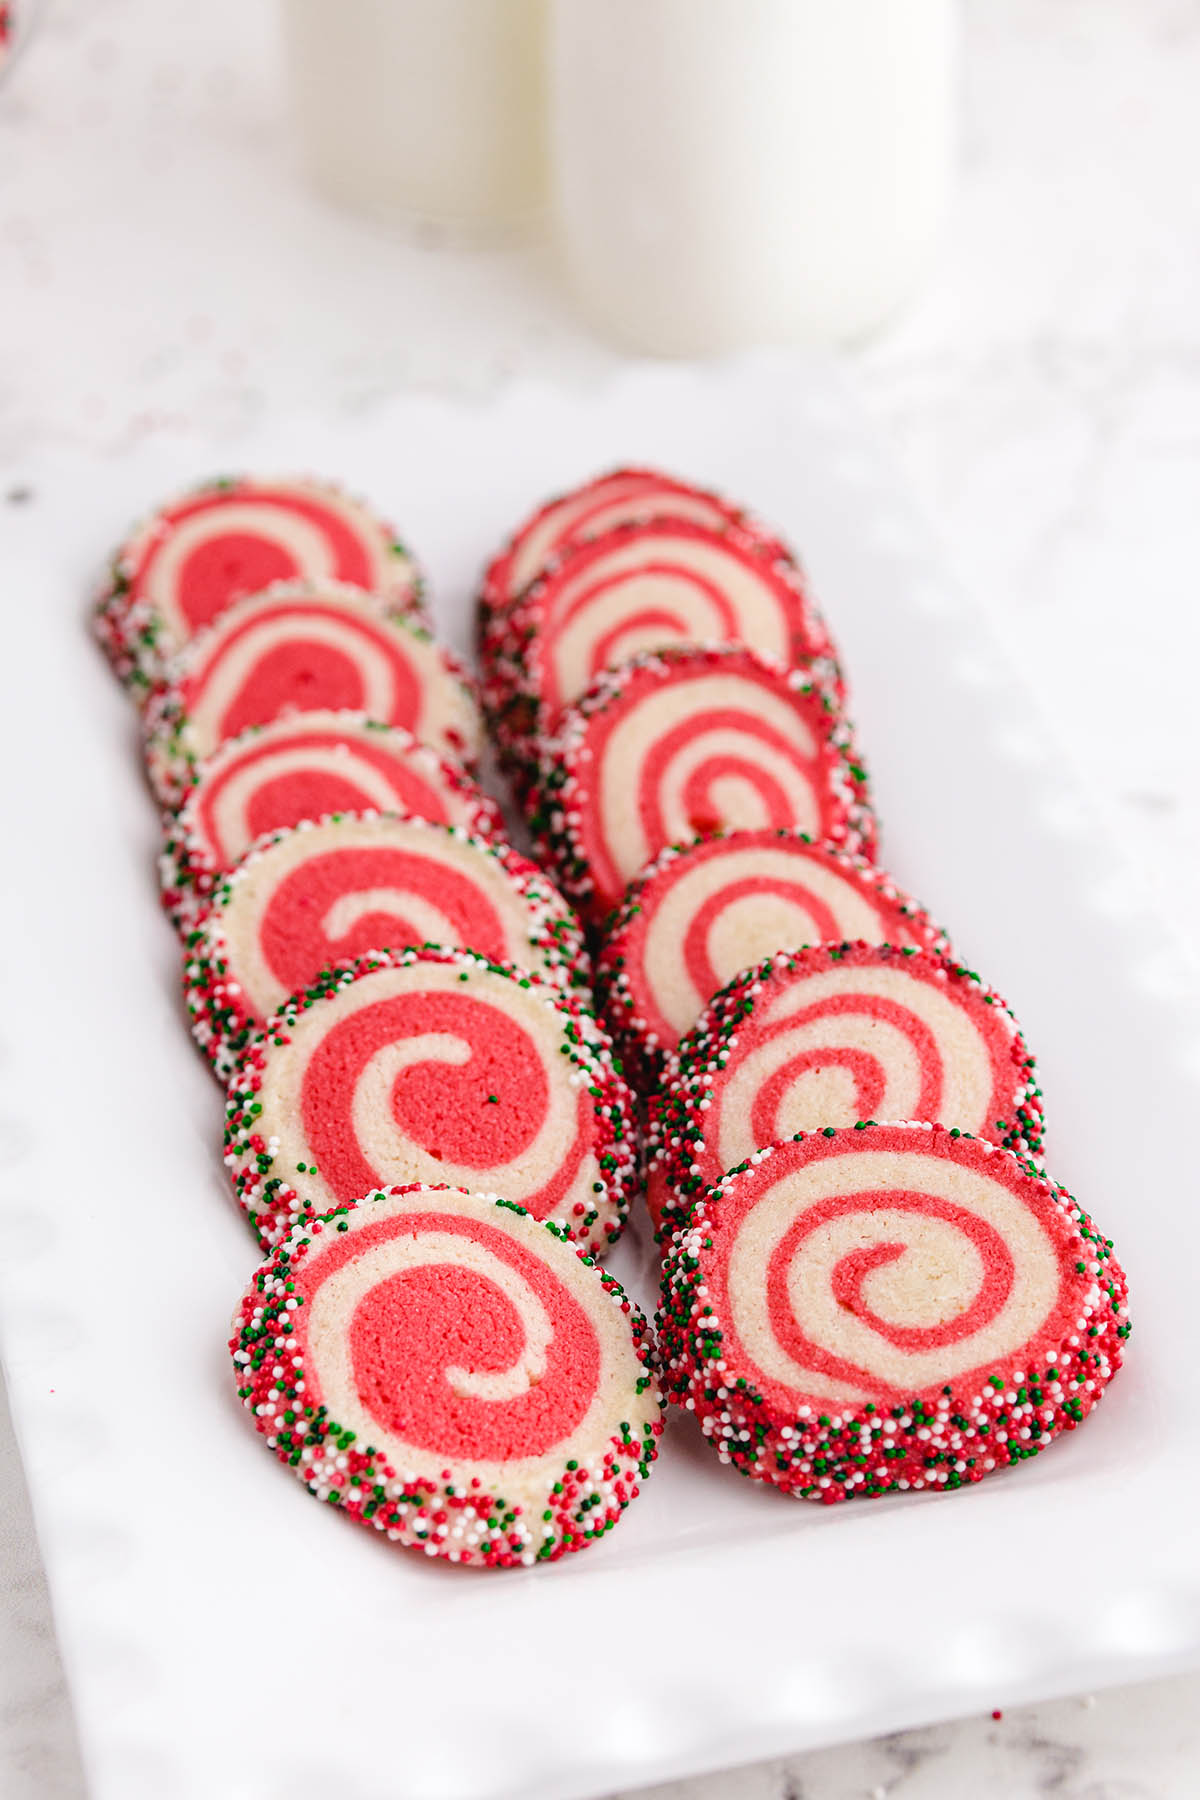
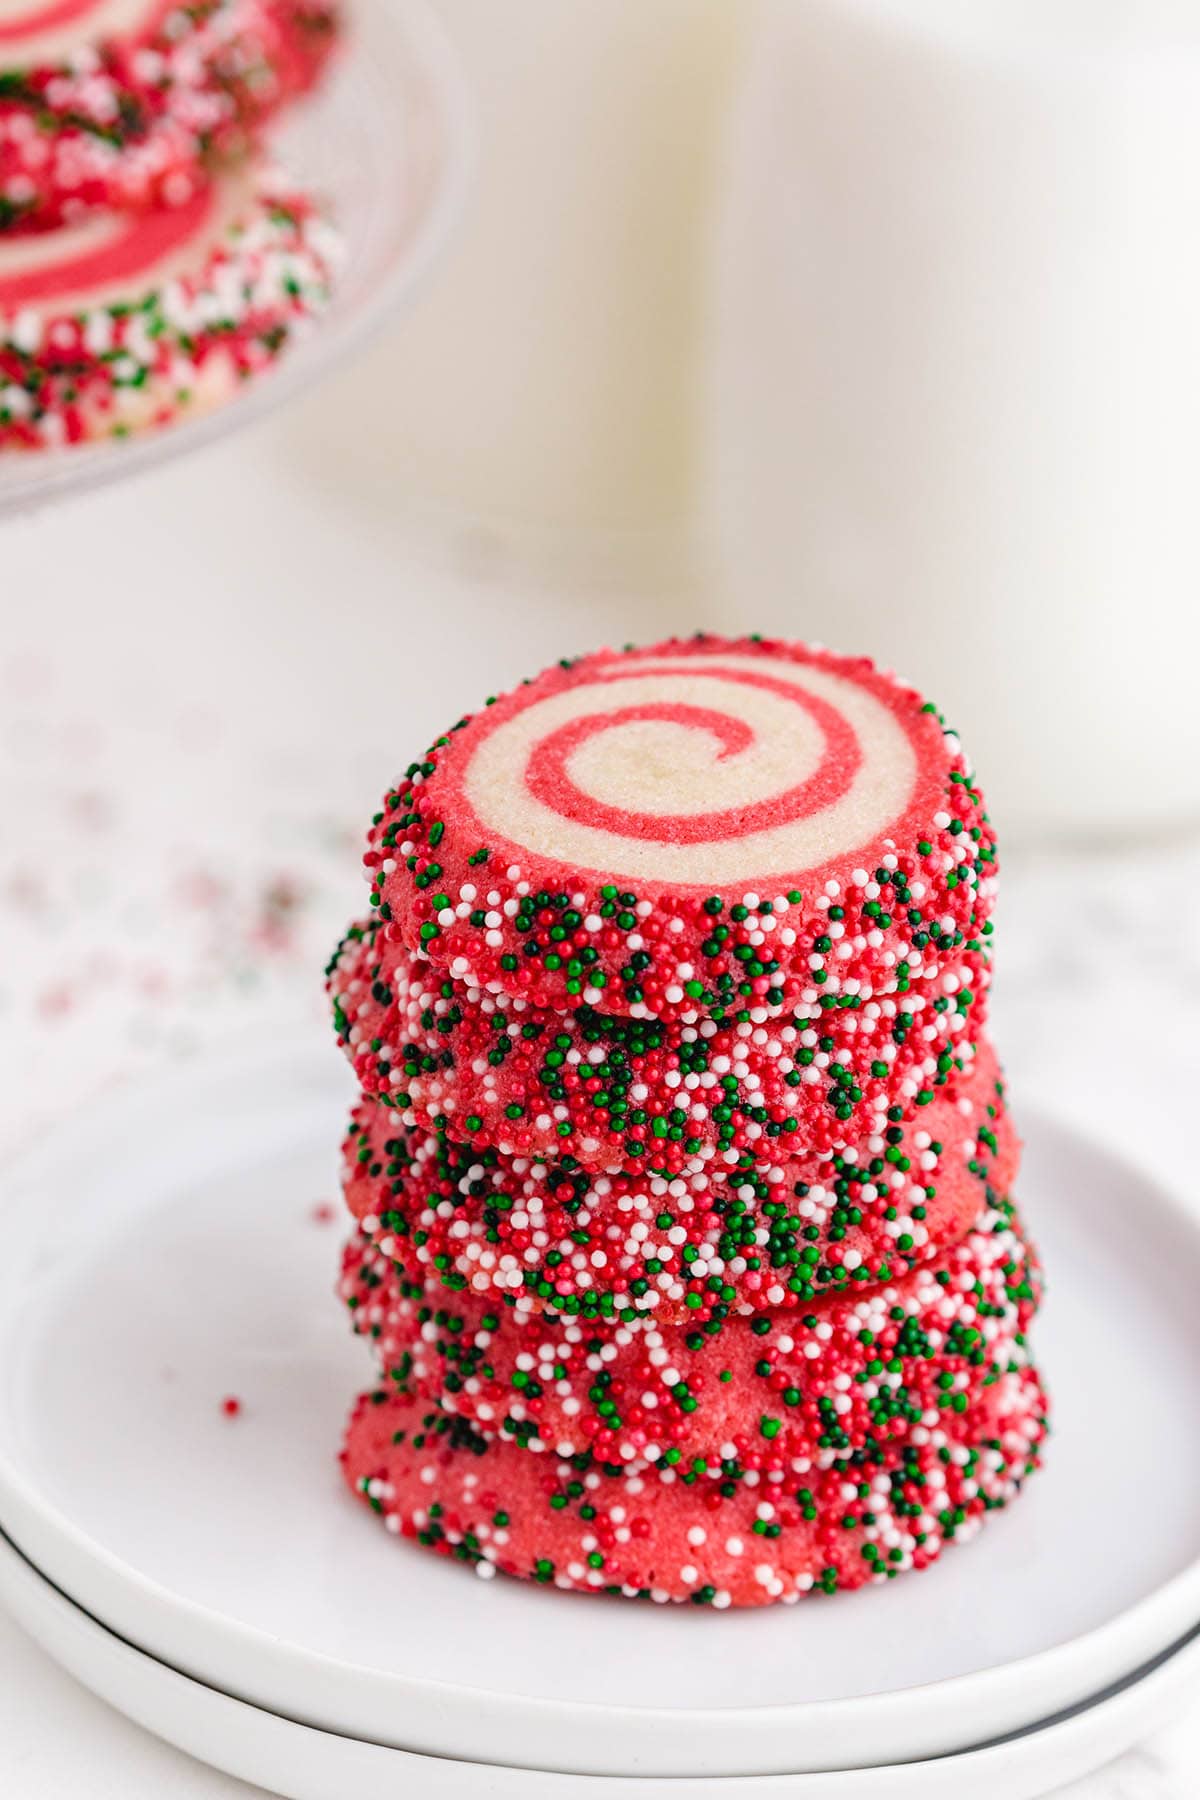
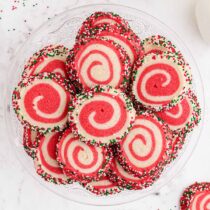
Christmas Pinwheel Cookies are the prettiest cookies on the dessert platter! With their signature swirls and festive colors, these two-toned treats are deceivingly easy to make. They’re just simple sugar cookies having fun, all decked out and feeling fancy for the holidays! Perfect for your cookie exchange or holiday party!
Christmas Pinwheel Sugar Cookies
Our Christmas Pinwheel Cookies recipe turns a classic sugar cookie dough into beautiful, eye-catching spiraled treats. But don’t be fooled by the contrasting colors because these desserts are really just a basic sugar cookie all dressed up to look festive.
No need to worry about making the perfect pinwheel – while it might take a little practice, just follow my easy steps below, and soon you’ll be swirling like a pro! Keep reading to learn how to create and cut the dough logs and get ready to bake the prettiest pinwheel Christmas cookies.
While this pinwheel cookie recipe adds pops of Christmas cheer to the holiday cookie platter, there’s no reason to stop at red and white swirls. You can customize your slice and bake cookie dough discs with different colors and flavors to fit any season or special occasion.
Christmas Pinwheel Cookies Ingredients
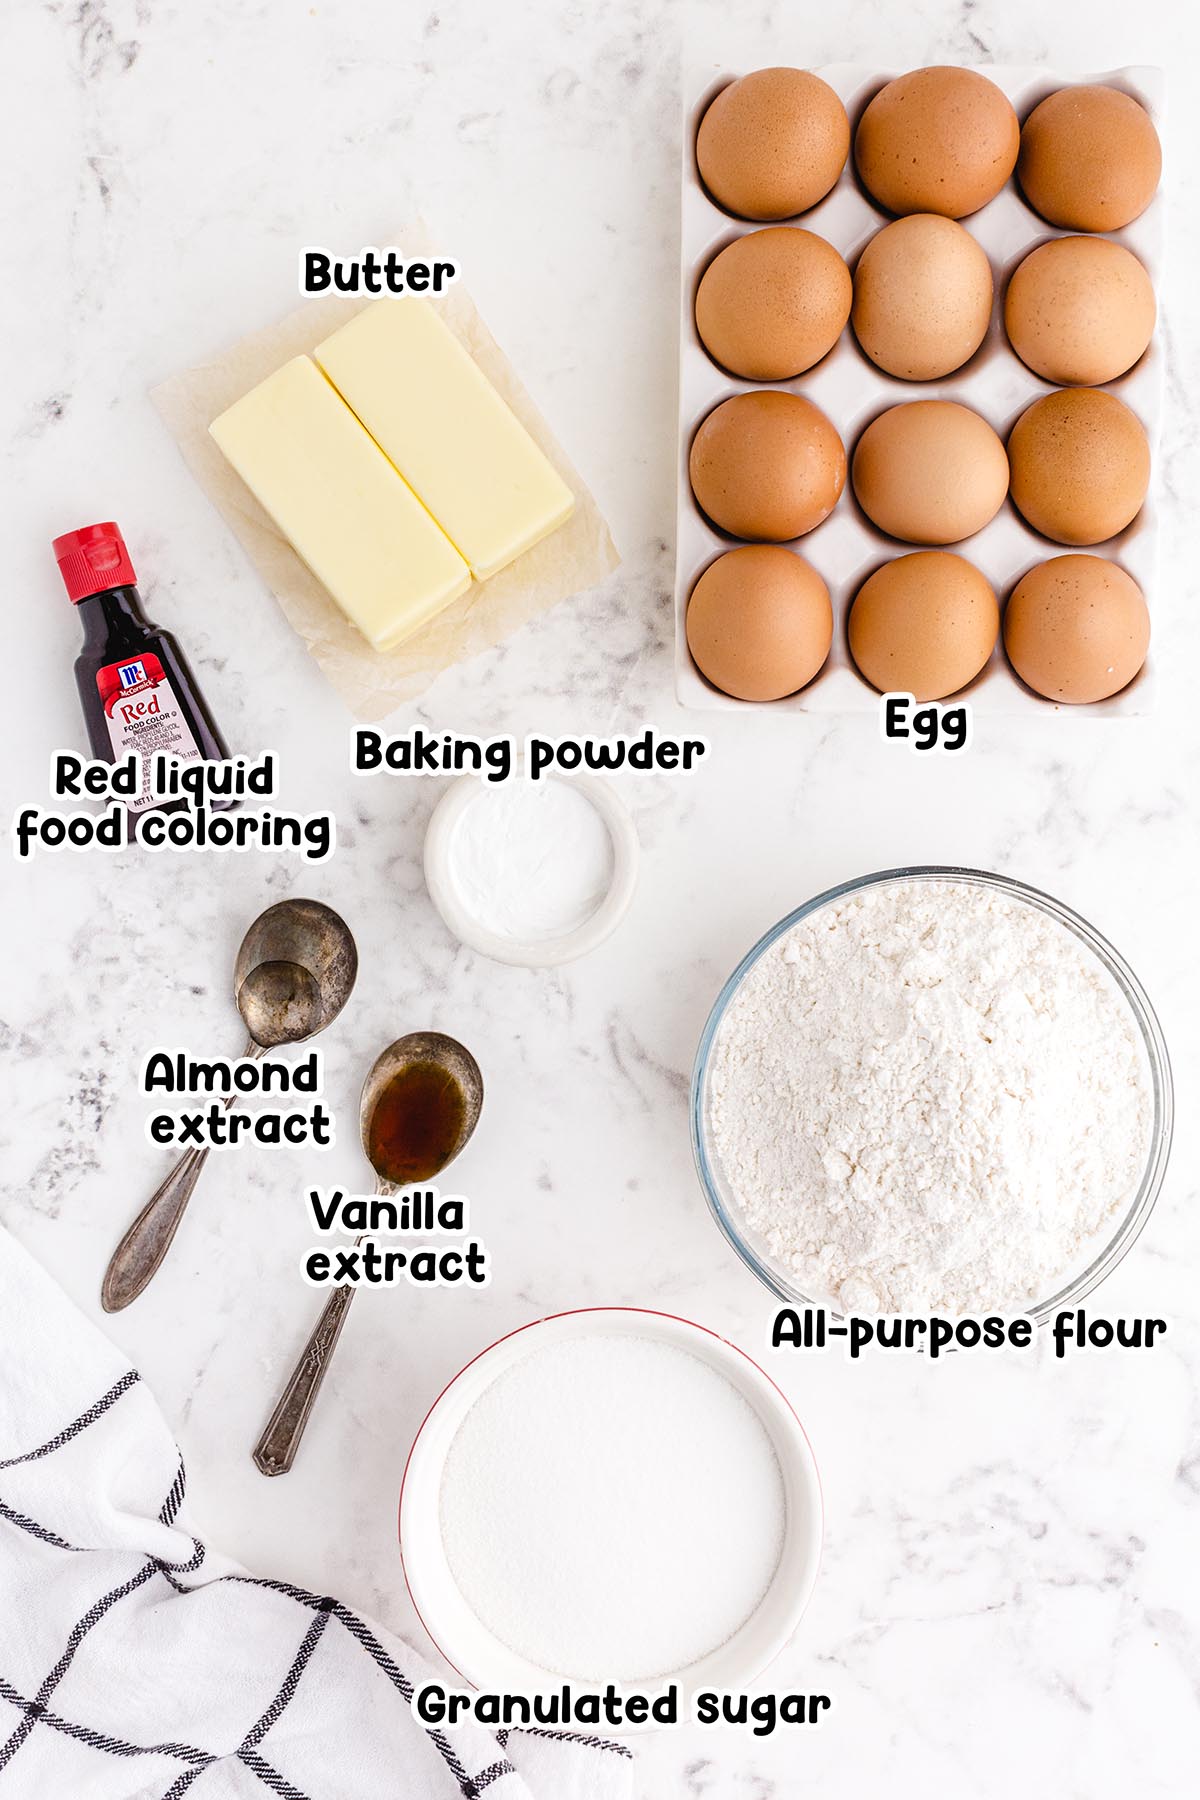
- Granulated sugar: Adds sweetness and helps create a tender texture.
- Salted butter: The fat in butter helps create a tender, soft cookie. Make sure it is softened to room temperature before beating.
- Vanilla extract: Adds depth of flavor which is characteristic of sugar cookies.
- Almond extract: Introduces a subtle nutty flavor that complements the vanilla.
- Baking powder: Acts as a leavening agent, helping the cookies rise slightly and creating a lighter texture.
- Egg: Binds the ingredients together and contributes moisture.
- All purpose flour: Provides structure to the cookies.
- Red food coloring: This recipe calls for liquid food coloring. If you choose to use gel food coloring, keep in mind that it is more concentrated so you need less of it than liquid food coloring.
See the recipe card for full information on ingredients and quantities.
How to Make Christmas Pinwheel Cookies
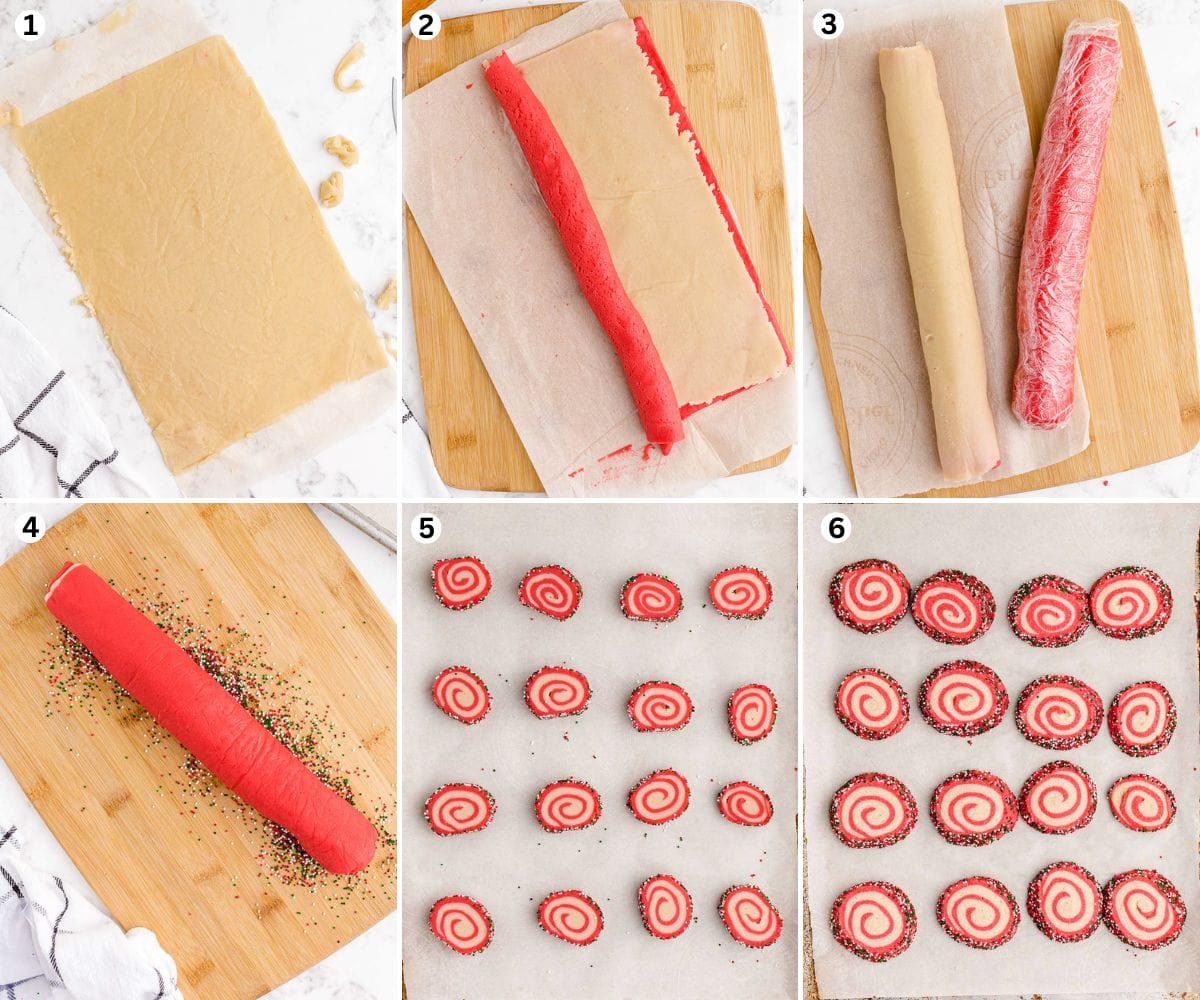
- Create The Cookie Dough: Beat together the sugar, butter, and vanilla extract until creamy. Scrape down the sides of the bowl, add the egg and continue mixing until combined. Add the flour and mix until no streaks of flour remain.
- Color The Cookie Dough: Divide dough in half and remove ½ from the mixing bowl. Add the food coloring and almond extract into the bowl and mix until the color is uniform.
- Divide The Dough: Divide each half in half so that you have 2 red and 2 plain dough pieces. Form each piece into a rectangle. Wrap in plastic wrap and refrigerate for 30 minutes.
- Roll Rectangles: Roll each piece of dough into an 11×7 rectangle. Place one red piece of dough on top of the plain piece. For the second stack, place the plain piece on top of the red.
- Roll Long Logs: Roll each rectangle into a long long. Wrap in plastic wrap and refrigerate for 1-2 hours, or overnight.
- Bake: Cut ¼-½ inch thick slices and place each disc on the prepared baking sheets. Bake at 350 degrees Fahrenheit until the cookies are barely starting to brown on the edges.
- Serve: Cool completely and serve. Enjoy!
Serving Suggestions
Pinwheel cookies are perfect for cookie exchanges, holiday parties, and potlucks, and always make a pretty presentation on Christmas cookie platters and dessert trays.
Colorful Christmas cookie recipes are great for gift-giving. Package them in decorative boxes or tins as a homemade present for friends and family.
How To Make Christmas Swirl Cookies Ahead
If you want to prepare the dough in advance, you have a few options. You can freeze the whole rolled, uncut cookie log, wrapped well, for up to 3 months. Allow the log to defrost overnight in the fridge before slicing and baking.
Alternatively, you can freeze individual unbaked cookie slices. Freeze the cut cookies in single layers in an airtight container or freezer-safe bag for up to 3 months. If baking from frozen, you will need to add a few extra minutes to the baking time.
Proper Storage
- To Store: Cooled cookies can be stored in an airtight container at room temperature for 4-5 days.
- To Freeze: You can freeze the baked cookies for up to 3 months. Wrap them tightly and place them in a freezer-safe container or storage bag to prevent freezer burn.
More Christmas Cookie Recipes
- Christmas Sugar Cookie Blossom Cookies
- Hot Chocolate Cookie Cups
- No-Bake Peanut Butter Balls
- Peppermint Snowball Cookies
- Christmas Tree Meringues
If you tried this Christmas Pinwheel Cookies Recipe or any other recipe on my website, please leave a 🌟 star rating and let me know how it went in the 📝 comments below. Thanks for visiting!!!
Christmas Pinwheel Cookies
Ingredients
- 1¼ cups granulated sugar
- 1 cup salted butter softened
- 1½ teaspoons vanilla extract
- 1 large egg
- 3 cups all-purpose flour
- ½ teaspoon baking powder
- ½ teaspoon red liquid food coloring
Instructions
- In the bowl of a stand mixer with the paddle attachment add the sugar, butter, vanilla extract. Beat the ingredients on medium until creamy, about 2 minutes.1¼ cups granulated sugar, 1 cup salted butter, 1½ teaspoons vanilla extract
- Use a rubber spatula and scrape down the sides of the bowl. Add the egg and continue mixing until combined.1 large egg
- Add the flour and baking powder and mix together on the low setting until no streaks of flour are visible.3 cups all-purpose flour, ½ teaspoon baking powder
- Scrape down the sides of the bowl. Divide the dough in half and remove half of it to a piece of parchment paper. Add the food coloring to the remaining dough in the stand mixer bowl and mix together on low speed until the color is uniform.½ teaspoon red liquid food coloring
- Divide each half in half so that you have 2 red and 2 dough colored pieces. Form each piece into its own separate rectangle. Wrap in plastic wrap and place in the refrigerator for 30 minutes.
- After the dough is finished chilling, remove one piece of dough and roll it out on a piece of parchment paper until it is roughly an 11×7 rectangle. Repeat with all pieces of dough. Trim the edges with a knife so you have straight lines.
- Once all 4 pieces of dough are rolled out, carefully place one red piece on top of the dough colored piece. On the other two pieces, place the red on the bottom.
- Carefully roll each rectangle into a long long. Wrap in plastic wrap and place back in the refrigerator for an additional 1-2 hours, or overnight.
- When ready to bake these cookies, preheat the oven to 350 degrees F. Line a baking sheet with parchment paper and set aside.
- Remove 1 log from the refrigerator and carefully slice ¼-½ inch thick cookies, depending on how thick you want them.
- Space cookies about 1 inch apart on the baking sheet. Place in the oven and bake for 9-11 minutes, or until the cookies are barely starting to brown on the edges. (These cookies taste best if they are not overcooked so watch them carefully).
- Let cookies cool on the baking sheet for 2-3 minutes, and then transfer to a wire rack to cool completely.
- Repeat steps to finish cooking the remaining log of cookies.
Jenn’s Notes
- To Store: Cooled cookies can be stored in an airtight container at room temperature for 4-5 days.
- To Freeze: You can freeze the baked cookies for up to 3 months. Make sure to wrap them tightly and place them in a freezer safe container or storage bag to prevent freezer burn.
Tips:
- These cookies taste best if they are not overcooked so watch them carefully. They are done baking when they are barely starting to brown on the edges.
- The vibrancy of the red food color will depend upon how much you add to the dough. So, if you want a very vibrant color make sure to add a little bit extra! However, if you’re using gel food coloring, you won’t need nearly as much.
- Feel free to add green food coloring to the second half of the cookie dough. Because after all, red and green are classic Christmas colors!
- To help prevent sticking, you can roll the cookie dough out between two pieces of parchment paper. You can also sprinkle on some flour if needed.