
This post may contain affiliate links. Please read our disclosure policy.
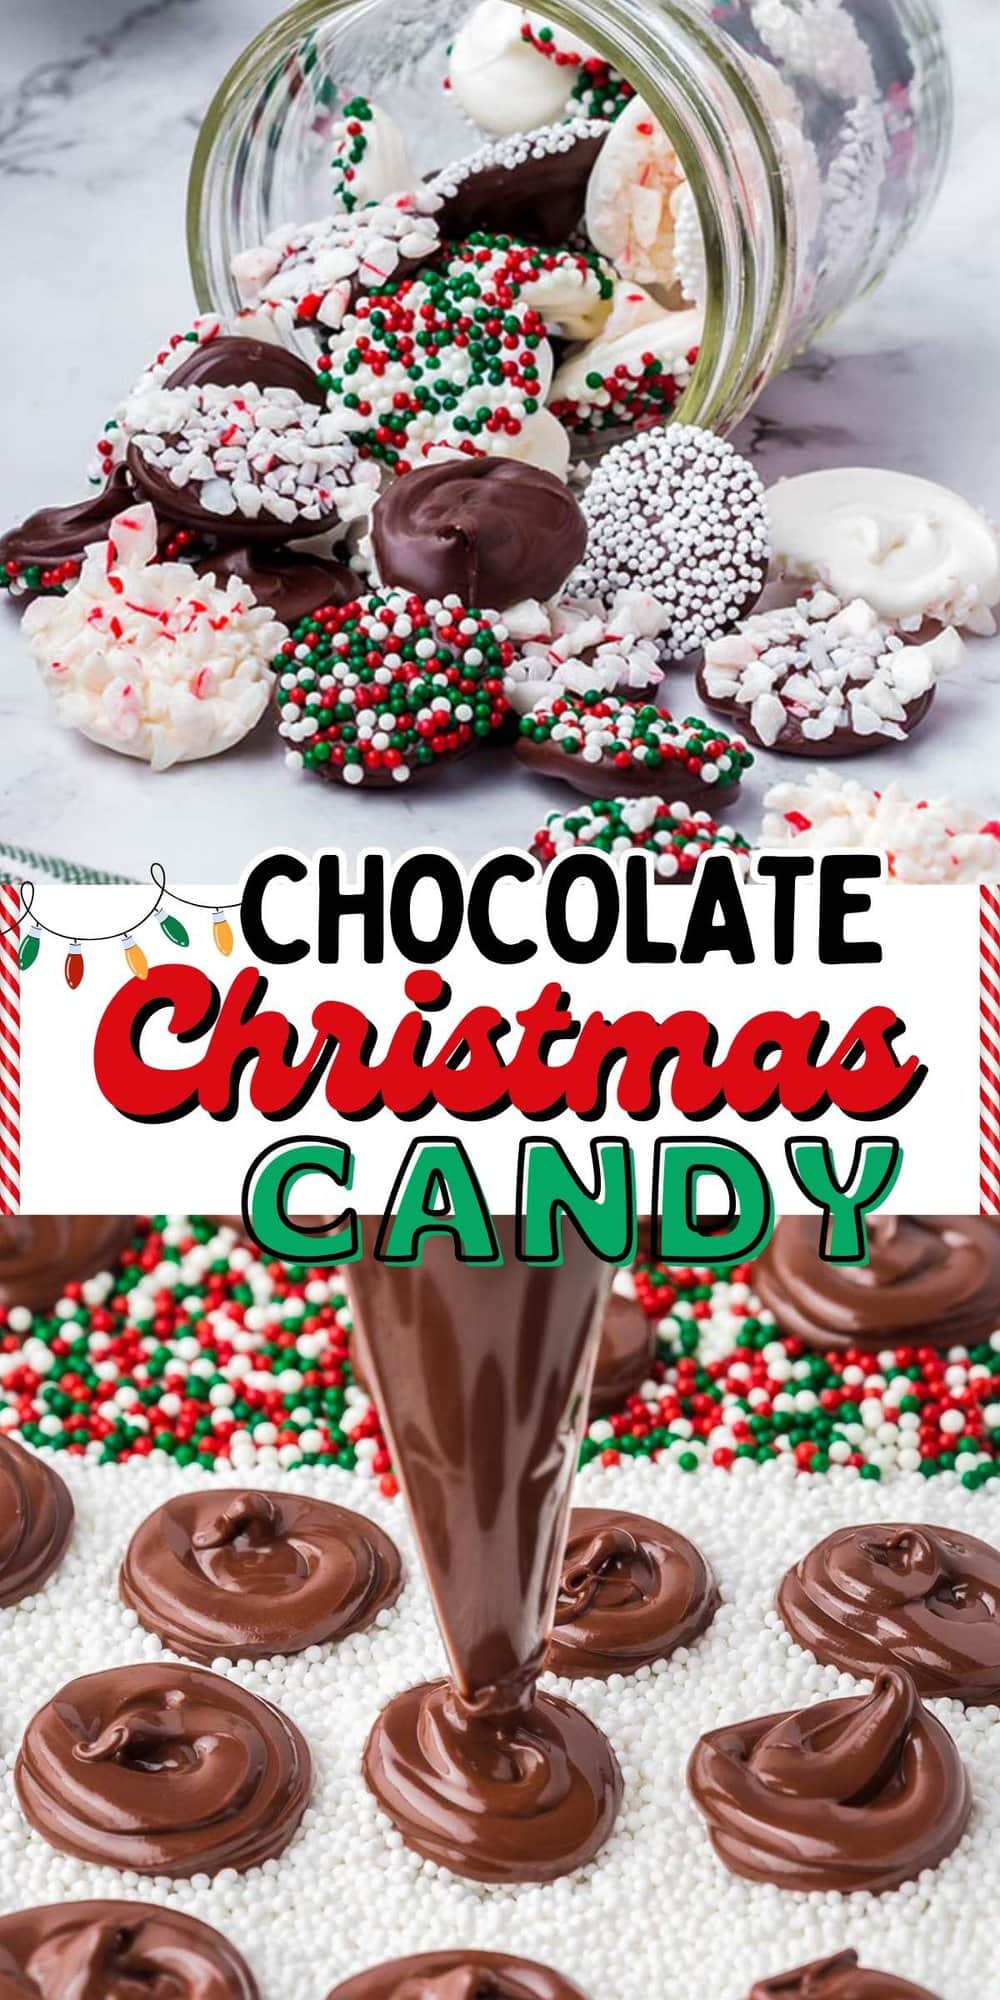
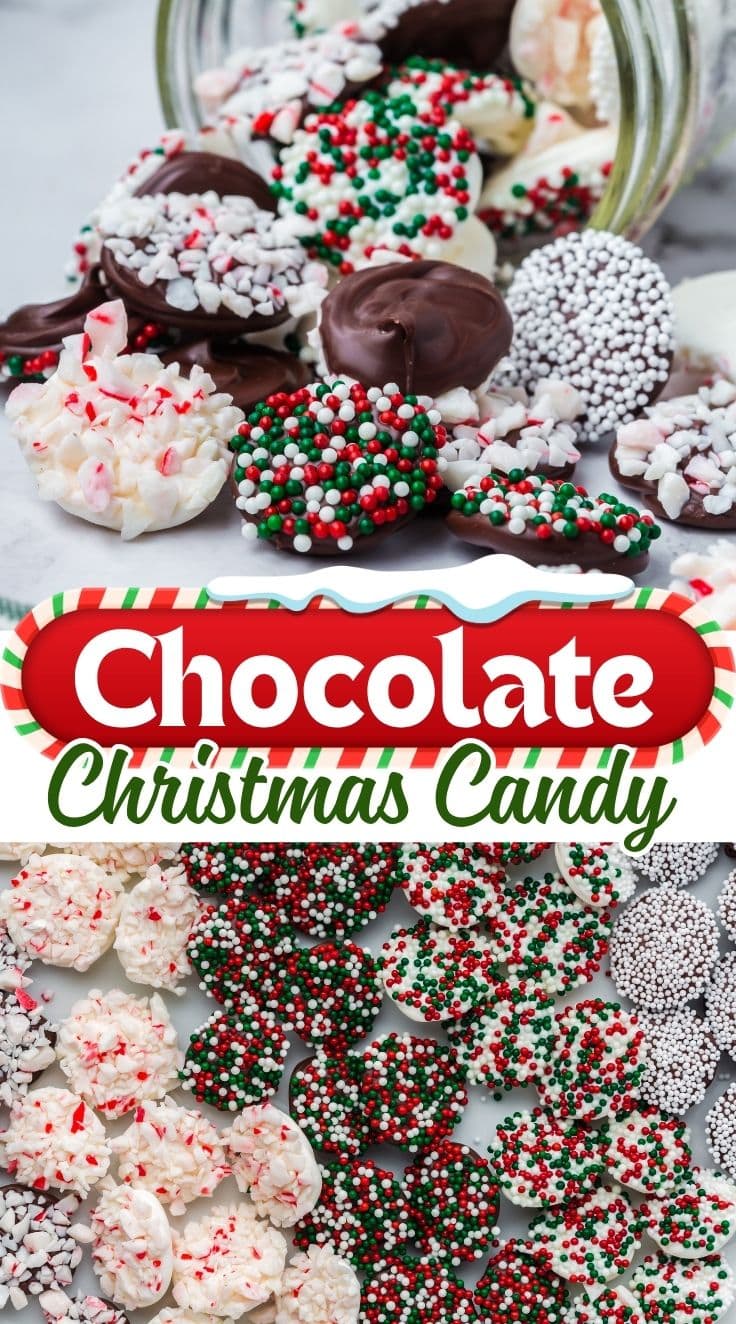
Make your own Chocolate Christmas Candy at home in 20 minutes from start to finish. Creamy chocolate buttons with nonpareil and crushed candy cane coated bottoms are great for gift giving or serving beside the Christmas cookies.

Homemade Chocolate Nonpareils
Our easy Chocolate Christmas Candy recipe is made to mimic the classic Sno-Caps chocolate nonpareil candy you buy in a box, but these homemade treats are turned festive for the holidays! Move over processed food because I’ve got the best copycat candy recipes to serve alongside these sno caps.
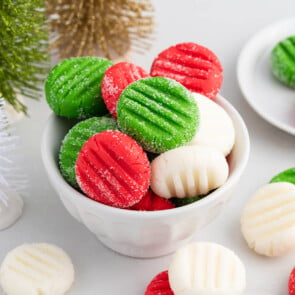
Smooth chocolate candy on one side with a crunchy sprinkle and candy cane coating on the other, nonpareil candy is easy to customize with your favorite flavors and colors for any occasion.
These small, sweet disks of rich chocolate with sugar pearl sprinkles on the reverse side are delicious confections and fun to make in various sizes and shapes!
Why We Love Homemade Nonpareil Candies
- Quick and easy to make in minutes.
- Uses a handful of simple ingredients.
- Copycat recipe that looks like the classic movie theater treat.
- Portable and easy to pop in your mouth when the candy craving hits.
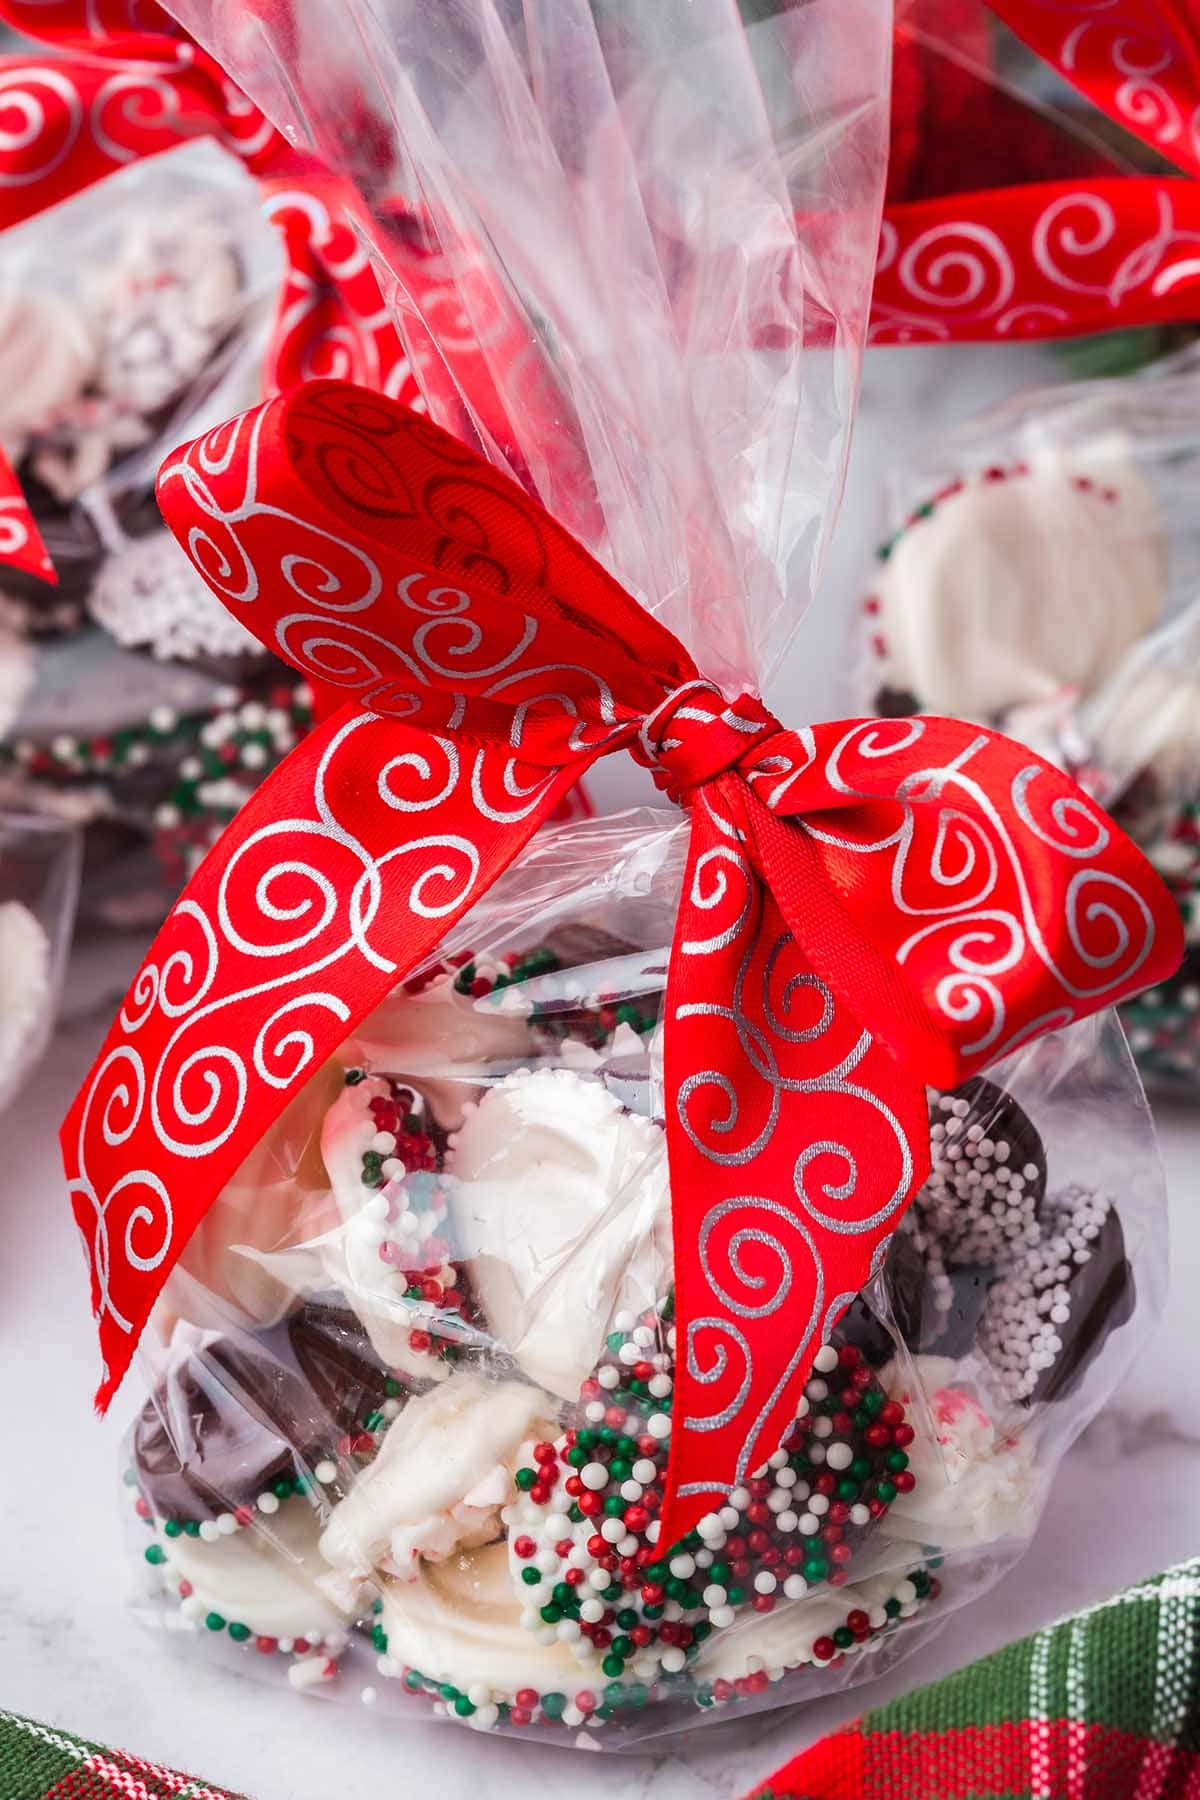
- Perfect for a Christmas party, dessert platter, cookie exchange, or gift giving.
Chocolate Christmas Candy Ingredients
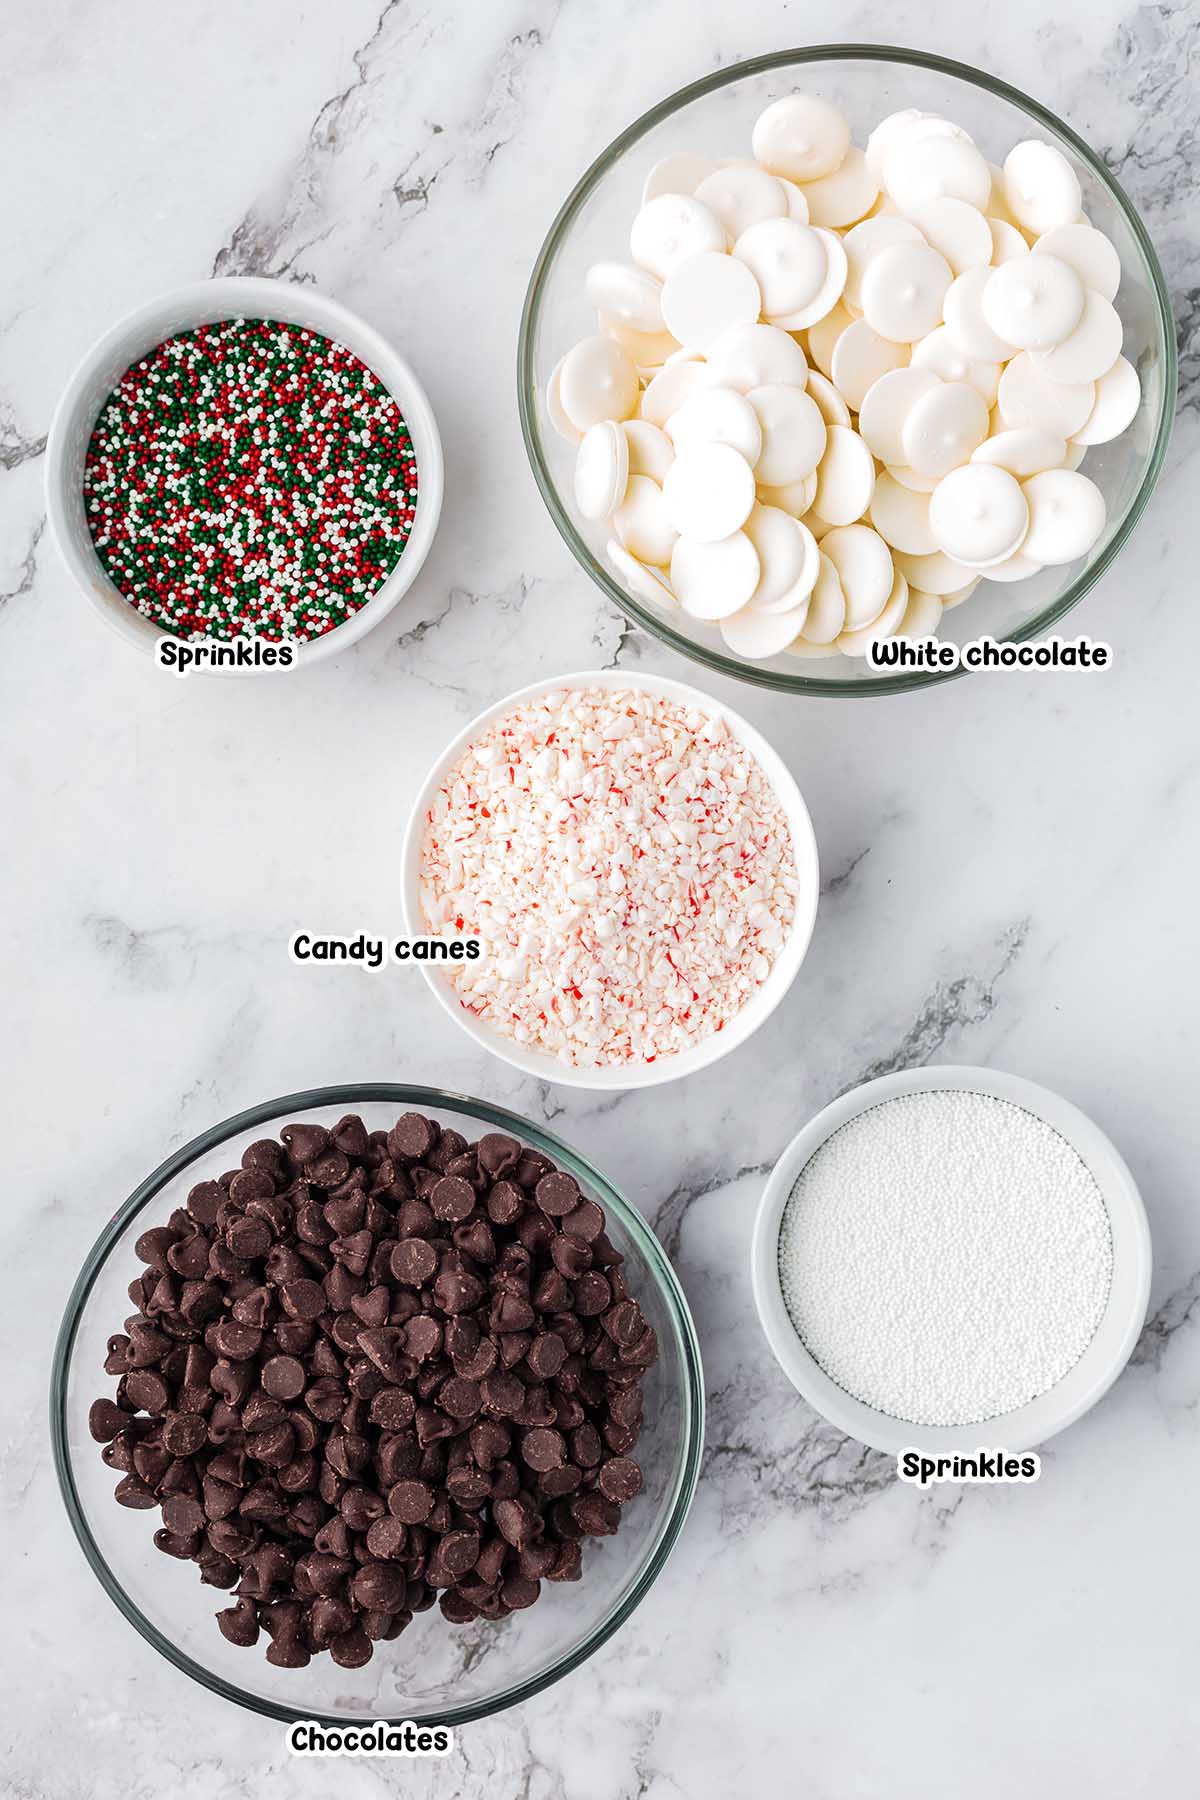
- Semi sweet chocolate chips or melting chocolates
- White chocolate melting wafers
- White nonpareil sprinkles
- Red, green, and white nonpareil sprinkles
- Crushed candy canes
See the recipe card for complete information on ingredients and quantities.
Substitutions and Additions
- Choose Your Chocolate: You can use milk chocolate chips or dark chocolate chips instead of the semi sweet chocolate if you prefer. You can even use dairy free chocolate so your candy is allergy friendly.
- Make With Other Mints: You can crush any kind of hard mint candy or starlight mints instead of candy canes.
- Decorate Your Disks: You can use any kind and color sprinkle you want to customize your candy for holidays and special celebrations. You can also get creative and try using things like crushed Oreos or other cookies, crumbled cereals, or chopped nuts!
How to Make Homemade Christmas Candy
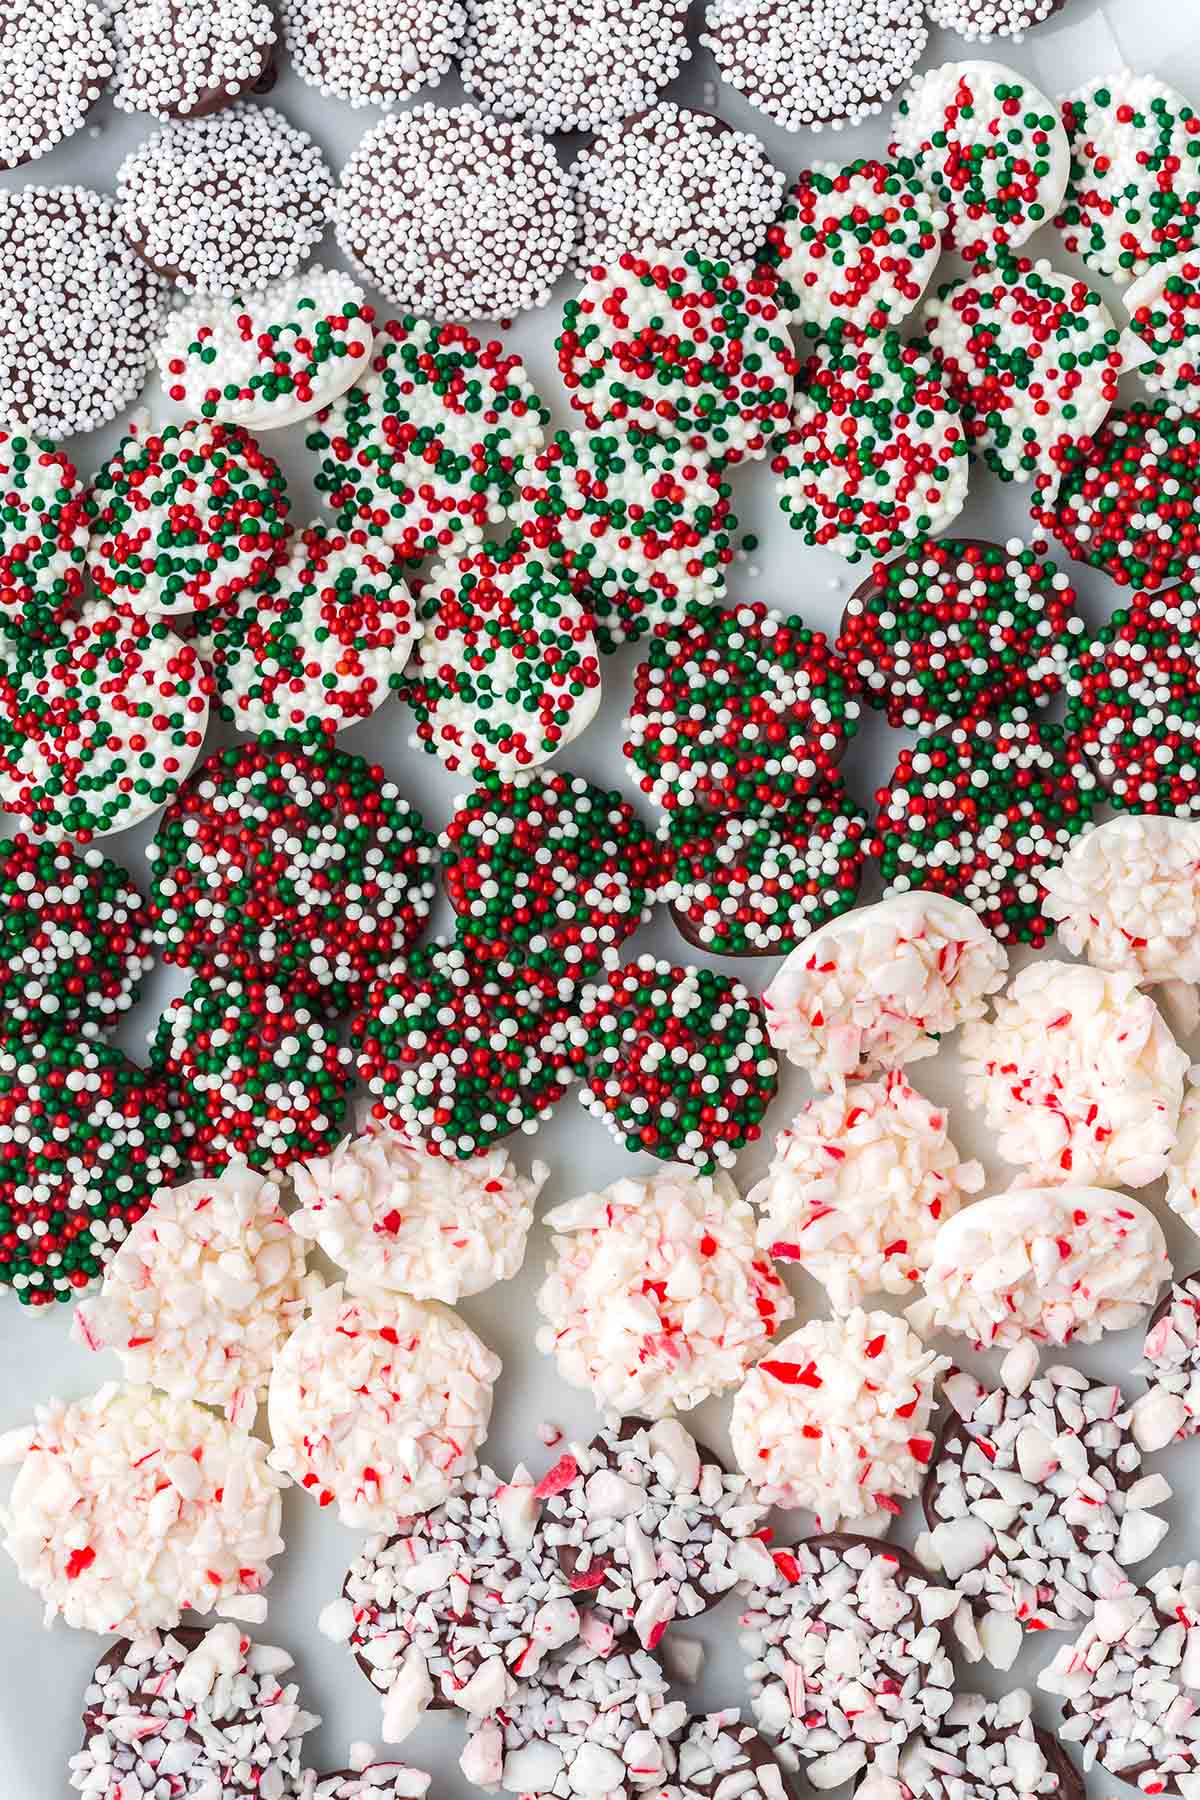
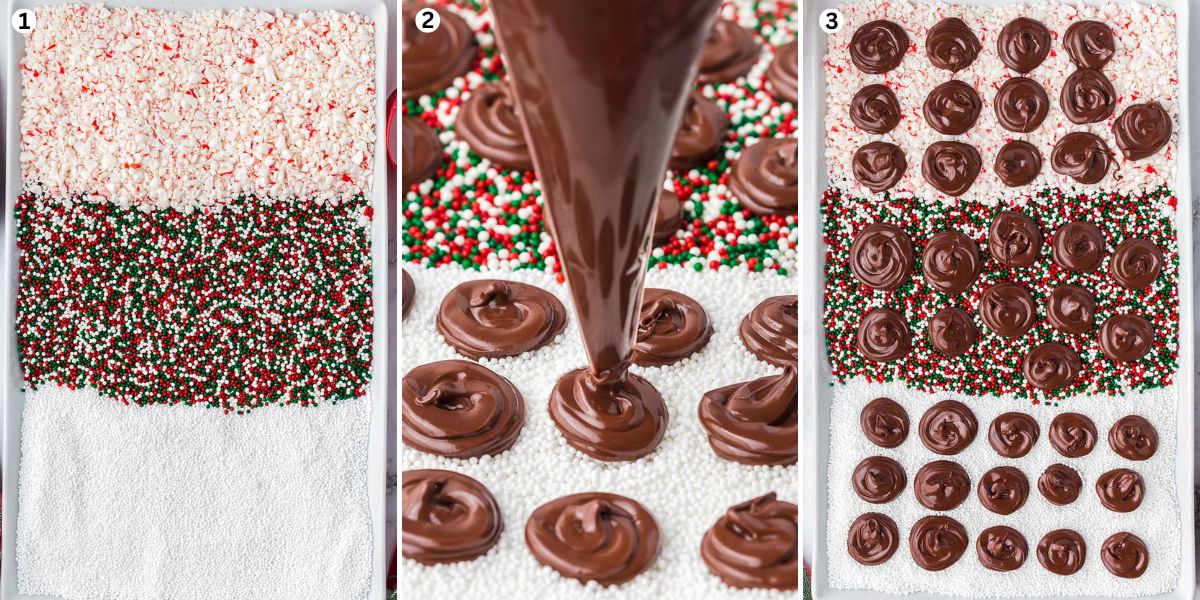
- Start With The Sprinkles: Arrange your sprinkles into 3 separate rows. (Image 1)
- Melt The Chocolate: Microwave one chocolate flavor until melted, according to package instructions.
- Create The Candy: Pipe circles of chocolate over the sprinkles until you have used all of the chocolate or half of the sprinkles. (Image 2)
- Sit And Scoop: Let the chocolate sit on the sprinkles for about 5 minutes or until hardened, then scoop the candy out of the sprinkles. (Image 3)
Pro Tip: You can put them in the refrigerator for a minute to speed this process up. - Repeat: Repeat this process with the other flavor of chocolate.
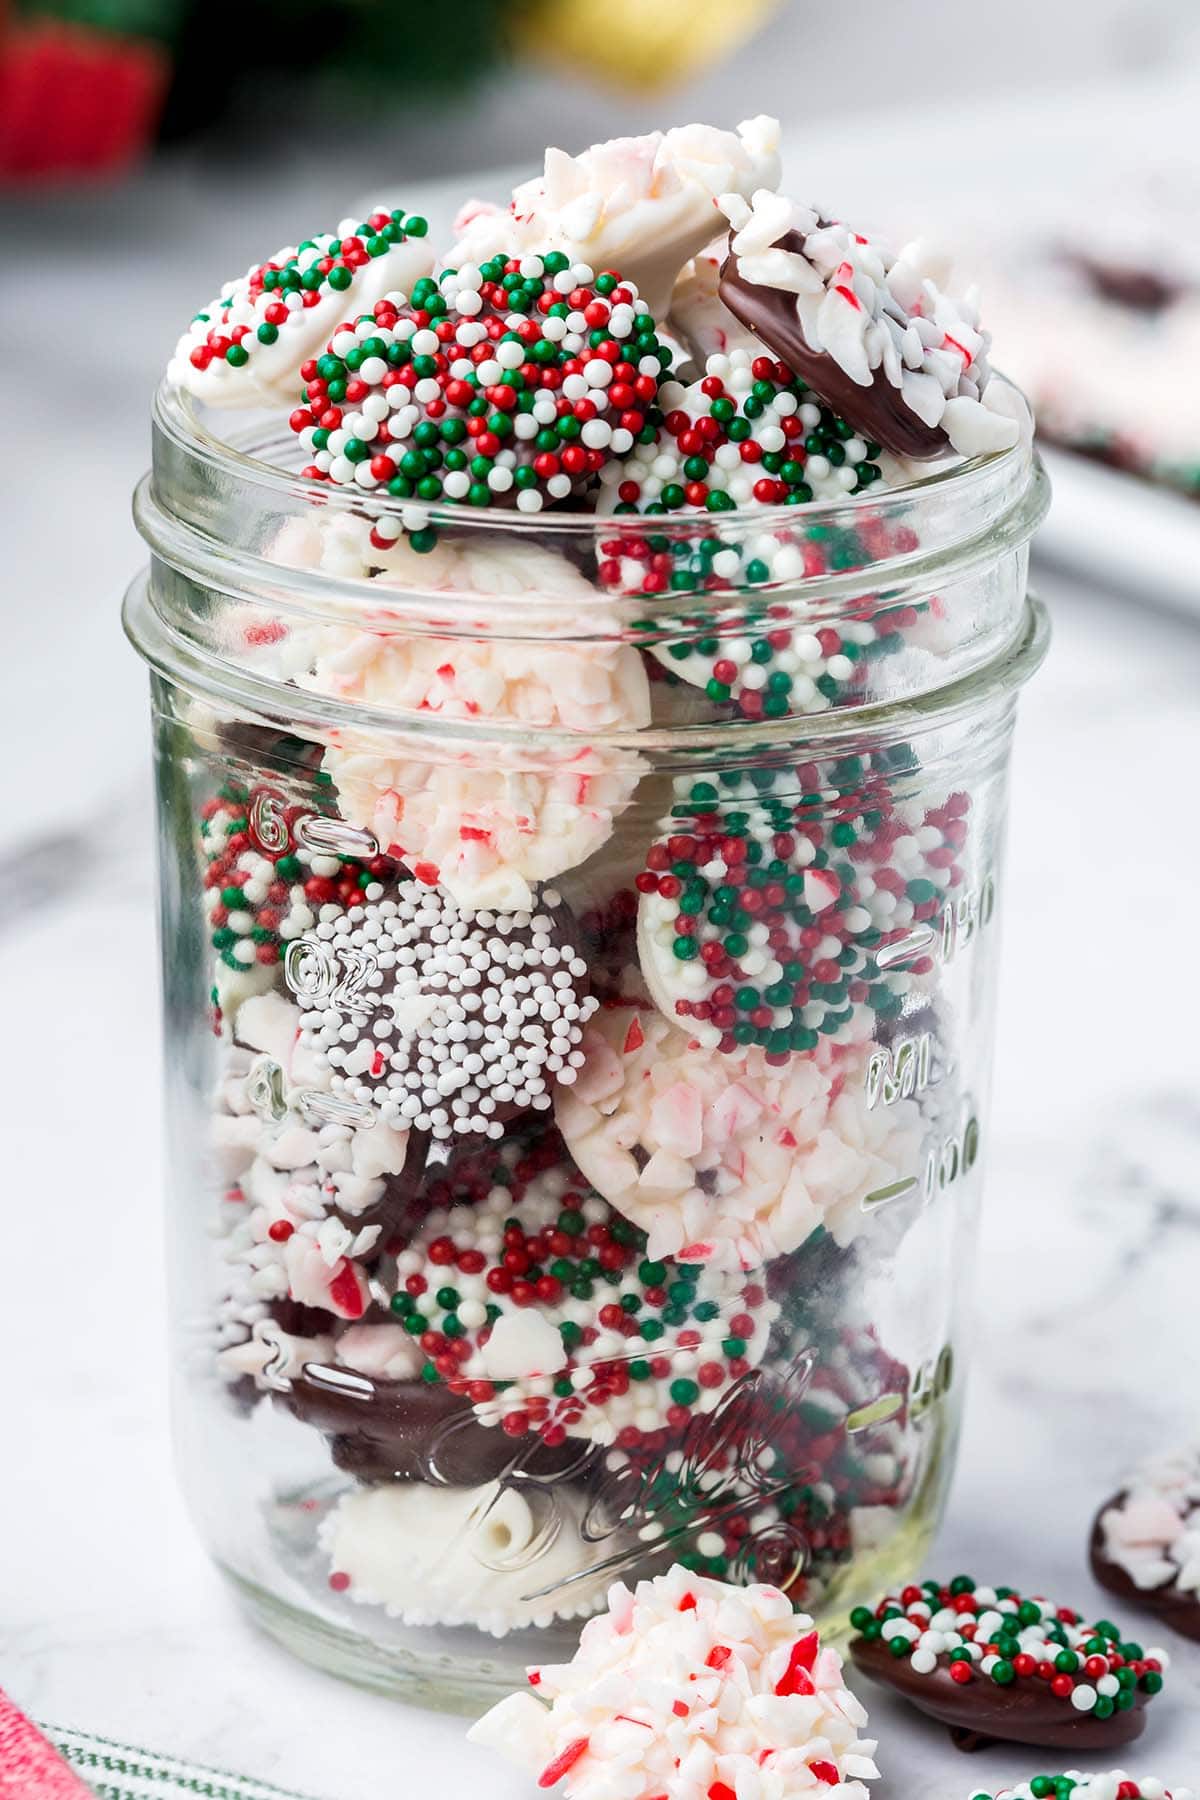
- Serve: Place your candies into a bowl, mason jar, gift bag, or serve them right away. Enjoy!
Tips For Making The Best Chocolate Nonpareils
- Make sure you melt just one flavor of chocolate before making your candy. The chocolate hardens quickly, and you don’t want to melt the second chocolate twice.
- You don’t want to warm these chocolate holiday candies up at all; they will melt and stick together, creating a big mess of sprinkles and chocolate. You should enjoy them at room temperature or chilled!
- These homemade candies do not have to be circle-shaped; they can be any shape you can make with the melted chocolate. Try writing your name with the melted chocolate or make a Christmas tree shape!
How to Store Chocolate Holiday Candy
- To Store: You can store these chocolate holiday candies on your counter in an air-tight container for up to 2 weeks. You can also store them in the refrigerator in an airtight container for 4 weeks. They will be good up to 3 months but will start to taste a bit less fresh after 4 weeks.
- To Freeze: You can freeze these little candies in an airtight container for up to 5 months.
More Easy Holiday Recipes
More Christmas Treats
- Christmas Chocolate Bark
- Candy Cane Sleighs
- Hot Chocolate on a Stick
- Sugared Cranberries
- Grinch Cake
- Grinch Hot Chocolate
- Christmas Marshmallow Pops
- Christmas Jello Balls
- Hard candy
If you tried this Chocolate Christmas Candy Recipe or any other recipe on my website, please leave a 🌟 star rating and let me know how it went in the 📝 comments below. Thanks for visiting!!!

Chocolate Christmas Candy
Ingredients
- 2 cups semi-sweet melting chocolates
- 2 cups white chocolate melting wafers
- ½ cup white non-pareil sprinkles
- ½ cup red, green, and white non-pareil sprinkles
- ½ cup crushed candy canes
Instructions
- Prepare the sprinkles. Arrange your sprinkles and crushed candy into 3 separate rows about ¼ inch deep. I used a serving dish with high edges. You can also use 3 separate plates if that makes things easier for you!½ cup white non-pareil sprinkles, ½ cup red, green, and white non-pareil sprinkles, ½ cup crushed candy canes
- Melt the chocolate. In a microwave-safe bowl, melt one chocolate according to package instructions. Make sure you melt just one before using it because the chocolate hardens very fast, and you don’t want to have to melt the second chocolate twice.2 cups semi-sweet melting chocolates
- Make the candy. Transfer the melted chocolate to a piping bag or a zip lock bag with a small hole cut in the tip. Pipe a circle about ½ inch in diameter over the sprinkles. Repeat this until you have used all of the chocolate or half of the sprinkles are used.
- Remove the candy. Let the chocolate sit on the sprinkles for about 5 minutes or until they are hardened. You can put them in the refrigerator for a minute to speed this process up. Once hardened, use a fork to scoop the candy out of the sprinkles.
- Repeat. Repeat this process with the remaining flavor of chocolate, starting with the heating process.2 cups white chocolate melting wafers
- Finish. Place your candies into a bowl, mason jar, or gift bag. You can package them as gifts or serve them right away!
Jenn’s Notes
- To Store: You can store these chocolate holiday candies on your counter in an air-tight container for up to 2 weeks. You can also store them in the refrigerator in an airtight container for 4 weeks. They will be good up to 3 months but they will start to taste a bit less fresh after 4 weeks.
- To Freeze: You can freeze these little candies in an airtight container for up to 5 months.
- Make sure you melt just one flavor of chocolate before making your candy. The chocolate hardens very fast and you don’t want to have to melt the second chocolate twice.
- You don’t want to warm these chocolate holiday candies up at all; they will melt and stick together creating a big mess of sprinkles and chocolate. You should enjoy them at room temperature or chilled!
- These homemade candies do not have to be circle-shaped; they can be any shape that you can make with the melted chocolate. Try writing your name with the melted chocolate or make a Christmas tree shape!


Fabulous x