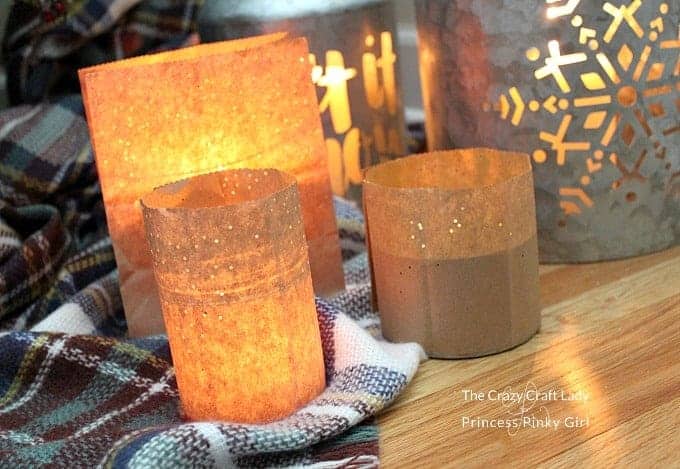
Learn how to make a simple winter luminary craft from brown paper bags, perfect for winter nights. These DIY Paper Bag Luminaries craft will cozy up any space at night.
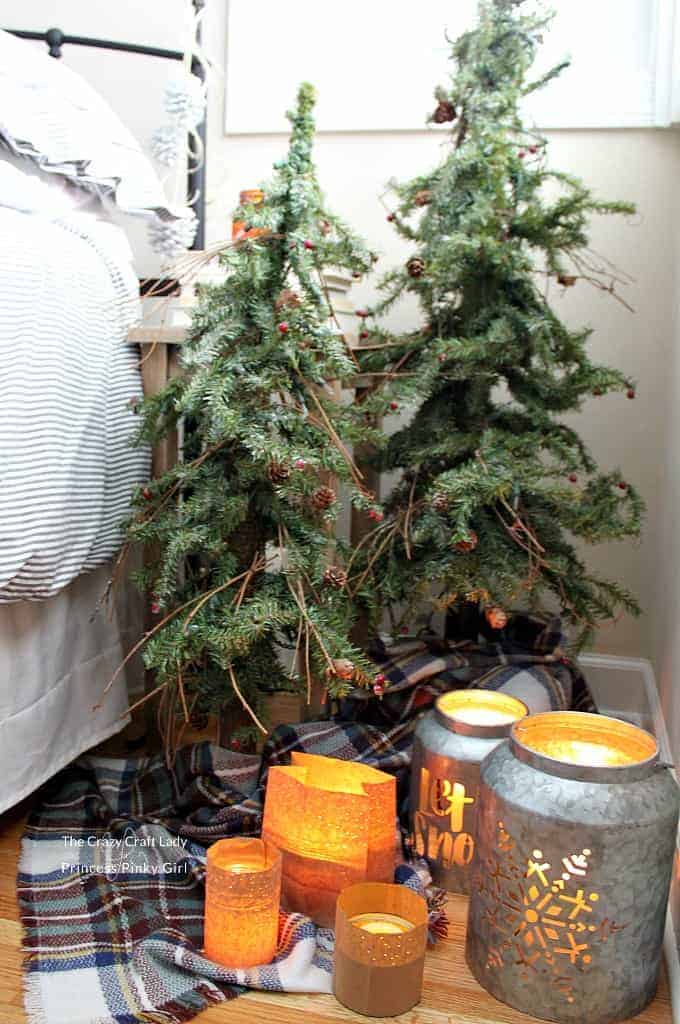
When winter has arrived, so have longer winter nights. Luminaries and lanterns are a fun (and a bit trendy) way to cozy up your space for winter. With this upcycled craft, you can make your own paper bag luminaries with supplies that you can probably already find in your kitchen cupboards.
Hi guys! I’m Aimee, and I blog over at The Crazy Craft Lady where I strive to make everyday creative with simple crafts, easy family-friendly recipes, organizing solutions, and DIY decor projects.
Thanks so much to Jenn for letting me stop in today and share this guest post – Paper Bag Luminaries. They are a super easy little winter luminary craft. I hope you all enjoy it!
For the full list of supplies and comprehensive
instructions, please see the how-to at the end
of this post. Before you scroll, there’s important
stuff in the blurb!
Do you love Aimee’s crafts? Check out some of her other amazing crafts that she has contributed to Princess Pinky Girl, like her tutorial on How to Make a Glass Jar with Any Image or her DIY Snow Globes.
Brown paper bags are good for more than just sack lunches. They’re also an incredibly versatile craft supply. They are the perfect weight for these luminary bags. They also make great planter bags for your indoor house plants or spring arrangements.
So grab the kids or a friend, and whip up this fun and easy winter craft. Feel free to get creative with the patterns of your hole punches or the size of your luminaries.
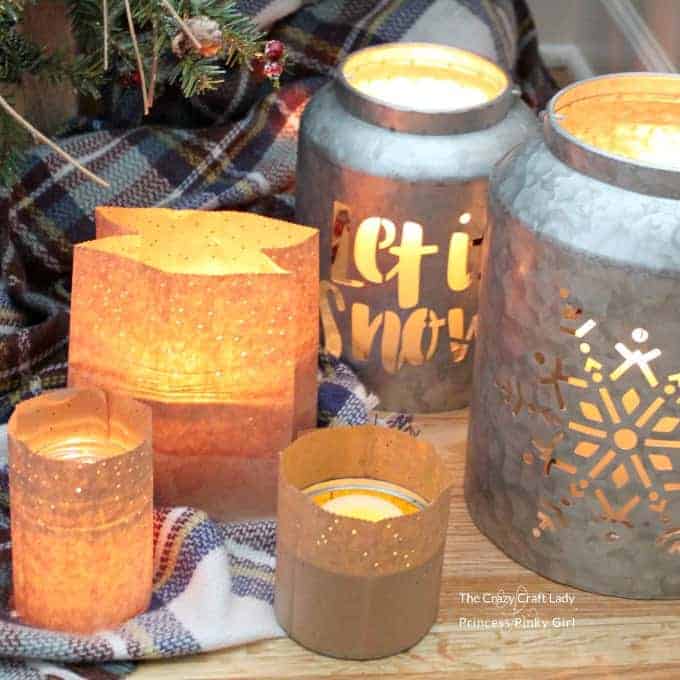
You can make them as small as a tea light, or as large as any candle that fits inside a brown bag.
Love this DIY Paper Bag Luminaries Project?
Tag us!If you make our Paper Bag Luminaries,
Snap a pic and hashtag it #princesspinkygirl
We love to see your creations on Instagram, Facebook, & Twitter!
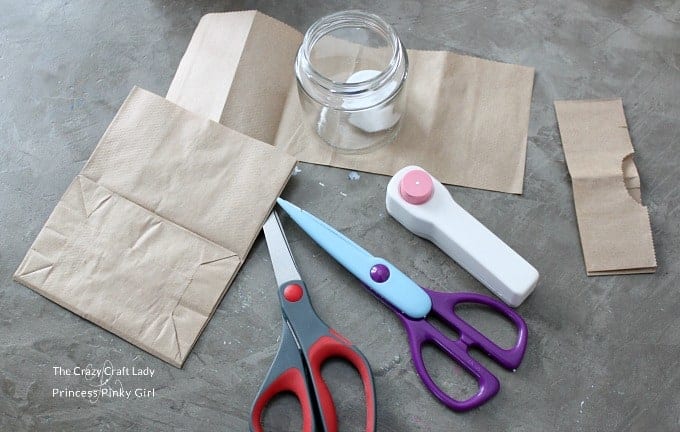
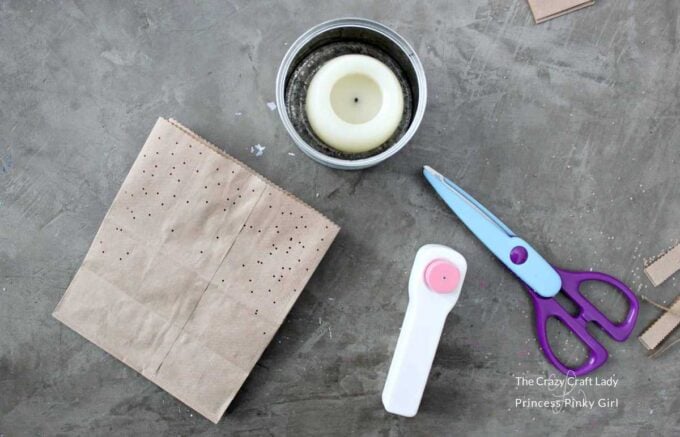
Supplies Needed to make DIY Paper Bag Luminaries
- Brown paper bags – like for your school lunches
- Scissors
- Scalloped craft scissors
- Small hole punch
- Double-sided tape
- Various small glass jars or tin cans, washed and dried
- Tea light candles (or electric votive candles)
Directions – How to Make DIY Paper Bag Luminaries
- Lay a brown paper bag flat on your work surface.
- Roughly measure the height of your glass jar/tin can.
- Trim off the top, uneven edge of the paper bag.
- Then cut off a piece of the paper bag that will be tall enough to cover the whole glass jar.
- Cut the paper bag along the seam, so that you have a strip of brown paper to work with.
- Cut the strip of paper down to size, about 1 inch longer than the diameter of your glass jar.
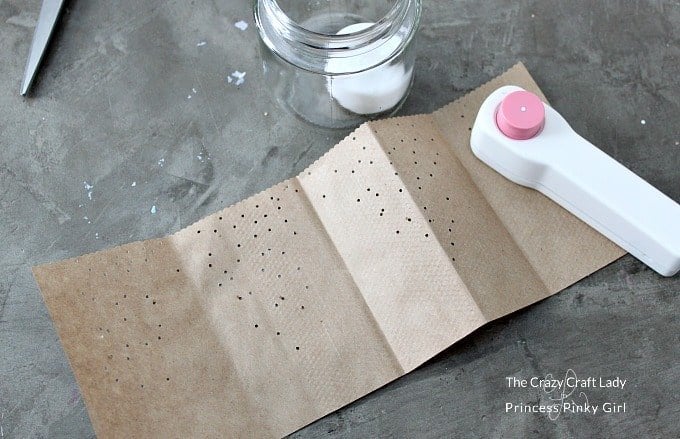
- Using the scalloped scissors, trim one long edge of the brown paper.
- Then punch holes with the mini hole punch. Concentrate the majority of punched holes closest to the scalloped edge.
- Space the mini hole punches more sporadically towards the other long end of the paper.
- Wrap the piece of brown paper around the glass jar, and secure with double-sided tape.
- Light a tea light inside the glass jar. Be sure that the glass jar is taller than the flame of the tea light – or use an electric candle. Safety first!
If you have a large electric candle, you can use the bottom of the brown paper bag itself, then scallop and hole punch like the other luminaries.
Didn’t these turn out great? I love the addition to my winter bedroom décor.

Here are a couple more simple, upcycled décor projects that I think you’ll enjoy:
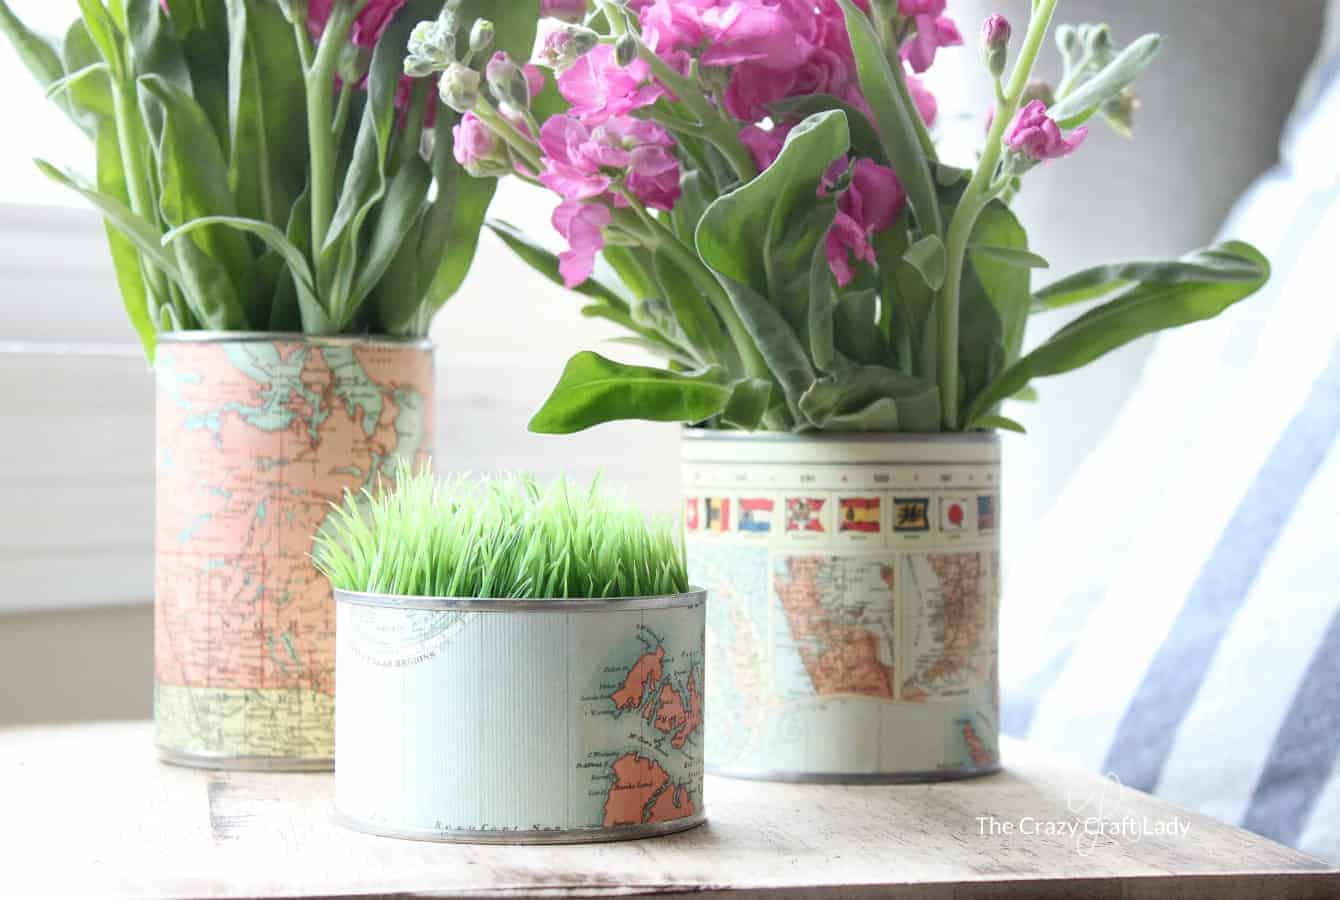
Tin Can and Map Vases – Try this upcycling craft and make tin can vases. Use map paper to spruce up empty cans and make a beautiful floral centerpiece.
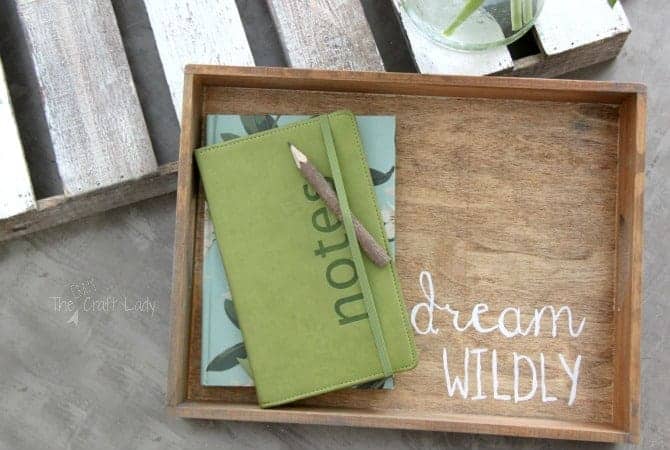
DIY Decorative Tray – Upcycle an empty wooden toy box with a bit of stain and chalk paint for a decorative tray.


Love this idea! It must be fun! I had a star-shaped hole punch