This post may contain affiliate links. Please read our disclosure policy.
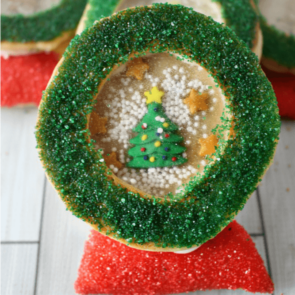
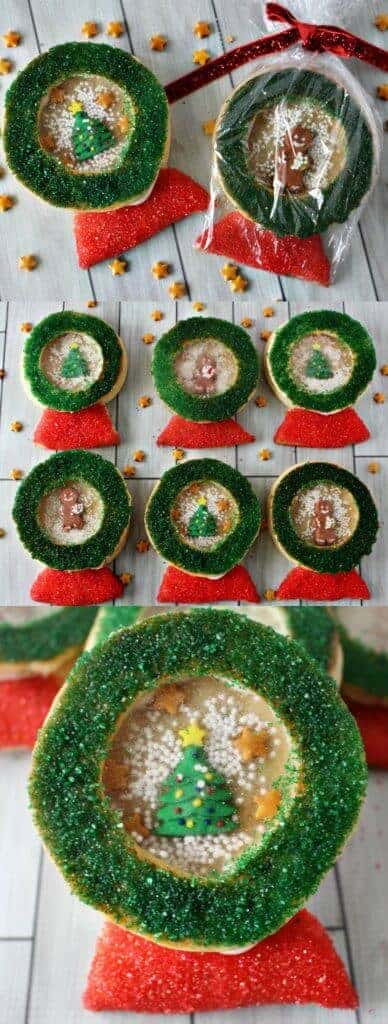
Snow Globe Cookies take Christmas Cookies to the next level – they are cute, delicious and even the glass is edible!!
I’ve said it before and I will say it again, I really am a horrible cook. Don’t get me wrong, I have gotten better over the years.
BUT what I do totally rock at is food crafting! I love creating cute projects with food – preferably dessert! When my sister, Julie, came home for Thanksgiving (and yes, Julie, it is coming home, because this is where you are from) we wanted to make some Christmas Cookies for Princess Pinky Girl.
BUT, not just any Christmas Cookies -we wanted to make something TOTALLY unique and different – Presto – Snow Globe Cookies were born.

Now, we could have just cut a sugar cookie in the shape of a snow globe, put some pretty frosting on it and called it a day – but heck no, that is not how we operate!
We needed to take it to the next level – I wanted it to have “glass”, just like a snow globe. So after some experimenting, we did it – we created an actual snow globe cookie with edible glass candy!
Best of all, it was super easy to do!!
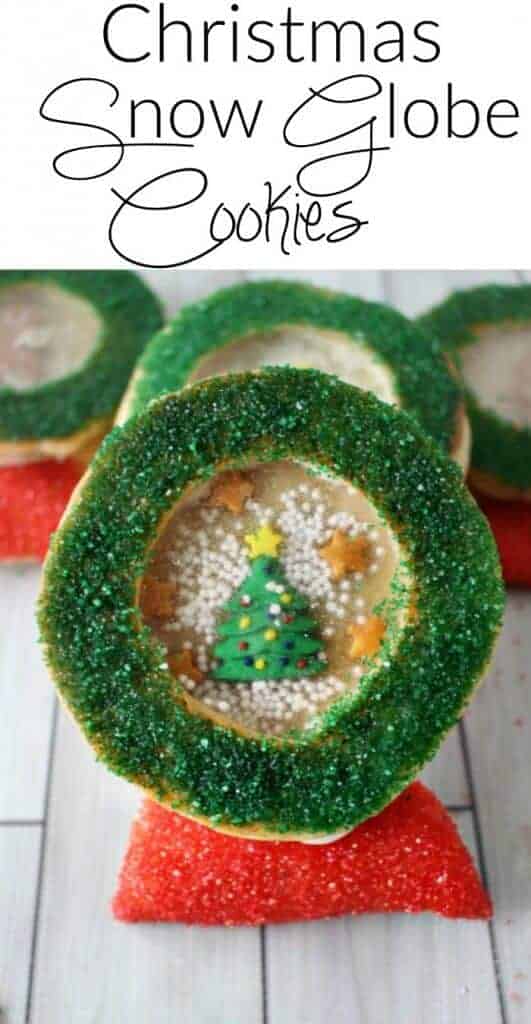
See the Full Instructions and How-To Video Below:
Here is what you need:
- Your favorite sugar cookie recipe (this is my absolute favorite, go to sugar cookie recipe! They are perfect for this sort of food craft because they don’t spread – Wholefully.com.
- Isomalt crystals (this is what you use for the glass candy)
- Lite corn syrup
- Red Decorating Sanding Sugar
- Green Decorating Sanding Sugar
- Christmas Icing Decorations – Get Trees Here! – Get Gingerbread Men Here!
- White nonpareils
- Gold star sprinkles
- White icing
- Silicon Mat – best thing ever!
- Circle cookie cutters (one big, one small)
Here is what you do:
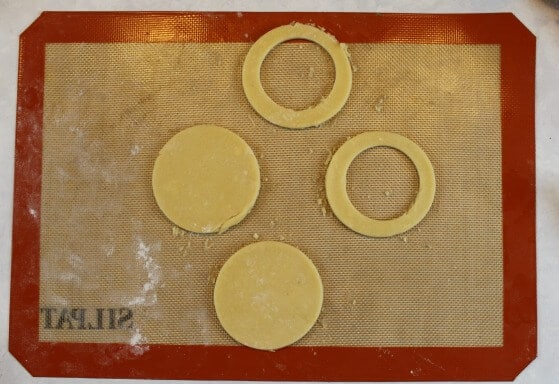
- Roll out your sugar cookies dough – I divided mine up into four and wrapped them in plastic wrap and kept the dough that I wasn’t working with in the refrigerator. It is much easier to work with when it is cold.
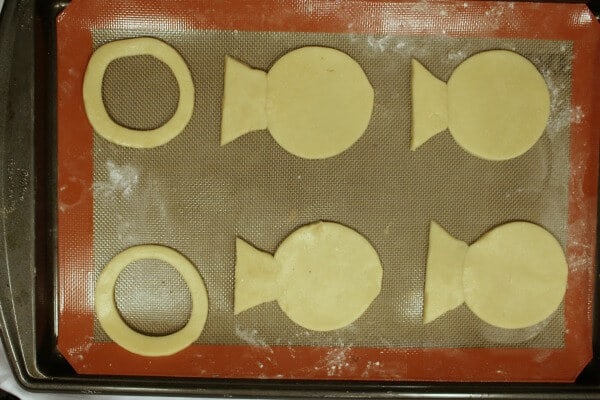
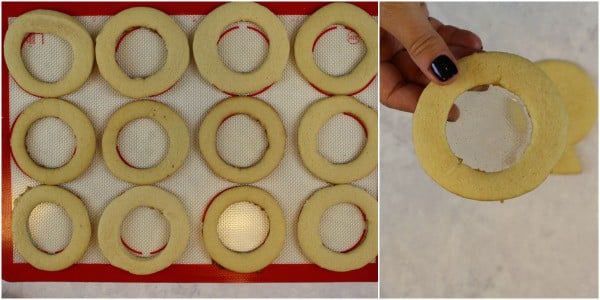
- Cut out circles for the globe. In half of the circles, cut a smaller circle out within the larger one (for the window).
- Cut out a base for each set of circles and press the base to the full circle.
- Bake the cookies according to the recipe directions (until they just start to get golden brown edges)
- Let cool completely.
- Place the cookies on the Silicon Mat.
- Melt the Isomalt crystals according to the directions on the package. Pour the melted candy into the center of the cut out circle and let harden.
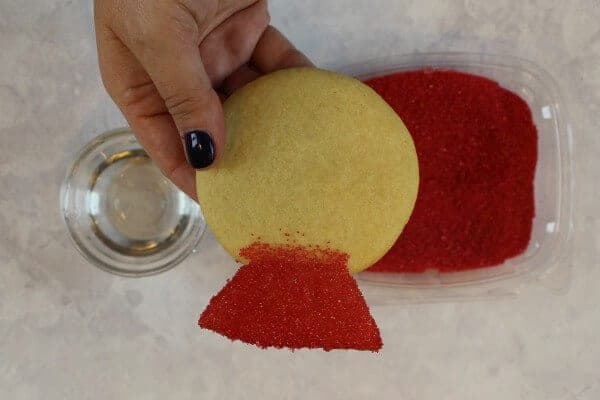
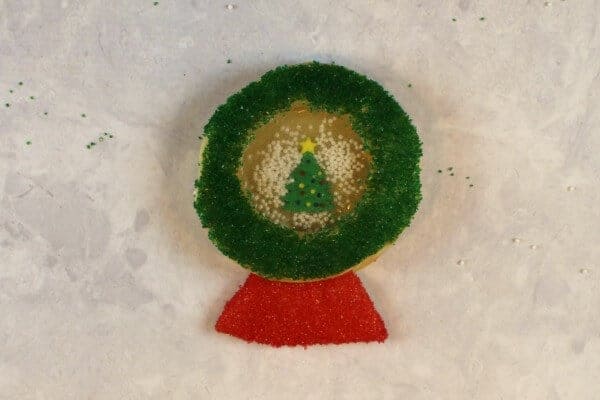
- Using a pastry brush lightly brush corn syrup on the base of the “snow globe” and immediately dip in the red decorating sand. Lightly brush corn syrup around the side of the cookie with the candy window (careful to not get the syrup on the window” and immediately dip into the green decorating sand.
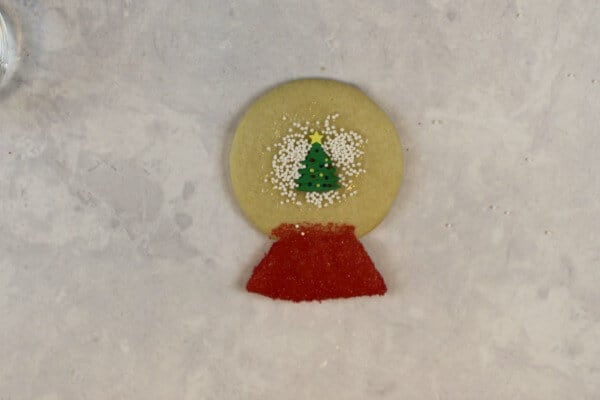
- Brush a little syrup on the base cookie and place the Christmas decorations of your choice in the middle (tree, gingerbread, stars, etc.) and sprinkle with the white nonpareils “snow”.
- Use the white icing to “glue” the two cookie parts together!
- Let dry and enjoy!


Is there a printable version of this recipe? Maybe I’m missing it on this page?
I am making the cookies and when you “glue” the 2 cookies together using the icing I have a gap because the tree is sticking up, any suggestions or is there supposed to be a gap
Sorry – just saw this comment – yes, there will be a little gap. I filled in with frosting!
Backtoherroots site doesn’t exist anymore so, no sugar cookie recipe to be had there.
Looks like she changed her site to Wholefully – I just updated the post – but here is the link https://wholefully.com/perfect-frosted-sugar-cookies/
These are so fun , I can’t wait to try
As I have never worked with Isomalt, I am wondering if you have any other suggestions on what to use for the clear “glass” effect.
Thanks in advance for the help.
Kim
It’s really easy to work with!! I promise. I don’t really know anything other that would give the same look – you could just leave it open?
Bee-U-tiful Snow Globe Cookies. To get your exact results, “What inch size are your big and small round cutters?” Cant tell from pictures.
Thanks a bunch of snowballs!
It would be so much cooler if you only put the corn syrup on the little tree so that the “snow” would be able to move around like a real snow globe. 🙂