
This post may contain affiliate links. Please read our disclosure policy.

Keto pickle chips are one of those snacks I make when I want something crunchy and salty but do not want to mess with anything complicated. I layer pickle slices with cheese, slide them into the oven, and a few minutes later they come out golden and crisp. I make these even when I am not eating low carb because they are just that good.

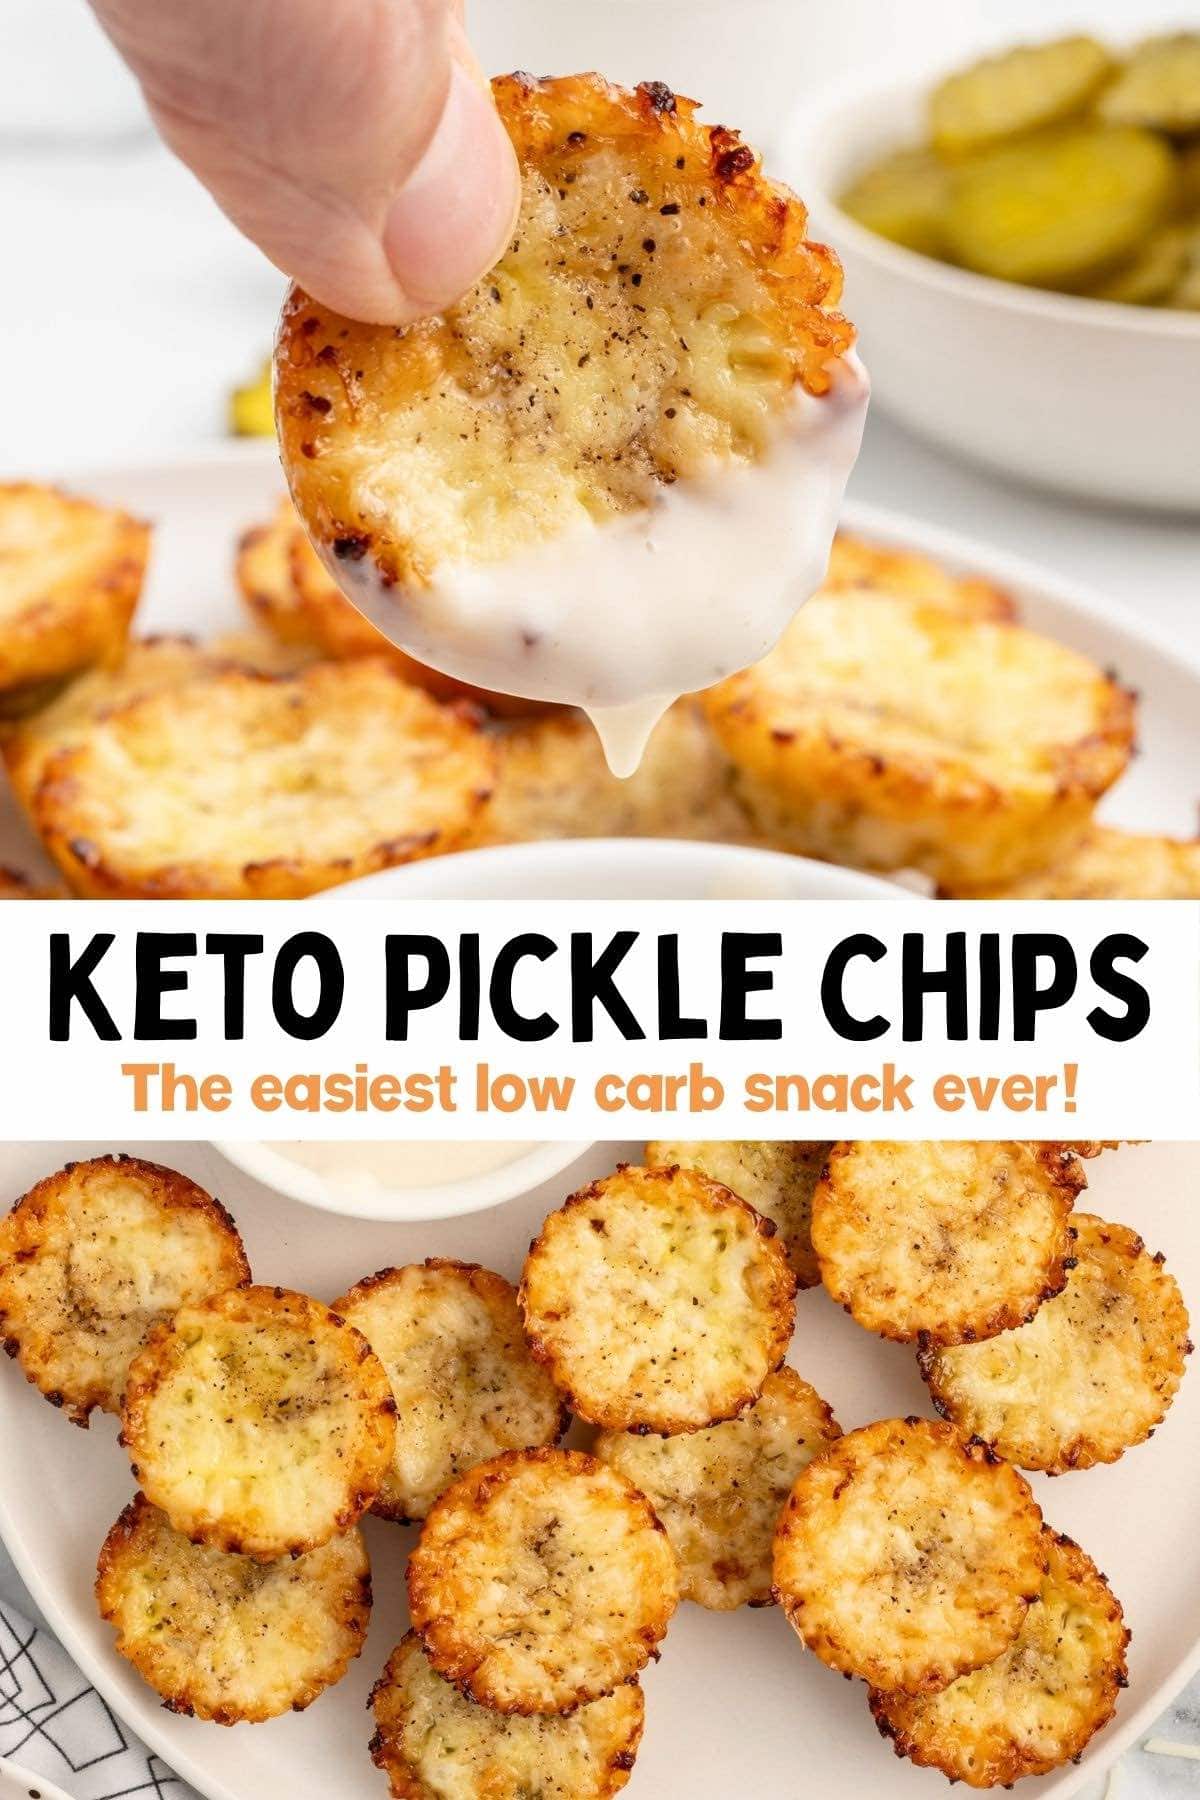
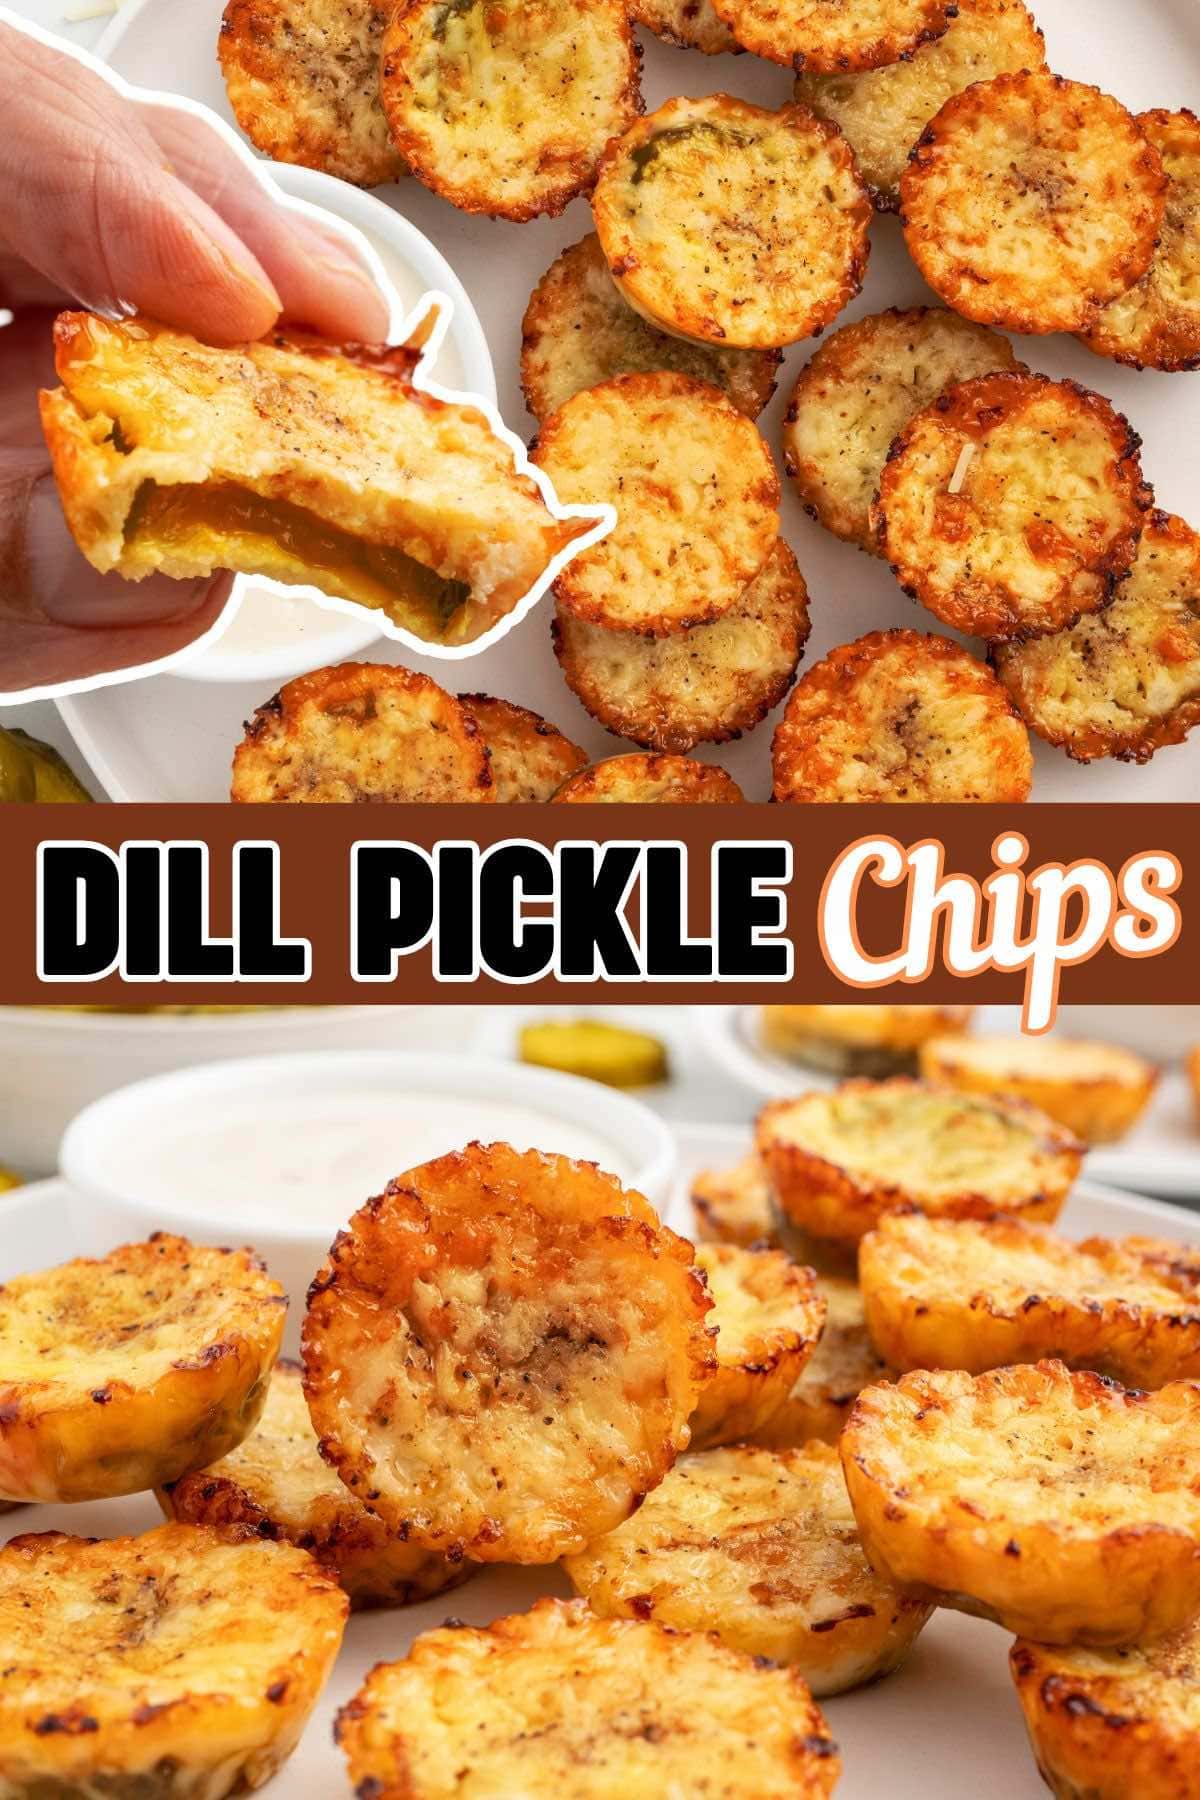


The outside gets perfectly crunchy while the pickle stays soft and tangy in the middle. I also love that the crunch comes from cheese instead of breading, so I get that fried pickle vibe without the extra carbs or oil.
Looking for some more low carb recipes? Try my Egg Roll in a Bowl and Bacon Wrapped Pickles – family approved and often requested!
Ingredients Notes

- Cheddar jack cheese: You can also use Monterey Jack, mozzarella, sharp cheddar, or a mix of cheeses. Avoid pre-shredded cheese when possible since it does not melt as evenly.
- Dill pickle slices: These may also be labeled as hamburger dill chips. Bread and butter pickle slices can be used if you prefer a slightly sweeter flavor, though the chips will be less tangy.
- Dry ranch dressing mix: You can substitute a blend of salt, black pepper, garlic powder, and onion powder if you prefer not to use ranch seasoning.
- Ranch dressing for dipping: Spicy mayo, sugar-free ketchup, cheese sauce, or even my dill pickle dip works well.
See the recipe card for full information on ingredients and quantities.

How to Make Keto Pickle Chips
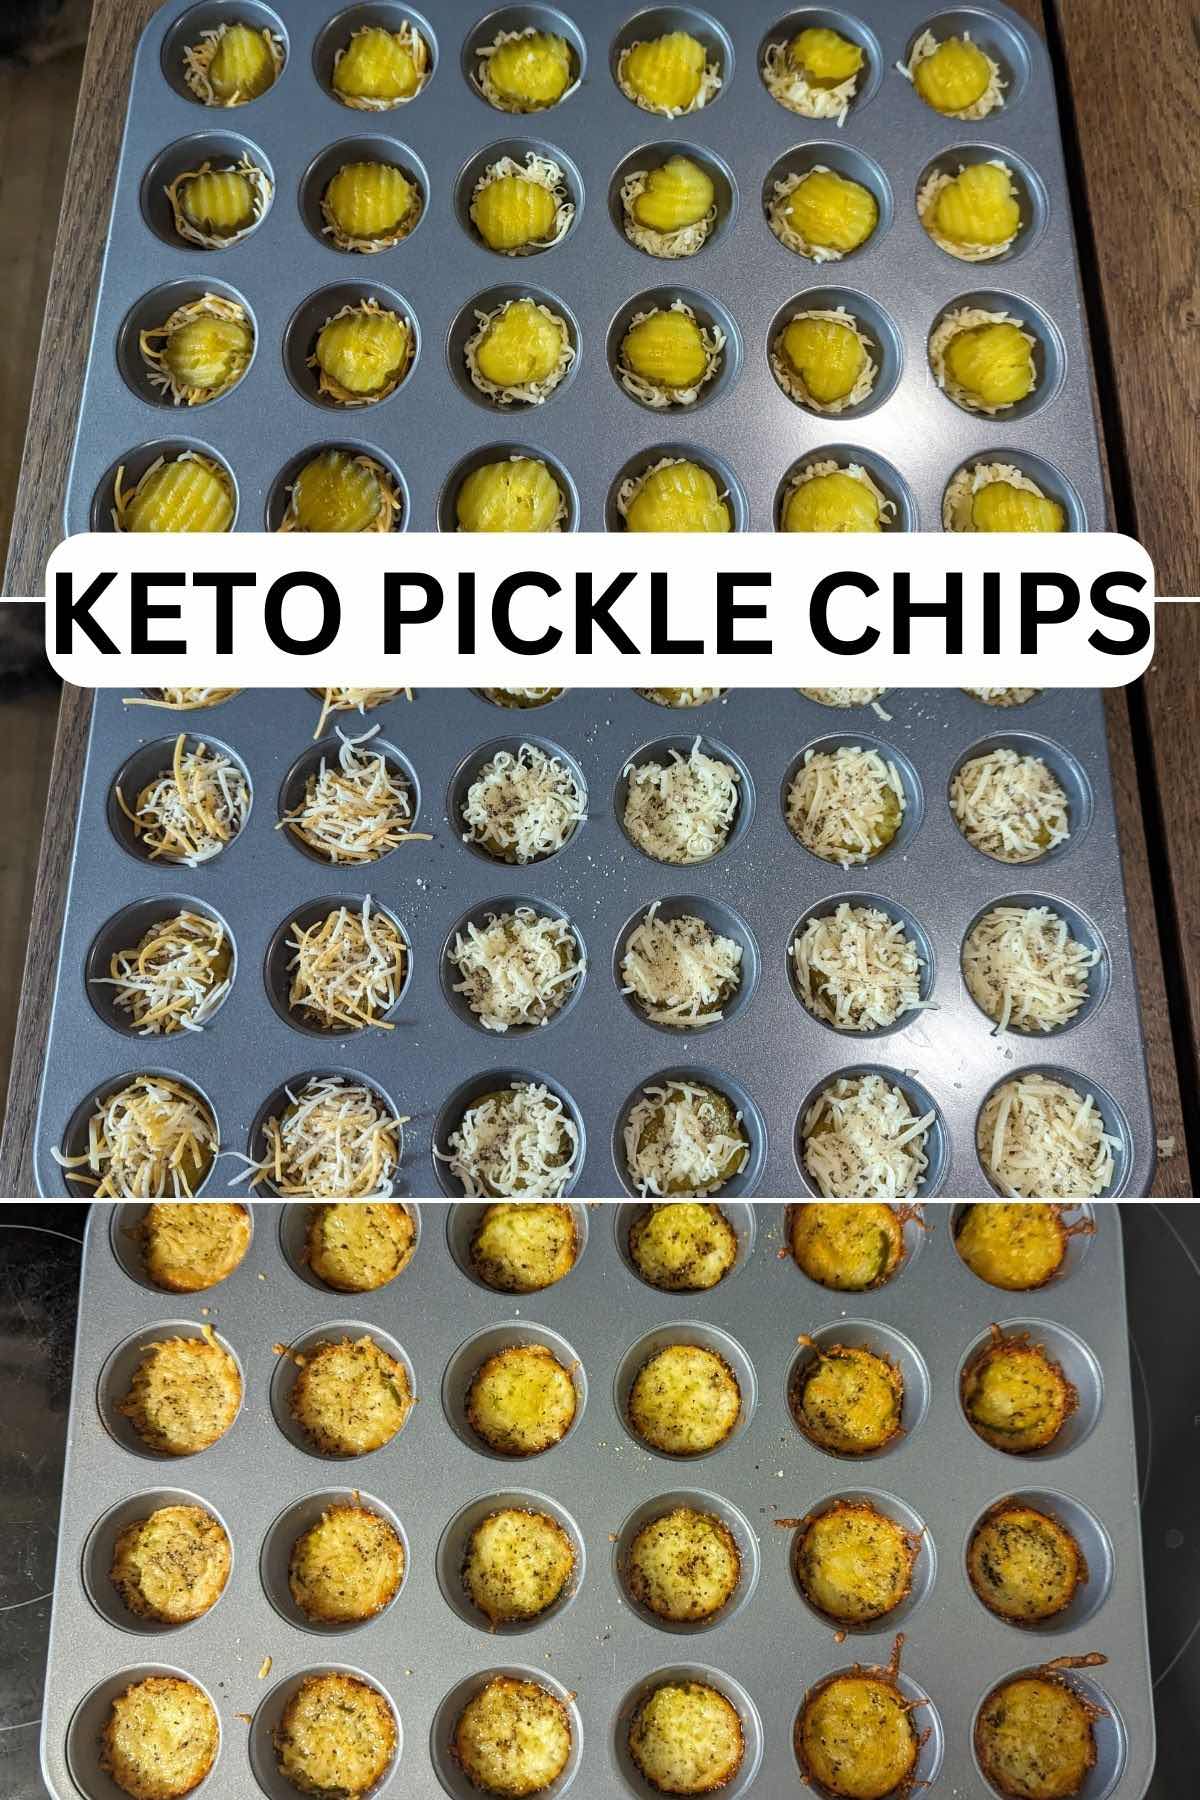
- Prep the pan and pickles: Preheat the oven to 375°F and lightly spray a muffin pan with avocado or olive oil spray. Pat the pickle slices dry with a paper towel to remove excess moisture.
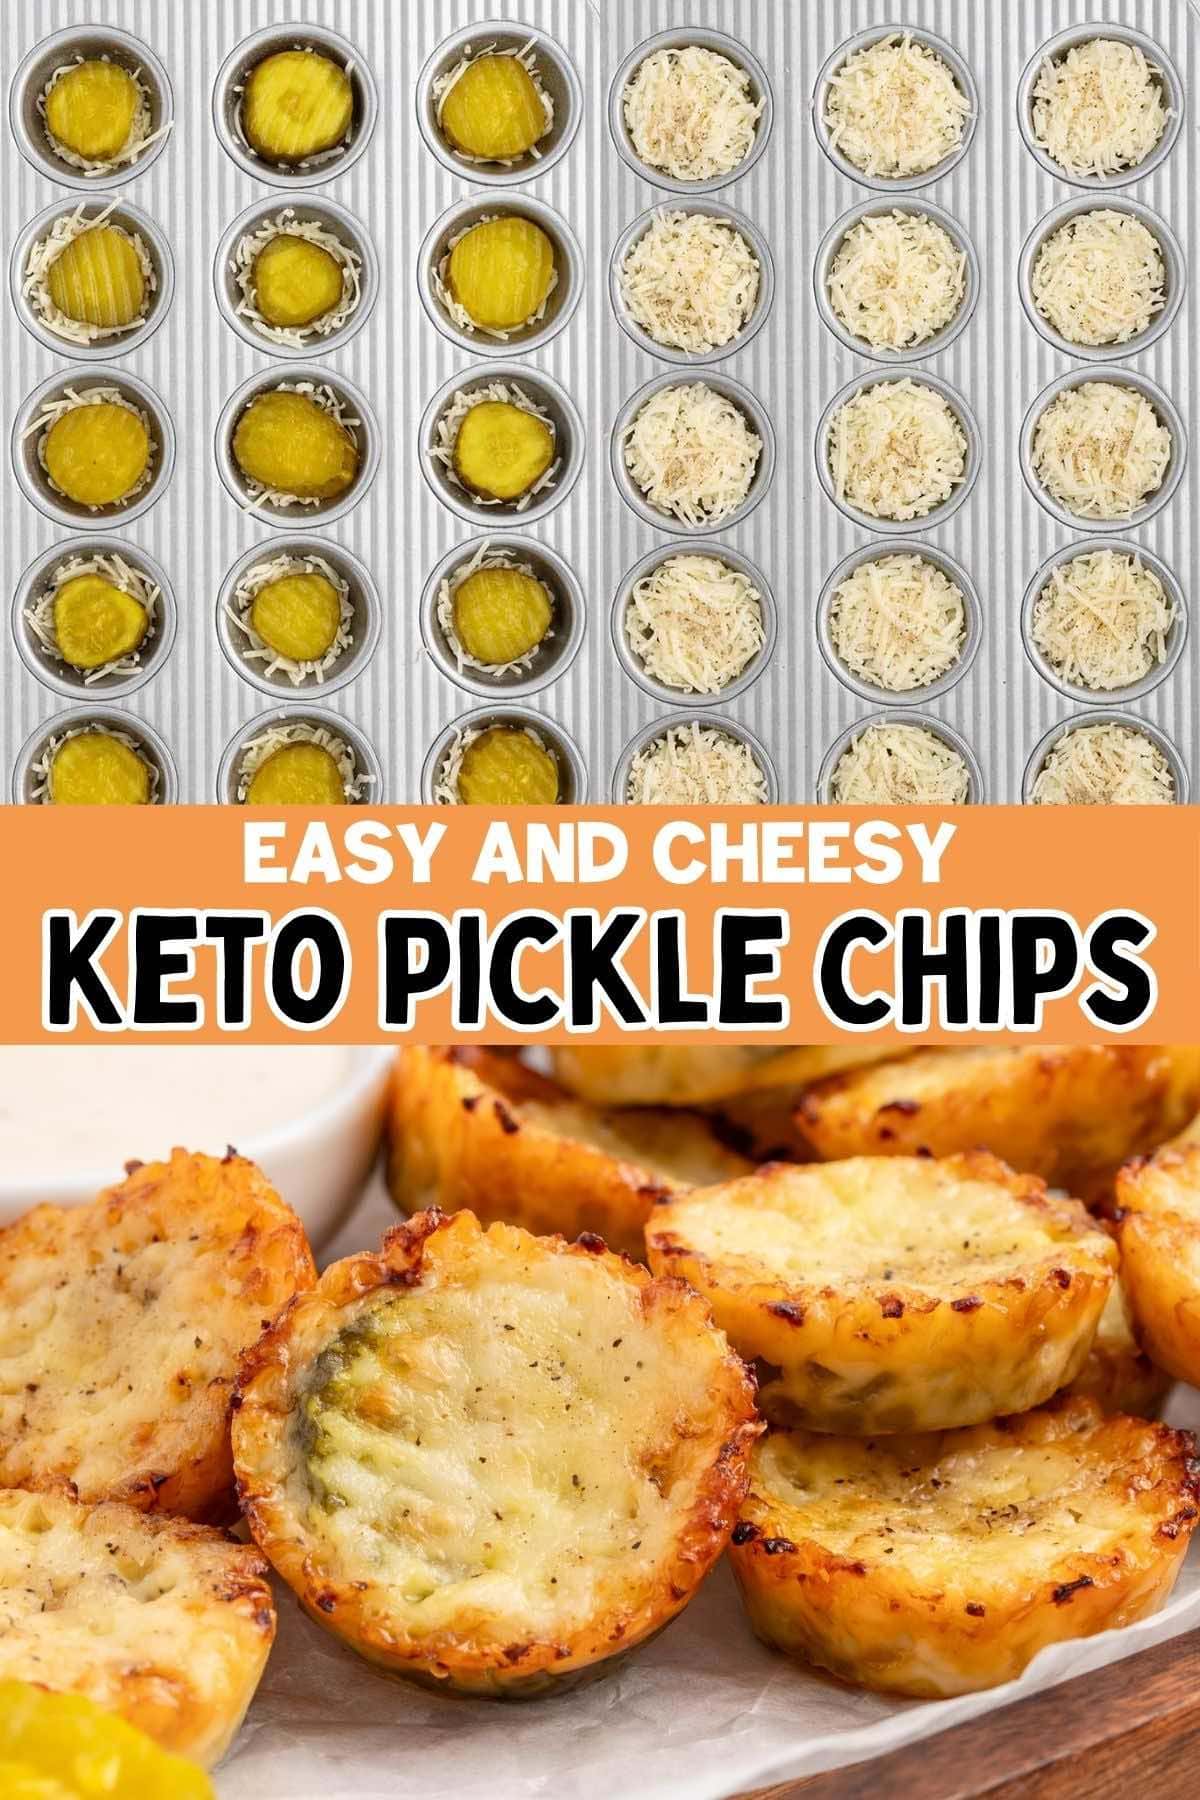
- Add the first cheese layer: Sprinkle a small amount of shredded cheese into the bottom of each muffin cup.
- Add pickles and seasoning: Place one pickle slice on top of the cheese and gently press it down. Sprinkle a small pinch of dry ranch seasoning over each pickle.

- Top with cheese and bake: Add more shredded cheese on top of each pickle slice. Bake for about 12 minutes or until the cheese is bubbling and the edges are golden brown. Bake an extra minute or two if you prefer darker, crispier chips.
- Cool and serve: Let the pickle chips rest for 1 to 2 minutes, then transfer to a cooling rack or paper towel-lined plate. Gently blot excess oil and serve with ranch dressing.


Frequently Asked Questions
This usually happens when there is too much moisture from the pickles or the cheese didn’t bake long enough. Make sure to pat the pickles dry before baking and bake until the edges are golden brown.
Hamburger dill chips are ideal because they are evenly sized. Whole pickle slices or thicker cuts may stay soft in the middle.
Not at all! Cheese naturally releases oil as it melts. Just blot the chips with a paper towel and enjoy.
Look for bubbling cheese with golden brown edges. If the cheese still looks pale, bake for another minute or two.
Yes, but the cheese may spread more. Using a mini muffin pan helps the chips hold their shape and stay crisp.
Yes! This recipe is naturally gluten free because it doesn’t use breading or flour.
Make Ahead & Storage Instructions
These keto pickle chips are best enjoyed fresh for maximum crispiness.
- Store: Keep leftovers in an airtight container in the refrigerator for up to 2 days.
- Reheat: Place on a parchment-lined baking sheet and bake at 350°F for 2-3 minutes per side until the cheese is crisp. You can also microwave for 25-30 seconds, though the chips may be softer.
- Freeze: Not recommended. Pickles release moisture and the chips lose their crispiness.
- Make Ahead: This recipe is best baked fresh. You can prep the pickle slices and shred the cheese ahead of time, then bake just before serving to keep the chips crunchy.

More Easy Snacks and Appetizers You’ll Love
If you’ve tried this Keto Pickle Chips Recipe or any other recipe on my website, please leave a star rating and let me know how it turned out in the comments below.

Pickle Chips
Ingredients
- 1½ cup freshly shredded cheddar jack cheese
- 12 dill pickle slices (May also be called hamburger dill chips)
- 1 tablespoon dry ranch dressing mix
- Ranch dressing for dipping
Instructions
- Preheat the oven to 375°F. Lightly spray a muffin pan with avocado or olive oil spray.
- Pat the pickle slices with a paper towel to remove any excess pickle juice.12 dill pickle slices
- Sprinkle 1 tablespoon of the shredded cheese into the bottom of each muffin cup.1½ cup freshly shredded cheddar jack cheese
- Place 1 sliced pickle on top of the shredded cheese. Press each pickle into the cheese.
- Sprinkle ¼ teaspoon of the dry ranch seasoning over the pickle slice.1 tablespoon dry ranch dressing mix
- Top pickle slice with 2 teaspoons of the shredded cheese.
- Bake for 12 minutes or until the cheese is bubbling and the edges are golden brown. (You’re wanting the cheese to be a golden brown color, but you can allow the chips to cook for an additional couple of minutes if you like a darker chip)
- Remove from the oven and allow to rest for 1-2 minutes before transferring the pickle chips to a cooling rack. You can also transfer to a paper towel lined plate. Pat the excess oil with a paper towel. (The pickle chips will be quite oily due to the cheese) Serve with the ranch dressing.Ranch dressing
Jenn’s Notes
- Store: Store leftovers in an airtight container in the refrigerator for up to 2 days.
- Reheat: Reheat on a parchment lined baking sheet in a 350°F oven for 2 to 3 minutes per side until the cheese is crisp. You can also microwave for 25 to 30 seconds, though the chips may be softer.
- Freeze: Freezing is not recommended since the pickles release moisture and the chips lose their crispiness.
- Make ahead:This recipe is best enjoyed fresh and is not recommended for making ahead. As the pickle chips sit, the pickles release moisture which softens the cheese and reduces crispiness. If needed, you can prep the pickle slices and shred the cheese ahead of time, then bake just before serving.
- Pat the pickle slices very dry before baking to help the cheese crisp instead of steaming
- Use low moisture cheeses for the best texture and crisp edges
- Let the chips cool slightly before removing them from the pan so they hold together
- A mini muffin pan works best to keep the cheese from spreading
- For extra crispiness, allow the chips to rest on a wire rack for a few minutes before serving.


looks delicious. i can tell by the recipe that these are good. can’t wait to make them.
Can’t wait to make this.
Haven’t tried this yet but was wondering how they taste once they cool off or sitting for awhile