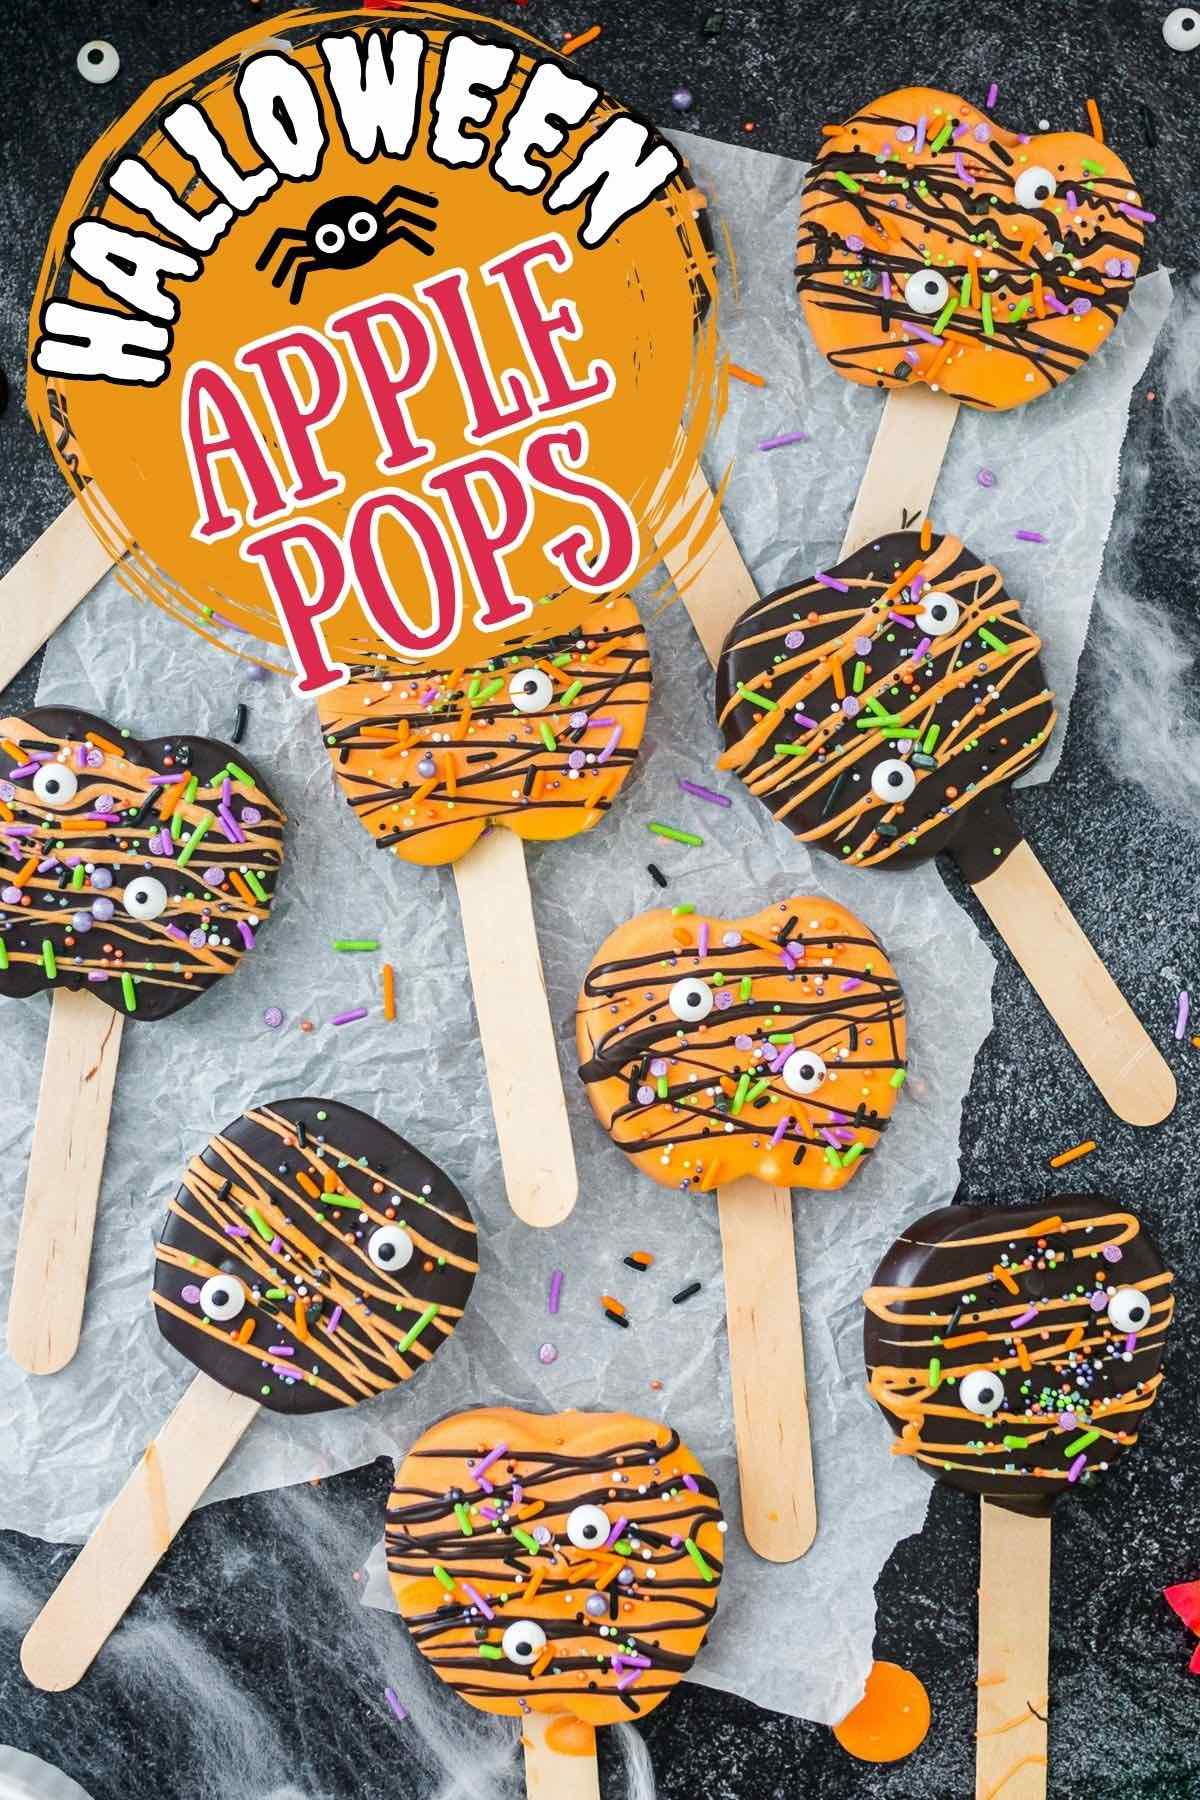
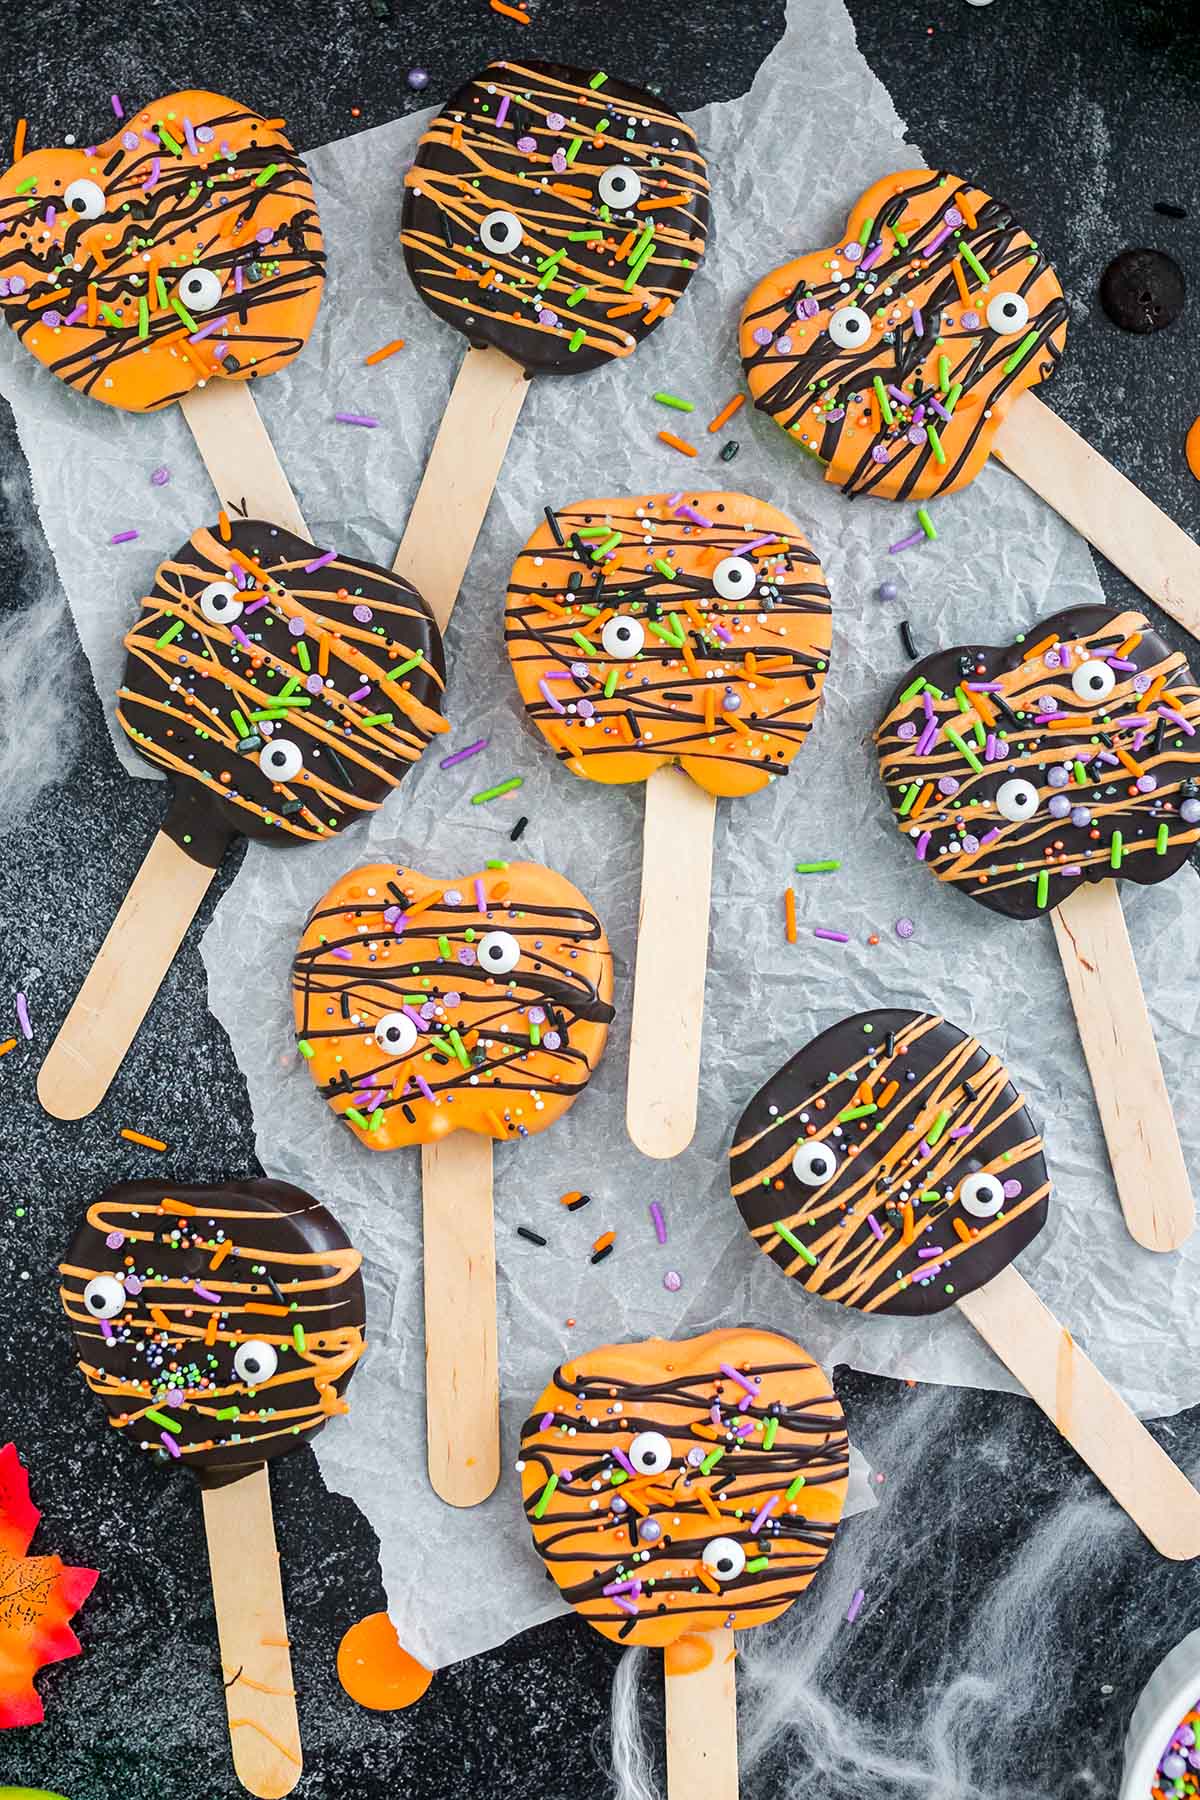
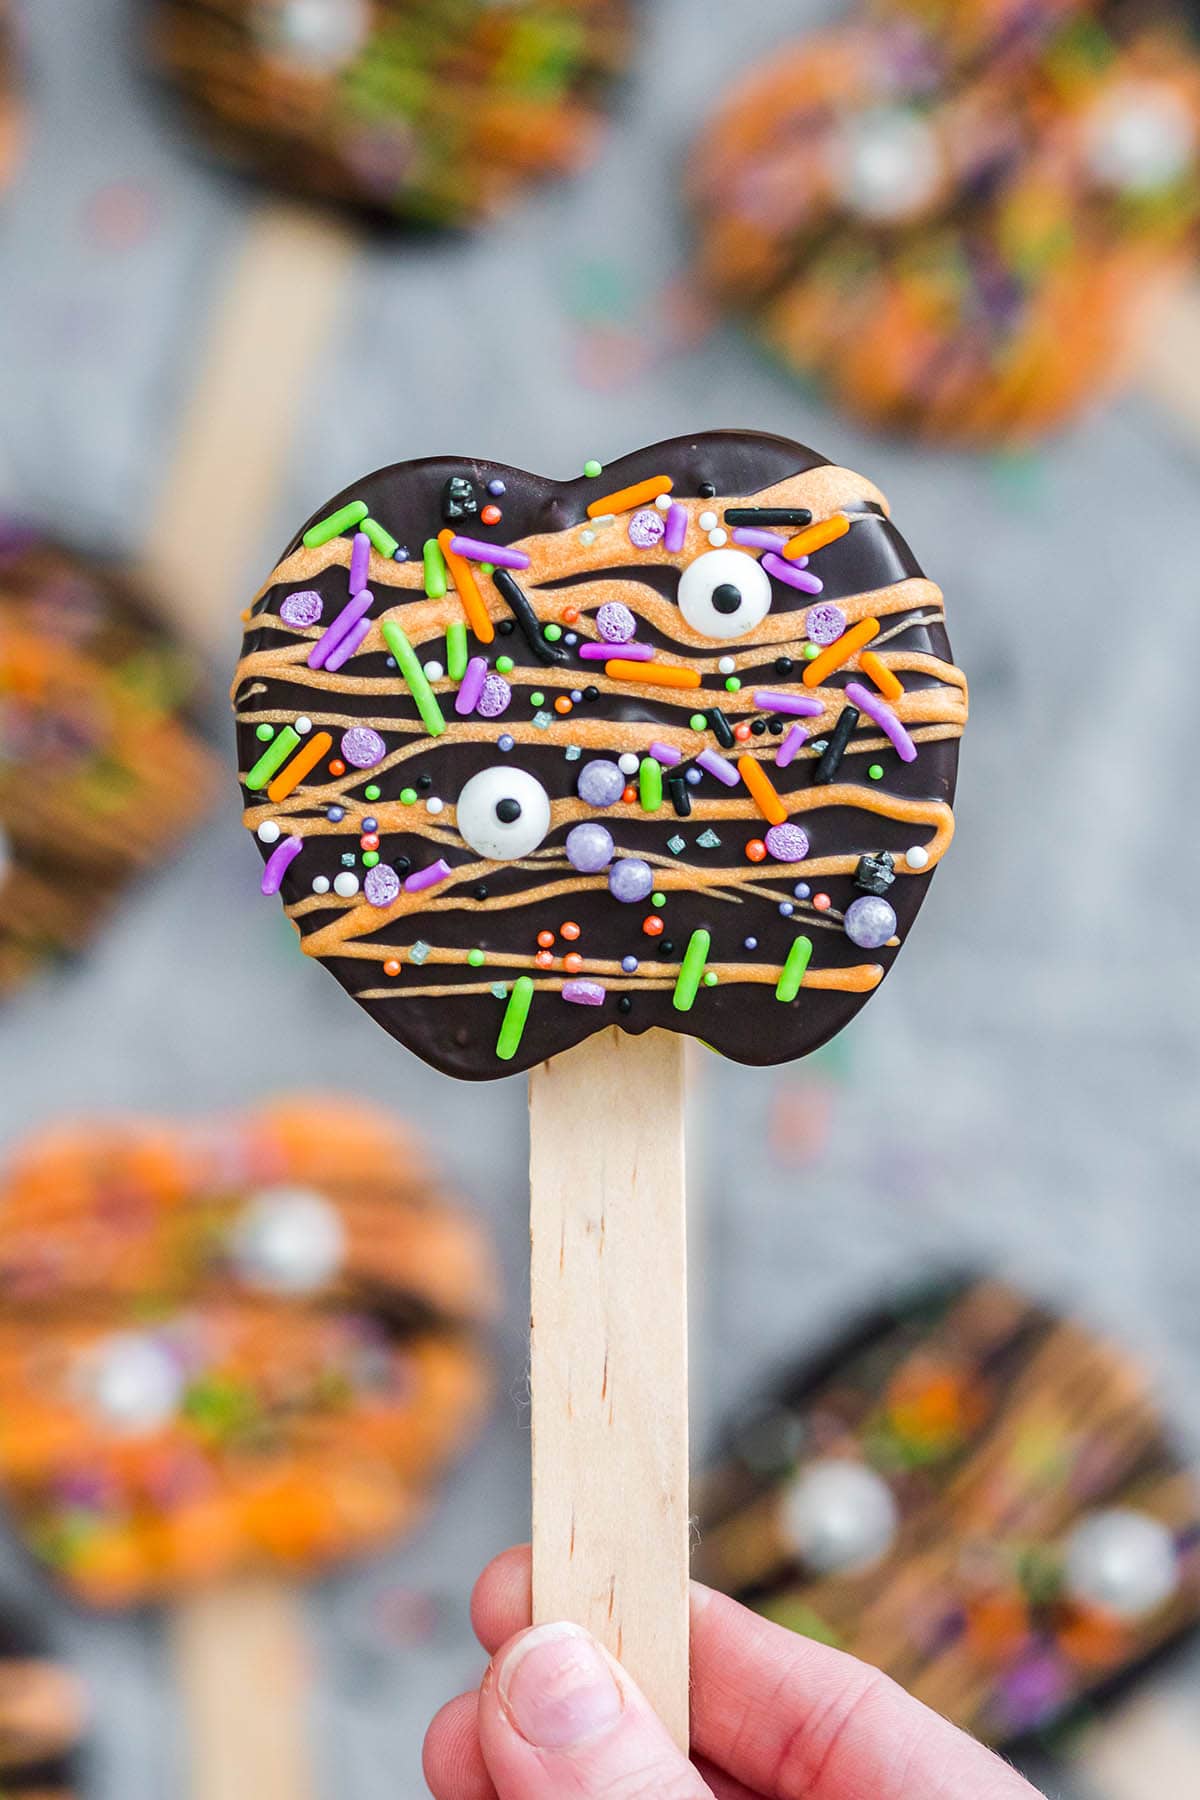
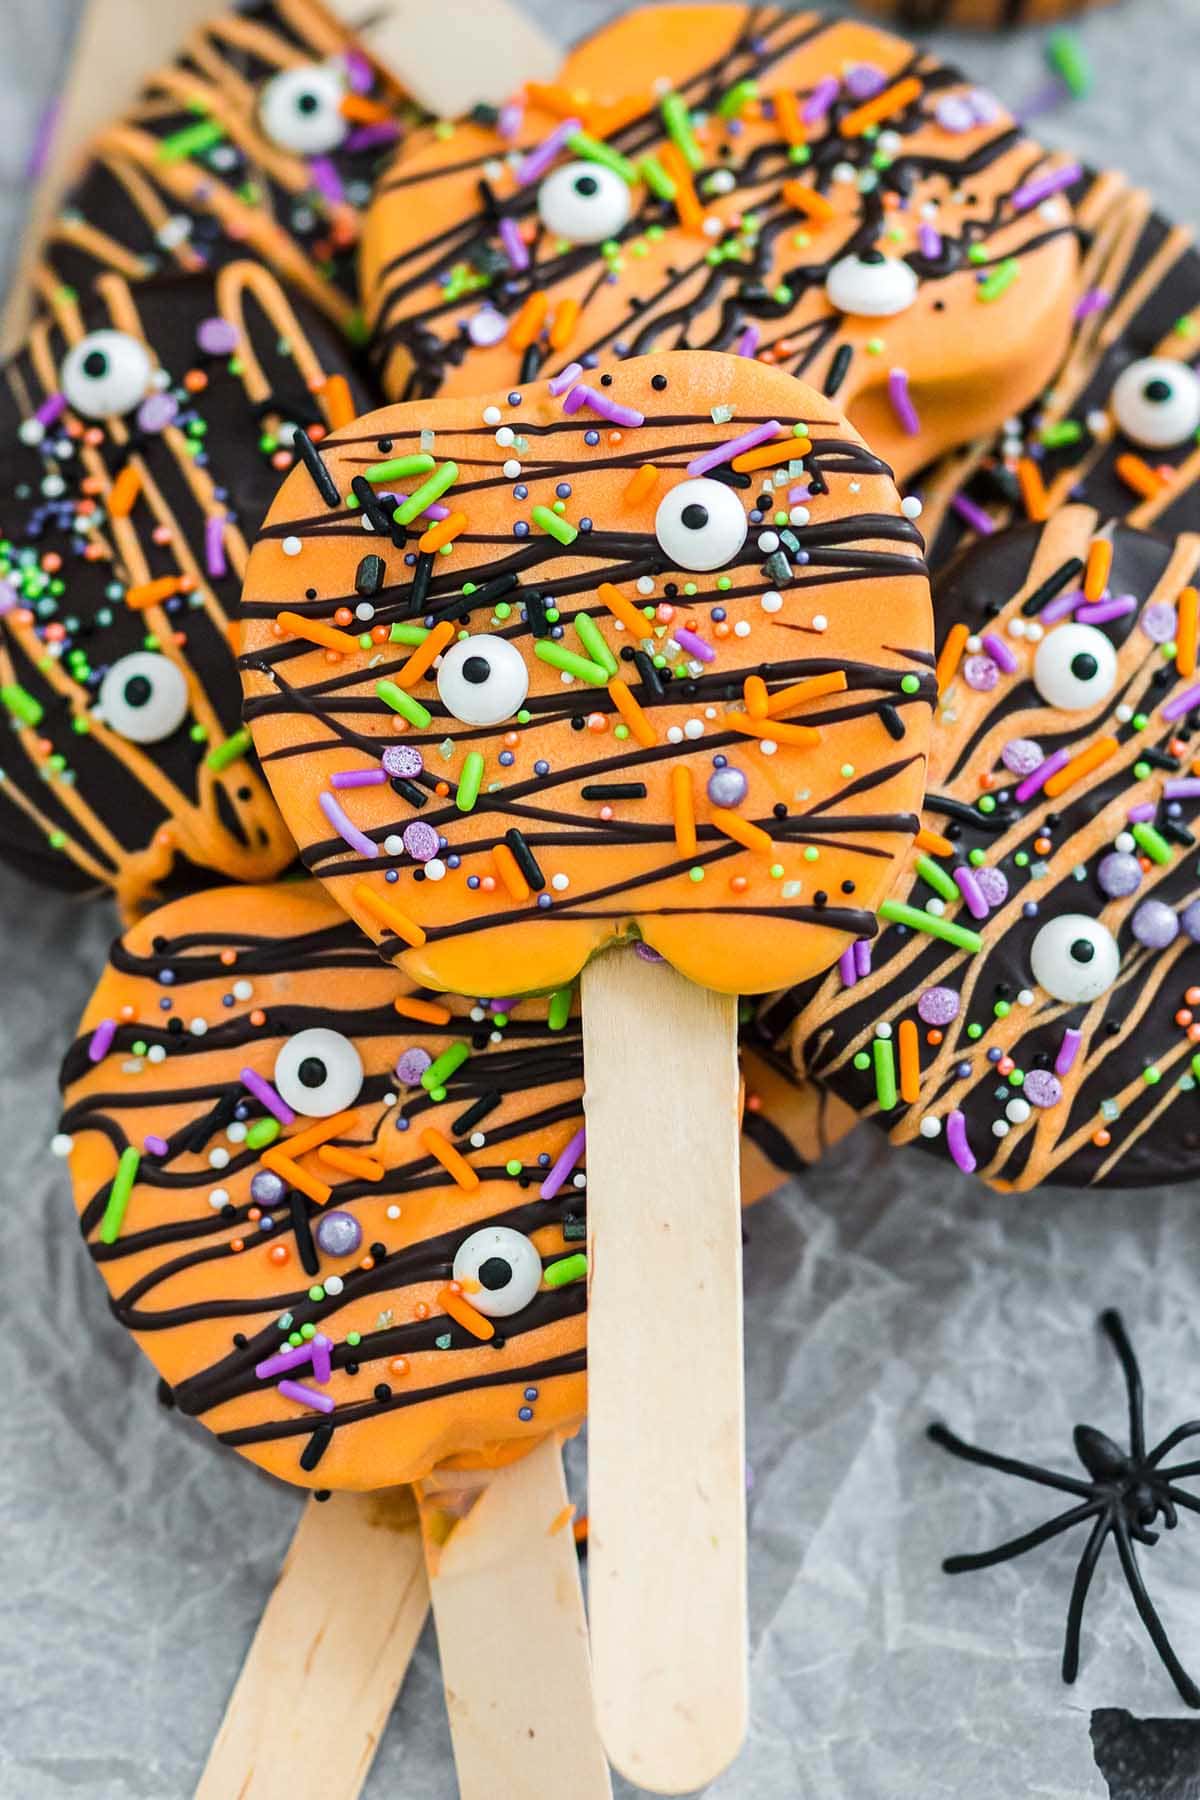
Halloween Chocolate-Covered Apple Pops are a healthier holiday snack on a stick. Featuring fresh apple slices, chocolate, and sprinkles, Halloween crafts are always fun when kids can help dip and decorate their desserts!
Easy Halloween Chocolate Covered Apple Slices
Our Halloween Chocolate-Coated Apple Pops recipe turns the classic candy-coated apple into an easier-to-eat slice on a popsicle stick! Part healthy and part sugary sweet, this handheld snack can double as edible party decor AND a delicious holiday treat.
Don’t skip the stick this season! Biting into an entire chocolate-coated apple can be cumbersome and messy, but preparing your apples as sliced chocolate apple pops makes it more manageable and less messy!
Preparing chocolate covered apple slices as pops can be a fun family activity. Everyone can customize their snacks. Dip them in your favorite flavored chocolate, drizzle them with caramel, and decorate them with different kinds of candy and crushed cookies.
Halloween apple pops are a healthier finger food that’s as much fun to eat as they are to make!
Ingredients Notes
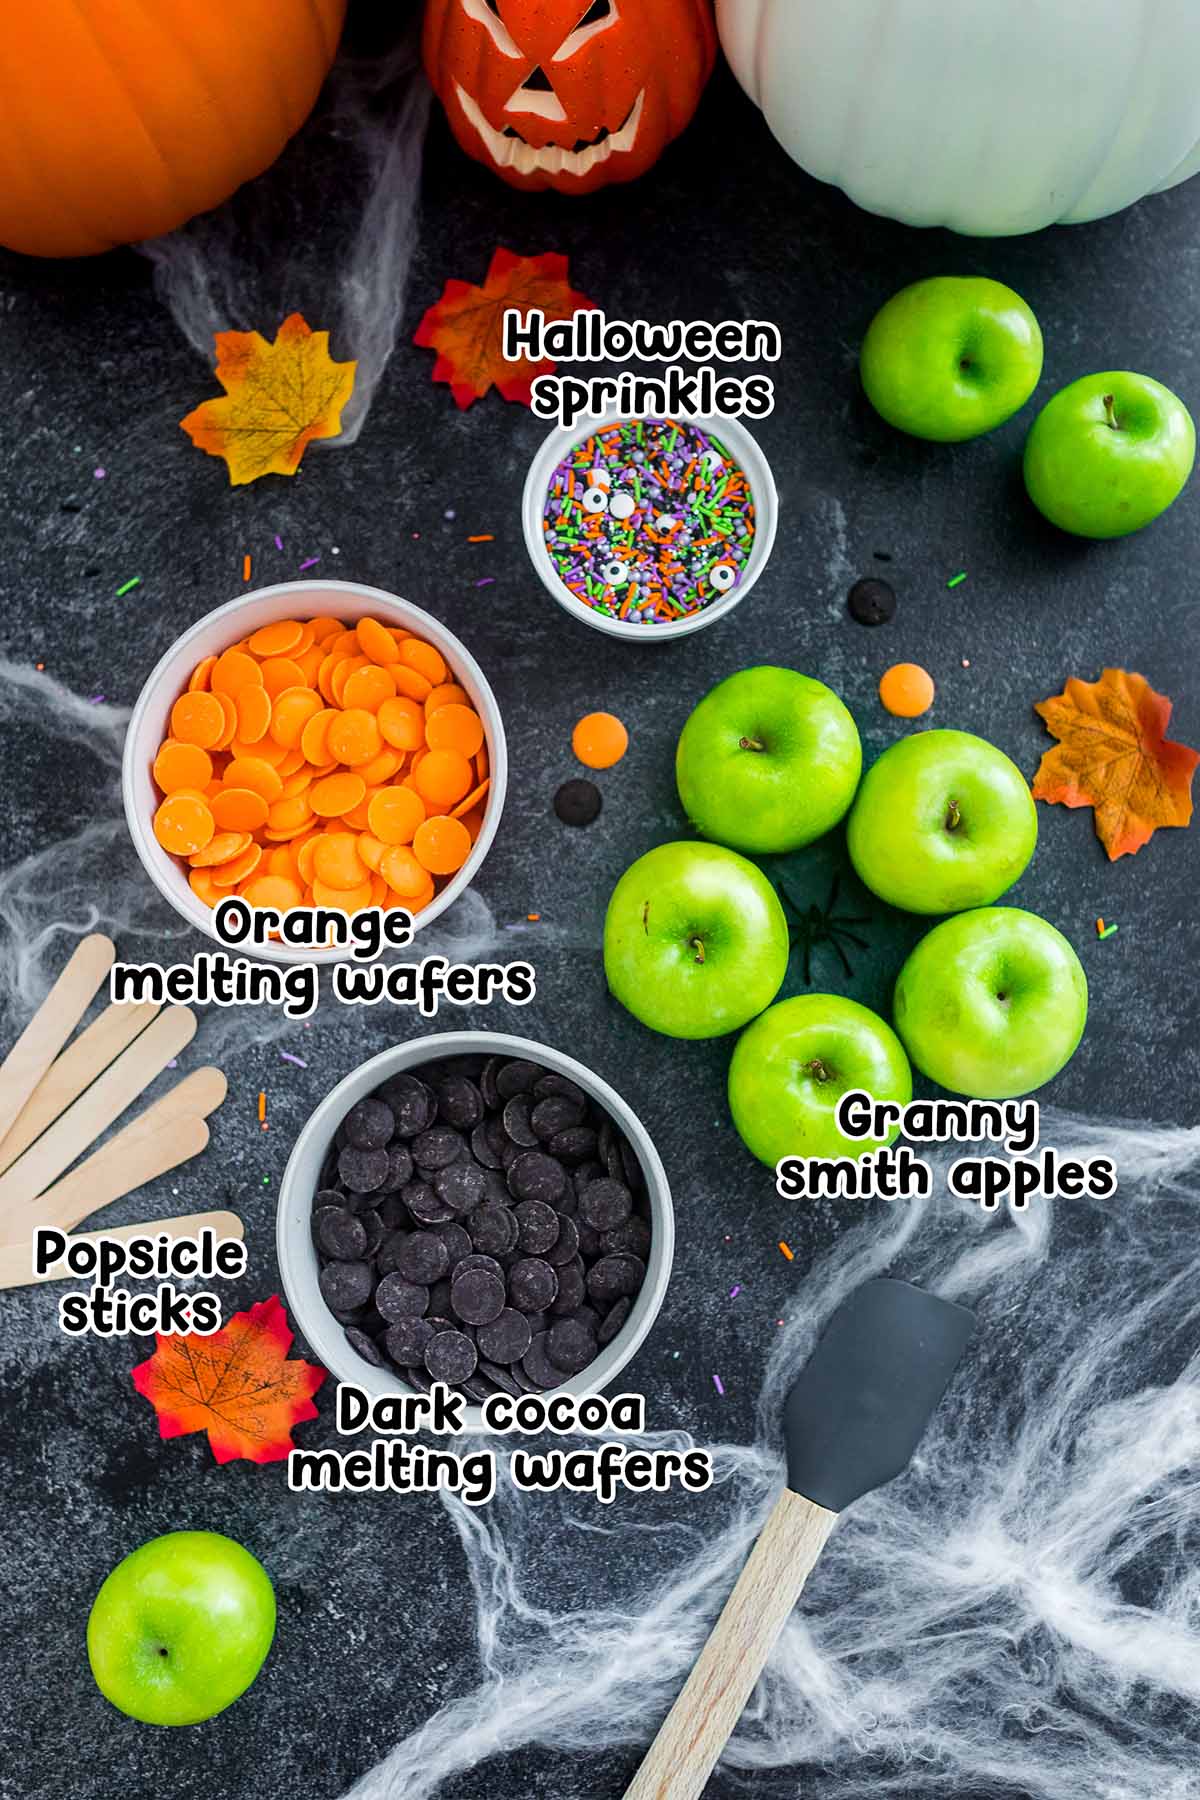
- Granny Smith apples: I love the contrast between the tart, crisp Granny Smith apples and the sweet, soft chocolate covering—it’s the perfect pairing of taste and texture. You can make your covered apple slices with any type of apple, but a tart apple holds up best to coating. If you prefer to use a soft, sweet apple, try Pink Lady, Honeycrisp, Gala, and Fuji instead.
- Dark cocoa melting wafers: I love apple slices dipped in dark chocolate, but for a sweeter taste, you can use milk chocolate, semi sweet chocolate, or even white chocolate chips. Be especially careful when melting white chocolate chips in the microwave because if they are overheated they seize quickly.
- Orange melting wafers: Depending on the holiday, you can use a different-colored melting wafer to drizzle over the cocoa chocolate.
- Halloween sprinkles: Adds a fun, festive flair to this Halloween food.
See the recipe card for full information on ingredients and quantities.
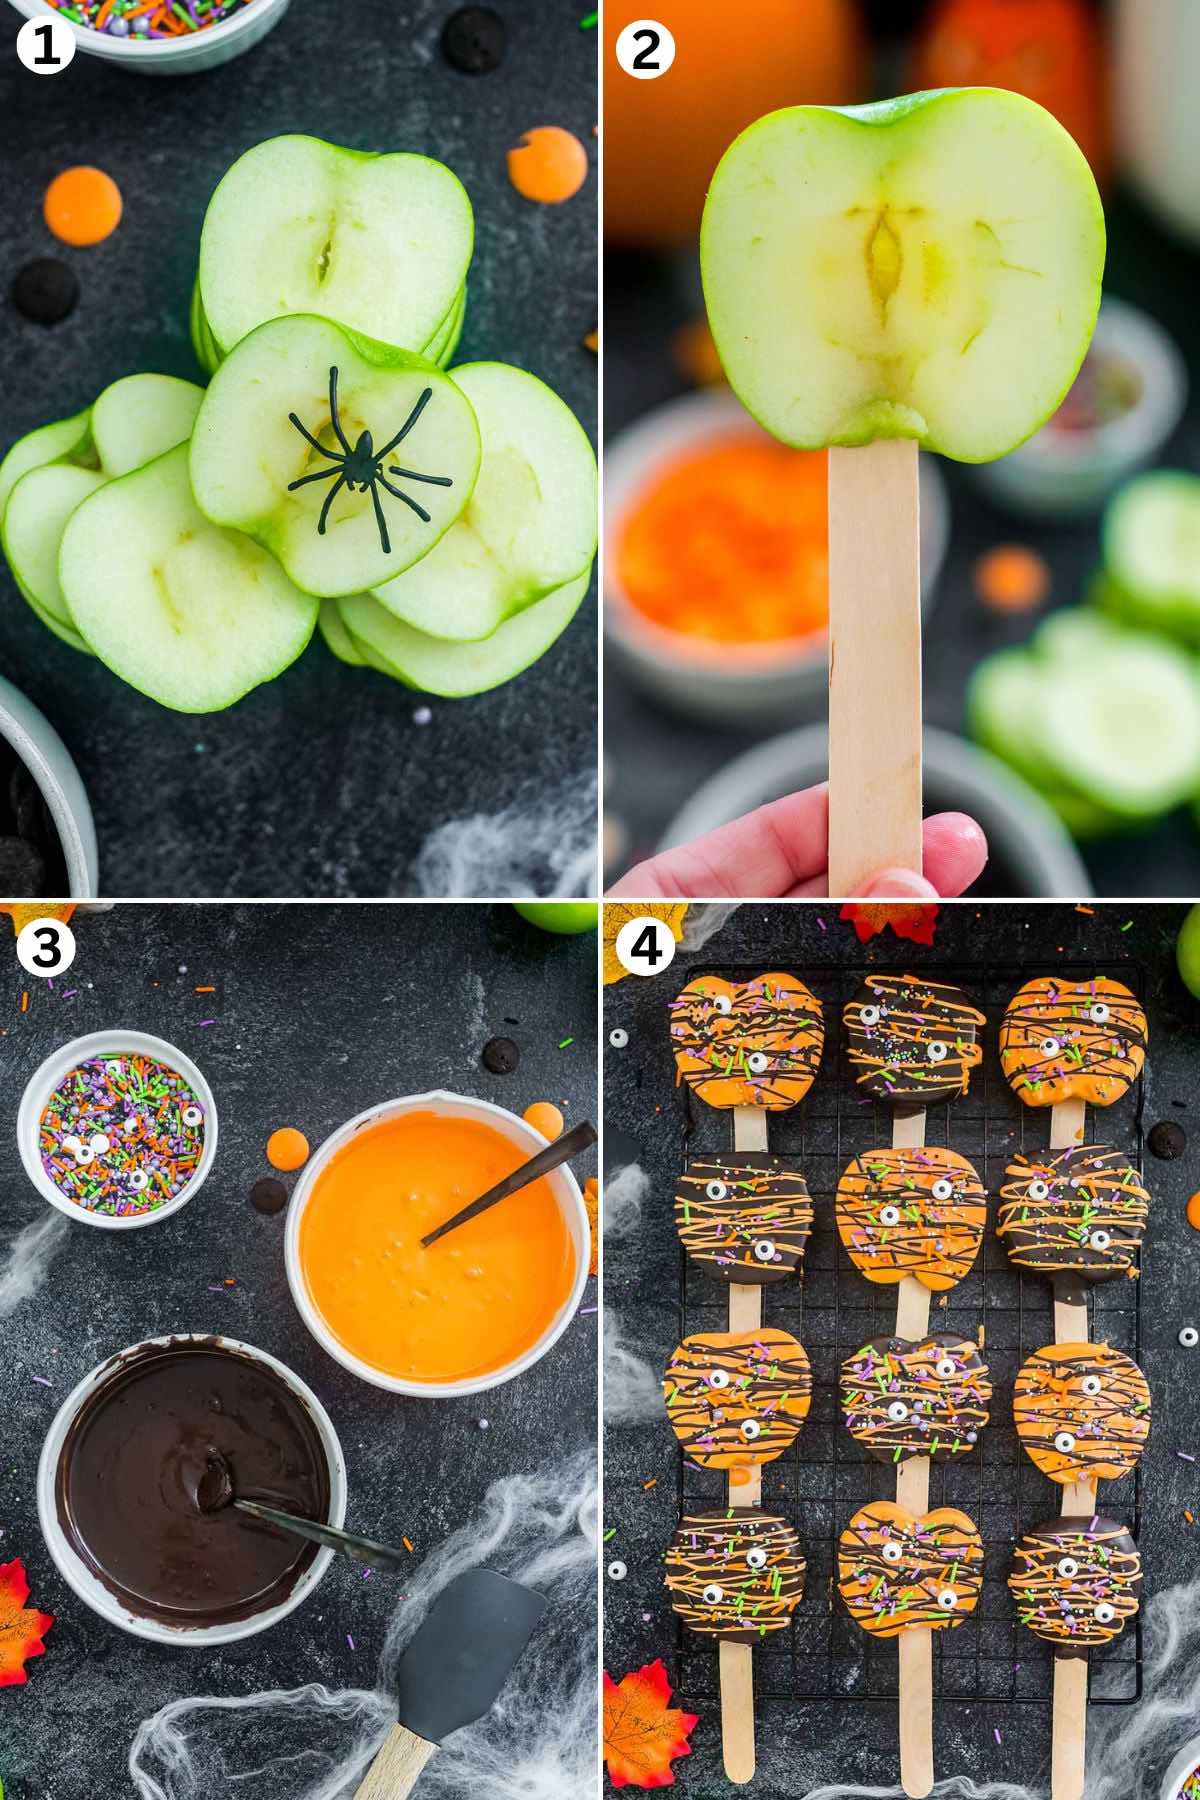
How to Make Halloween Chocolate Covered Apple Pops
- Prepare Your Produce: Cut each apple into 4 slices, then push a popsicle stick into the center of each slice.
- Melt: Microwave the melting wafers separately for 2 minutes each. Stir, then continue to melt for 30-second increments until fully melted.
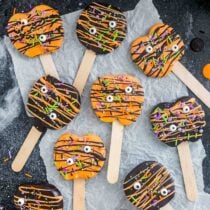
- Dip and Decorate: Dip both sides of half of the pops in melted cocoa chocolate and drizzle with orange chocolate. Top with Halloween sprinkles. Dip the other half in melted orange chocolate and drizzle with cocoa chocolate. Decorate with Halloween sprinkles.
- Set And Serve: Place the apple pops on parchment paper to set and then enjoy!
Serving Suggestions
Place on a Party Tray: Chocolate dipped apple slices are a great grab-n-go snack. They are perfect for fall gatherings, seasonal parties, and serving for dessert when entertaining guests.
Serve on a Stick: What better way to prepare a possibly messy treat than by making it more portable? By serving snacks on a stick, you can hand them out like lollipops. Check out my Caramel Apple Slices for inspiration! I even have recipes for Halloween cake pops and Halloween Donut Hole Cake Pops!
Tips & Variations
- Before You Begin: Be sure to prepare everything before cutting your apple slices. You want to have any toppings set out and ready, plus all your ingredients waiting so that your apples don’t turn brown while waiting to be dipped.
- Prevent Browning Produce: To help prevent the apple slices from browning, brush the exposed apple with a little lemon or lime juice. They will stay fresh for a few hours.
- Cut Without The Core: Don’t use the core! I cut my apples into slightly less than 1⁄2 inch slices. If your apples are sliced too thin, the stick will not push in correctly and the apple will be limp.
- Dip the Stick: If you can’t get your popsicle sticks in the apples, put a dab of melted chocolate on one side of the apple and press the stick onto the dab. Allow it to set, then dip the apples like normal!
- Thin Out If Thick: If your chocolate is too thick, add 1 tbsp of crisco to it and stir well. This will thin it out.
- Tasty Toppings: Chocolate covered Halloween apples are so much fun to make. Get creative and decorate with mini chocolate chips, M&Ms, sprinkles, crushed Oreos, chopped nuts, mini marshmallows, shredded coconut, or any of your favorites.
- Decorate Your Dessert: There is no limit to these types of recipes. Make apple spider snacks by adding a melted white chocolate web, or make monsters, witches, pumpkins, or any spooky slice you can think of!
How to Keep the Chocolate on the Apple Slices
The key to keeping the chocolate on the apple slices is to make sure you slice the apples thick enough and completely coat them with chocolate. If you leave even a small section uncovered, the apple juices will leak out, and the chocolate will not stick to the apple slice.
Also, if your apples are too wet, the chocolate may not coat them well. Try drying the apple flesh with a paper towel before dipping into the chocolate.
Proper Storage
- To Store: These pops are best eaten the same day they are prepared, but you can put them in the fridge for one day!

More Halloween Dessert Recipes
- Halloween Punch
- Halloween Chocolate Covered Strawberries
- Peanut Butter Spider Cookies
- Halloween Puppy Chow
If you tried this Halloween Chocolate Covered Apple Pops Recipe or any other recipe on my website, please leave a 🌟 star rating and let me know how it went in the 📝 comments below. Thanks for visiting!!!
Halloween Chocolate Covered Apple Pops
Ingredients
- 5 medium/small granny smith apples
- 12 ounces dark cocoa melting wafers
- 12 ounces orange melting wafers
- Halloween sprinkles
Instructions
- Cut each apple into 4 slices (don't use the core) then carefully push a popsicle stick into the center of the apple to hold the apple up. I cut my apples into slightly less than 1⁄2 inch slices. If your apples are sliced too thin, the stick will not push in correctly and the apple will be limp.5 medium/small granny smith apples
- Melt your orange and cocoa melting wafers (in separate microwavable bowls) for 2 minutes each. Stir, then continue to melt for 30 second increments until fully melted. Stir between each increment.12 ounces dark cocoa melting wafers, 12 ounces orange melting wafers
- Take an apple pop and dip each side in the melted cocoa chocolate. Then take a spoon and lightly drizzle some of the orange chocolate over the apple pop.
- Top with halloween sprinkles.Halloween sprinkles
- Place the apple pop on a sheet of parchment or a metal rack to set.
- Repeat steps 3-5 with 9 other apple pops.
- Once half are covered in the dark cocoa chocolate and orange drizzle, dip the remaining apple pops in the orange chocolate. Drizzle with the cocoa chocolate and top with the halloween sprinkles.
- Place apple pops on the parchment or wire rack.
- Allow the apple pops to set and then enjoy!
Jenn’s Notes
- To Store: These pops are best eaten the same day they are prepared, but you can put them in the fridge for 1 day!
- Be sure to have everything prepared before you start cutting your apple slices. You want to have any toppings set out and ready plus all your ingredients waiting so that your apples don’t turn brown while waiting to be dipped.
- To help to prevent the apple slices from browning you can brush the exposed apple with a little lemon juice or lime juice and they will stay fresh for a few hours.
- Don’t use the core! I cut my apples into slightly less than 1⁄2 inch slices. If your apples are sliced too thin, the stick will not push in correctly and the apple will be limp.
- If you cannot get your popsicle sticks in the apples, put a dab of melted chocolate on one side of the apple and press the stick onto the dab. Allow to set then dip the apples like normal! Also, if your apples are too wet, the chocolate may not coat them well. Try drying the apple flesh with a paper towel before dipping into the chocolate.
- If you find your chocolate too thick, add 1 tbsp of crisco to the chocolate and stir well. This will thin it out.
- Chocolate covered Halloween apples are so much fun to make. Get creative and decorate with mini chocolate chips, M&Ms, sprinkles, crushed Oreos, chopped nuts, mini marshmallows, shredded coconut, or any of your favorites.
- There is really no limit to these types of recipes. Make apple spider snacks by adding a melted white chocolate web; or make monsters, witches, pumpkins, or any kind of spooky slice you can think of!