
This post may contain affiliate links. Please read our disclosure policy.

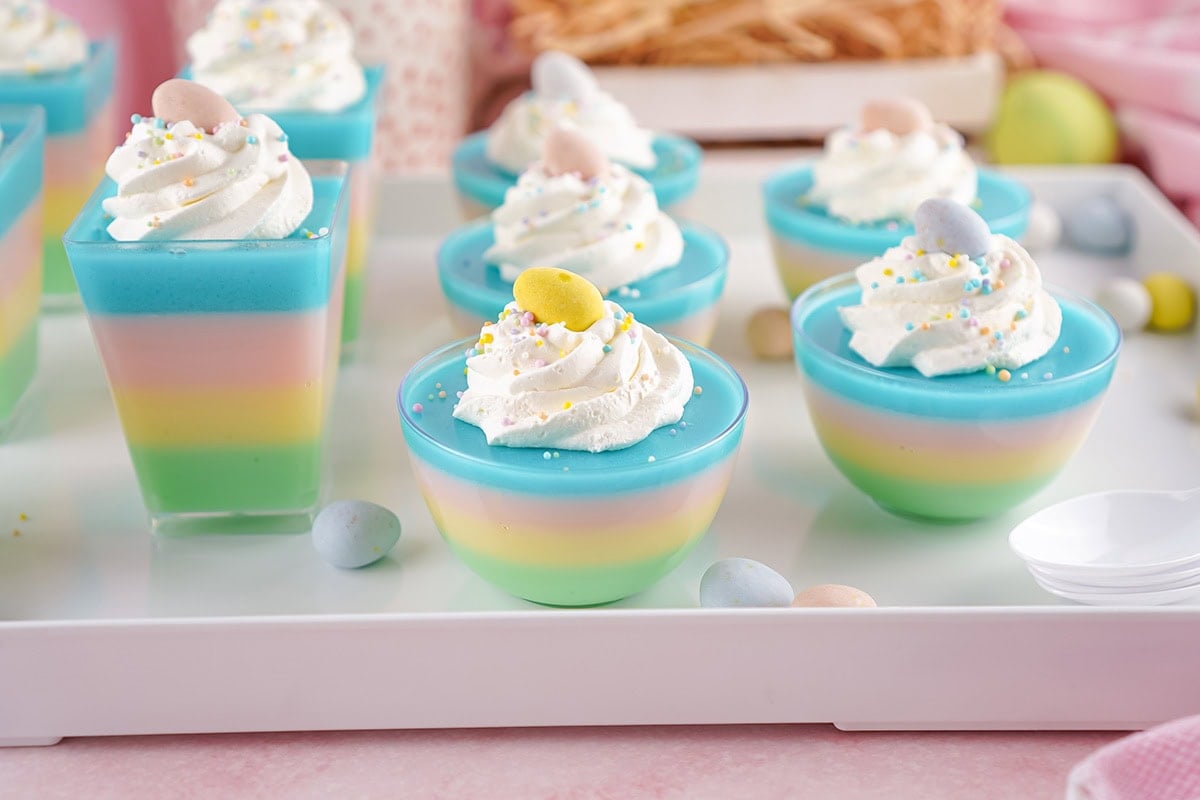
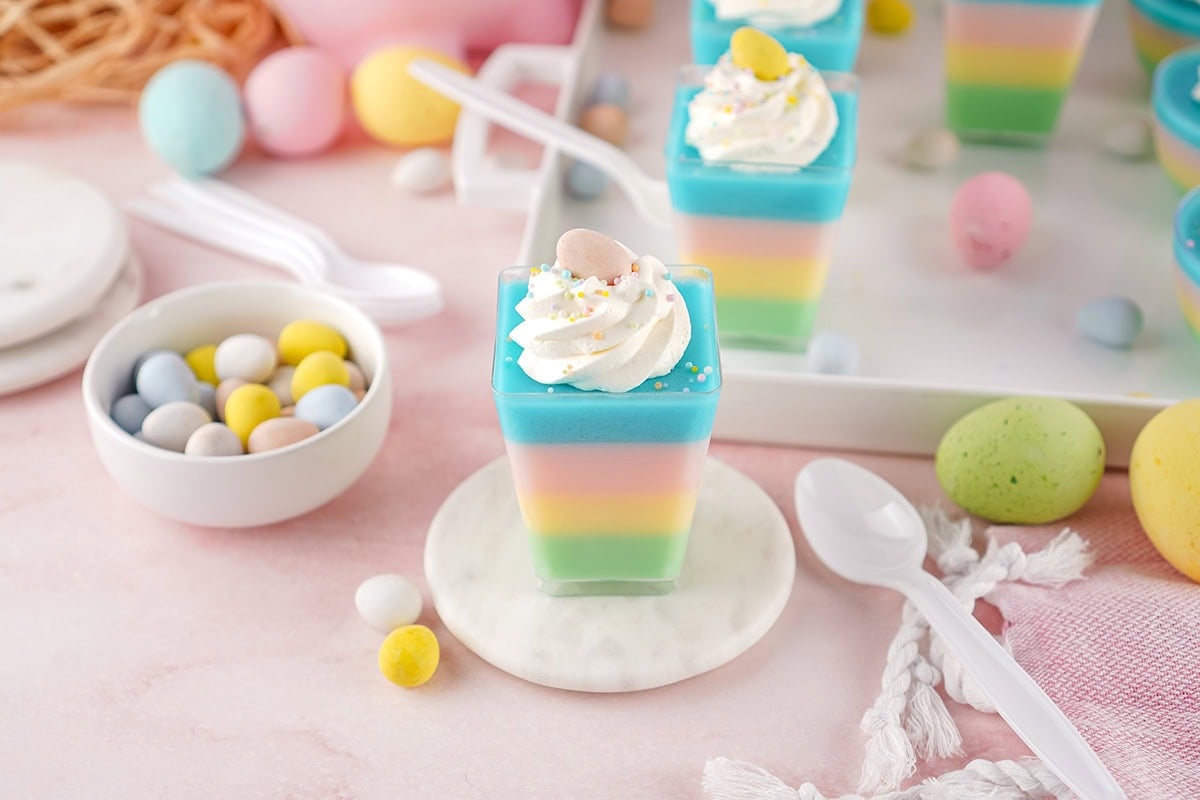
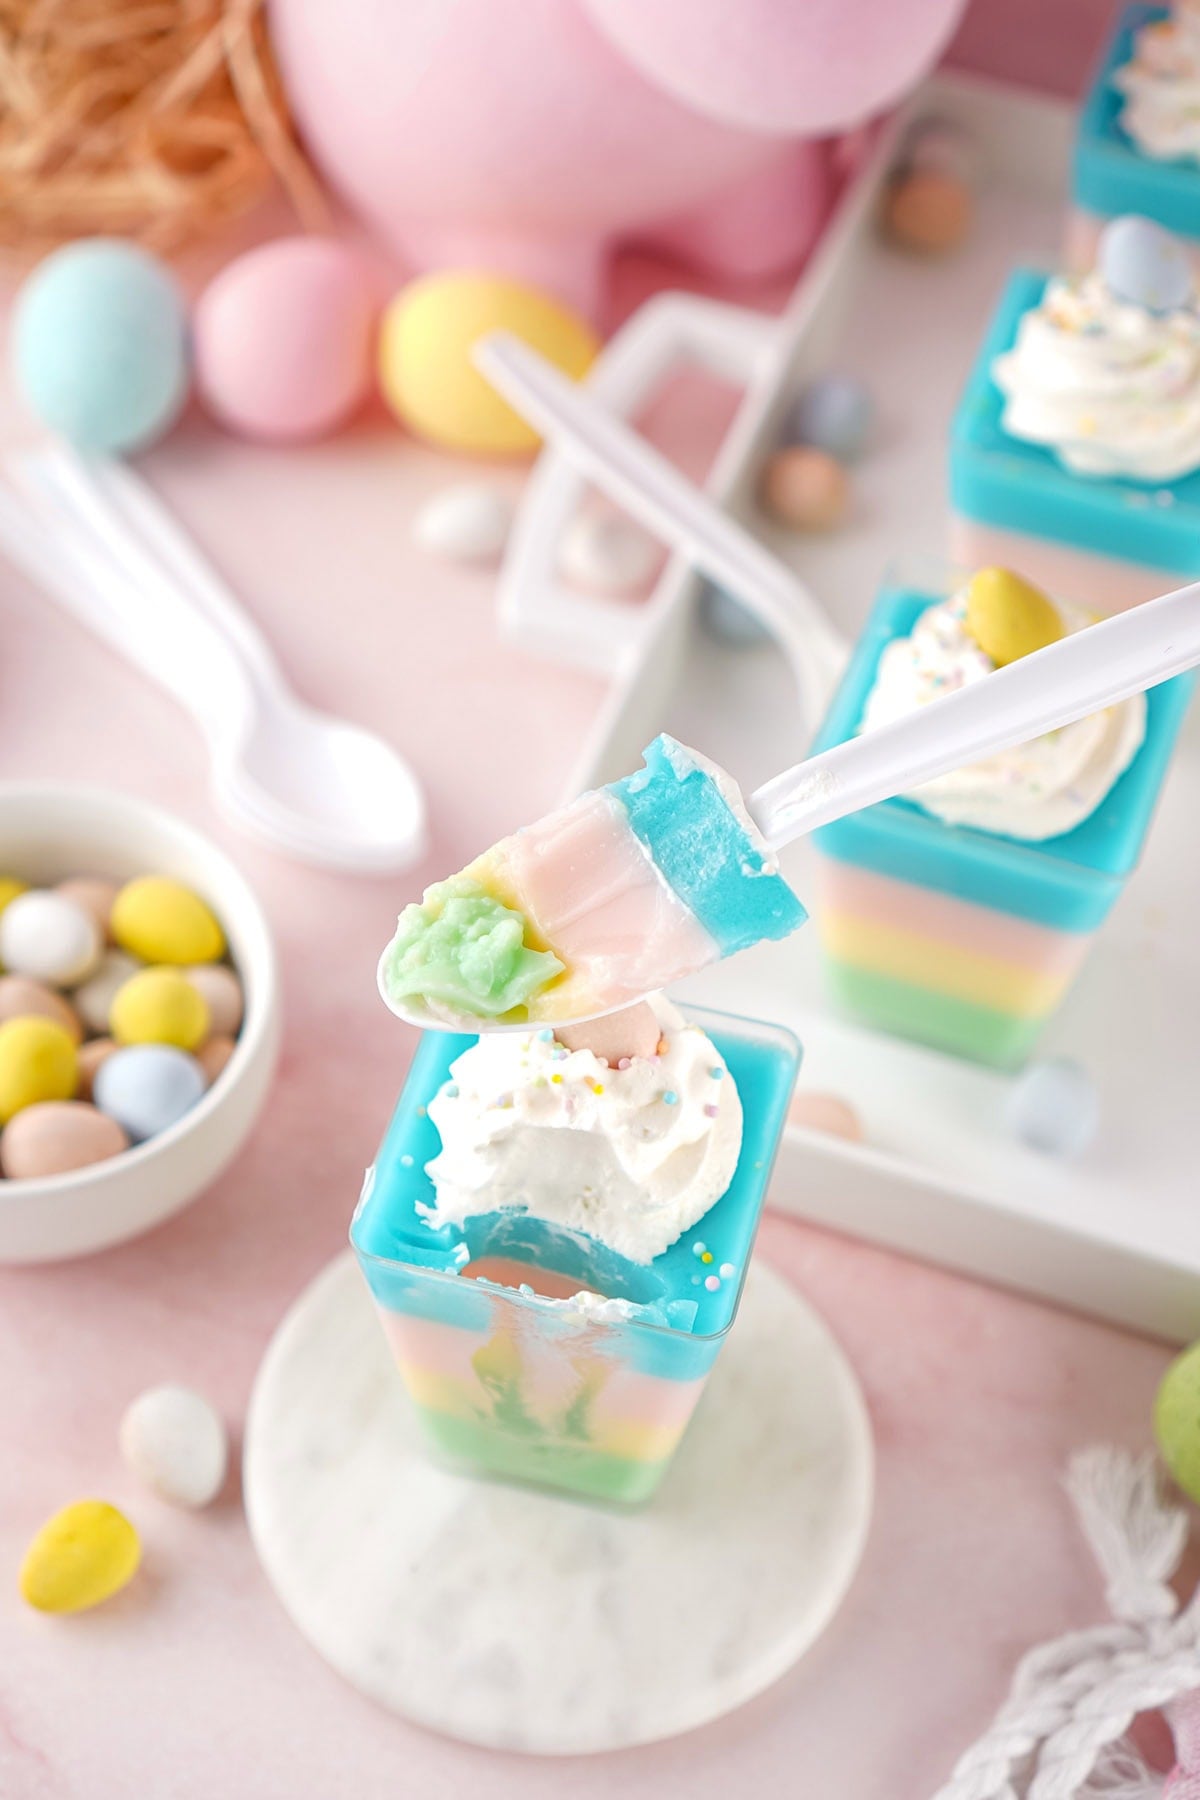
Every Easter, I want something on the dessert table that’s just as pretty as it is delicious, and these Easter Jello Cups check every single box. Four pastel layers of creamy, fruity jello layered inside individual cups, topped with a cloud of whipped topping, pastel sprinkles, and a Cadbury Mini Egg. They’re almost too cute to eat. Almost.

I tested a few versions of these cups before landing on this recipe. My first batch used plain Jell-O with no additions, and while the layers looked pretty, they tasted flat. That’s when I started stirring sweetened condensed milk directly into each layer, and it changed everything. I also had to dial in the ratio because too much and the jello won’t set firmly, too little and you lose that creamy payoff. Also, setting the cups on a flat, movable baking sheet in the fridge guarantees clean, straight lines every single time.
If you enjoy fun and festive spring treats, you should also check out my Spring Blossom Cookies or my viral Easter Jell-O Pie.
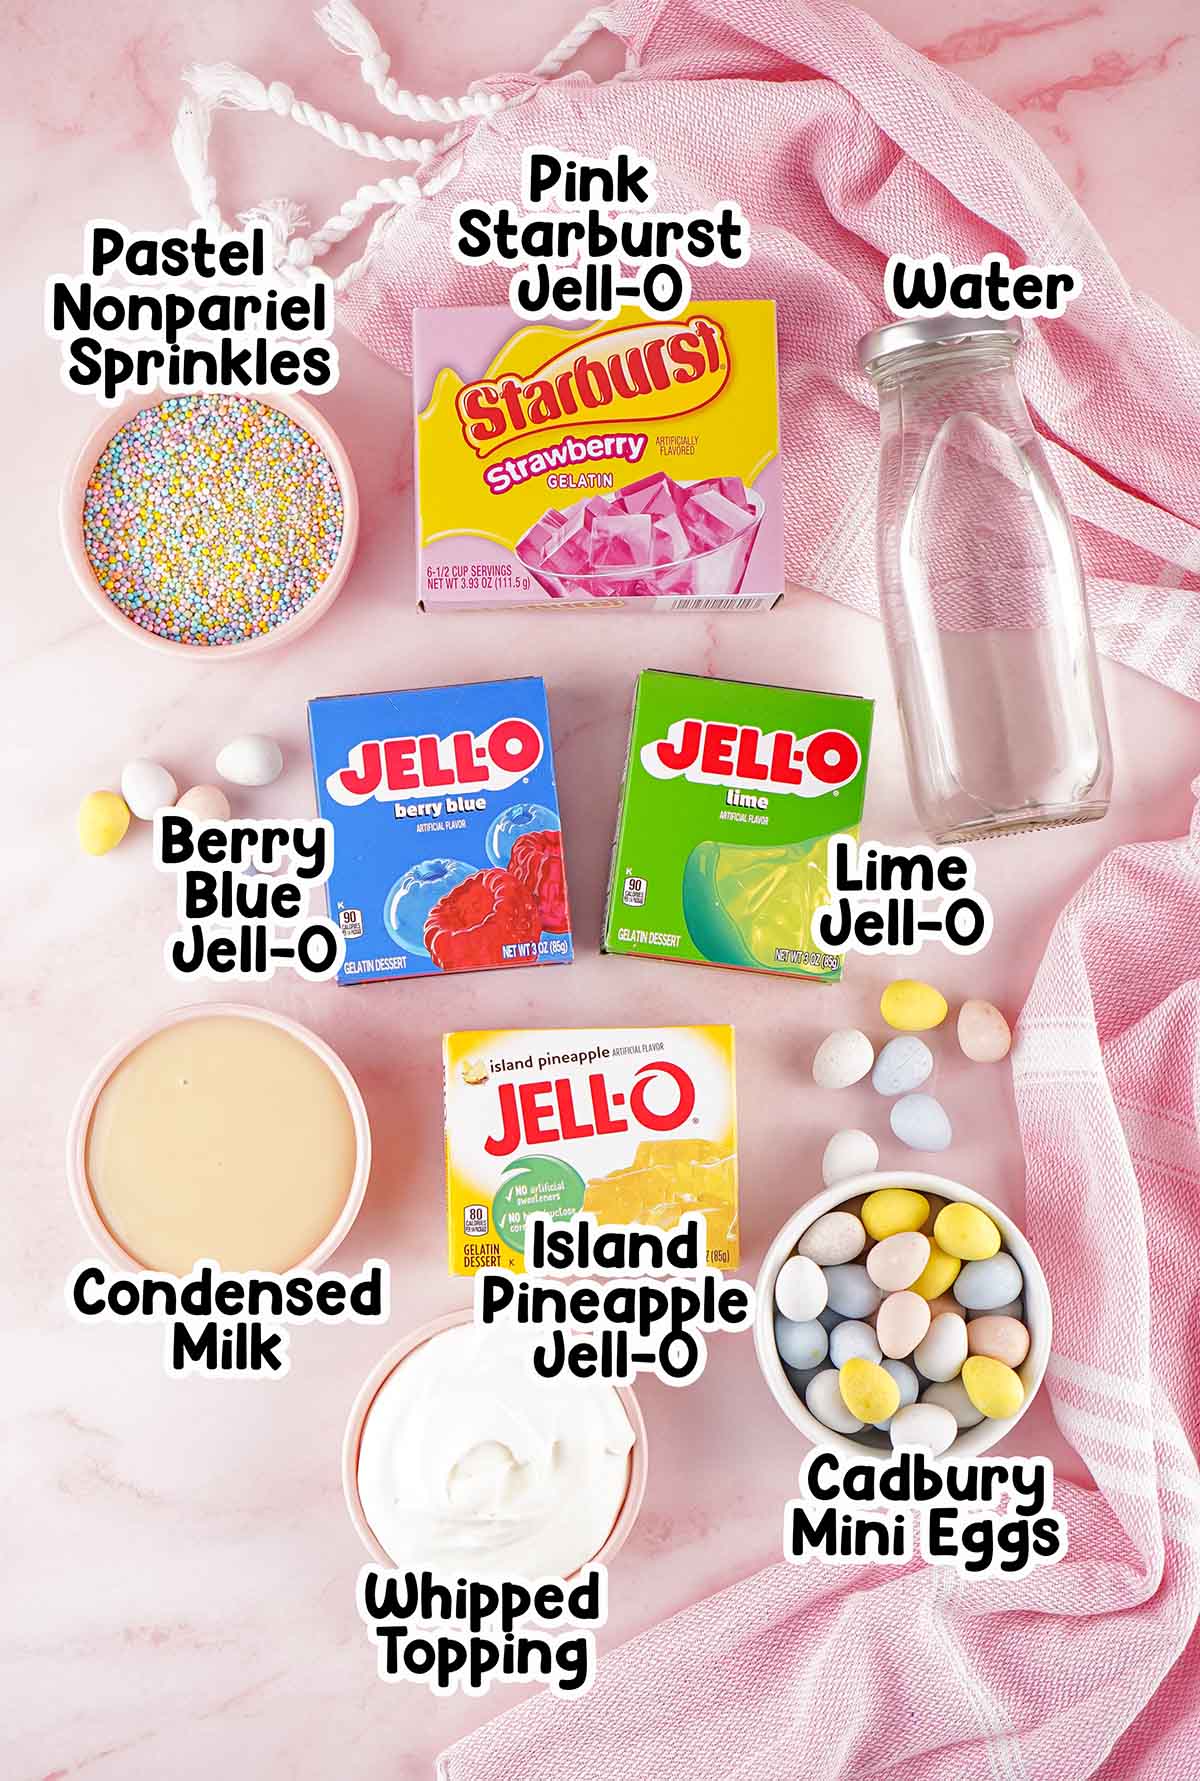
Key Ingredients & Why They Work
- Flavored Jell-O: I use a combination of pineapple, lime, pink strawberry, and blue raspberry gelatin to get that perfect spring pastel color palette.
- Sweetened Condensed Milk: This is the secret ingredient that gives the gelatin layers a beautiful, creamy, and opaque look instead of being see-through.
- Whipped Topping: A generous swirl on top of each cup pulls the whole look together. I pipe it on with a frosting bag and a 1M tip for that bakery-style finish, but a simple spoonful works just as well if you want to keep it casual.
- Garnishes: Pastel sprinkles and mini chocolate eggs tie the spring theme together nicely.
See the recipe card for full information on ingredients and quantities.
How to Make Easter Jell-O Cups
Step 1: Prep the Containers
Line up your glass jars or plastic cups on a flat baking sheet or another movable surface. This makes it much easier to transfer them all in and out of the fridge safely. Make sure every cup is sitting completely level; even a slight tilt will show up in your layers once they set. This is one of those small things that makes a big difference in the finished look.
Step 2: Mix the First Layer
In a medium mixing bowl, combine the lime jello and boiling water, stirring until the powder is completely dissolved. Stir in the sweetened condensed milk, followed by the cold water to combine.
Step 3: Pour and Chill
Pour the green jello mixture evenly into each of your containers. Place the baking sheet in the fridge until the layer is fully set and firm to the touch (let set for at least 1 hour before moving on)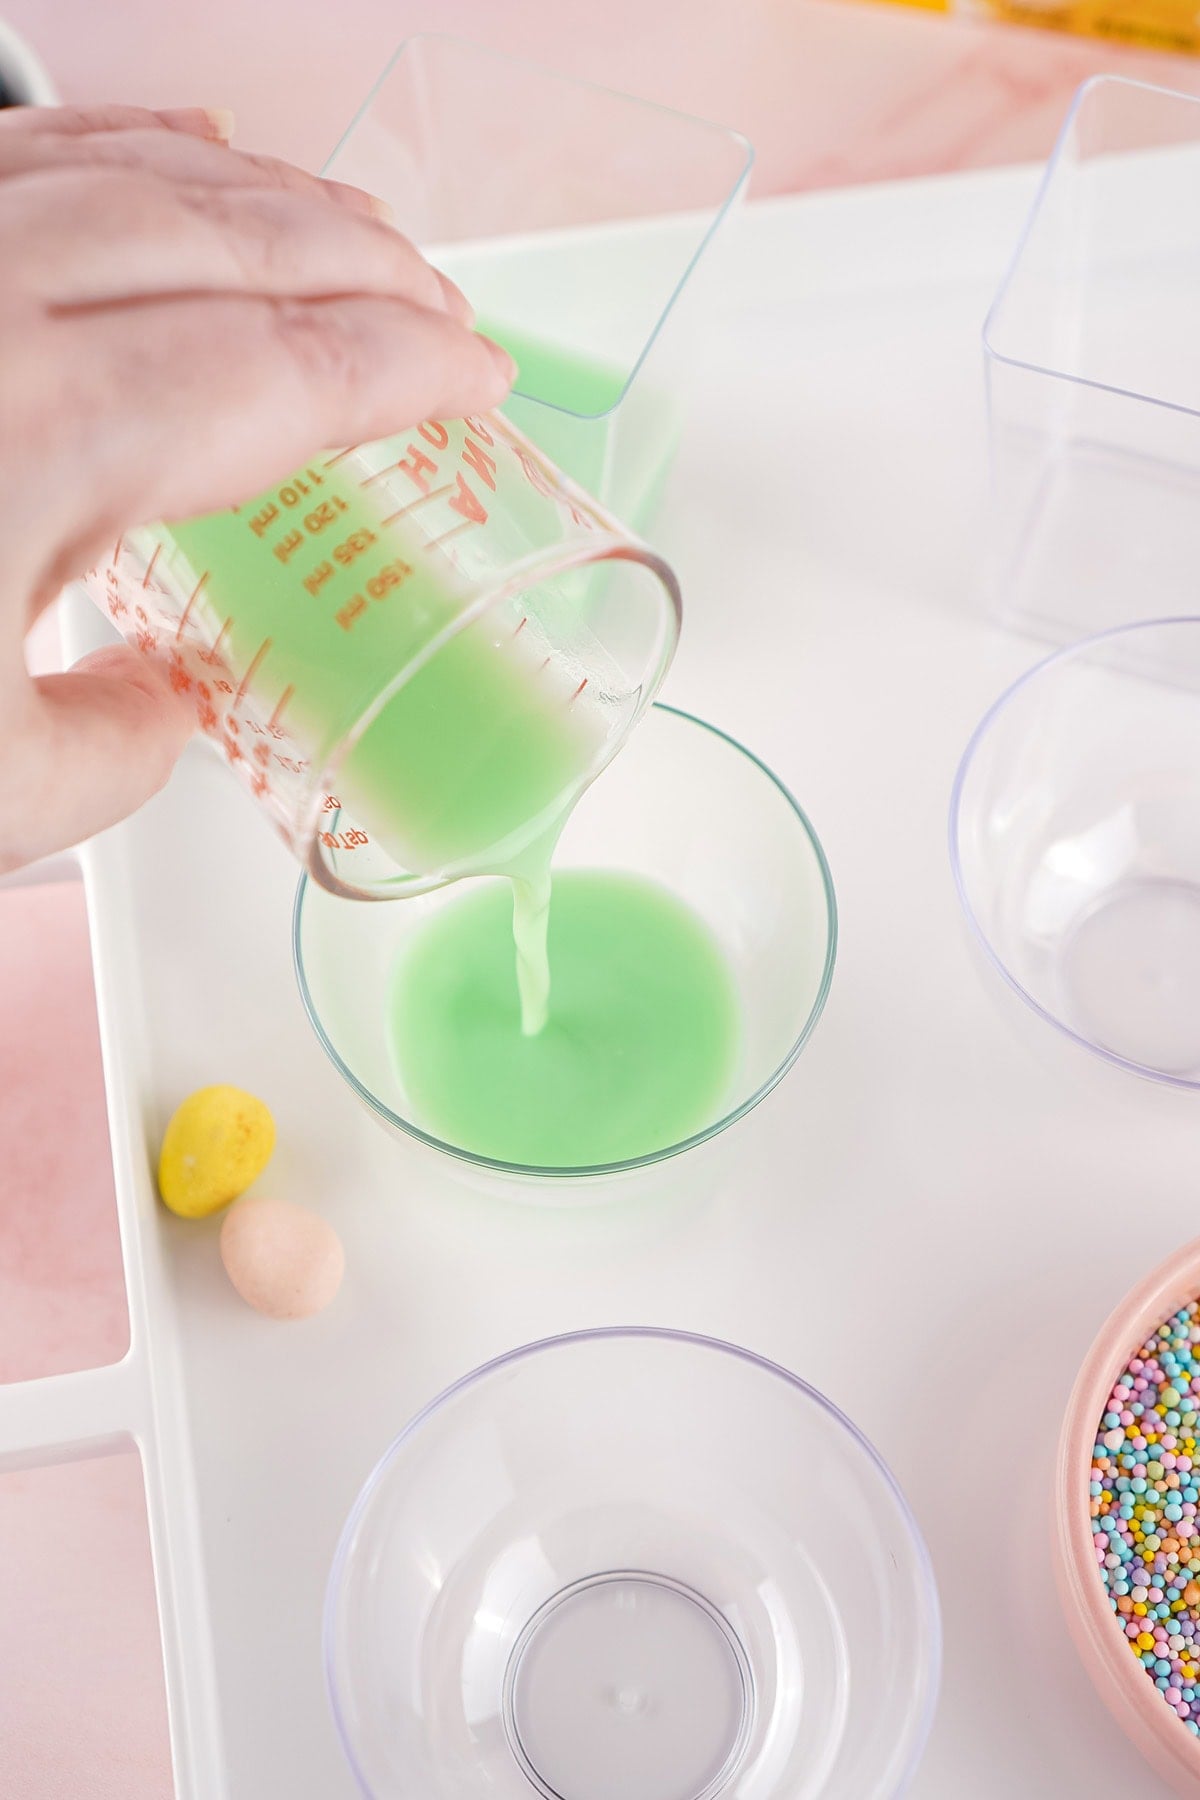
Step 4: Repeat for Remaining Colors
Repeat the mixing and pouring process for the yellow, pink, and blue jello, exactly in that order. If your freshly mixed jello is too warm, let it cool in the bowl for a few minutes before layering it on top of the chilled cups so it doesn’t melt the layers together.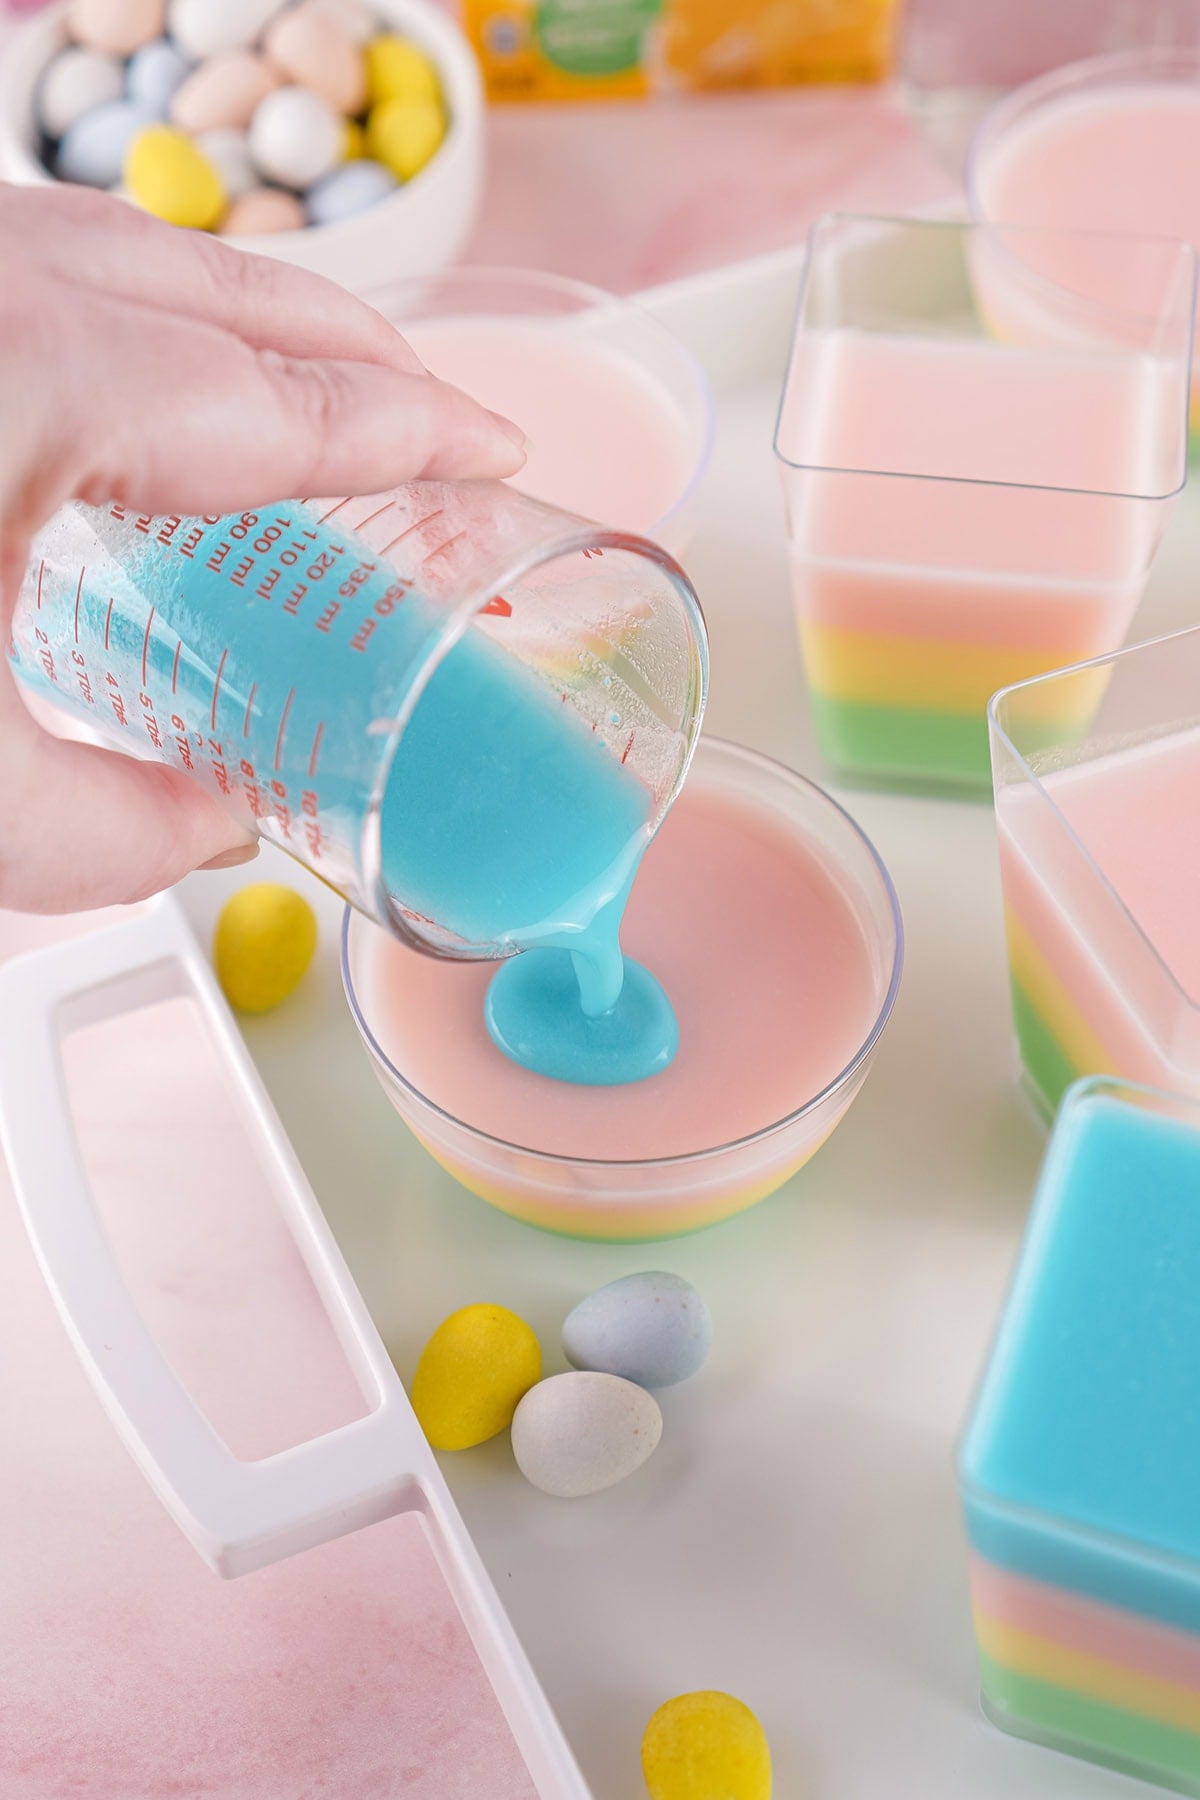
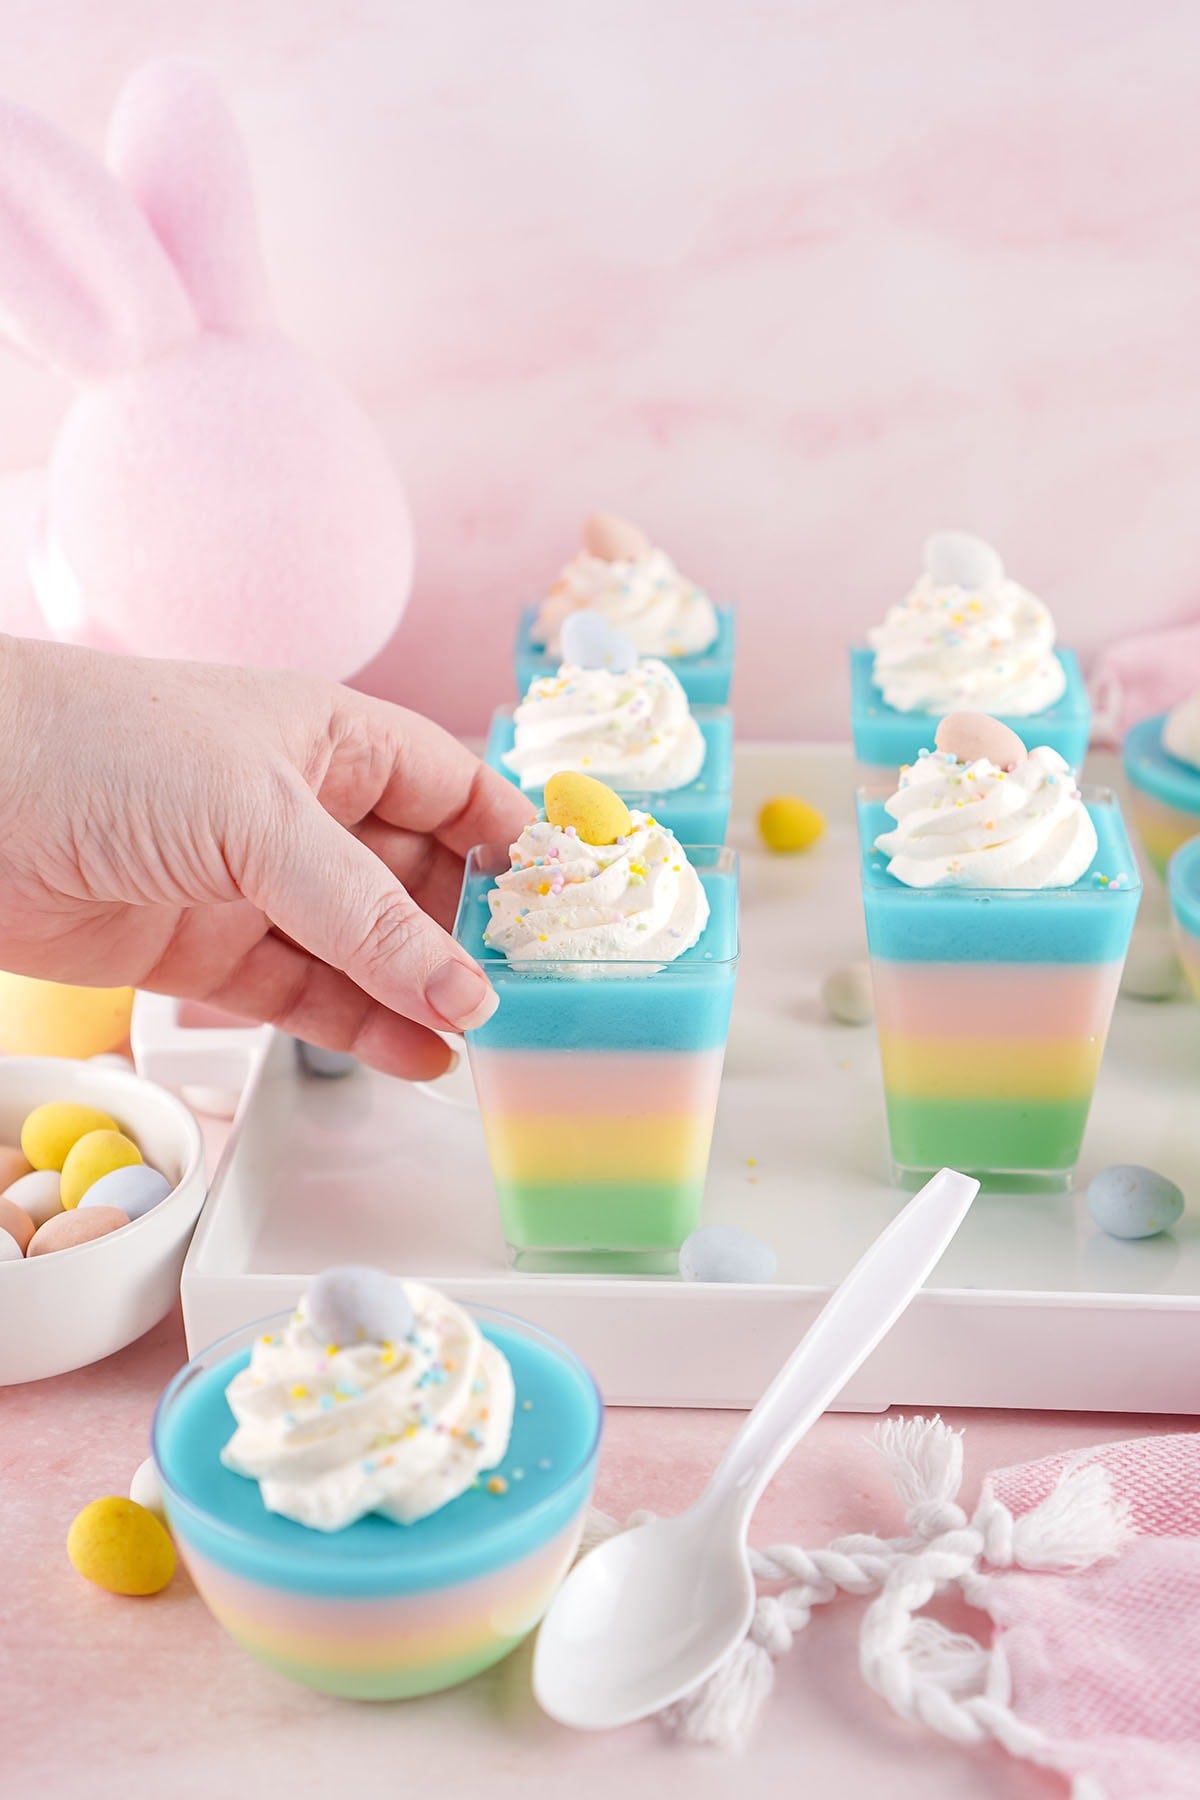
Step 5: Garnish and Serve
Once your final blue layer is fully set, top each cup with a dollop of whipped topping using an optional frosting bag and a Wilton 1M tip. Sprinkle with pastel nonpareils and finish by placing a Cadbury mini egg on top. Serve immediately, or keep them in the fridge ungarnished until you’re ready.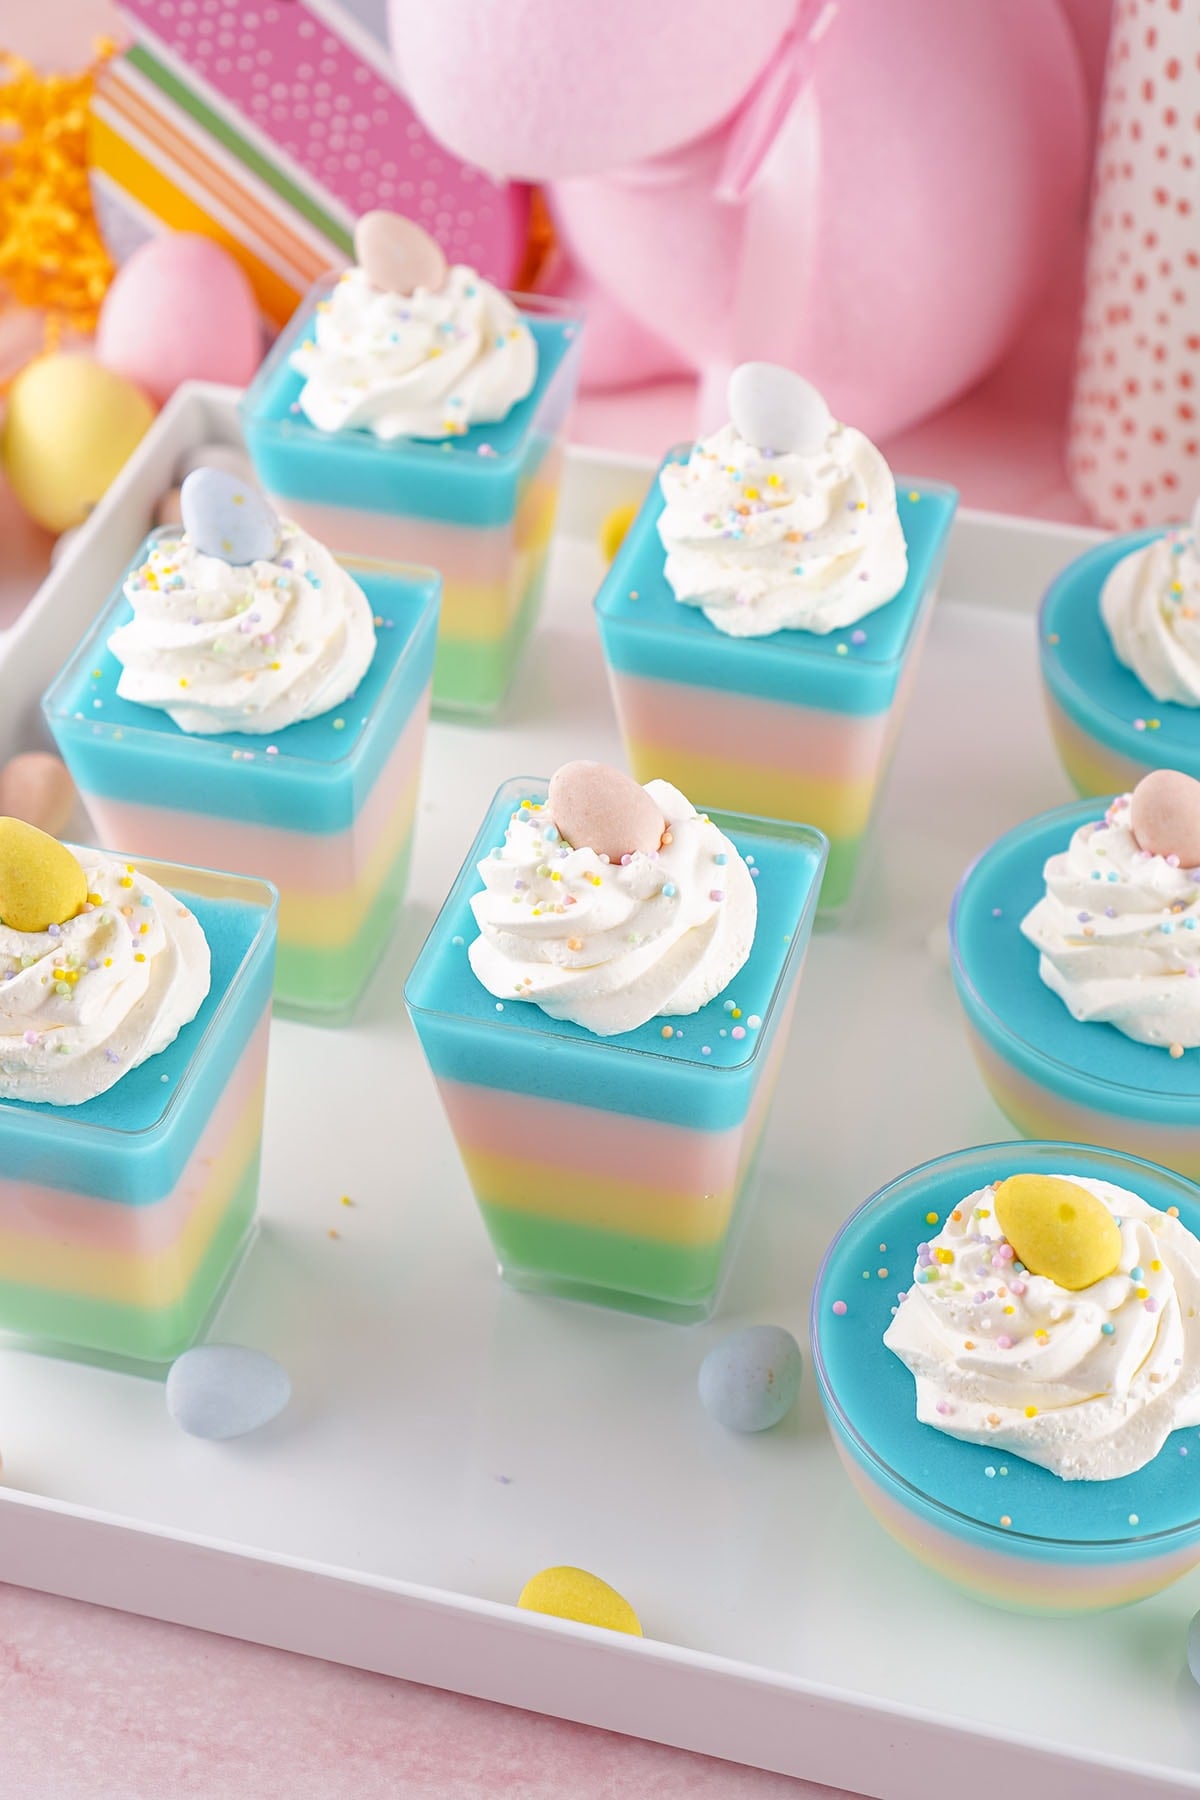
Storage Tips
- Storage: Keep these refrigerated, covered, for up to 4 days, but only if they haven’t been garnished yet. The whipped topping can get weepy, and the sprinkles will bleed color if stored on top of the cups. Keep the garnishes separate and add them right before you’re ready to serve.
- Garnishing: Always garnish right before serving for the best presentation. A freshly piped swirl of whipped topping and a perfectly placed Cadbury egg will look so much more impressive than one that’s been sitting topped in the fridge.
More Easter Recipes You May Enjoy
If you’ve tried this or any other recipe on my website, please leave a star rating and let me know how it turned out in the comments below.

Easter Jell-O Cups
Ingredients
- 3 ounces Island Pineapple Jell-O 1 Box
- 3 ounces Lime Jell-O 1 Box
- 3.93 ounces Pink Starburst Jell-O 1 Box
- 3 ounces Berry Blue Jell-O 1 Box
- 14 ounces Sweetened Condensed Milk 1 Can
- 4 cups Boiling Water
- 4 cups Cold Water
- 19 Cadbury Mini Eggs varying colors
- Pastel Nonpariel Sprinkles
- 8 ounces Whipped Topping 1 Tub
Instructions
- Line up containers on a baking sheet or other flat, moveable surface.
- In a medium mixing bowl, add the green jello and 1 cup boiling water. Stir until the jello is dissolved.
- Add 3.5 ounces of sweetened condensed milk (¼ of the can) to the bowl and stir until dissolved.
- Add 1 cup cold water to the bowl and stir to combine.
- Pour 1 ounce of the green jello into each container. Place in the fridge for 1 hour or until set.
- Repeat steps 2-5 for the yellow jello, pink jello, and blue jello (in that order). If the jello mixture is too warm, let it cool for 5-10 minutes before layering it on top of the chilled layer, as it could melt it and mix colors.
- Once the final layer is set, top with a dollop of whipped topping using a frosting bag and 1M frosting tip, if desired. Sprinkle with pastel nonpareils and top with a Cadbury mini egg. Enjoy!
Jenn’s Notes
Tips:
- Select straight-sided containers: To keep your layers looking perfectly even, avoid cups that taper at the base. Using straight-sided containers ensures every layer appears uniform from top to bottom.
- Ensure a level surface: Double-check that your cups are sitting completely flat in the fridge while they set. Even a slight tilt can ruin those crisp, horizontal lines you’re aiming for.


could that be made in one serving bowl with straight side ?????
What a fun idea! Since this recipe already calls for straight-sided containers, you’re already thinking the right way! The layering process would work the same — just pour each color, let it fully set, then repeat. The main thing to keep in mind is that the layers in a larger bowl will be deeper, so give each one plenty of time in the fridge before adding the next (at least an hour, possibly a bit more). I haven’t personally tested it in a single large bowl, so I can’t promise exactly how the set times will go, but use the “firm to the touch” test as your guide before moving on to the next layer. Would love to hear how it turns out!
I’d give it 5 more stars !!!!!!!
awwwwww thank you! So glad you enjoyed it!