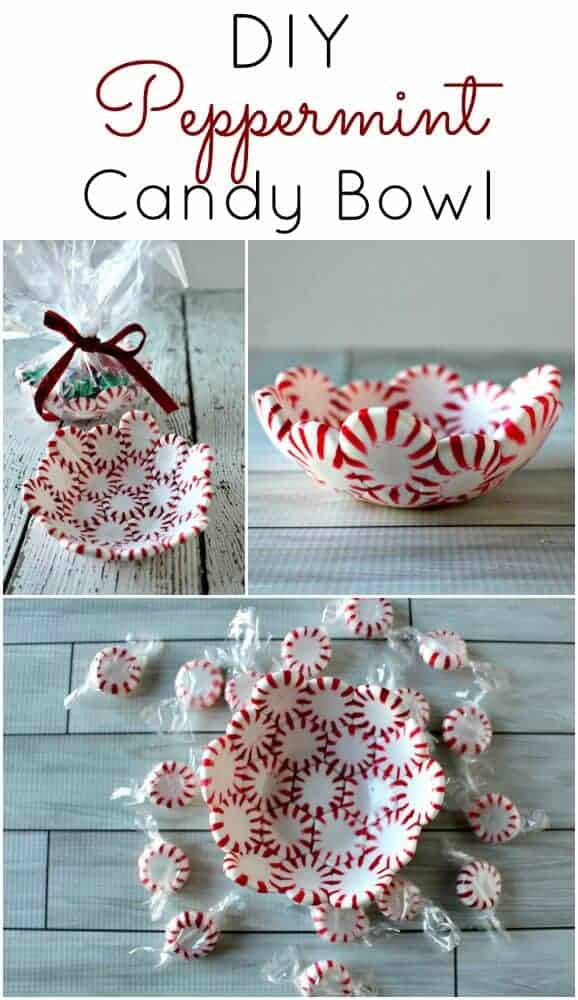
Candy canes are not just for sucking on anymore!
I had so much fun making these Candy Cane Christmas Trees this past weekend! They are such a cute treat and easy to make gift for the holidays!
It is unbelievable all of the adorable things that can be done by melting candy canes! It is incredibly fun – just melt them and they become totally mold-able and a crafter’s dream!

Ingredients
- Mini Candy Canes
- Starlight Peppermint Candy
- White Chocolate Wafers – I used this kind
- Christmas Sprinkles
- Silicon baking mat (I got mine here and I use it for EVERYTHING) or parchment paper and wax paper
Just follow these instructions and watch the How To Video below:
How to Make Candy Cane Christmas Trees
- Preheat oven to 300 degrees
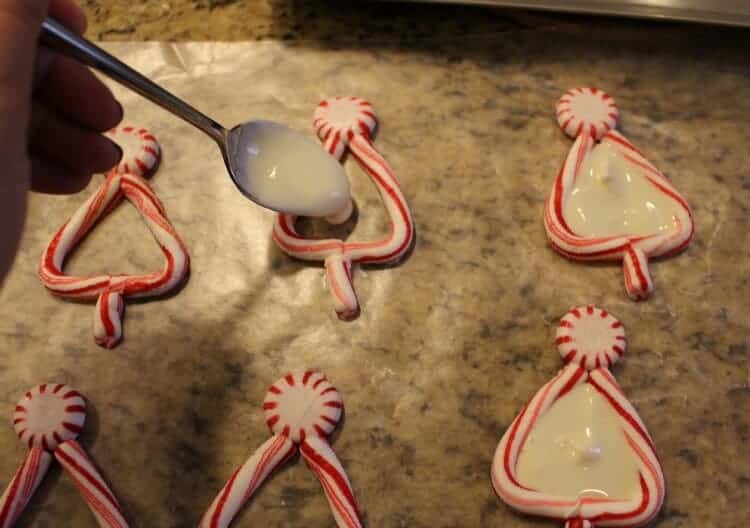
- Lay candy canes in a heart shape on the mat. Place one starlight peppermint candy at the tip end of the “heart”. Cut a mini candy cane to create a “tree stump” and place at the opposite end of the heart (see pictures or video below).

- Place in oven for about 3-5 minutes (please note, all ovens cook differently so you need to watch the candy and as soon as it get a little soft, remove from oven…. you can always put it back in for longer if needed)
- ADULT STEP – As soon as it comes out of the oven (NOTE – BE VERY CAREFULLY because it will be very hot and you could burn yourself!!), shape the tree by straightening the “humps” of the heart into a straight line, press the “points” of the heart together with the peppermint candy and attach and pinch the tree stump to the tree.

- Let cool completely and if you are using parchment paper, transfer to wax paper. If you are using the silicon mat, your can complete the next step on the mat, as well.
- Melt the white chocolate wafers according to the directions on the package. Using a teaspoon, carefully spoon the white chocolate into the center of the tree. Immediately scatter with the sprinkles of your choice.

- Let cool completely and use a spatula to remove from the mat or paper if they are sticking!
- Enjoy!

Check out some of my other fun crafts and treats using peppermints!!


Thank you
love this, was thinking of trying the bowls this year
You must! They are my favorite thing on my entire site!! Please share a photo if you make them!(use Target brand mints!)
I made these & used as cupcake toppers. Won most creativebin dessert contest! They were super fun to do. Be sure to be EXTRA gentle when picking up from wax paper after final cooling from filling in center. One of my broke bc I wasn’t at first. See @maetexas on Instagram for pics.
That is SOOOOO Awesome! Can you tag me in the IG post so I can see it @princesspinkygirl
Hi ….. want to make these for a get together for the Holidays …. how far ahead can I make them ….. and how do you suggest keeping them after they are completed?
They look adorable and I love peppermint as well, so really interested in doing them for Christmas.
Hi Judith – you can probably make them a week or two out, just keep them sealed in a container!
These worked great although I had to play around a bit. The mints I had melted easier than the candy canes so I put the candy canes in oven ~3 minutes and then the mints for the final ~2. I also used a mint for the base and used a knife to shape into a pot (flat based with angled flat sides) and this also helped make it nice and firm to hold the bottom of candy canes together. My daughter decided we use a bit of green gel food colouring to make the white melts green and it looks awesome.
Really cute ideas. Thanks.
We struggled with these at first. We had everything “joined” together when we put them in the oven, but as they warmed, the pieces separated, especially the canes from the mints. Eventually figured out that I could stretch the canes back up to meet the mint (moving the mint causes it to lose its shape and look odd!). One thing I noticed is that, the more of the cane that touches the mint, the better your chance that they will stay together once cooled. The nice thing about these is that you get a “second chance” to fix them if they cool and break apart! Aren’t many recipes like that, for sure! Thanks for the great idea!
My 9 year old daughter was determined for us to try this recipe so she could give them out during her class holiday card and gift exchange. After they first came out of the oven, I had several thoughts that this was not going to work as some of the peppermint pieces on the top of the tree were flattened and the cane pieces were not fusing together. After a little massaging/pinching the cane sections and returning them to the oven for short bursts of time, they managed to stay together and hardened pretty quickly. The candy melts were the easiest part, followed by beautiful sprinkling on top. Voila! Small little masterpieces and a very happy glowing smile on my daughter’s face!! We plan to package each one in a holiday celophane gift bag, for her to give to her friends. Thanks for the easy and very creative idea.
Happy mom and daughter.
Great project with kids. We used the rounded bit from the candy canes cut for stumps as the tree topper, placing it over the joined tips of the whole candy canes, instead of using starlight mints. Three minutes was perfect for softening Brach’s candy canes. They were easy to bend and did not burn fingers. We did not wait for the peppermints to cool before adding the melted candy. Worked great. This meant less waiting for the silpat mat to be free for its next use. We put them closer together on the silpat, and could make a dozen at a time on the mat.
Thanks for the idea!