
This post may contain affiliate links. Please read our disclosure policy.

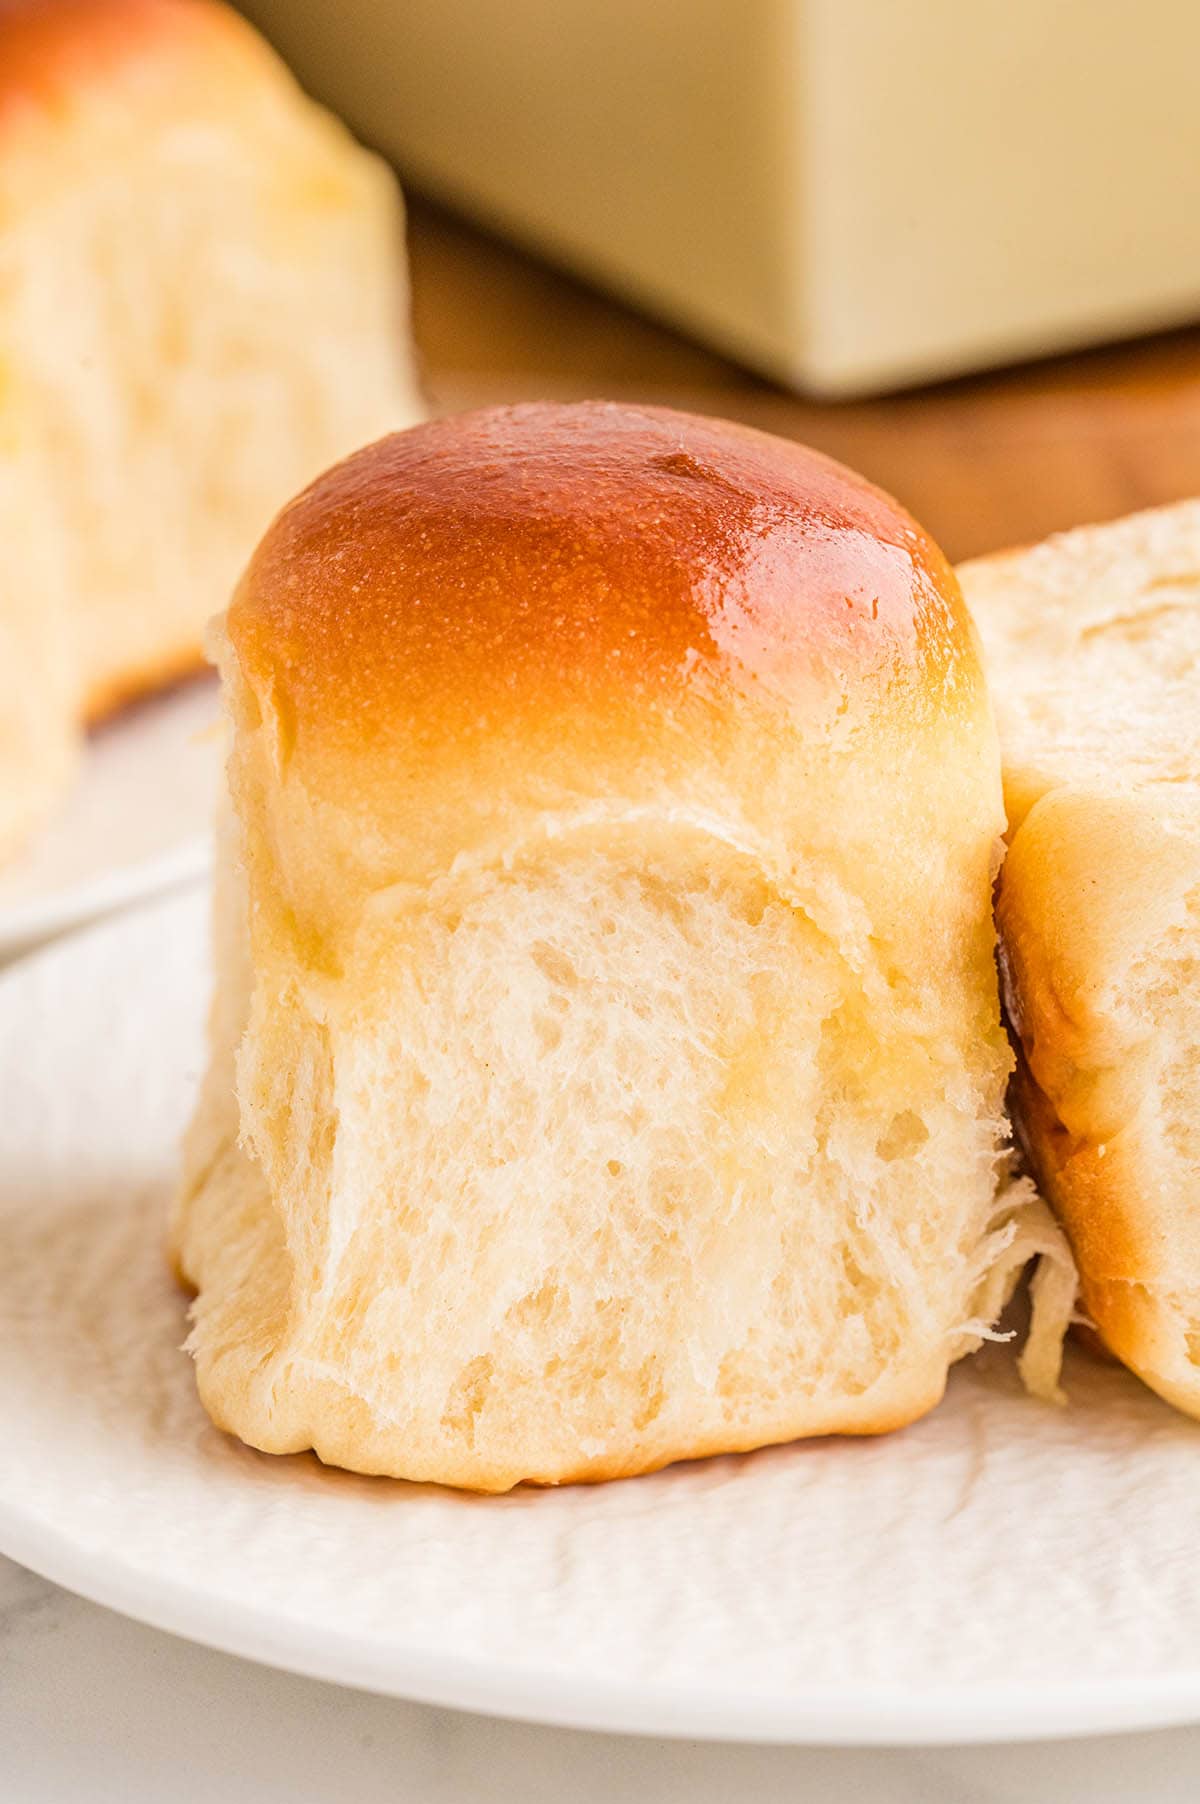
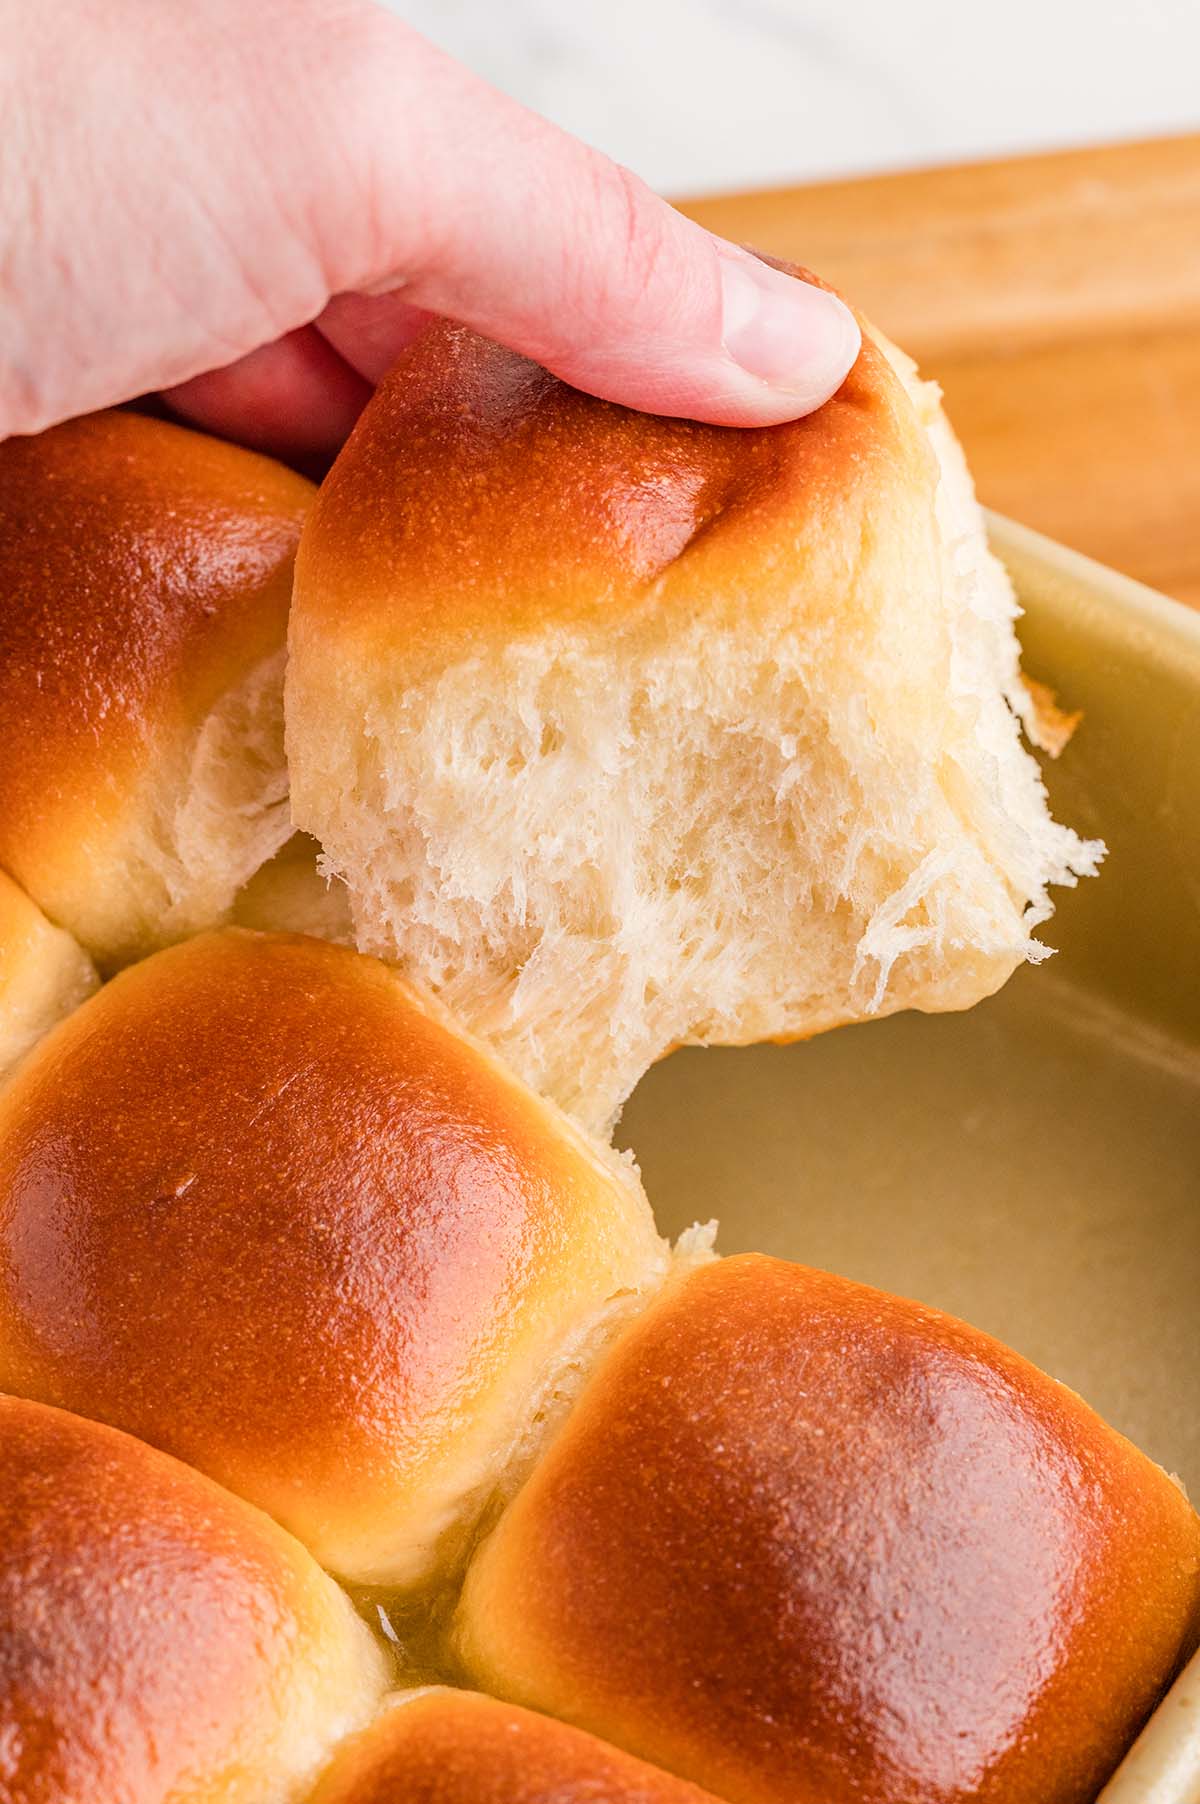
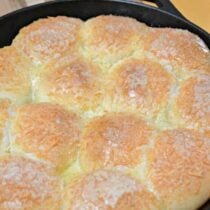
The second these yeast rolls go into the oven, the whole house fills up with that warm, yeasty, slightly sweet smell. If you grew up eating lunch in a school cafeteria, you know exactly what I mean. Soft, fluffy, and pull-apart perfect, this recipe makes 24 of them in one pan.
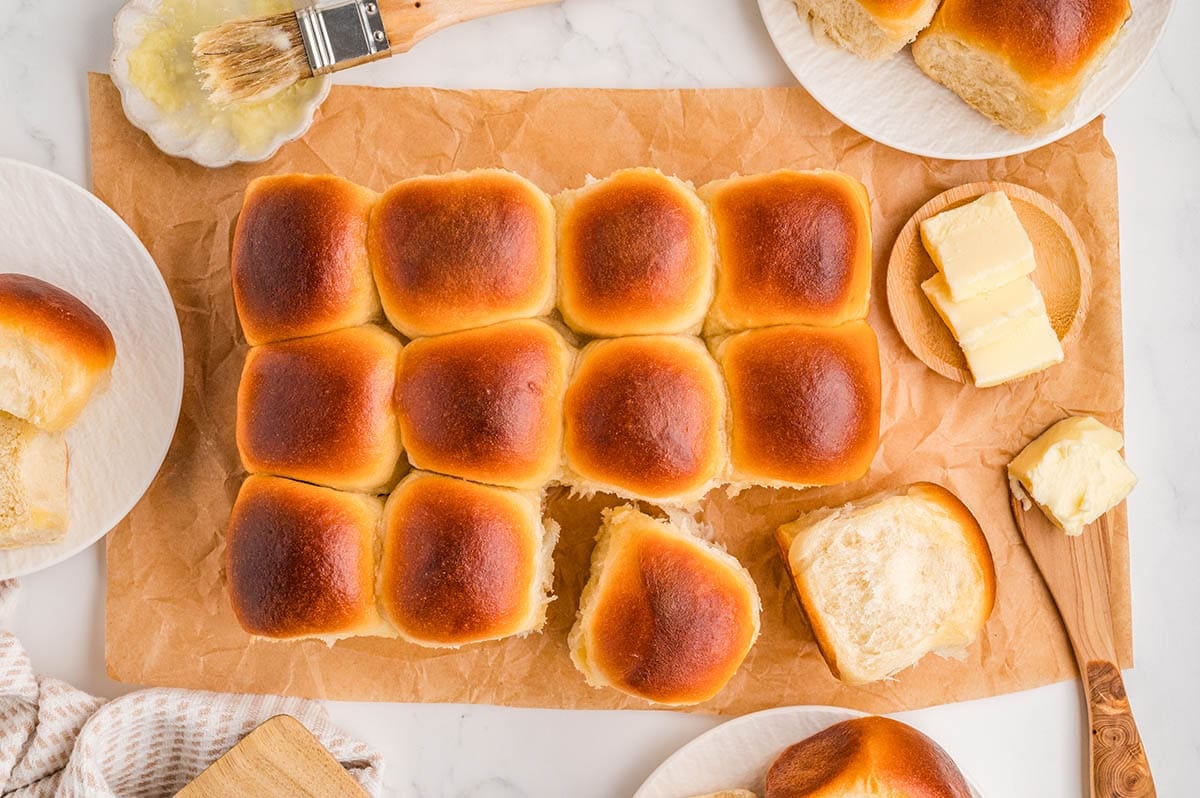

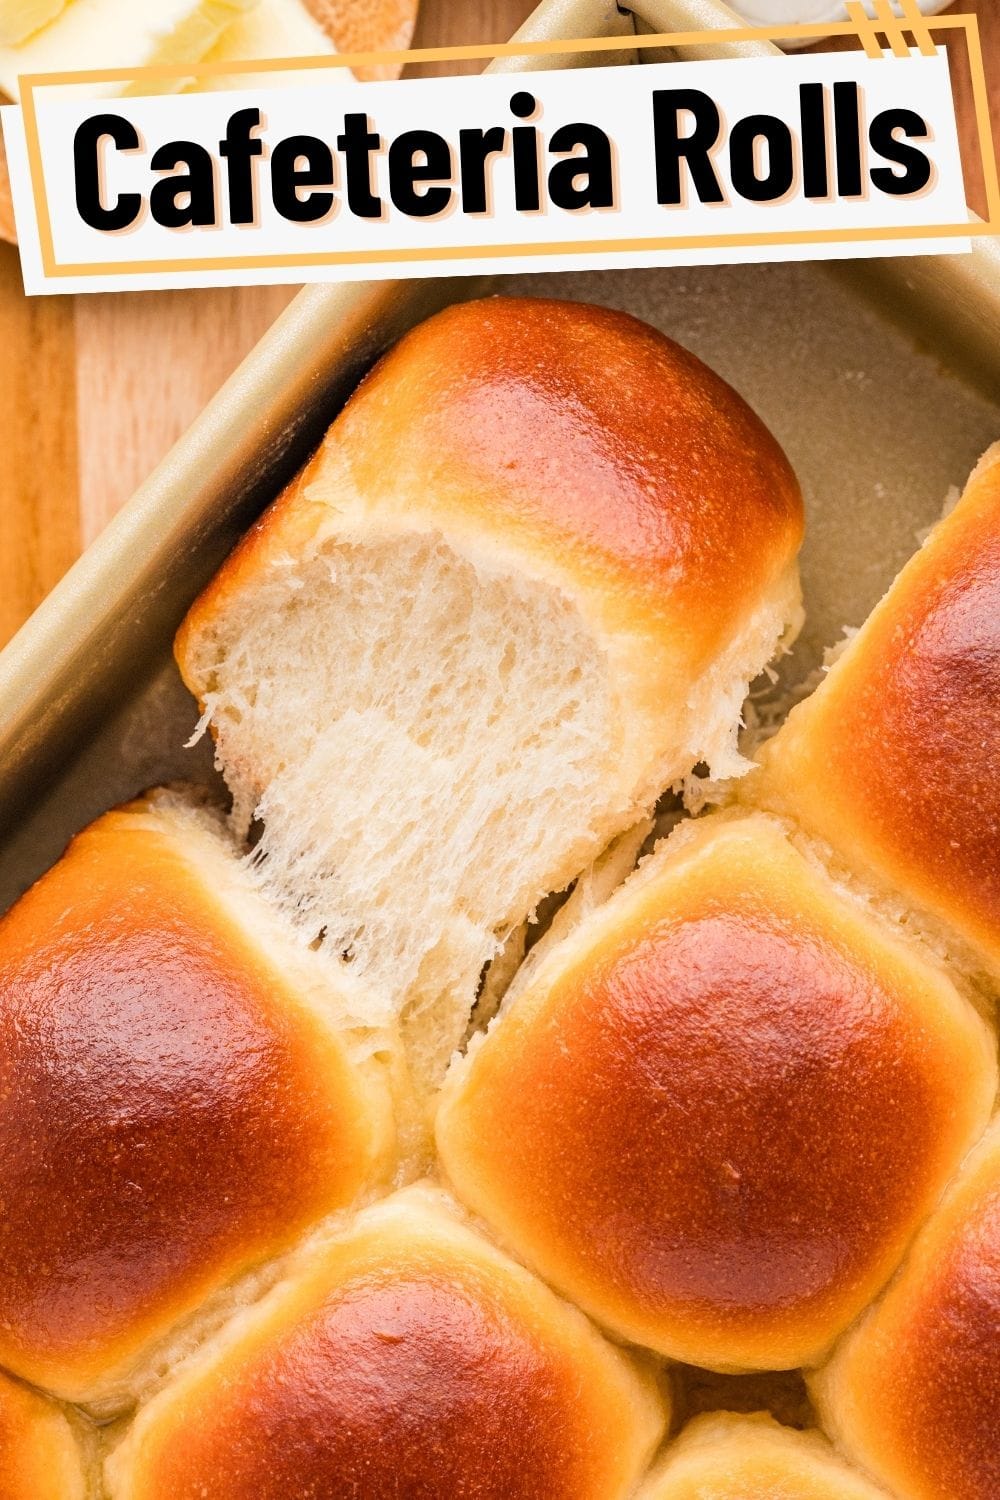
Every time I make these cafeteria rolls, I am right back in the school lunchroom. The lunch line wasn’t always the highlight of the day, but those rolls were the best thing on the tray. Soft, warm, and buttery with that perfect pull-apart texture. And that smell floating through the hallways? My kitchen smells exactly the same way when these are baking.
I make these a few times a year as a special treat, usually alongside BBQ chicken or steak. If there are any left the next day (a big if), they make a seriously good sandwich roll. They are quick enough for a weeknight and impressive enough to bring to any holiday table.
The secret that makes these taste just like the old-school cafeteria rolls you remember is nonfat dry milk powder. It’s the ingredient that sets these apart from a basic dinner roll and gives them that signature slightly sweet, tender crumb. Combined with a blend of bread flour and all-purpose flour, these bake up tall, pillowy, and perfect every single time.
If you need the perfect dinner to serve alongside these, my Crockpot Chicken Spaghetti is always a crowd-pleaser. And on a cozy night, a big bowl of Chicken Pot Pie Soup with a basket of warm rolls on the table is just about perfect.
Key Ingredients
Here is what makes these rolls so good:
- Instant yeast. This is what makes the recipe beginner-friendly. Instant yeast goes straight into the dough with no proofing required. Just mix and go. (Using active dry yeast instead? See the FAQ below.)
- Bread flour AND all-purpose flour. This combo is the key to the right texture. Bread flour gives the rolls structure so they rise tall and hold their shape. All-purpose keeps them soft and tender rather than chewy.
- Nonfat dry milk powder. This is the cafeteria roll secret right here. Dry milk powder adds a subtle sweetness and richness to the dough without making it too wet. It is what gives these that nostalgic, slightly sweet flavor that is so hard to recreate any other way.
- Canola oil. Using oil instead of butter keeps the dough easy to work with and gives the rolls a soft, light crumb.
- Melted butter for topping. Non-negotiable. Brushing the rolls the second they come out of the oven gives them that irresistible glossy, buttery finish.

How to Make Yeast Rolls
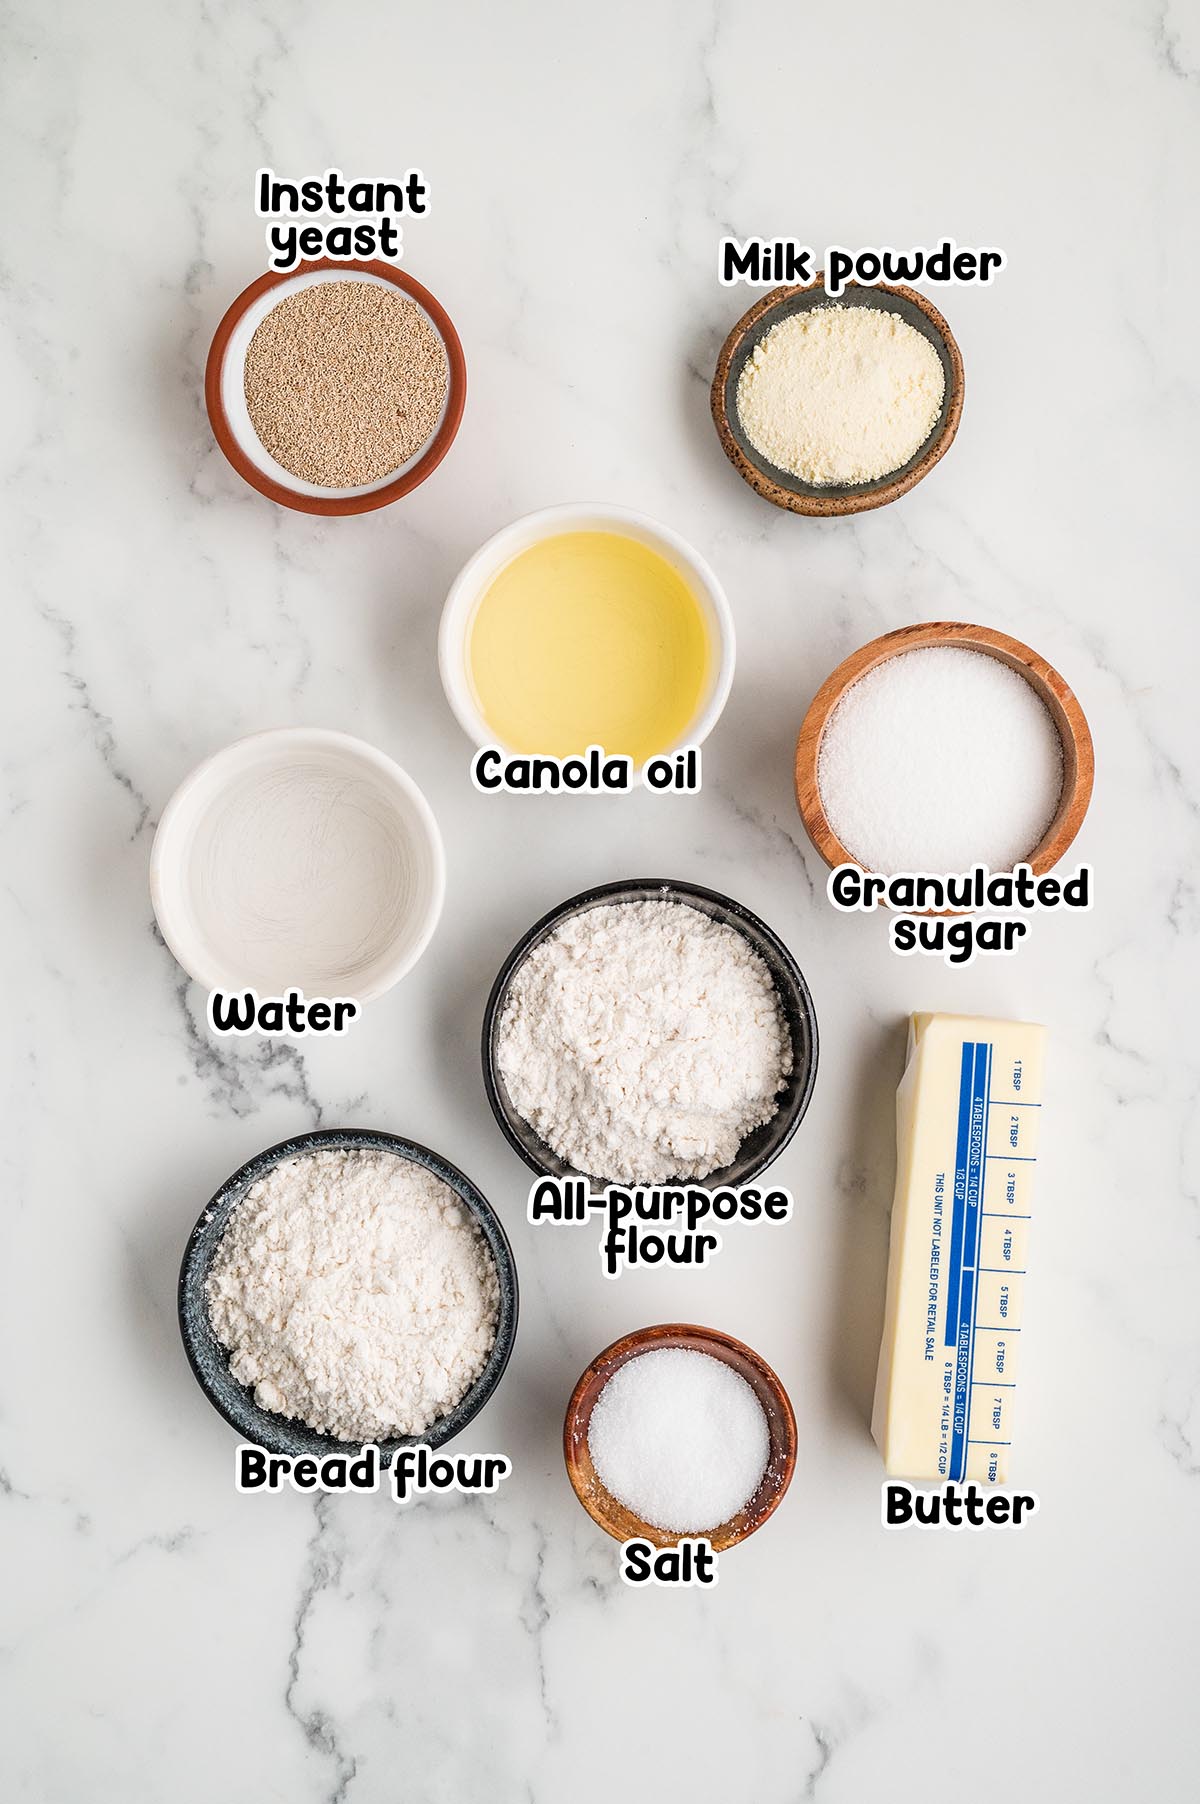
Step 1: Mix the wet ingredients. In the bowl of a stand mixer, use a fork to quickly mix together 2 cups warm water, 2 tablespoons instant yeast, ½ cup sugar, and ½ cup canola oil.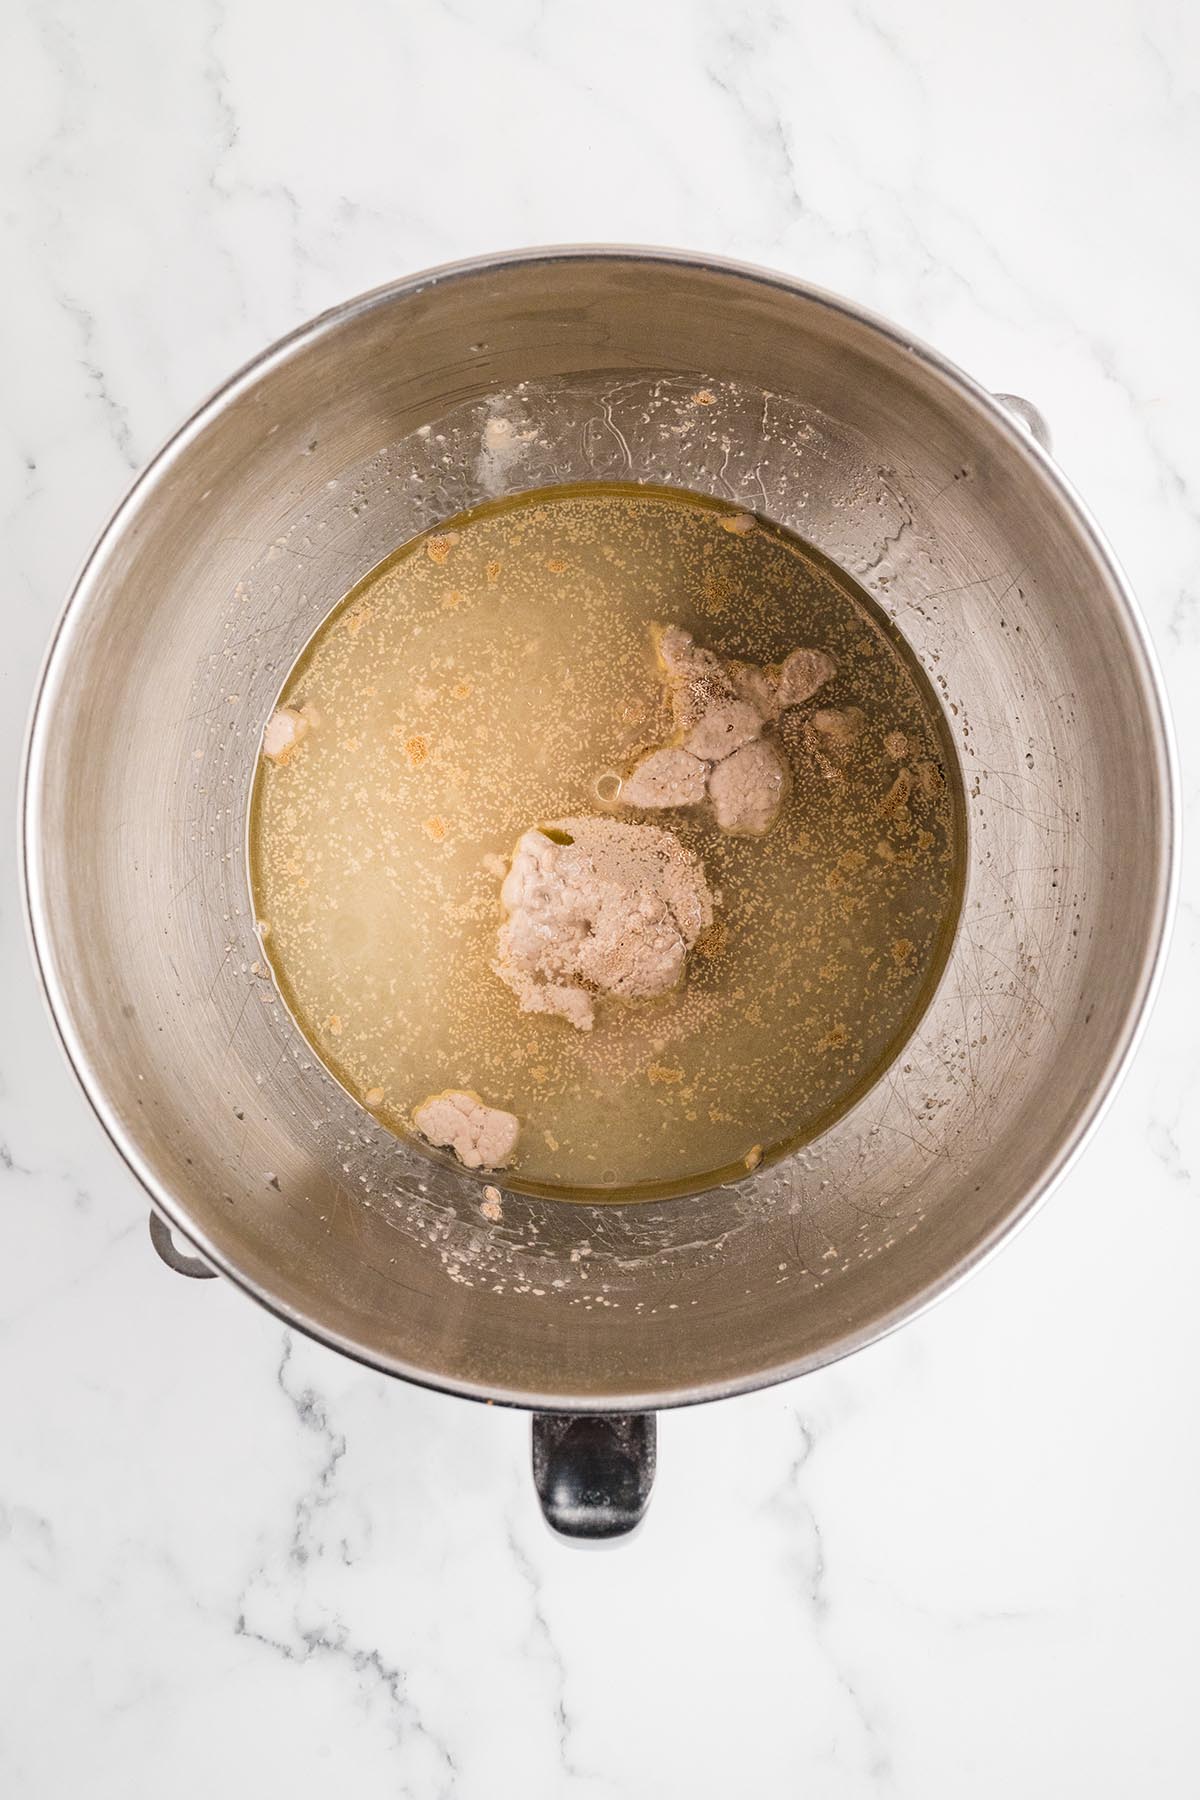
Step 2: Add the dry ingredients. Add 4 cups bread flour, 2½ cups all-purpose flour, ¾ cup dry milk powder, and 1 tablespoon salt. Start with just 2½ cups of the all-purpose flour. You can add more later if the dough needs it.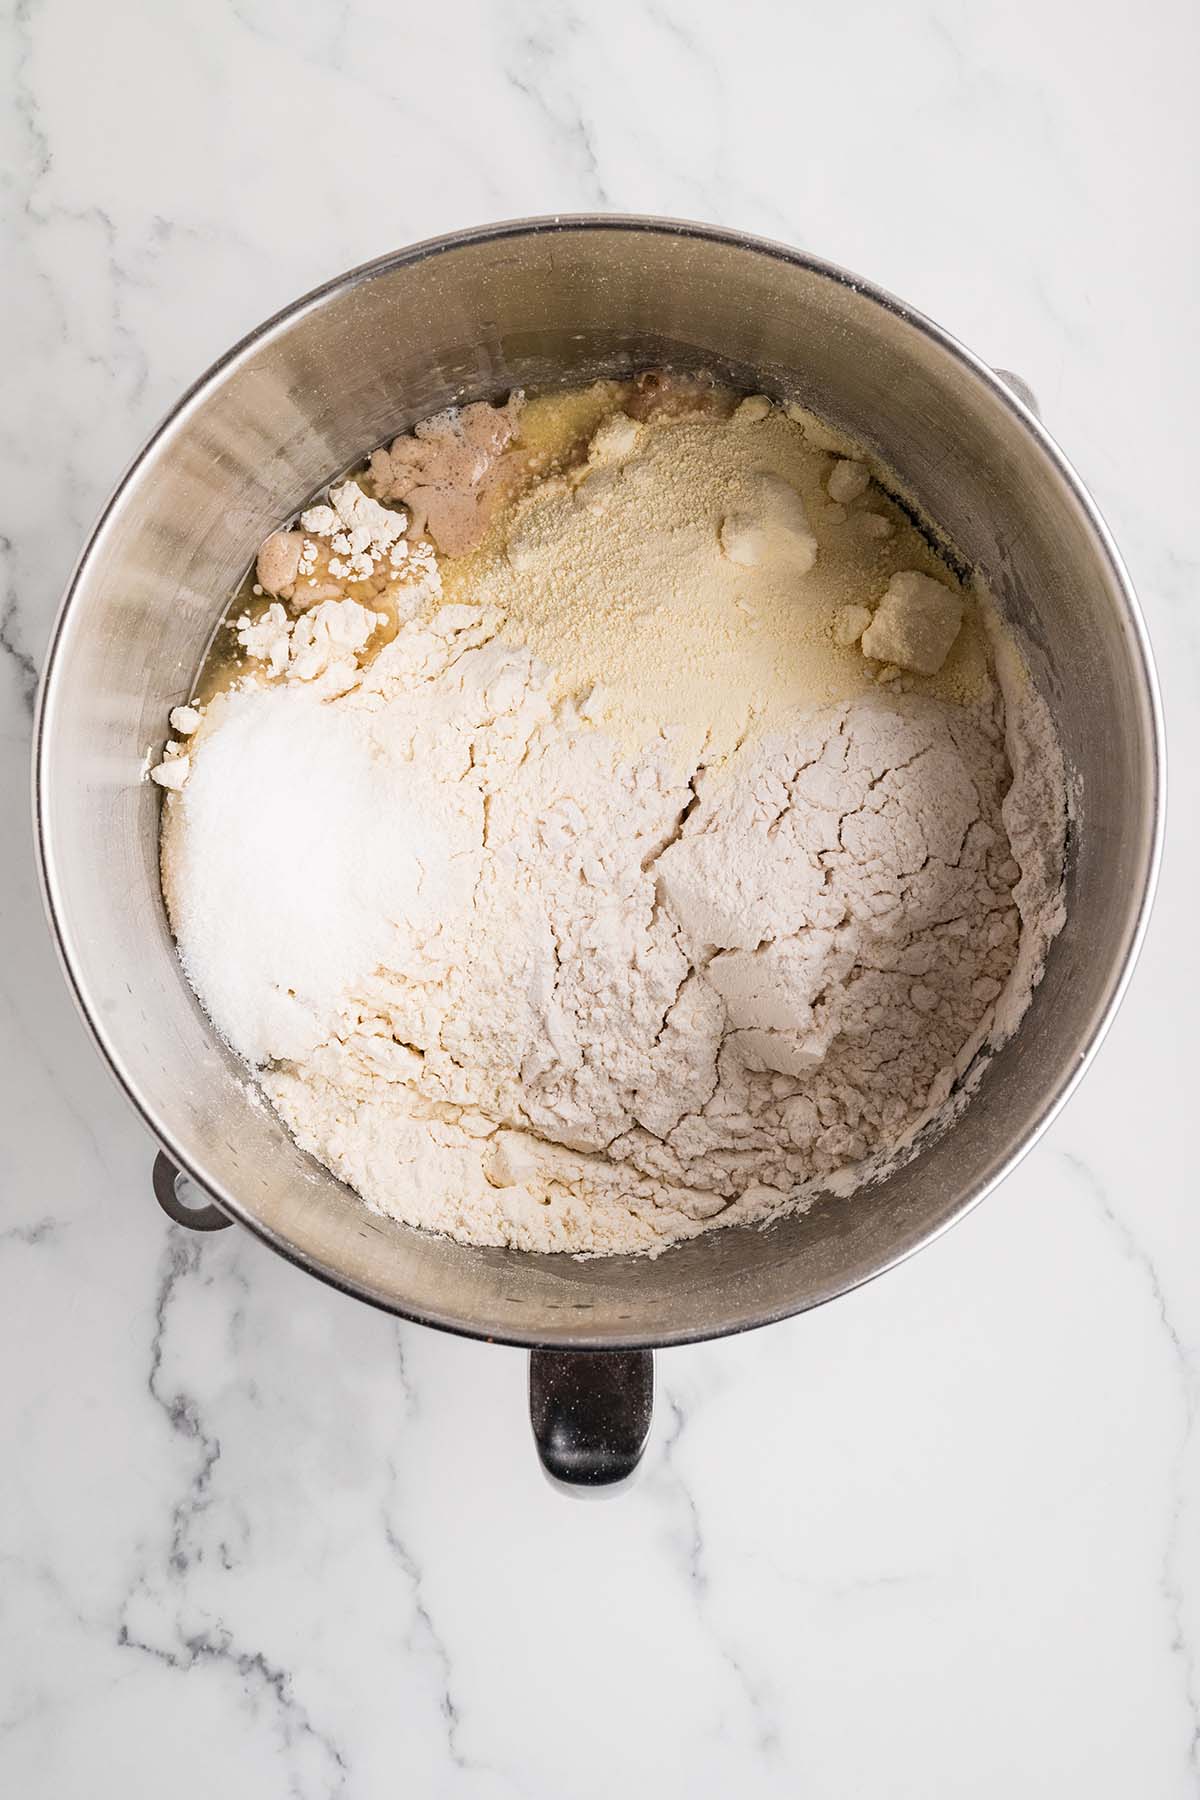
Step 3: Knead the dough. Attach the dough hook and knead on low for 2 to 3 minutes, just until the dough comes together and wraps around the hook. Once it forms a ball, bump the speed up slightly and knead for 5 more minutes. You want a dough that is smooth, soft, and just slightly tacky. If it is sticking to the sides of the bowl, add more flour a little at a time, no more than ¼ cup at a time.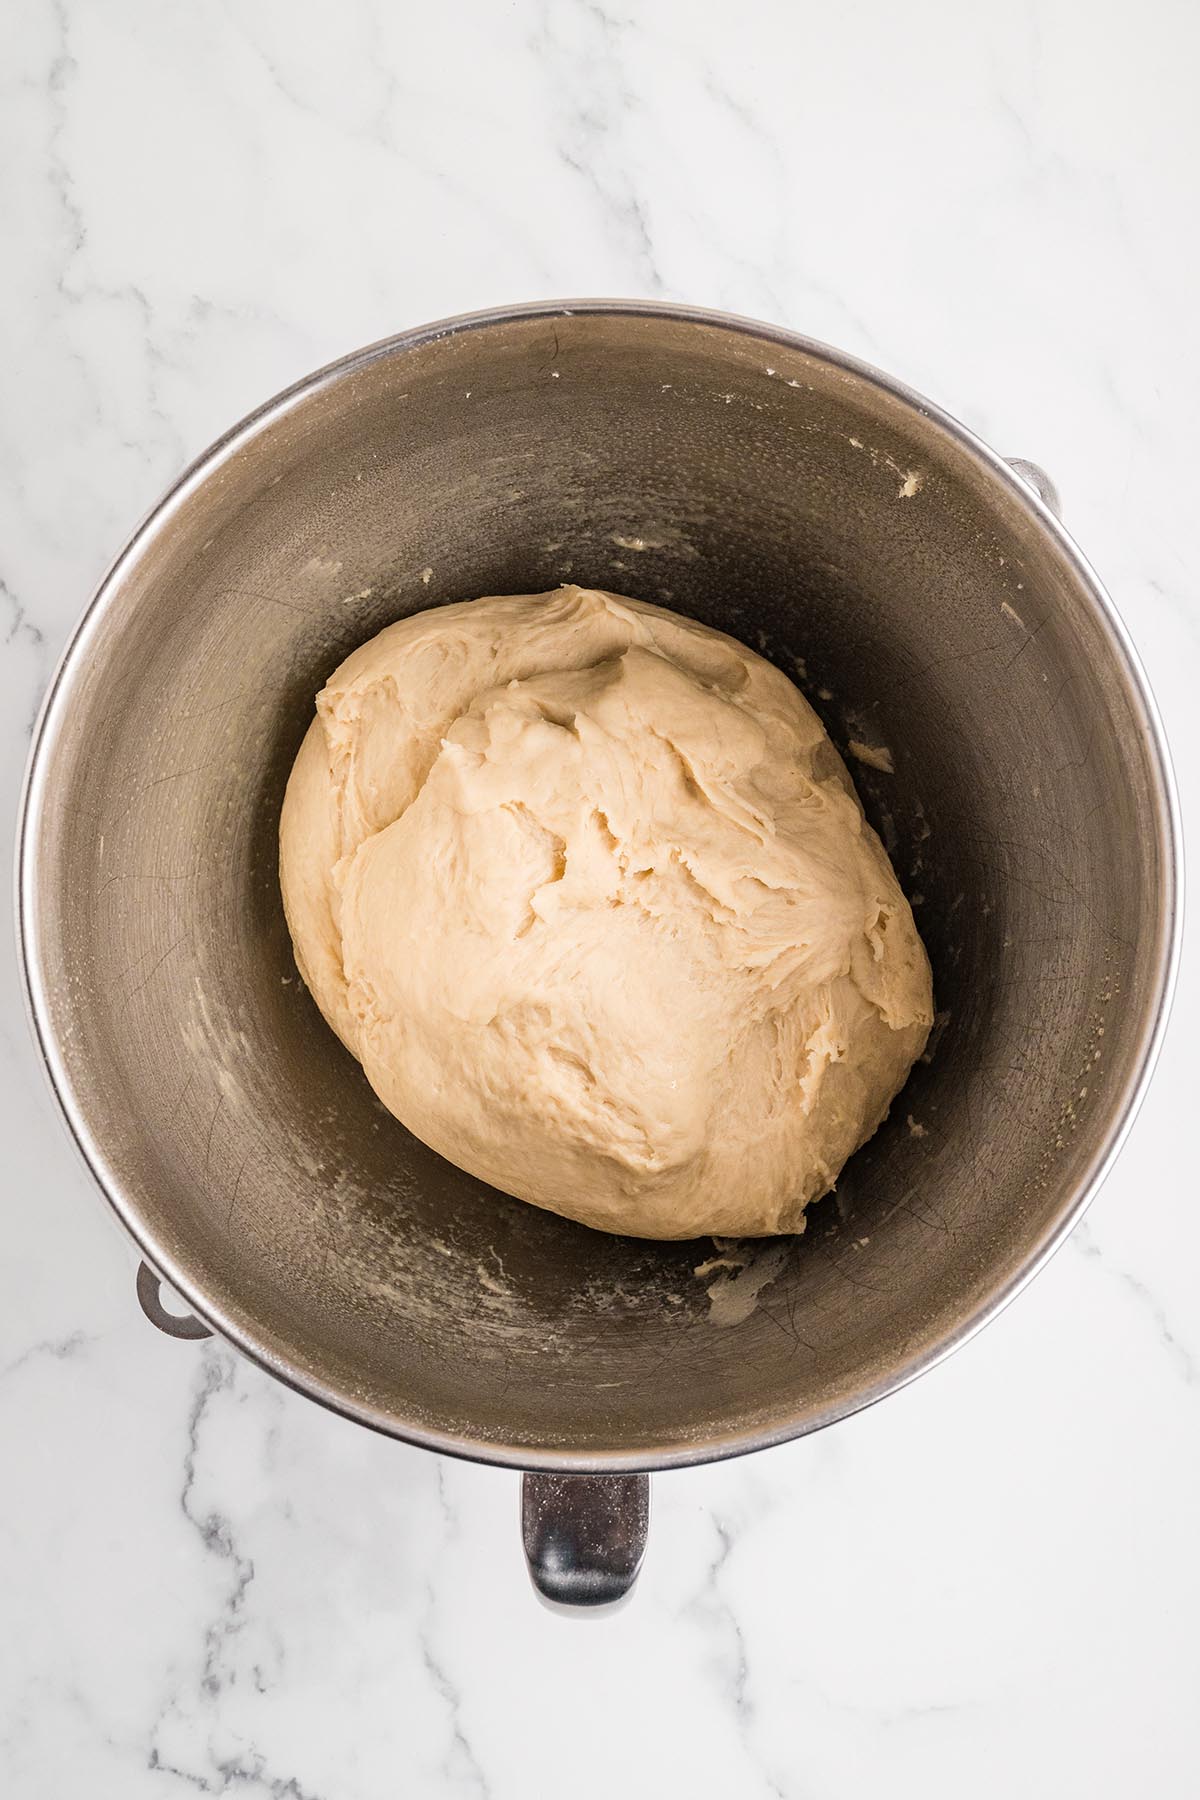
Step 4: First rise. Remove the dough briefly to spray the mixer bowl with cooking spray, then return the dough to the bowl. Cover tightly with plastic wrap and set it somewhere warm until doubled in size, about 1 hour. I like to place mine in the oven with just the oven light on. It creates a perfectly warm, draft-free spot without turning the oven on.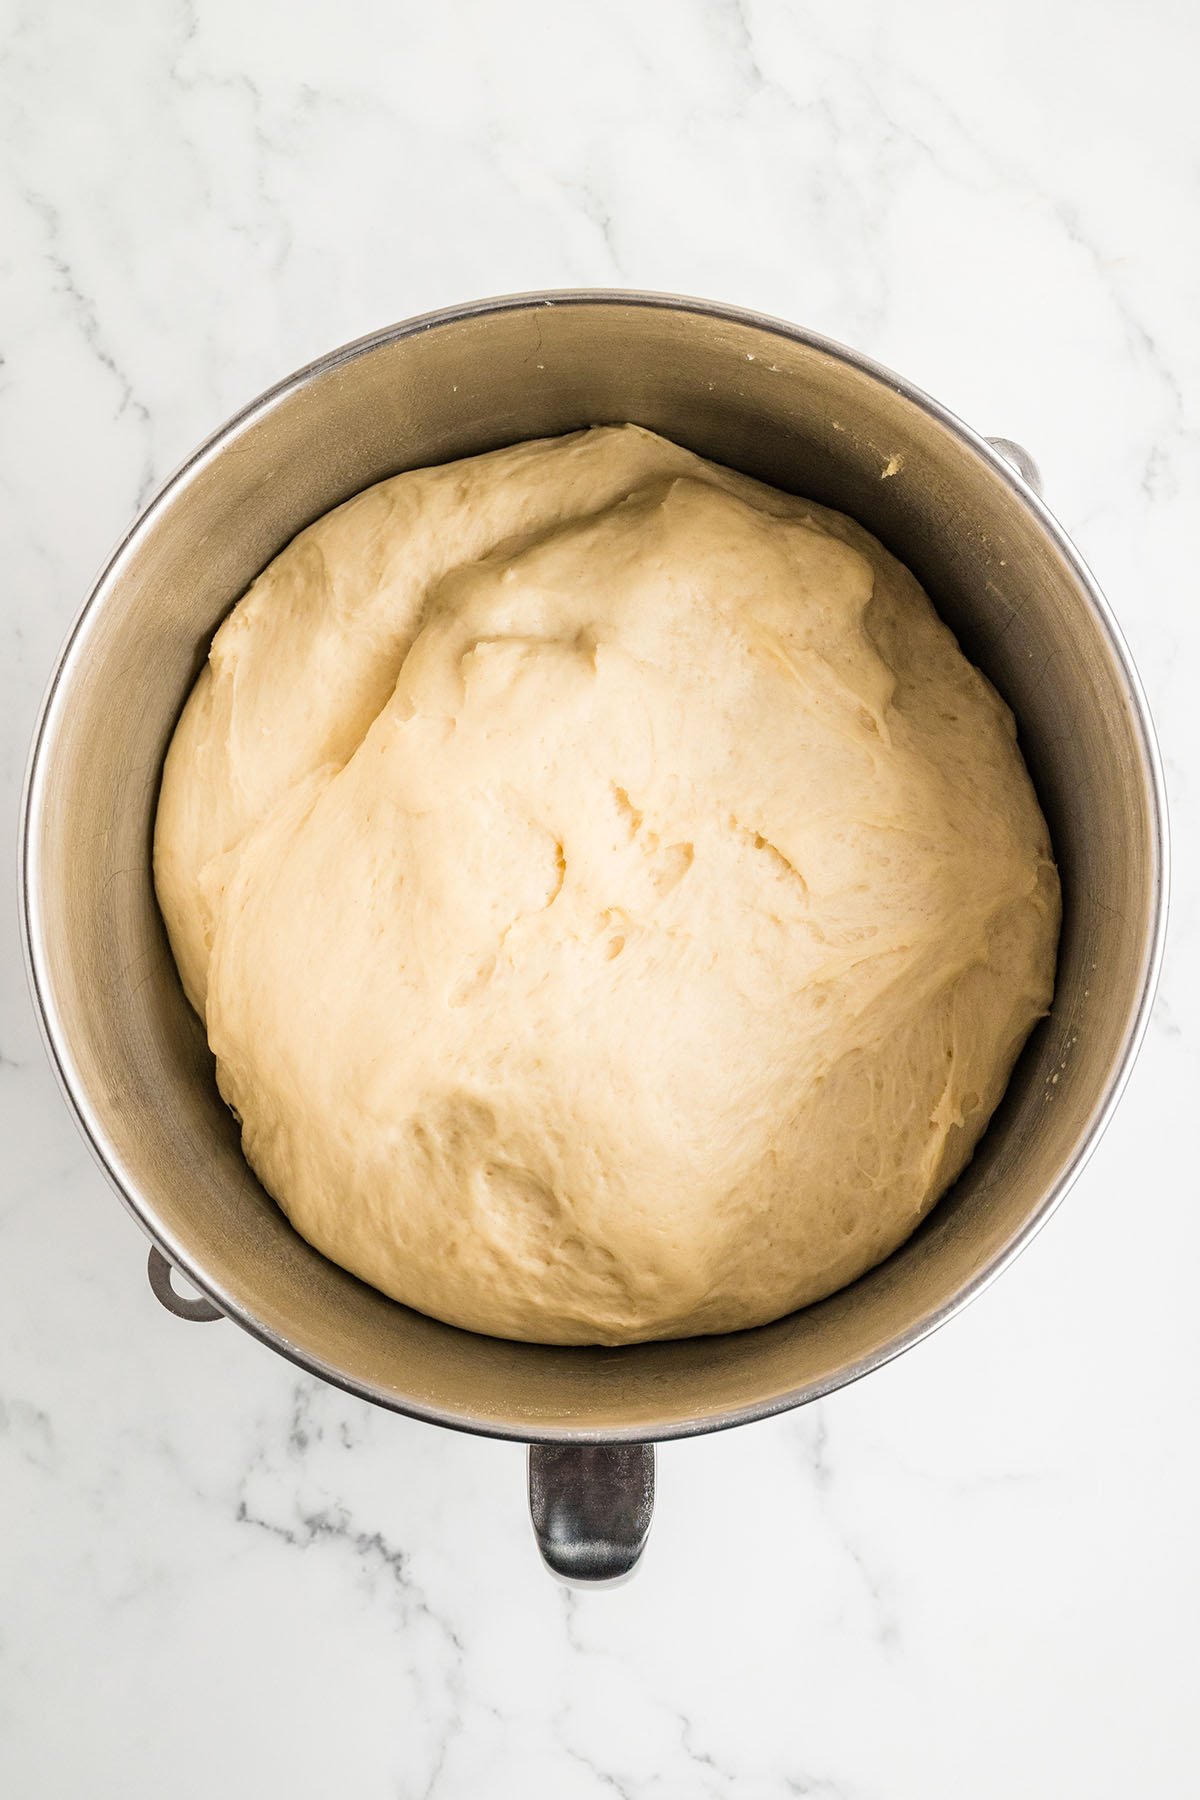
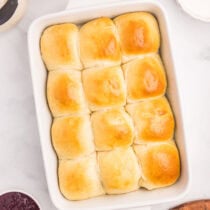
Step 5: Prep your pan and shape the rolls. Spray a 9×13 baking dish with cooking spray. Lightly punch the dough down to release the air, then divide it into 24 equal-sized pieces. Roll each piece into a smooth ball by cupping your hand and rolling it against the counter in a gentle circular motion.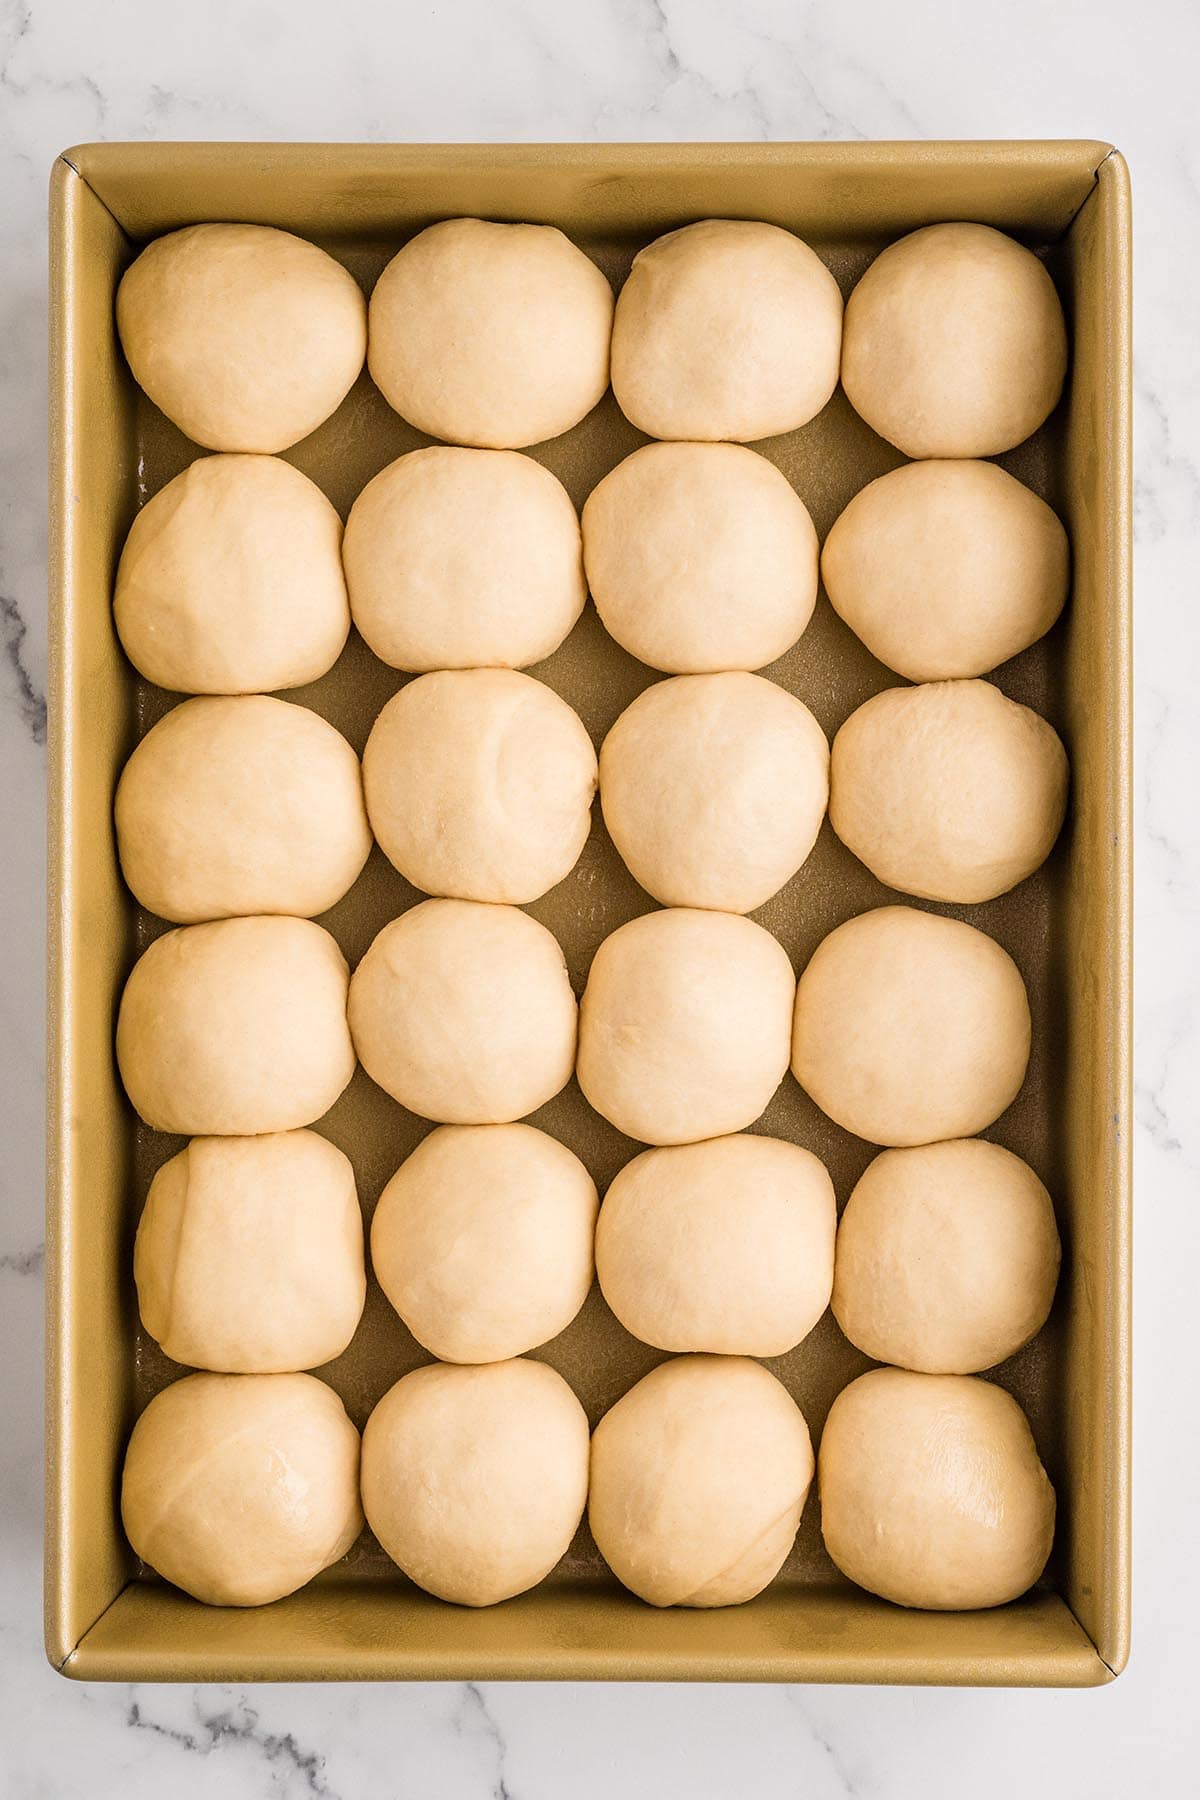
Step 6: Second rise. Place the dough balls in the prepared pan, 4 across and 6 down. Cover loosely with greased plastic wrap and let them rise until puffy and nearly doubled, about 30 minutes. Preheat your oven to 400°F during this time.
Step 7: Bake. Remove the plastic wrap and bake for 17 to 20 minutes, or until the tops are deep golden brown. If the tops are browning too fast, tent loosely with foil at the 10-minute mark. A center roll should reach an internal temperature of 190°F when fully baked.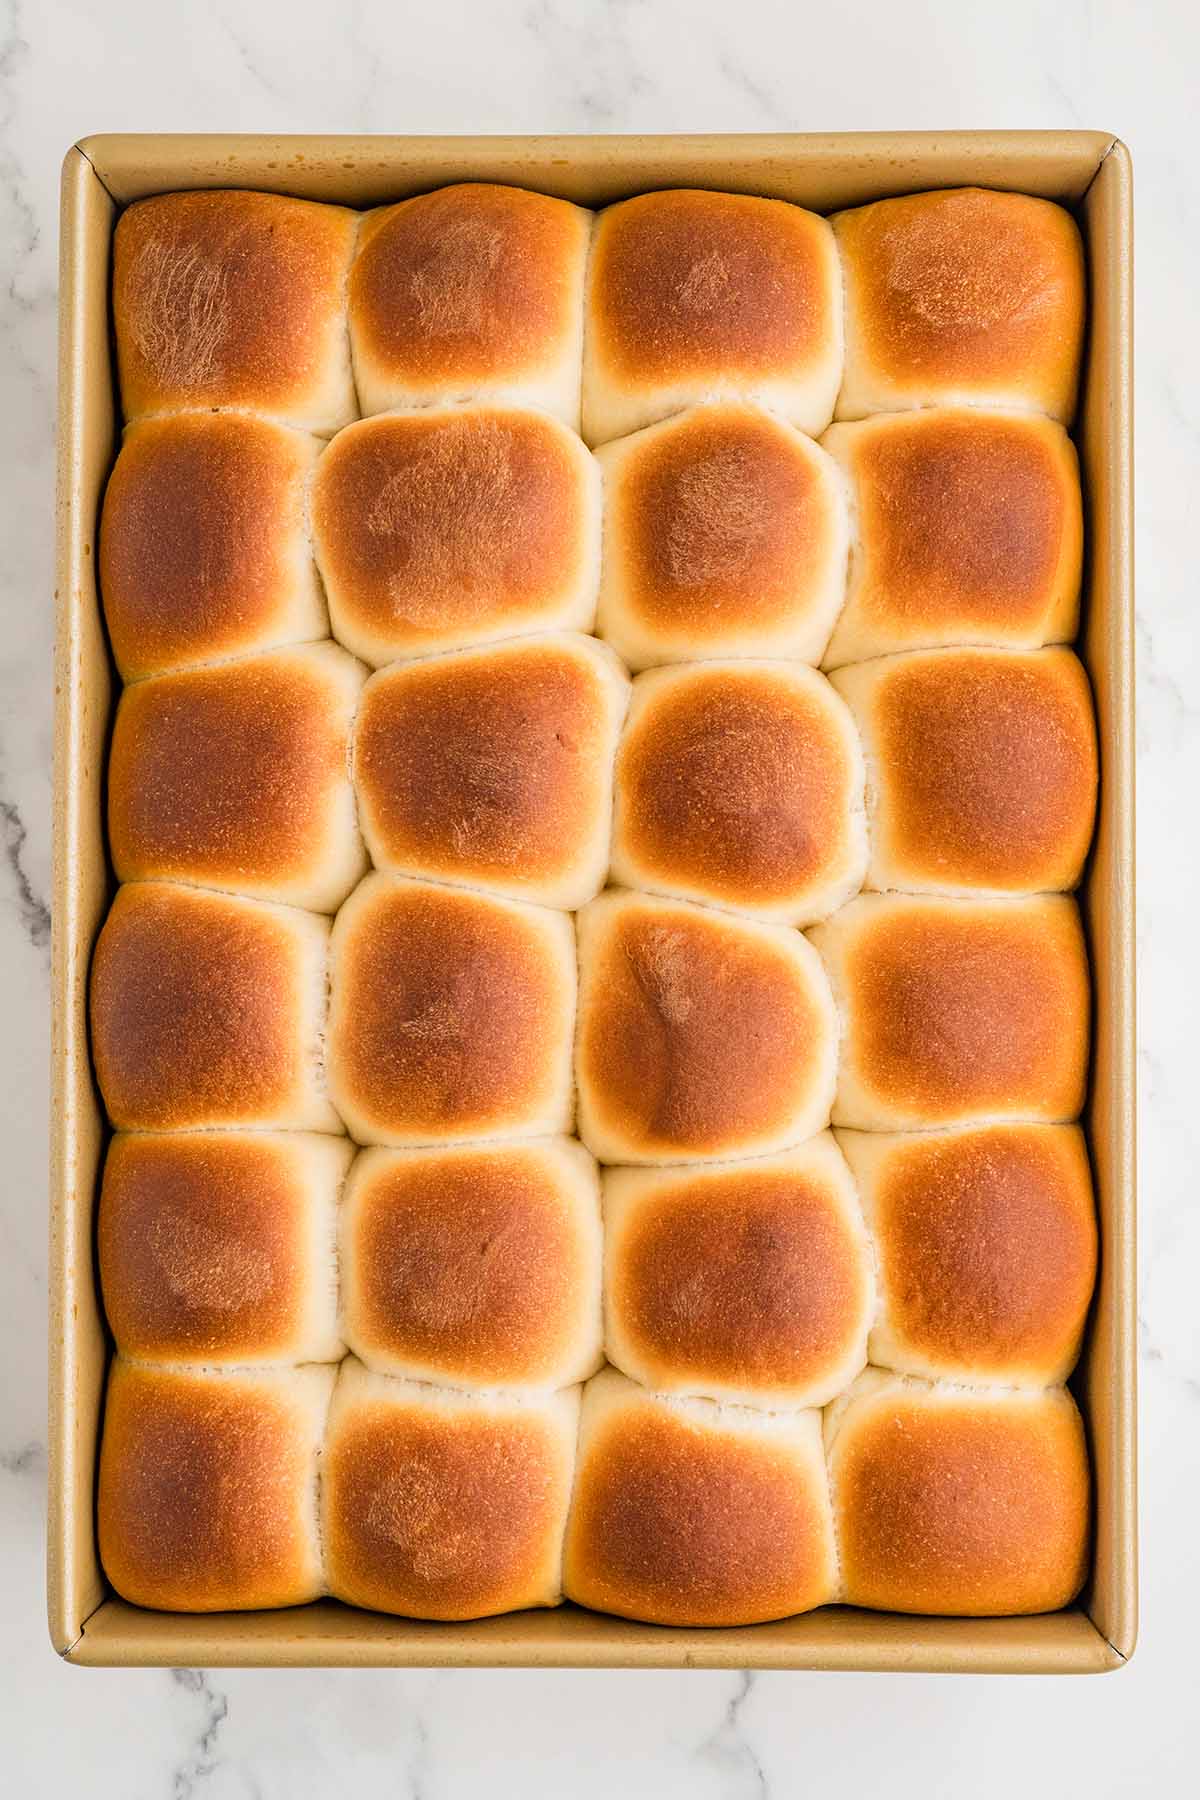
Step 8: Brush with butter and serve. The second the rolls come out of the oven, brush them generously with the 3 tablespoons of melted butter while they are still hot. Pull apart and serve warm.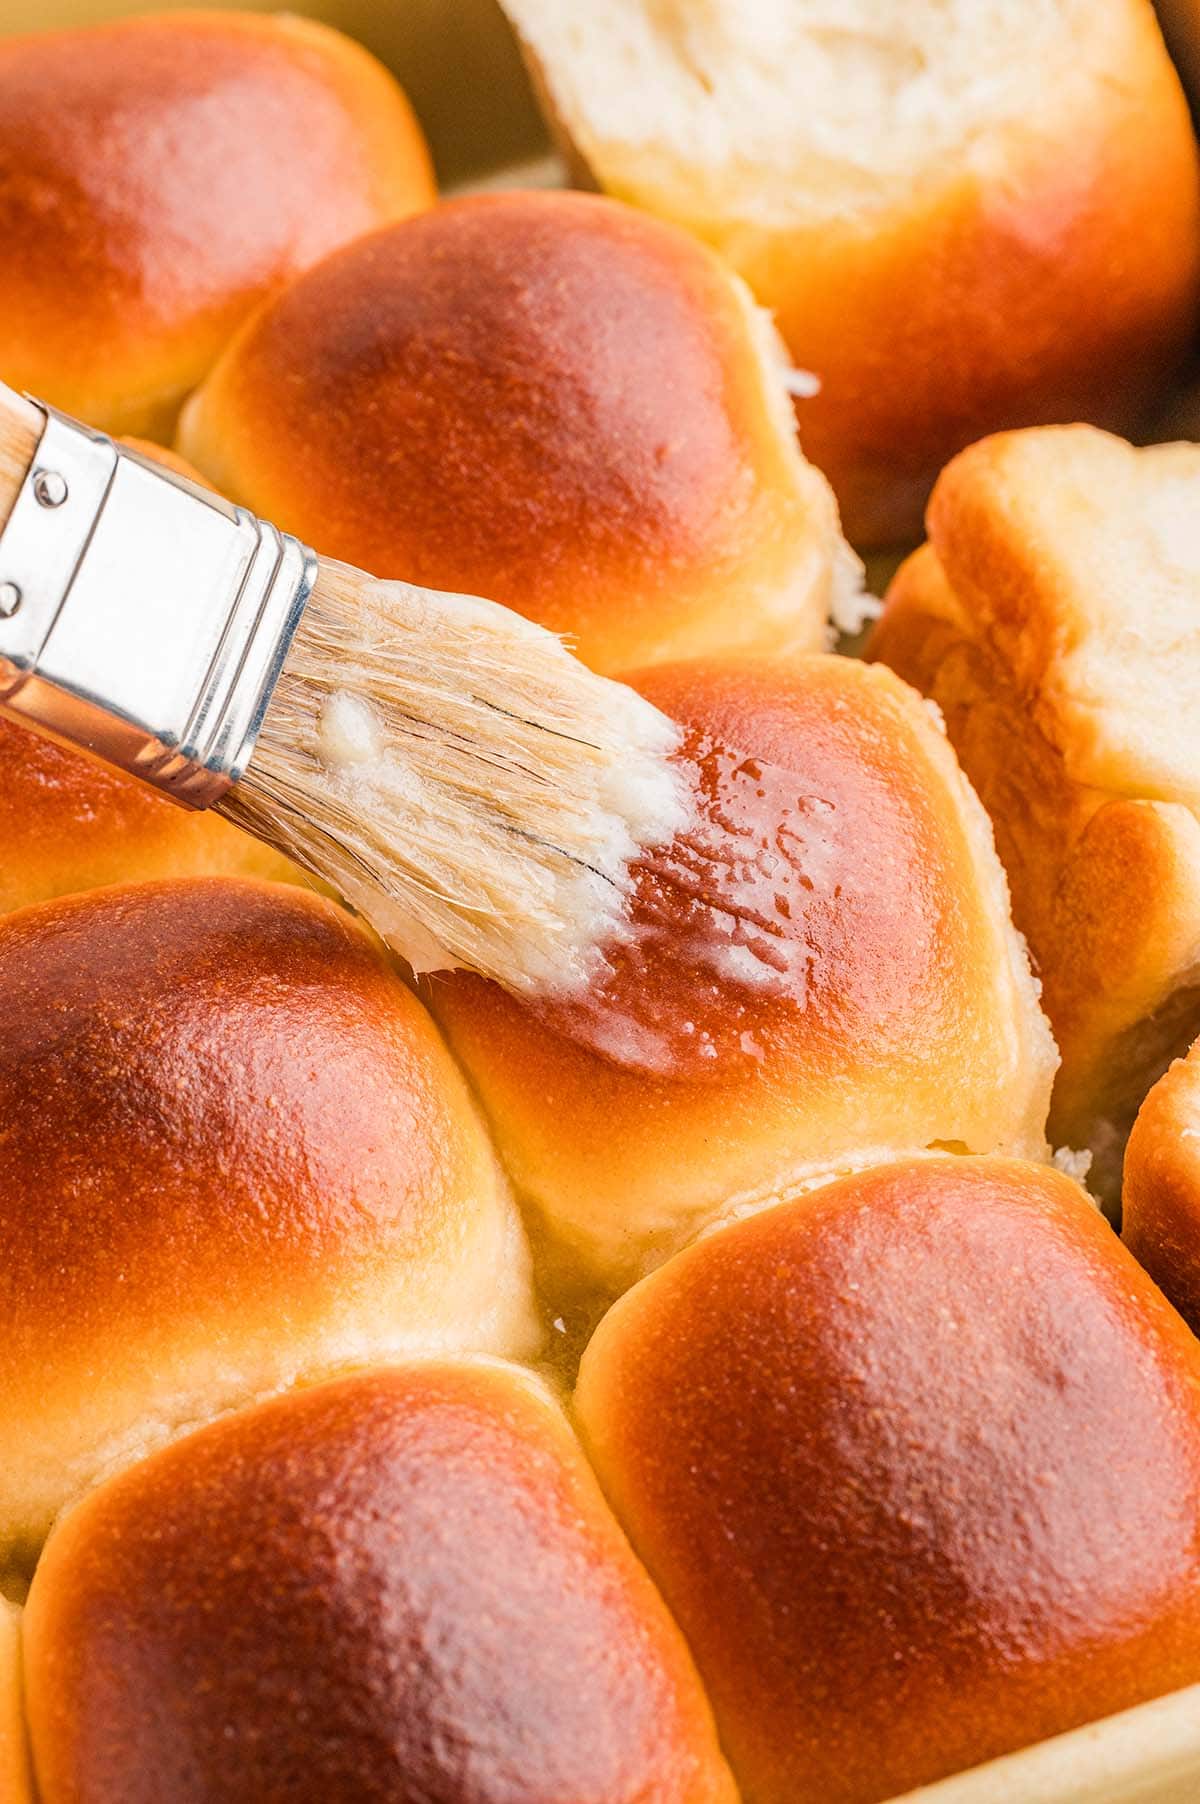
Common problems and how to fix them
- Rolls didn’t rise: The most likely causes are expired yeast or water that was too hot and killed it. Always check your yeast’s expiration date before starting, and make sure your water feels warm on the inside of your wrist but not hot. A cold kitchen will also slow things down significantly.
- Tops browning too fast: Tent the pan loosely with foil at the 10-minute mark and continue baking. The foil slows the browning while the centers finish cooking through.
- Dense or doughy rolls: This usually means the dough didn’t rise long enough before baking. Wait until it has truly doubled during both rises before moving on.
How to Store Yeast Rolls
Store completely cooled rolls in an airtight container or zip-top bag at room temperature for up to 3 to 4 days. They actually get even softer on day two, which my family considers peak roll. To freeze, place cooled rolls in a freezer bag for up to 3 months.
More Easy Side Dish Recipes

Easy Homemade Yeast Rolls
Ingredients
- 2 cups warm water
- 2 tablespoons instant yeast *see note
- ½ cup granulated sugar
- ½ cup canola oil
- 4 cups bread flour
- 2½-3½ cups all-purpose flour *see note
- ¾ cup nonfat dry milk powder
- 1 tablespoon salt
- 3 tablespoons melted butter topping
Instructions
- In the bowl of a stand mixer use a fork to quickly mix together the water, yeast, sugar, and oil. Add the bread flour, 2 ½ cups all-purpose flour, dry milk powder, and salt. Attach a dough hook and knead on low for 2-3 minutes until the dough comes together around the hook. Once it’s formed a ball around the hook, increase the speed slightly and knead for about 5 minutes longer until the dough is smooth and soft and slightly tacky still. Add more flour if needed, a little at a time.2 cups warm water, 2 tablespoons instant yeast, ½ cup granulated sugar, ½ cup canola oil
- Remove the dough briefly to a clean counter or your hand and spray the bowl with cooking spray. Return the bread to the bowl and cover with plastic wrap. Sit the bowl in a warm location until doubled in size, about 1 hour.4 cups bread flour, 2½-3½ cups all-purpose flour , ¾ cup nonfat dry milk powder, 1 tablespoon salt
- Spray a 9×13 baking dish with cooking spray when the dough has risen.
- Punch the dough down lightly and divide into 24 equal-sized pieces. Roll each piece into a smooth ball and place in the prepared baking dish 4 wide and 6 down. Cover with greased plastic wrap and let rise until poofy and almost doubled in size, about 30 minutes. During this time preheat your oven to 400 F.
- Remove the plastic wrap and bake for 17-20 minutes or until golden brown on top.
- Brush with melted butter when the rolls are still warm. Pull apart and enjoy warm.3 tablespoons melted butter
Jenn’s Notes
- If you use dry active yeast, use 2 ½ tablespoons and make sure to let the yeast proof in the water and sugar until it becomes frothy before continuing.
- All yeast breads will vary in flour amounts due to the humidity and temperature of your kitchen and how you measure your flour. Add only 2 ½ cups all-purpose flour to begin. Add ¼ cup more at a time if needed to get a soft, slightly tacky dough that sticks to itself more than it sticks to the sides of the bowl.
- I used a combo of bread flour and all-purpose flour. If you use all bread flour the rolls will be more firm. If you use all all-purpose flour the bread may not have as much structure as they need to rise tall for baking right next to all the other rolls.
- These rolls are done when the internal temperature of a center roll reaches 190 F. If the rolls get too dark on top too fast you can tent lightly with foil at the 10 minute baking mark.


I’ve just baked my 1st homemade bread today. Four loaves that taste
great! Now on to these rolls!
WOOT WOOT! Great work!! This one is sooooo easy. Let me know what you think!
awesomeness